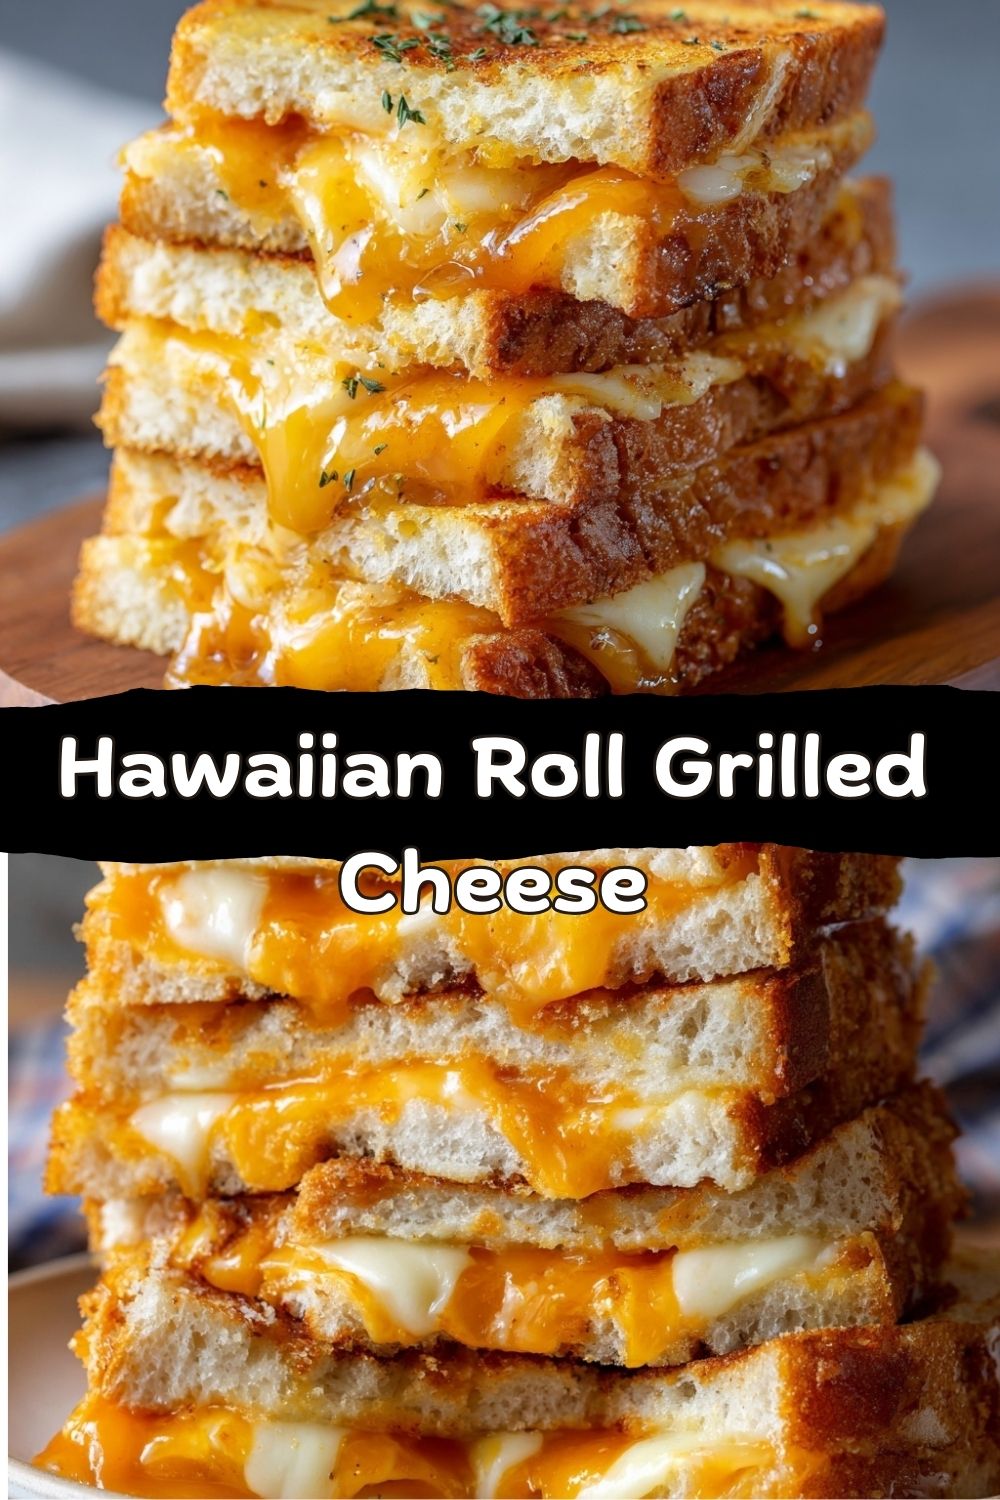
Hawaiian Roll Grilled Cheese: Your New Favorite Comfort Food Hack
Hey friends, Jackson here from Food Meld. Let’s talk about a universal truth: sometimes, you just need a grilled cheese. But not just *any* grilled cheese. We’re talking about that magical, pull-apart, shareable (or not-so-shareable) kind of cheesy goodness that makes everyone gather around the kitchen counter. The kind that’s perfect for dunking into a big bowl of tomato soup on a rainy day, or for serving as the star of your next game-day spread.
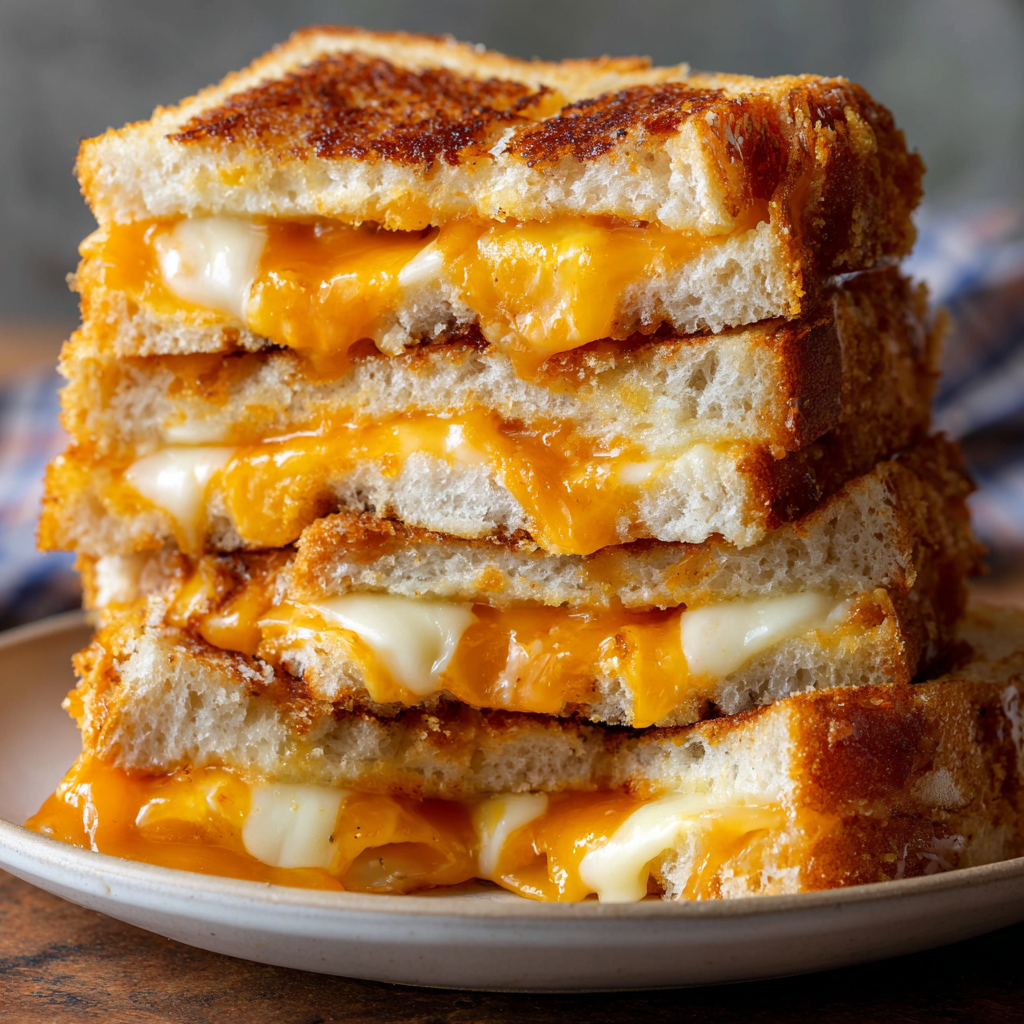
That’s exactly why I’m obsessed with this Hawaiian Roll Grilled Cheese. We’re taking those wonderfully soft, subtly sweet Hawaiian rolls and transforming them into a crispy-on-the-outside, molten-on-the-inside masterpiece. It’s a recipe that perfectly embodies what I love about cooking: taking simple, easy-to-find ingredients and “melding” them into something truly unforgettable with just a little creative energy. This isn’t just a sandwich; it’s a whole experience. It’s fun, it’s messy in the best way, and it’s guaranteed to create one of those “you’ve GOTTA try this” moments. So, grab your butter and your favorite cheese—let’s make something awesome together.
The Day I Fell for Hawaiian Rolls
This recipe was born from a beautiful kitchen accident, like the best ones often are. A few years back, I was hosting a last-minute football watch party. My fridge was looking a little bare—some random cheese ends, condiments, and a forgotten pack of Hawaiian rolls I’d bought for sliders. Time was ticking, and the crowd was getting hungry. I stared at those sweet, pillowy rolls and had a “what if” moment.
What if I treated the whole pack like one giant piece of bread? I sliced, I layered every bit of cheese I had (cheddar, mozzarella, even a slice of provolone), brushed the top with garlic-herb butter, and threw it in the oven. The smell alone was a victory. When I pulled it out—golden, bubbling, and impossibly fragrant—and cut it into pull-apart squares, it was pure magic. The sweet bread caramelized against the salty, gooey cheese, and it disappeared in minutes. That happy, hungry crowd’s reaction told me everything I needed to know: this wasn’t just a quick fix; it was a new staple. It’s a memory that reminds me that the best food doesn’t have to be complicated—it just has to be made with a little bit of love and a willingness to experiment.
Gathering Your Flavor Party
Here’s the beautiful part: you only need a handful of items to create this masterpiece. Let’s break them down.
- 1 pack (12-count) Hawaiian Sweet Rolls: The star of the show! Their signature soft texture and hint of sweetness are the perfect contrast to the savory cheese and crispy butter. Chef’s Insight: Don’t separate the rolls! We’re keeping them connected to create that epic, pull-apart effect.
- 8–10 slices of your favorite melty cheese:
- Cheddar: My go-to for sharp, classic flavor.
- Mozzarella: For that epic, stretchy “cheese pull” factor.
- American: Don’t knock it! It melts into an ultra-creamy, velvety layer that’s pure nostalgia.
- Swiss, Gouda, or Pepper Jack: Fantastic for a flavor twist (more on that later!).
Pro Tip: Using a *mix* of cheeses (like cheddar AND mozzarella) gives you the best of both worlds—great flavor and superb melt.
- 2–3 tablespoons unsalted butter, melted: This is our golden ticket to that irresistible, crispy-crunchy exterior. Using unsalted lets you control the seasoning. Substitution Tip: For a richer flavor, try mayo on the outside. It sounds wild, but it creates an incredibly even, golden-brown crust!
- Optional Flavor Boosters: This is where you make it yours!
- A pinch of garlic powder in the butter.
- A sprinkle of Italian seasoning or everything bagel seasoning.
- A dusting of grated Parmesan over the butter before baking for a savory, cheesy crust.
Let’s Build Some Cheese Magic: Step-by-Step
Ready? This comes together so fast, you’ll be in cheesy heaven before you know it.
- Prep Your Canvas. Preheat your oven to 350°F (180°C). Take your pack of Hawaiian rolls and, using a long serrated bread knife, slice the entire slab in half horizontally, keeping the top and bottom halves fully intact. Imagine you’re slicing one giant square of bread—you want a top “lid” and a bottom “base.” This is the only tricky part, so take your time! Place the bottom half on a baking sheet or in an oven-safe skillet.
- Cheese, Please! Layer your cheese slices evenly over the bottom half of the rolls. Don’t be shy—cover every inch right to the edges. The cheese will melt and fill in any gaps. If you’re using shreds, just sprinkle them in an even layer. Once you’re satisfied with your cheesy landscape, gently place the top half of the rolls back on, like putting the lid on the most delicious box ever.
- The Butter Bath. Melt your butter (I just zap it in the microwave for 20 seconds). Using a pastry brush, generously brush the melted butter all over the top and sides of the rolls. This is what gives us that gorgeous, golden-brown, crispy texture. Now’s the time to sprinkle on any of those optional flavor boosters—garlic powder, herbs, or Parmesan.
- The Meltdown (The Good Kind). Here’s your choice:
- For the Oven (My Pick for Hands-Off Ease): Loosely tent the whole thing with aluminum foil. This traps steam and melts the cheese perfectly without over-browning the top too quickly. Bake for 10-15 minutes. Then, remove the foil and bake for another 3-5 minutes, or until the top is a beautiful, golden brown and you can hear the cheese sizzling inside.
- For the Stovetop (For that Classic Grill Feel): Heat a large skillet or griddle over medium-low heat. Place your assembled rolls in the skillet. Use a smaller skillet or a bacon press wrapped in foil as a weight to press down gently. Cook for 4-5 minutes until the bottom is deep golden brown. Carefully flip the *entire* slab (be brave! use a big spatula), press again, and cook until the second side is golden and the cheese is molten.
- The Grand Reveal. Remove your masterpiece from the oven or skillet. Let it rest for just a minute—this keeps the cheese from immediately oozing out everywhere. Then, using a sharp knife, slice along the roll perforations to create 12 perfect, individual mini grilled cheeses. Watch as they pull apart, revealing glorious strands of melted cheese.
How to Serve This Legend
Presentation is part of the fun! I love placing the whole, unsliced slab on a big wooden cutting board in the middle of the table and letting everyone pull off their own sandwich. It’s interactive and always gets a smile.
Now, for the dunking situation. A big, steaming bowl of creamy tomato soup is the classic, unbeatable partner. The sweet-savory combo is out of this world. But don’t stop there! Try it with:
- A side of marinara sauce for a pizza-dipping vibe.
- Ranch dressing for a cool, tangy contrast.
- A simple side salad with a bright vinaigrette to cut through the richness.
This is also the ultimate snack for a crowd. Set it out with different dipping sauces and watch it vanish.
Make It Yours: Creative Twists
The basic formula is perfect, but your kitchen is your playground. Here are a few of my favorite ways to mix it up:
- The Pizza Party: Add a layer of sliced pepperoni or salami between the cheese and the bread. After brushing with butter, sprinkle with a little Italian seasoning and grated Parmesan. Bake and serve with marinara for dipping. It’s a pizza pull-apart in disguise!
- The Buffalo Chicken Dip Sandwich: Mix 1 cup of shredded cooked chicken with 1/3 cup of buffalo sauce and 4 oz of softened cream cheese. Spread this mixture on the bottom half before adding the cheese (blue cheese crumbles are amazing here!). Proceed as usual.
- Breakfast Grilled Cheese: Add crispy cooked bacon or diced ham between the cheese layers. You can even crack an egg, scramble it lightly, and cook it into a thin sheet to fit the size of the rolls before layering it in.
- The “Everything” Gourmet: Use a mix of Gruyère and Fontina cheese. Mix everything bagel seasoning into your melted butter before brushing. Sophisticated, savory, and utterly addictive.
- Vegetarian Lover’s: Add very thin slices of ripe tomato, fresh spinach leaves, or a layer of pesto spread on the bread before the cheese. Just be sure to pat any veggies very dry so you don’t make the bread soggy.
Jackson’s Chef Notes
This recipe has evolved in my kitchen more times than I can count. I’ve learned that the lower-and-slower method in the oven (with the foil tent) gives the most reliable, foolproof melt without risking burnt edges. One time, I got overzealous with the broiler to get it extra crispy… let’s just say we had a *very* well-done top and a lesson in patience! It was still delicious, because melted cheese is forgiving like that.
The real beauty of this dish is its versatility. I’ve made it with gluten-free Hawaiian-style rolls for a friend, and it worked like a charm. It’s a recipe that welcomes your personality. So, experiment! Throw in what you love. That’s what Food Meld is all about.
FAQs & Quick Fixes
Q: Can I make this ahead of time?
A: You can assemble it (slice, add cheese, put the top back on) up to a few hours ahead, wrap it tightly in plastic, and keep it in the fridge. Brush with butter and add seasonings right before baking. You may need to add 2-3 extra minutes to the bake time since it’s starting from cold.
Q: My cheese isn’t fully melted but the top is getting brown. Help!
A> This is the #1 issue, and it’s easy to fix! That’s exactly why we start with the foil tent. If you’re already browning too fast, just lay a piece of foil loosely over the top. This shields the bread and allows the heat to penetrate and melt the cheese without further browning.
Q: Can I use shredded cheese instead of slices?
A> Absolutely! I often do. Just use about 2-2.5 cups of shredded cheese for an even layer. The pre-shredded stuff works, but block cheese you shred yourself will melt a bit creamier (it doesn’t have anti-caking agents).
Q: It’s a bit greasy. How can I prevent that?
A> The butter is key for crispness, but you can definitely control it. First, make sure you’re brushing the melted butter on, not pouring it. Second, you can lightly toast the rolls on a dry skillet for a minute per side before adding cheese and butter—this creates a slight barrier. Finally, using a mix of a drier cheese (like cheddar) and a super-melty one (like mozzarella) can help balance it.
Nutritional Info (A Quick Note)
Alright, let’s keep it real—this is a treat, a comfort food celebration. Here’s a rough estimate per mini sandwich (based on using cheddar and unsalted butter):
- Calories: ~160
- Fat: 9g
- Carbohydrates: 14g
- Sugar: 4g (primarily from the rolls)
- Protein: 5g
To lighten it up slightly, you can use a light brushing of olive oil or cooking spray instead of butter, use reduced-fat cheese, and serve it with a big salad on the side. But sometimes, you just gotta embrace the butter and cheese—life’s about balance!
Final Bite
And that’s it, friends! The humble Hawaiian roll, transformed into a show-stopping, crowd-feeding, soul-warming treat. This recipe proves that you don’t need fancy techniques or obscure ingredients to make food that brings people joy. It’s about taking a simple idea and running with it.
I hope this Hawaiian Roll Grilled Cheese becomes a regular in your kitchen playbook, just like it is in mine. Make it, share it (or don’t!), dunk it, and love every single bite. And remember, the best ingredient you can add is always a little bit of “what if?” energy.
Got a twist you tried? I’d love to hear about it! Drop a comment on the blog. Now, go cook something awesome.
Cheers,
Jackson


