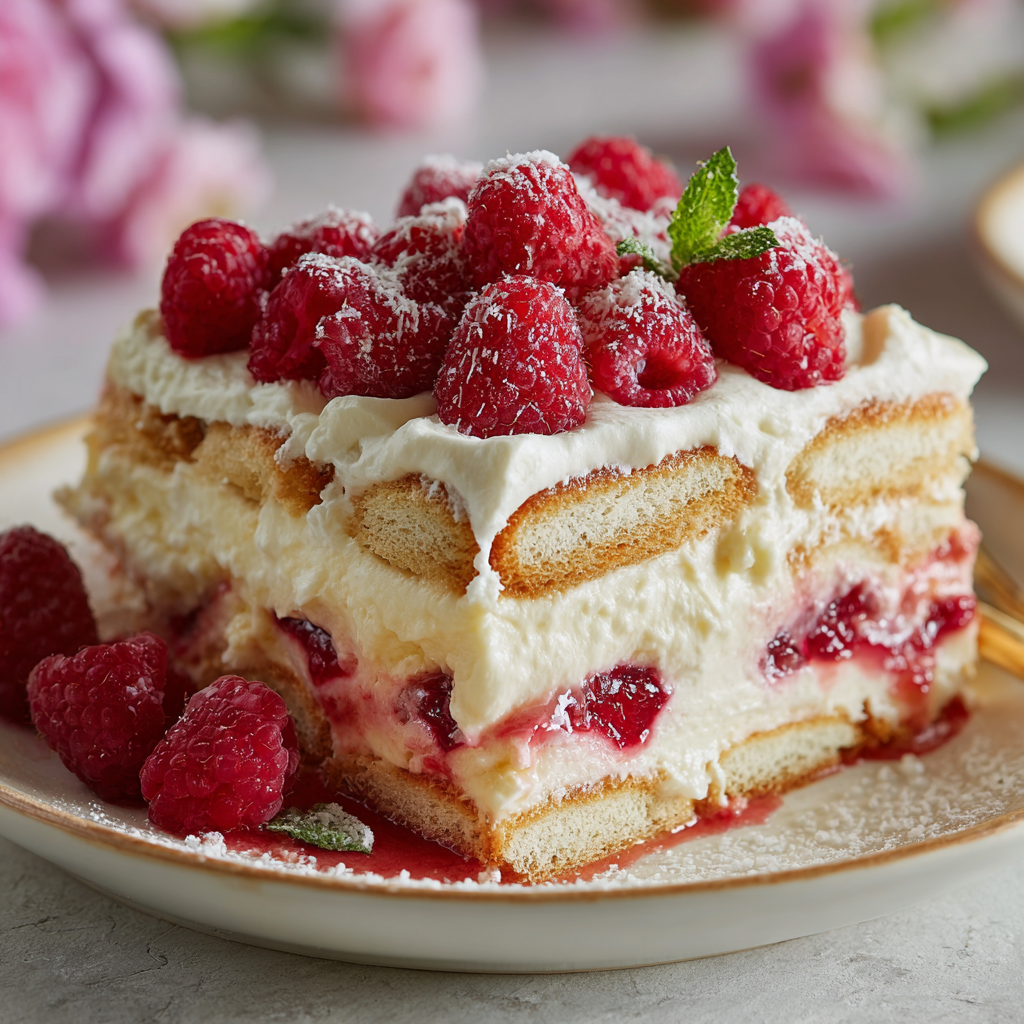
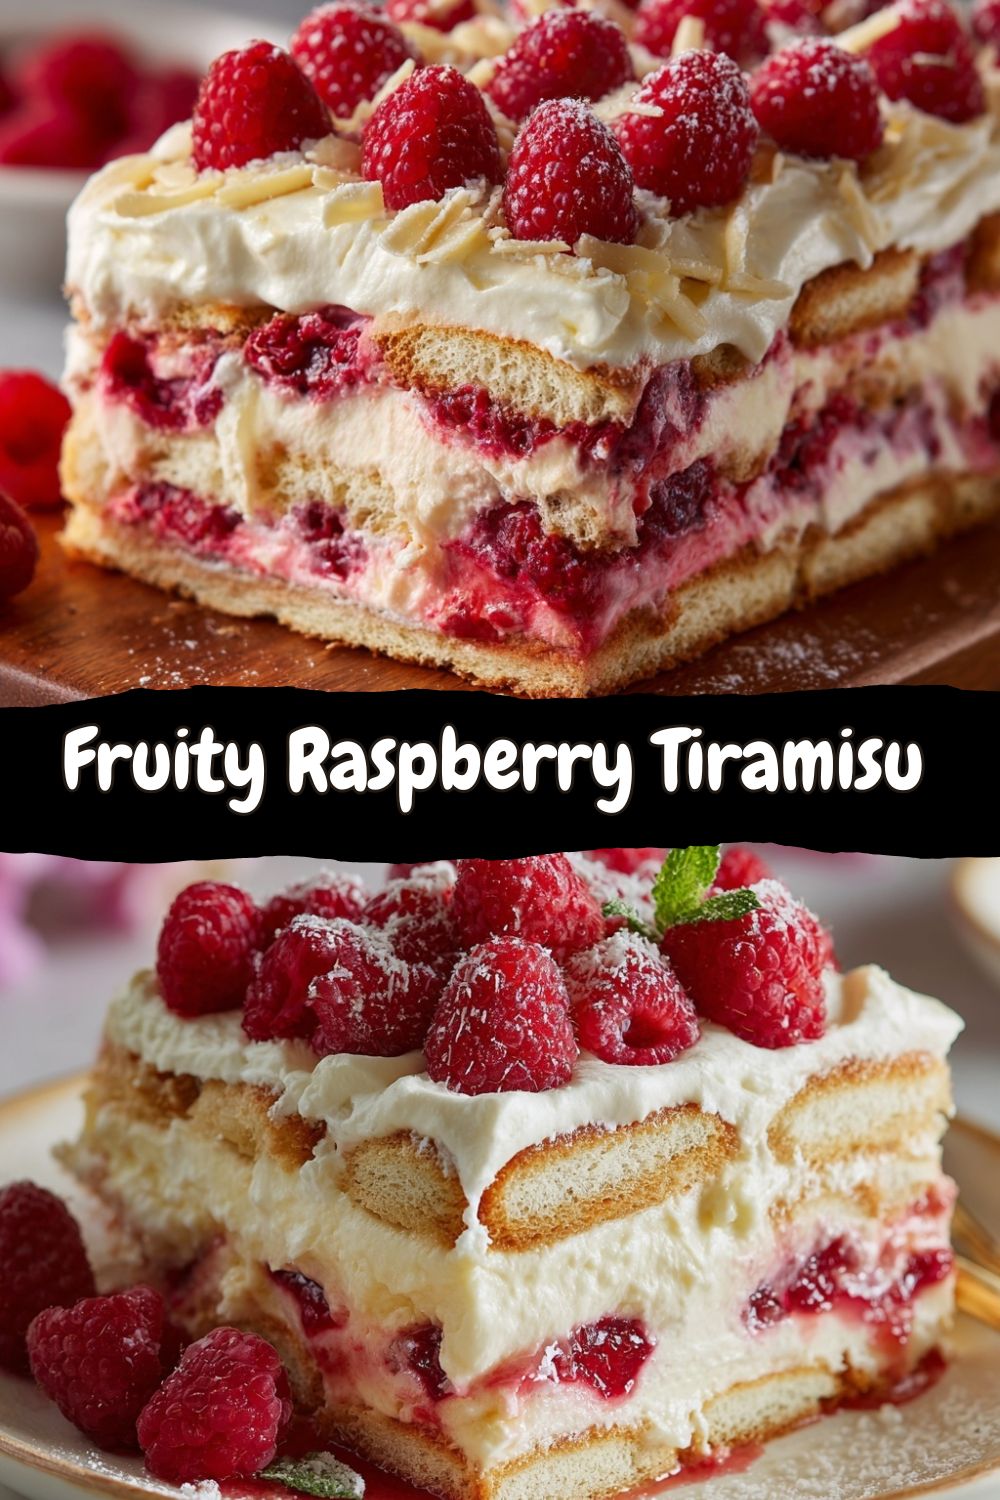
Ditch the Coffee, Grab the Berries: My Fruity Raspberry Tiramisu
Hey friends, Jackson here from Food Meld. Let’s talk about a little kitchen magic I like to call a “flavor meld.” You know that feeling when you’re craving something decadent, like a classic tiramisu, but the weather is screaming for something bright, fruity, and a little bit lighter? That’s exactly the spot I found myself in last summer. I wanted all the luxurious, creamy, layered goodness of the Italian icon, but I wanted it to taste like a sun-ripened berry patch. So, I started asking, “What if we tried this?”
The result? This stunning, no-bake Fruity Raspberry Tiramisu. We’re swapping out the coffee soak for a tangy, vibrant raspberry puree and keeping that cloud-like mascarpone cream that makes tiramisu so irresistible. It’s a dessert that feels elegant enough for a dinner party but is secretly so simple to throw together. It’s all about those layers: soft ladyfingers kissed with raspberry, fluffy cream, and a pop of fresh berry garnish. It’s a showstopper that doesn’t require a pastry degree, just a love for awesome flavor. So, if you’re tired of the same old desserts and ready for a “you’ve gotta try this” moment, you’re in the right place. Let’s make something unforgettable.
Where This Berry-Filled Dream Came From
This recipe was born out of a happy accident and a serious berry obsession. My grandma, who had the most incredible Southern garden, would always have a bowl of raspberries on her counter in the summer. She’d sprinkle them with a little sugar and let them sit until they got all syrupy. We’d eat them over ice cream or just with a spoon.
One year, for a big family potluck, I was tasked with bringing dessert. I was set on making my go-to tiramisu, but when I opened the pantry… no espresso. At all. A minor panic ensued. Then, I saw a container of those macerated raspberries in my fridge, just like Grandma used to make. The gears started turning. What if the berries *were* the soak? I gave it a shot, layering it all up and crossing my fingers. When I took that first bite after it chilled… game over. The bright acidity of the raspberries cut through the rich cream in the most perfect way. It was a total “flavor meets fun” victory, and it’s been a staple in my recipe rotation ever since. It tastes like summer nostalgia, with a creative twist.
Gathering Your Flavor Toolkit
Here’s everything you need to build this beauty. Simple, quality ingredients are key here—they really get to shine.
- 1 cup fresh or frozen raspberries (plus extra for garnish) – Frozen berries are my secret weapon year-round! They’re frozen at peak ripeness and work perfectly for the puree. If using fresh, look for plump, deeply colored berries.
- 2 tbsp sugar – This is for the raspberry puree. It tames the tartness and helps create that lovely syrup we’ll dip the ladyfingers in.
- 2 tbsp lemon juice – A little fresh lemon juice makes the berry flavor pop. It’s the bright, high note that balances everything. Bottled juice works in a pinch, but fresh is always best.
- 1 cup heavy whipping cream – Make sure it’s cold! This is the body of our cream layer. We’re whipping it to soft peaks for that ethereal, fluffy texture.
- 8 oz mascarpone cheese – The star of the show. This rich, slightly tangy Italian cream cheese is non-negotiable for authentic texture and taste. Let it sit on the counter for 15-20 minutes before using so it blends smoothly.
- ⅓ cup powdered sugar – It dissolves instantly into the mascarpone, preventing any graininess. You can adjust this to your sweetness preference!
- 1 tsp vanilla extract – The warm, aromatic backbone of the cream. A good quality pure vanilla makes a noticeable difference.
- 1 package ladyfinger cookies (savoiardi) – These dry, oblong cookies are perfect because they soak up just enough moisture without turning to mush. You’ll usually find them in the international aisle.
- Optional: white chocolate shavings or mint for garnish – I love the sweet crunch of white chocolate against the tart berries, or a fresh mint leaf for a beautiful color contrast.
Let’s Build Some Layers: Your Step-by-Step Guide
Don’t let the fancy look fool you—this is just assembly. The magic happens in the fridge. Here’s how we do it, with all my best chef hacks along the way.
Step 1: Wake Up the Raspberries. In a small saucepan, combine your raspberries, sugar, and lemon juice. Cook this over medium heat for 5-7 minutes. You’ll hear it start to bubble and the berries will break down. I like to give them a gentle mash with a fork or potato masher to help them along. Once it’s saucy and the sugar has dissolved, take it off the heat and let it cool completely. Chef’s Tip: If you want a super smooth puree without seeds, press the cooled mixture through a fine-mesh sieve. I sometimes leave a few seeds in for texture—it’s totally up to you!
Step 2: Make the Cloud (aka the Mascarpone Cream). This is the most important step for getting that signature light texture. First, pour your cold heavy cream into a large bowl. Using a hand mixer or stand mixer, whip it on medium-high until you get soft peaks. That means when you lift the beaters, the cream forms a peak that gently curls over at the tip. Don’t go to stiff peaks! Set this aside. In another bowl, combine the softened mascarpone, powdered sugar, and vanilla. Beat this just until it’s smooth and combined—over-beating here can make it grainy. Now, take your whipped cream and gently fold it into the mascarpone mixture. Use a rubber spatula and a slow, turning motion to keep all that air in. You want a homogeneous, fluffy, dreamy cream. Chef’s Hack: A splash of cream or milk in the mascarpone bowl before adding the sugar can help it blend even smoother from the start.
Step 3: The Dip & Layer Dance. Get your serving dish ready (an 8×8 dish or a pretty trifle bowl works great). Pour your cooled raspberry sauce into a shallow bowl or plate. Now, for the ladyfingers: this is not a swim meet! Quickly dip each side of the ladyfinger into the raspberry sauce—just a second or two per side. You want it to be moistened but not soggy and falling apart. Layer them in your dish, breaking a few to fill in any gaps.
Step 4: Spread, Repeat, and Chill. Spread half of your magnificent mascarpone cream over the first layer of ladyfingers. Smooth it out into an even layer. Now, repeat! Do another layer of quickly-dipped ladyfingers, followed by the rest of the cream. Smooth the top, cover tightly with plastic wrap, and let the fridge work its magic for at least 4 hours, but ideally overnight. This chill time is non-negotiable—it allows the flavors to meld and the cookies to soften perfectly into the dessert.
Step 5: The Grand Finale (Garnish!). Right before serving, scatter a handful of fresh raspberries over the top. If you’re feeling fancy, add some white chocolate shavings or a few mint leaves. Then, slice, scoop, and get ready for the compliments.
How to Serve It Up in Style
Presentation is part of the fun! For a family-style vibe, just set the whole dish on the table with a big spoon and let everyone dig in. If you want individual servings, use a sharp knife dipped in hot water to cut clean squares. For a more elegant look, layer everything in individual glasses or mason jars—just break the ladyfingers to fit. This dessert is rich, so a little goes a long way. I love serving it after a light meal like grilled chicken or a big salad. And don’t forget the coffee or a glass of Prosecco on the side—the perfect pairing for our Italian-inspired treat.
Make It Yours: Creative Twists on the Classic
The “what if we tried this?” energy doesn’t stop here. This recipe is a fantastic canvas for your own flavor melds.
- Mixed Berry Bliss: Swap half the raspberries for blueberries or blackberries in the puree. The deep, jewel-toned color is incredible.
- Citrus Zing: Add a tablespoon of orange liqueur (like Grand Marnier) to the raspberry puree once it’s off the heat, or mix a bit of zest into the mascarpone cream.
- Boozy & Bold: For an adult twist, brush the ladyfingers with a mix of Chambord (raspberry liqueur) and the raspberry puree instead of just dipping.
- Lighter Swap: Use a lower-fat cream cheese mixed with a little Greek yogurt in place of mascarpone. The texture will be slightly tangier but still delicious.
- Chocolate Raspberry Dream: Add a layer of dark chocolate shavings or a drizzle of melted chocolate between the cream and ladyfinger layers.
Chef’s Notes: Lessons from My Kitchen
Over the years, I’ve made this tiramisu more times than I can count, and it’s evolved in little ways. My biggest lesson? Patience is an ingredient. That chill time is crucial—it transforms the separate layers into one cohesive, melt-in-your-mouth dessert. I’ve also learned that the ladyfinger dip is a feel thing. The first time you make it, you might be nervous, but you’ll get the rhythm. It’s better to under-dip than over-dip! And one funny story: I once tried to “save time” by using thawed frozen whipped topping instead of whipping my own cream. Let’s just say the texture was… interesting. Not my finest “what if” moment. Stick with real whipped cream. Trust me on this one.
Your Questions, Answered
Q: Can I make this ahead of time?
A: Absolutely! That’s one of its best features. Make it the day before, let it chill overnight, and garnish right before serving. The flavors are even better on day two.
Q: My cream layer seems runny. What happened?
A: Two likely culprits: 1) The mascarpone was too cold when you mixed it, making it lumpy and hard to fold into the cream smoothly. Let it soften! Or 2) The heavy cream was over-whipped to butter territory, or it wasn’t cold enough to whip up properly. Start with cold cream and stop at soft peaks.
Q: I can’t find ladyfingers. What can I use instead?
A: You can use a plain sponge cake (like a pound cake) cut into strips. Biscotti are too hard. For a gluten-free option, seek out gluten-free ladyfingers or a GF vanilla sponge.
Q: How long does it keep in the fridge?
A: It’s best enjoyed within 2-3 days. The ladyfingers will continue to soften, but it will still taste great.
A Quick Note on Nutrition
Let’s keep it real: this is a celebratory dessert, meant to be savored and enjoyed. Per serving (assuming 8 servings), you’re looking at roughly: Calories: ~320 | Protein: 5g | Fat: 20g | Carbs: 28g. The fats come from the mascarpone and cream, which give it that luxurious mouthfeel. The carbs are primarily from the ladyfingers and sugars. While it’s not an everyday health food, it’s a wonderful, homemade treat where you control the ingredients—no weird additives or preservatives. Everything in moderation, especially when it’s this delicious!
Final Thoughts: Your “You’ve Gotta Try This” Moment Awaits
And that’s it, friends! My Fruity Raspberry Tiramisu. It proves that you don’t need fancy equipment or days of prep to create a dessert that looks and tastes like it came from a boutique bakery. It’s about taking a classic, adding your own spin (in this case, a big, juicy berry spin), and having a blast in the kitchen. I hope this recipe brings you as much joy to make as it does to eat. Remember, cooking is supposed to be fun, a little messy, and full of flavor. So grab those berries, whip that cream, and let’s make something awesome together. Don’t forget to tag me @FoodMeld if you make it—I love seeing your creations!
Until next time, keep melding those flavors,
Jackson


