Fluffy Chocolate Waffles: Your New Weekend Brunch Superstar
Hey friends, Jackson from Food Meld here. Let’s get real for a second. Who decided that chocolate is only for dessert? I’m here to start a delicious rebellion, one that begins the moment you wake up. We’re throwing out the rulebook and diving headfirst into a plate of the most decadent, soul-warming, and downright irresistible Fluffy Chocolate Waffles you’ve ever tasted.
Picture this: It’s a lazy Saturday morning. The sun is streaming through the kitchen window, and the rich, comforting aroma of chocolate is wafting through the air. Not from a box of cocoa powder, but from a real, honest-to-goodness batter sizzling in your waffle iron. You’re not just making breakfast; you’re crafting an experience. You’re creating a moment that makes everyone in the house, including you, feel like it’s a special occasion.
This recipe is my love letter to breakfast. It’s got that perfect balance—deep, rich chocolate flavor without being overly sweet, and a texture that’s crisp on the outside and magically fluffy on the inside. They’re bold, comforting, and packed with that “what if we tried this?” energy I live for. Best of all, they are deceptively simple. You probably have everything you need in your pantry right now. So, let’s ditch the boring routine and cook something awesome together. Welcome to the best part of your weekend.
A Sweet Slice of Childhood Memory
This recipe takes me right back to my grandma’s kitchen. She was a force of nature, a woman who believed a little chocolate could solve most of life’s problems. Every year, without fail, on my birthday, she’d bypass the traditional pancake and present me with a towering stack of chocolate waffles for breakfast. It was our thing. She’d use this ancient, heavy waffle iron that had seen better days, but it produced the most incredible, crispy-edged waffles I’ve ever had.
She’d always let me be the official taste-tester, handing me the first, slightly misshapen waffle from the iron. I’d tear into it, my fingers covered in melted butter and chocolate, and declare it “perfect.” She’d just wink and say, “Jackson, life’s too short for boring food.” That simple, joyful philosophy is the heart and soul of Food Meld. These waffles aren’t just a recipe; they’re a vessel for creating your own happy, messy, and utterly delicious memories. Every time I make them, I can almost hear that old waffle iron clanking shut and smell her kitchen. It’s a flavor of pure, unadulterated joy.
Gathering Your Flavor Arsenal
Alright, let’s talk ingredients. This is where the magic starts. We’re using simple, pantry-friendly items, but each one plays a crucial role in creating our fluffy chocolate masterpiece. Here’s your shopping list and a little chef insight on why each one matters.
- 1 cup All-Purpose Flour: This is the backbone of our waffle. It gives them structure. For a lighter, cakier texture, you can swap in cake flour. For a heartier whole-wheat version, just replace half the all-purpose flour with whole wheat.
- ¼ cup Unsweetened Cocoa Powder: This is where our deep chocolate flavor comes from! Don’t use hot chocolate mix—it’s loaded with sugar and other stuff. Go for a good-quality natural cocoa powder for that classic, rich taste. Chef’s Tip: For an even deeper flavor, try using Dutch-processed cocoa!
- 2 tbsp Sugar: We’re keeping it light on the sugar here because the real sweetness will come from our toppings. This amount just perfectly balances the bitterness of the cocoa.
- 2 tsp Baking Powder: This is our leavening agent—our secret weapon for achieving those sky-high, fluffy interiors. Make sure yours is fresh for maximum lift!
- ¼ tsp Salt: Never, ever skip the salt! It’s the flavor enhancer that makes the chocolate taste more chocolaty. It balances the sweetness and brings all the flavors into harmony.
- 1 cup Milk: The liquid that brings our batter together. Whole milk will give you the richest result, but any milk you have works. For a dairy-free version, unsweetened almond or oat milk are fantastic substitutes.
- 2 large Eggs: Eggs are our binding agents, and they add richness and help with the rise. Take them out of the fridge about 20 minutes before you start—room temp eggs incorporate into the batter more smoothly.
- ¼ cup Melted Butter (or Oil): Butter equals flavor, folks. It gives the waffles a gorgeous, rich taste and helps create that crispy exterior. If you’re using oil, a neutral one like vegetable or canola works best.
- 1 tsp Vanilla Extract: The ultimate flavor booster. Vanilla and chocolate are a match made in heaven. It adds a warm, aromatic depth that makes the chocolate pop.
Let’s Get Cooking: Your Step-by-Step Guide to Waffle Perfection
Ready to make some magic? Follow these steps, and you’ll be a waffle wizard in no time. I’ve packed this section with all my favorite chef hacks to ensure your success.
- Mix Your Dry Team. Grab a large mixing bowl and a whisk. Add your flour, cocoa powder, sugar, baking powder, and salt. Now, whisk it all together like you mean it! This isn’t just about combining; you’re aerating the flour and making sure the baking powder is evenly distributed. No one wants a bite of plain flour or a pocket of baking powder. Chef’s Hack: For an extra-smooth batter, you can sift these ingredients together. It’s an optional step, but it makes for a beautifully velvety texture.
- Unite the Wet Team. In a separate, medium-sized bowl, whisk together your milk, eggs, melted (and slightly cooled) butter, and vanilla extract. Whisk until it’s a smooth, homogenous, beautiful yellow liquid. Pro Tip: Make sure your melted butter isn’t piping hot when you add it, or you might accidentally cook the eggs! Let it cool for a minute.
- The Grand Meld. This is the most important step. Create a well in the center of your dry ingredients and pour the wet mixture in. Now, using a spatula, gently fold everything together. I’m talking slow, deliberate strokes. Stop as soon as you no longer see dry streaks of flour. A few lumps are PERFECTLY FINE—I promise! Overmixing is the enemy of fluffy waffles. It develops the gluten in the flour and will make them tough. We want tender, we want light.
- Fire Up the Iron. Preheat your waffle iron according to its instructions. Give it a light spray with non-stick cooking spray or brush it with a little oil or melted butter. A hot iron is key for that initial crisp. You should hear a satisfying sizzle when the batter hits the surface.
- Cook to Crispy, Fluffy Glory. Pour your batter onto the center of the hot iron. I find about ½ cup is a good starting point, but your iron might vary. Don’t overfill it, or you’ll have a messy situation on your hands! Close the lid and let it work its magic. Resist the urge to peek too early! You’ll know they’re done when the steam significantly slows down and the outside is crisp. Chef’s Secret: If you want to keep your first batch warm while you cook the rest, place them in a single layer on a wire rack in a 200°F (95°C) oven. This keeps them crisp instead of getting soggy.
Let’s Dress ‘Em Up: Serving Suggestions
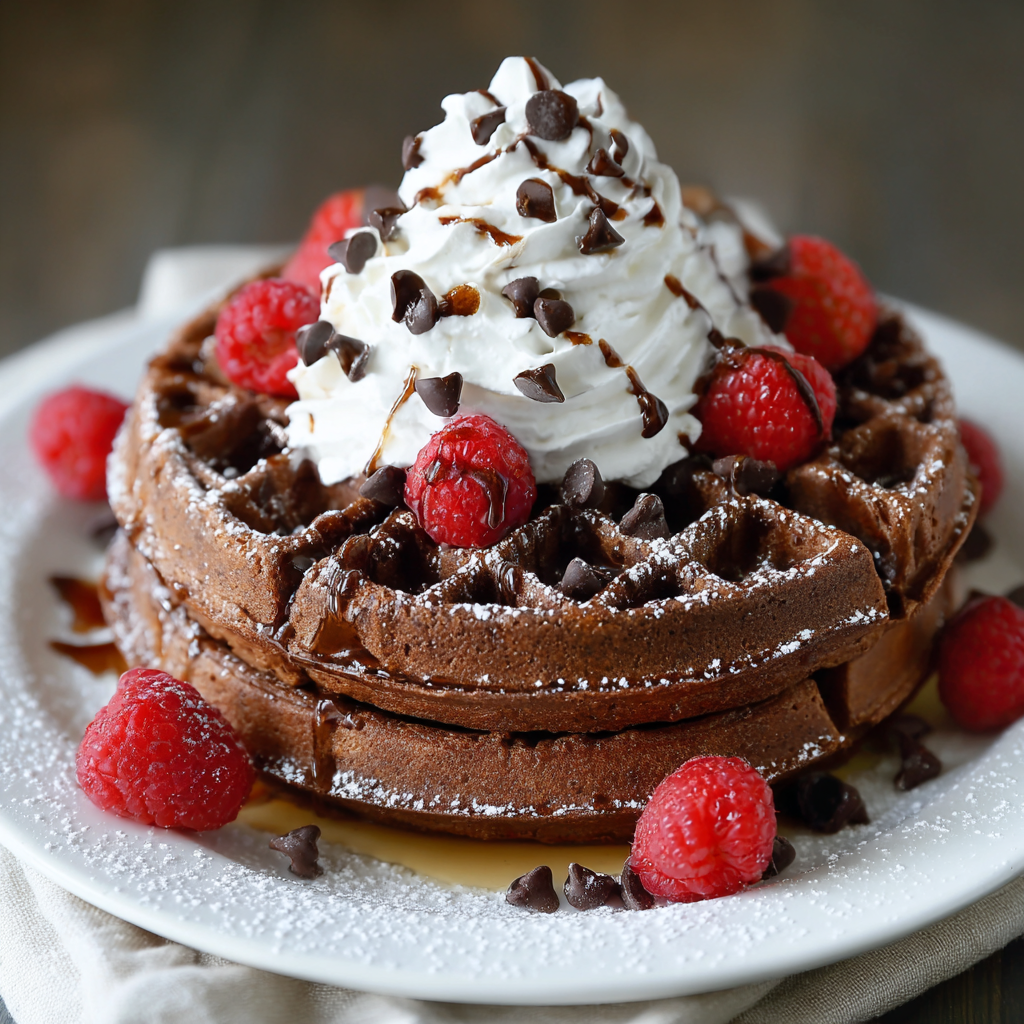
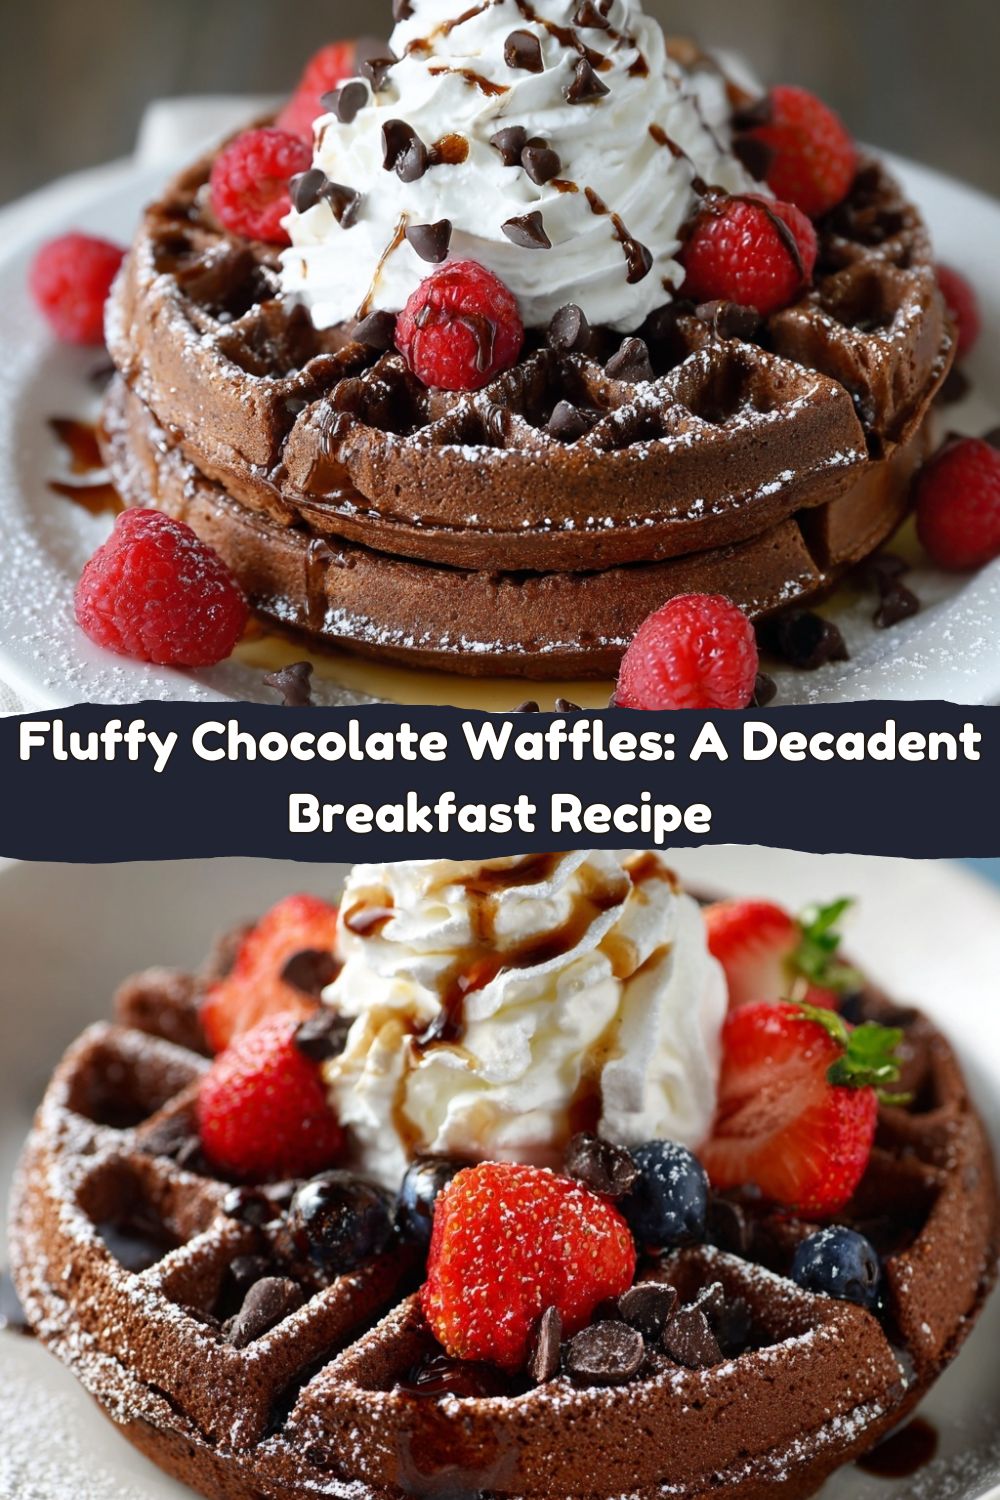
Now for the really fun part—the toppings! This is where you can let your personality shine and make these waffles truly yours. Here’s how I love to serve them for that ultimate “wow” factor.
For a classic look, I go for a dusting of powdered sugar, a generous drizzle of warm maple syrup, and a handful of fresh, juicy strawberries or raspberries. The tartness of the berries cuts through the richness of the chocolate beautifully.
Feeling extra indulgent? Let’s go full dessert-for-breakfast. Pile on a big dollop of freshly whipped cream, a cascade of chocolate chips or chocolate shavings, and maybe even a scoop of vanilla ice cream. Hey, I won’t tell!
For a stunning brunch platter, I make a big batch of these waffles, cut them into quarters, and let everyone build their own. Set out small bowls with different toppings: sliced bananas, toasted nuts (pecans are a dream), a bowl of warm Nutella, and some crispy bacon. The sweet and salty combo is a game-changer.
Make It Yours: Recipe Variations
One of my favorite things about this recipe is how adaptable it is. Don’t be afraid to play with it and add your own creative twist! Here are a few of my favorite variations to get you started.
- Chocolate Orange Bliss: Add the zest of one orange to the wet ingredients. The bright, citrusy flavor of orange paired with dark chocolate is an absolute classic for a reason.
- Double Chocolate Chunk: For the true chocoholic, fold in ½ cup of semi-sweet or dark chocolate chunks into the batter right before cooking. You’ll get melty, gooey pockets of chocolate in every single bite.
- Mexican Hot Chocolate Style: Spice it up! Add a pinch (about ¼ tsp) of cayenne pepper and ½ tsp of cinnamon to the dry ingredients. It adds a wonderful, warm complexity that will keep people guessing.
- Gluten-Free & Vegan Friendly: To make this gluten-free, use a 1:1 gluten-free flour blend. For a vegan version, swap the milk for plant-based milk, use a flax egg (1 tbsp ground flax + 3 tbsp water per egg), and use oil or vegan butter.
- Mocha Madness: Dissolve 1-2 teaspoons of instant espresso powder into the milk before adding it to the wet ingredients. The coffee doesn’t make it taste like coffee; it just makes the chocolate flavor taste even richer and more intense.
Jackson’s Chef Notes & Kitchen Stories
This recipe has come a long way since my first test kitchen disaster. Batch one was a complete failure—I overmixed the batter so aggressively that I ended up with what can only be described as chocolate hockey pucks. My dog wouldn’t even eat them! But that’s the beauty of cooking. You learn, you adapt, and you get better.
Over time, I’ve learned to embrace the lumps in the batter and to trust the process. I’ve also found that letting the batter rest for 5-10 minutes after mixing can lead to an even fluffier waffle, as it gives the baking powder a little extra time to work its magic. This recipe is a testament to the idea that the best food comes from a place of fun and a little bit of experimentation. Don’t stress, just enjoy the process.
Your Questions, Answered: FAQs & Troubleshooting
I get a lot of questions about this recipe, so I’ve compiled the most common ones here to help you out!
Q: My waffles are coming out soft and not crispy. What am I doing wrong?
A: The number one culprit is usually a waffle iron that isn’t hot enough. Make sure you let it fully preheat. Also, don’t stack the finished waffles on top of each other on a plate—the steam will make them soggy. Keep them in a single layer on a wire rack in a warm oven as mentioned above.
Q: Can I make the batter ahead of time?
A: You can, but the waffles won’t be as fluffy. The baking powder starts working as soon as it hits the liquid. For the best results, mix the dry and wet ingredients separately the night before, then combine them right before you’re ready to cook.
Q: My batter is super thick. Should I add more milk?
A: Waffle batter is meant to be thicker than pancake batter! Resist the urge to thin it out, as that can affect the texture and crispiness. It should be scoopable and spread slightly on the iron when you close the lid.
Q: Can I freeze these waffles?
A: Absolutely! Let them cool completely on a wire rack, then place them in a single layer on a baking sheet to “flash freeze” for an hour. Once frozen solid, transfer them to a freezer bag. They’ll keep for up to 3 months. Reheat them straight from the freezer in a toaster or oven for a quick and delicious breakfast.
Nutritional Information (Because We’re All Friends Here)
I’m a big believer in balance and enjoying the foods you love. These waffles are a treat, and it’s helpful to know what you’re enjoying. The following is an estimate for one waffle (without toppings), based on a recipe that yields four waffles. Remember, your specific ingredients and waffle iron size can change these numbers.
- Calories: ~280
- Protein: 7g
- Carbohydrates: 28g
- Fat: 16g
- Saturated Fat: 9g
- Cholesterol: 115mg
- Sodium: 320mg
- Fiber: 2g
- Sugar: 6g
To lighten things up a bit, you can use low-fat milk and swap half the butter for unsweetened applesauce. But my personal philosophy? When you’re going for a chocolate waffle, go all in and savor every single, glorious bite. You can have a salad for lunch!
Final Thoughts: Let’s Keep the Conversation Going!
And there you have it, friends—my ultimate guide to Fluffy Chocolate Waffles. This recipe is more than just a list of ingredients and steps; it’s an invitation to bring a little more joy and a whole lot more flavor to your kitchen. It’s about creating those small, happy moments that turn an ordinary morning into something memorable.
I hope you feel inspired to preheat that waffle iron and fill your home with the incredible smell of chocolate. Remember, cooking is an adventure. It should be fun, a little messy, and always, always delicious. I’d love to hear how your waffles turn out! Tag me on social @FoodMeld with your creations or leave a comment below and tell me your favorite topping combination.
Until next time, let’s keep cooking something awesome together.
– Jackson