Easy Spring Blossom Cookies: A Celebration of Sweetness and Sunshine
Hey there, fellow food lovers! 🌸 If there’s one dessert that perfectly embodies the essence of spring, it’s got to be the beloved Spring Blossom Cookies. These delightful little treats are not just a feast for the eyes with their vibrant colors and charming designs, but they’re also incredibly easy to whip up in your own kitchen. Whether you’re planning a spring gathering, a family picnic, or just a sweet way to welcome sunny days, these cookies are sure to bring smiles all around.
A Sweet Memory in Bloom
As I dove into creating this recipe, I was transported back to my childhood. One of my fondest memories is of baking with my grandma every spring. She had this massive old cookbook loaded with recipes from her own childhood, and it was practically falling apart. Oh, how we’d giggle as we sifted flour and sneaked bites of cookie dough! One day, she surprised me with a batch of beautifully decorated cookies adorned with pastel icing and colorful sprinkles shaped like flowers. Those cookies felt like magic—small bites of happiness that captured the spirit of renewal and joy that spring brings.
We’d sit outside in her garden, enjoying the delicate cookies with cups of tea, surrounded by blooming flowers. That moment stuck with me, and to this day, I love recreating those cheerful treats. Bringing people together, sharing cookies, and creating memories in the kitchen is what it’s all about. So, gather your loved ones, and let’s create our own Spring Blossom Cookies that will make your heart bloom!
Ingredients: What You’ll Need for Your Cookies
Before we dive into our baking adventure, let’s check out the ingredients you’ll need to bring these delightful cookies to life:
-
2 ¾ cups all-purpose flour
This is the backbone of your cookie! If you’re looking for a gluten-free option, try using a 1:1 gluten-free flour blend. The texture may vary slightly, but it’ll still be delicious. -
1 teaspoon baking soda
This little ingredient gives your cookies the perfect lift. Make sure your baking soda is fresh—old soda can lead to sad, flat cookies. -
½ teaspoon salt
Just a pinch of salt enhances all the sweet flavors. You can also use sea salt for a touch of extra flavor. -
1 cup (2 sticks) unsalted butter, softened
Butter brings richness and flavor. If you’re in a pinch, you can substitute with coconut oil, though it will change the taste slightly. -
1 cup granulated sugar
Sweetness galore! You can cut back to ¾ cup if you’re watching your sugar intake, but go for the full cup if you can—it’s worth it for that classic cookie taste. -
½ cup brown sugar, packed
Brown sugar adds a lovely caramel-like flavor. Don’t have brown sugar? You can substitute with a bit of granulated sugar mixed with molasses (1 tablespoon of molasses for every cup of sugar). -
2 large eggs
These bind everything together and add fluffiness. If you’re egg-free, you can use a flaxseed egg (1 tablespoon of ground flaxseed mixed with 2.5 tablespoons of water per egg). -
1 teaspoon vanilla extract
A key flavor enhancer. If you’re feeling adventurous, try using almond extract instead for a different twist! -
1 ½ cups powdered sugar (for decoration)
This is what transforms our cookies into a delightful spring treat. You could also use alternative sweeteners for a lower sugar version. -
Sprinkles and edible decorations
Get creative! Choose colorful sprinkles or edible flowers to make your cookies pop.
Step-by-Step Instructions: Let’s Get Baking!
Now that we have our ingredients ready, let’s dive into the fun part! Here’s how to make your very own Spring Blossom Cookies, step by step:
-
Preheat Your Oven
Preheat your oven to 350°F (175°C). You want the oven nice and hot to give your cookies that lovely golden hue. -
Mix Dry Ingredients
In a medium bowl, whisk together the flour, baking soda, and salt. This step ensures that the baking soda is evenly distributed throughout the flour. Pro tip: Sifting your flour before measuring can add extra lightness to your cookies! -
Cream the Butters and Sugars
In a large mixing bowl, using an electric mixer, cream the softened butter, granulated sugar, and brown sugar together until it’s light and fluffy. This should take about 2-3 minutes. Not only does this incorporate air for softness, but it also develops a luscious texture. Chef hack: Scrape the sides of the bowl occasionally for even mixing! -
Add the Eggs and Vanilla
Beat in the eggs one at a time, allowing each to mix well before adding the next. Add the vanilla extract and beat until combined. The mixture should look creamy and smooth. -
Combine Dry and Wet Mixtures
Gradually add the flour mixture to the wet ingredients, mixing on low speed until just combined. Be careful not to overmix, or your cookies may become tough. If you notice the dough isn’t coming together, you can add a splash of milk! -
Scoop the Dough
Using a cookie scoop or tablespoon, scoop out balls of dough and place them on a parchment-lined baking sheet. Space them about 2 inches apart, as they will spread during baking. -
Bake the Cookies
Bake in the preheated oven for 10-12 minutes, until the edges are golden and the centers are just set. The cookies will continue to firm up as they cool, so don’t overbake! -
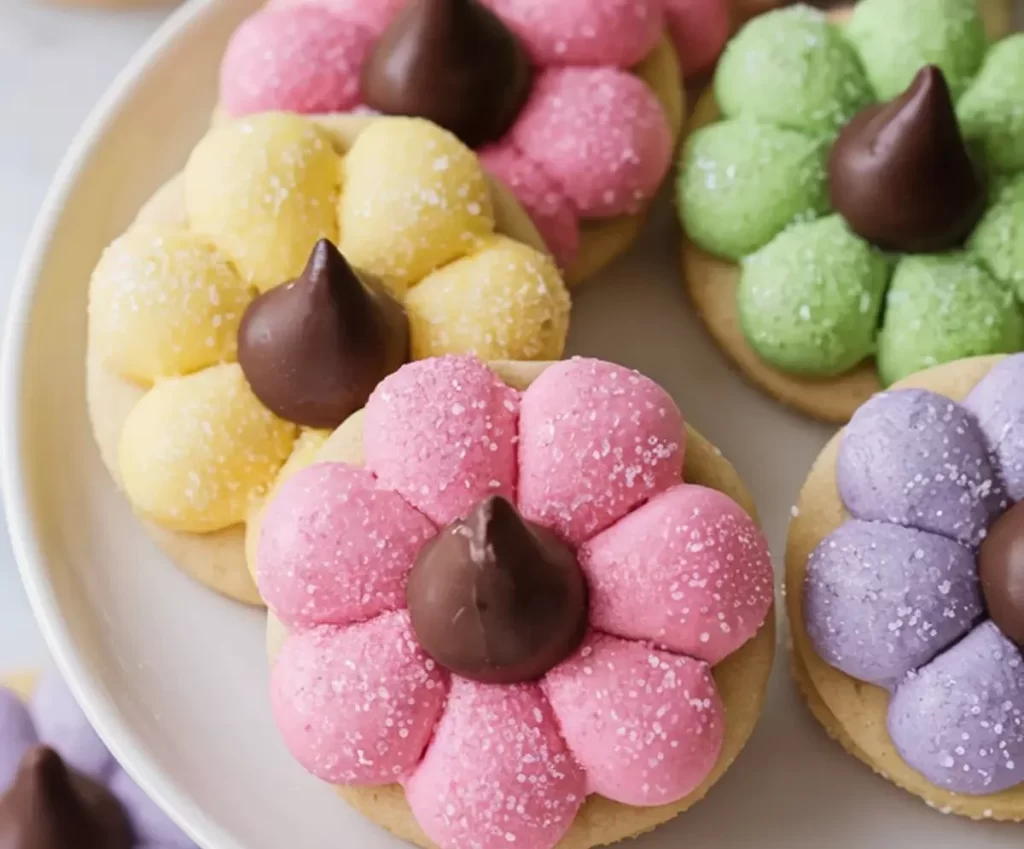
Cool and Decorate
Remove the cookies from the oven and let them cool on the baking sheet for 5 minutes before transferring them to a wire rack. Once they’re completely cool, mix the powdered sugar with a tiny bit of water or milk to make a glaze. Drizzle or dip your cookies in the glaze and sprinkle with colorful decorations!
Serving Suggestions: Make It Shine
Presentation is key, my fellow foodies! When it comes to serving your Spring Blossom Cookies, there are endless possibilities:
-
Cookie Tower: Stack them in a lovely cookie jar or a cake stand for a beautiful display that welcomes guests to grab one (or two…or three!).
-
Picnic Treats: Pack them up in cute containers or bags for a picnic. They’ll be a hit with your friends and family, plus they travel well!
-
Tea Time: Pair them with a cup of herbal or floral tea (think chamomile or jasmine) for a delightful afternoon treat.
-
Personal Touch: If you’re gifting them, tying a little twine around a stack, adding a cute tag, and throwing on a flower will make anyone feel special.
Recipe Variations: Get Creative!
As if this cookie recipe wasn’t versatile enough, here are some fun variations and twists to try:
-
Chocolate Chip Blossom Cookies: Add 1 cup of semi-sweet chocolate chips to the dough for a delightful contrast of flavors.
-
Lemon Zest Surprise: Add the zest of one lemon to the dough for a fresh citrus flavor that screams spring.
-
Nutty Delight: Incorporate chopped walnuts or pecans for added crunch and flavor.
-
Dairy-Free Option: Substitute the butter with coconut oil and the egg with a flaxseed mixture for a vegan twist!
-
Gluten-Free Version: Use a 1:1 gluten-free flour blend to cater to your friends with dietary constraints.
Chef’s Notes: A Whimsical Journey
These spring cookies have evolved over time, much like me! Over the years, I’ve learned from countless cookie-baking trials and errors. I’ve experimented with different flavors and decorations—chocolate drizzle here, nut toppings there. Each batch brings a unique personality. But I’ll tell you, the best part about these cookies is how they seem to spread happiness in every bite. Nobody can resist a good cookie, especially one decorated with love and sprinkles!
And let’s not forget the inevitable kitchen mishaps! One time, I accidentally grabbed baking powder instead of baking soda—let’s just say the cookies were a fluffy disaster. But even that taught me the importance of reading labels carefully. Always!
FAQs and Troubleshooting
-
Why are my cookies flat?
If your cookies came out flat, it could be a sign that your baking soda isn’t fresh, or your butter may have been too warm. Make sure to measure carefully and chill your dough if needed! -
How do I store these cookies?
Store them in an airtight container at room temperature for up to a week. To keep them fresh for longer, you can freeze them in a single layer and then store them in a freezer-safe bag or container. -
Can I make the dough ahead of time?
Absolutely! You can prepare the dough, refrigerate it for up to 24 hours, and bake fresh cookies whenever the sweet tooth strikes. -
How can I make the glaze thicker or thinner?
Adjust the consistency by adding more powdered sugar for thickness or more milk/water for a thinner drizzle.
Nutritional Info (Per Cookie Variation)
While I believe in enjoying your treats, here’s a quick run-down of the general nutritional information for a standard Spring Blossom Cookie:
- Calories: Approximately 120
- Fat: 6g
- Carbohydrates: 16g
- Protein: 1g
- Sugar: 7g
This can vary based on specific variations and if you add any extras, of course!
Final Thoughts: Let’s Celebrate with Cookies!
There you have it, my delightful friends! Your journey to creating scrumptious Spring Blossom Cookies is just a few steps away. These cookies are so much more than just a sweet treat; they’re a celebration of warm weather, laughter, and the joy of sharing good food with good company. Don’t hesitate to make them your own with variations, decorations, and creative plating. Most importantly, embrace the magical moments in the kitchen—they’re what make cooking so special.
So, roll up your sleeves, get that apron on, and let’s bake some sweet memories together! I can’t wait to hear how your Spring Blossom Cookies turn out. Share your creations, stories, and how many cookies you actually ate in one sitting—I promise, I won’t judge!
Happy baking! 🌼 — Chef Emily 🍪
Print
Easy Spring Blossom Cookies
- Total Time: 27 minutes
- Yield: 24 cookies 1x
- Diet: Vegetarian
Description
Delightful cookies that embody the essence of spring with their vibrant colors and charming designs, perfect for any gathering.
Ingredients
- 2 ¾ cups all-purpose flour
- 1 teaspoon baking soda
- ½ teaspoon salt
- 1 cup (2 sticks) unsalted butter, softened
- 1 cup granulated sugar
- ½ cup brown sugar, packed
- 2 large eggs
- 1 teaspoon vanilla extract
- 1 ½ cups powdered sugar (for decoration)
- Sprinkles and edible decorations
Instructions
- Preheat your oven to 350°F (175°C).
- In a medium bowl, whisk together the flour, baking soda, and salt.
- In a large mixing bowl, cream the softened butter, granulated sugar, and brown sugar until light and fluffy.
- Beat in the eggs one at a time, then add the vanilla extract.
- Gradually add the flour mixture to the wet ingredients, mixing on low speed until just combined.
- Scoop out balls of dough and place them on a parchment-lined baking sheet, spacing them about 2 inches apart.
- Bake for 10-12 minutes until edges are golden.
- Cool for 5 minutes on the baking sheet before transferring to a wire rack. Decorate with a glaze made from powdered sugar and a little water or milk, then top with sprinkles.
Notes
Store cookies in an airtight container at room temperature for up to a week or freeze for longer storage. Dough can be made ahead and refrigerated for up to 24 hours.
- Prep Time: 15 minutes
- Cook Time: 12 minutes
- Category: Dessert
- Method: Baking
- Cuisine: American
Nutrition
- Serving Size: 1 cookie
- Calories: 120
- Sugar: 7g
- Sodium: 125mg
- Fat: 6g
- Saturated Fat: 4g
- Unsaturated Fat: 2g
- Trans Fat: 0g
- Carbohydrates: 16g
- Fiber: 0g
- Protein: 1g
- Cholesterol: 30mg
Keywords: cookies, spring cookies, desserts, baking, easy cookie recipe, cookie decorations