Spooky, Sweet, and Seriously Fun: Your New Halloween Cookie Obsession
Hey friends, Jackson from Food Meld here! Can you feel it? That crispness in the air, the sudden appearance of giant bags of candy in every grocery store, the urge to watch Hocus Pocus for the hundredth time? Yep, Halloween is creeping up on us, and my kitchen is officially in full spooky season mode. And let me tell you, nothing gets me more excited than a dessert that’s equal parts delicious and dramatically fun.
If you’ve ever scrolled through Pinterest around this time of year, you’ve seen ‘em. Those gloriously gory, terrifyingly tasty cookies that look like they just came from a crime scene. They seem super intricate, right? Like something only a professional pastry chef with a steady hand and years of experience could pull off. I’m here to let you in on a little secret: they are one of the EASIEST Halloween treats you will ever make. Seriously.
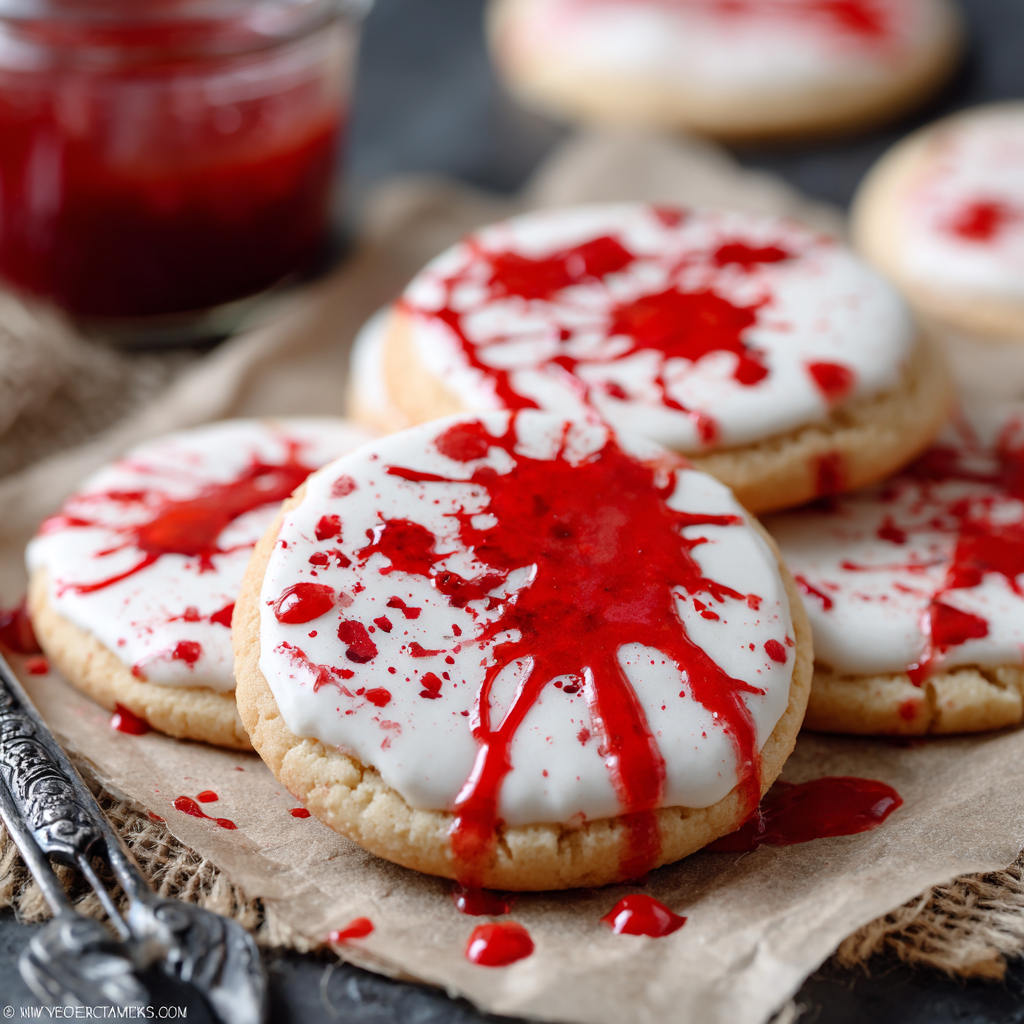
These Blood Splatter Cookies are my go-to for a reason. We’re starting with a classic, buttery, crisp sugar cookie that’s practically foolproof. Then, we’re slathering on a simple, sweet vanilla icing. The real magic—the blood splatter—is a one-bowl, three-ingredient situation that involves zero precision and maximum fun. It’s the kind of project where making a mess is the whole point. Whether you’re hosting a monster mash, need a show-stopping treat for the school party, or just want to have a hilariously good time with your kids in the kitchen, this recipe is your ticket. So, grab your apron (maybe a black one to set the mood), and let’s cook something awesomely creepy together.
The Cookie That Started It All
This recipe takes me right back to my grandma’s kitchen, though not in the way you might think. Nana Walker was a phenomenal baker, but her style was more… pristine. Perfectly fluted pie crusts, delicate tea cakes, cookies that all looked exactly identical. I loved them, but my Halloween spirit always craved a little chaos.
One year, when I was about ten, I was “helping” her decorate sugar cookies for a party. I was in charge of the red icing, and let’s just say my enthusiasm outweighed my coordination. I went to drizzle a line and accidentally jerked my hand, sending a huge glob of crimson red icing flying across the counter—and right onto a whole tray of her perfect, white-iced cookies. I froze, expecting a scolding. But Nana just looked at the carnage, then at my horrified face, and started laughing. “Well, would you look at that,” she said, wiping a tear from her eye. “They look like they’ve been in a fight… and lost!”
We decided to lean in. We took toothbrushes and went to town, splattering red everywhere. They were the messiest, most ridiculous cookies at the party, and they were the absolute first platter to be emptied. It taught me a powerful lesson: sometimes, the best food isn’t about perfection. It’s about the fun you have making it and the unforgettable moment you create. These blood splatter cookies are my official, delicious tribute to that perfectly imperfect kitchen accident.
Gathering Your Spooky Supplies
Here’s the beautiful part: you probably have most of this in your pantry right now. This is about simple ingredients creating a spectacular effect. Let’s break it down.
For the Cookies:
- 2 1/2 cups all-purpose flour: The sturdy base of our cookie. It gives that classic structure we need for a crisp cookie that can hold all our gory details. For a slightly softer cookie, you can swap in 1/2 cup of cake flour, but all-purpose works perfectly.
- 1/2 tsp baking powder: Our leavening agent! This is the little bit of lift that gives the cookie a tender crumb instead of being rock-hard.
- 1/4 tsp salt: Never skip the salt in sweet recipes. It’s the flavor enhancer that makes the vanilla and butter really sing and prevents the cookie from tasting flat.
- 3/4 cup unsalted butter, softened: The star of the show. I use unsalted so I can control the salt level. “Softened” is key here! It should be cool to the touch but leave a slight indent when you press it. Pro tip: if you forget to take it out, cut it into chunks and it will soften in about 15 minutes.
- 3/4 cup sugar: Plain white granulated sugar is what we want for that classic crisp sugar cookie texture.
- 1 large egg: The binder. It brings our dough together and adds richness. Make sure it’s at room temperature to blend seamlessly with the butter.
- 1 tsp vanilla extract: The soul of the cookie. Use the real stuff! That imitation vanilla can’t compete with the deep, warm flavor of pure vanilla.
For the Icing (Our “Canvas”):
- 2 cups powdered sugar: Also known as confectioner’s sugar. It dissolves instantly, creating that smooth, glossy finish we’re after.
- 2–3 tbsp milk: Whole milk is great, but any milk you have works. Start with 2 tablespoons and add the third only if you need it to reach a spreadable consistency.
- 1 tsp vanilla extract: Yes, more vanilla! It flavors the icing and makes it taste like a dreamy vanilla glaze.
For the Edible “Blood”:
- 1/2 cup light corn syrup: This is the secret weapon. It gives the “blood” its terrifyingly realistic viscosity and glossy, wet look. Honey or agave nectar can work in a pinch, but they will add their own flavor and be slightly less shiny.
- 1–2 tbsp red food coloring: Gel food coloring is my #1 recommendation here. It’s more concentrated, so you get a vibrant, deep red without making the mixture too runny. Liquid works too, you’ll just need a bit more.
- 1 tsp cocoa powder: This is the chef’s hack! Pure red can look a little too “cherry candy.” A tiny bit of cocoa powder deepens the color, adds a touch of brownish undertone, and makes it look like real, dark blood. Trust me on this.
Let’s Make Some (Delicious) Magic
Okay, team! Time to get our hands dirty. Follow these steps, and you’ll have a cookie masterpiece in no time.
- Preheat and Prep: Fire up that oven to 350°F (175°C). This is always our first move—we want it hot and ready for our cookie dough. Line your baking sheets with parchment paper. Not only does this prevent sticking, but it makes cleanup an absolute dream. No scrubbing pans? Yes, please.
- Cream the Good Stuff: In a large bowl, beat together the softened butter and sugar. We’re not just mixing; we’re creaming. Beat it on medium-high speed for a good 2-3 minutes until it becomes light, pale, and fluffy. This incorporates air, which is part of what gives the cookie its perfect texture. Don’t rush this step!
- Add the Wet Team: Crack in that room-temperature egg and pour in the vanilla. Mix until everything is beautifully combined, stopping to scrape down the sides of the bowl to make sure no rogue butter is hiding out.
- Bring in the Dry Crew: In a separate bowl, whisk together your flour, baking powder, and salt. This little whisking session ensures the leavening and salt are evenly distributed throughout the flour. Now, with your mixer on low, gradually add the dry ingredients to the wet. Mix until the dough just comes together and there are no more dry streaks of flour. Chef’s Tip: Overmixing at this stage can lead to tough cookies. Low and slow is the way to go.
- Roll and Cut: Lightly flour your surface and your rolling pin. Turn the dough out and roll it to about a 1/4-inch thickness. This is the sweet spot—thick enough to be satisfyingly cookie-like, but thin enough to get a nice crisp bite. Use a simple round cutter (about 3 inches is perfect) to cut out your circles. Re-roll the scraps and keep going until you’ve used all the dough.
- Bake to Golden Perfection: Place the cookies about an inch apart on your prepared baking sheets. Pop them in the oven for 10-12 minutes. You’re looking for the edges to be just lightly golden. They might still look a tiny bit soft in the center—that’s okay! They will firm up as they cool. Let them cool on the baking sheet for 5 minutes before transferring them to a wire rack to cool completely. This is non-negotiable. Icing a warm cookie is a recipe for a melted, sad mess.
- Create the Icing Canvas: While the cookies cool, make the icing. Whisk the powdered sugar, 2 tablespoons of milk, and vanilla together in a medium bowl. You want a thick but spreadable consistency. It should drizzle slowly off the whisk. If it’s too thick, add the remaining milk, a teaspoon at a time. Too thin? Add a bit more powdered sugar.
- Ice Those Cookies: Using a butter knife or a small offset spatula, spread a smooth, even layer of icing over each completely cooled cookie. Don’t worry about it being flawless! A slightly rustic look adds to the charm. Let the iced cookies sit for at least 30 minutes until the icing is set. It should be dry to the touch.
- Make the “Blood”: This is the best part. In a small, shallow bowl (a ramekin is perfect), whisk together the corn syrup, red food coloring, and cocoa powder. Start with 1 tablespoon of food coloring and add more until you get a deep, dark red that you love. The cocoa powder will make it look legitimately creepy.
- Unleash the Carnage: Now for the messy fun! You have two great options. For fine misty spatter, dip a clean toothbrush into the “blood,” point it at the cookie, and run your thumb over the bristles to flick it on. For bigger, more dramatic drips and splats, use a spoon or a paintbrush. Dip it and just flick your wrist over the cookies. There is no wrong way to do this. Go crazy! Let your inner Jackson Pollock out. Let the cookies dry completely before serving or stacking.
How to Serve These Spooky Sweets
Presentation is everything with these cookies! Pile them high on a stark black platter for a seriously dramatic effect. For a fun party trick, arrange them on a serving tray and loosely drape some creepy cheesecloth or plastic spiders around them. If you’re packing them for a party, place a small piece of parchment paper between layers so your beautiful blood splatter artwork doesn’t get smudged. They pair perfectly with a glass of cold milk for the kids or a dark, rich coffee for the adults braving the sugar rush.
Mix It Up! Creative Twists on the Classic
Want to play with the formula? Here are a few of my favorite ways to switch things up:
- Chocolate Crime Scene: Add 1/4 cup of cocoa powder to the dry ingredients for a chocolate sugar cookie base. It adds a deeper flavor and makes the white icing pop even more.
- Green Ooze Variation: Halloween isn’t just about blood! Use green food coloring (and skip the cocoa powder) to create a slimy, alien ooze effect instead.
- Zombie Bite: Before icing, use a small circle cutter or a knife to take a “bite” out of a few cookies. Then, splatter the blood coming out of the bite mark for a seriously gruesome detail.
- Gluten-Free Ghouls: Swap the all-purpose flour for a 1:1 gluten-free baking blend. I’ve had great success with brands like Bob’s Red Mill or King Arthur.
- “Bleeding” Center: For a surprise inside, place a small dollop of red jam (like raspberry or strawberry) between two smaller, thinner cookies before baking. Seal the edges, bake, then ice and splatter as usual. When you bite in, it “bleeds”!
Jackson’s Chef Notes
This recipe has become a Halloween staple in my house, and it’s evolved a bit over the years. The cocoa powder in the blood was a total happy accident—I knocked some into the bowl while reaching for something else and realized it was a massive upgrade. My biggest piece of advice? Embrace the mess! Lay down some newspaper or old parchment paper under your wire rack before you start the splattering. It will save your countertops and make cleanup a five-second job. Also, this is a fantastic recipe to do with kids. Give them their own cookies to decorate and let them go wild. The looks of pure joy (and concentration) on their faces are worth every single red speck you’ll later find on your walls. True story.
FAQs & Troubleshooting
Q: My icing is too runny/thick. How do I fix it?
A: No worries, this is an easy fix! If it’s too runny, just add more powdered sugar, a tablespoon at a time, until it thickens up. If it’s too thick and won’t spread, add more milk, a teaspoon at a time, until it reaches that perfect drizzling consistency.
Q: Can I make the cookie dough ahead of time?
A: Absolutely! The dough can be made, wrapped tightly in plastic wrap, and refrigerated for up to 3 days. Let it sit at room temperature for about 15-20 minutes before rolling it out. You can also freeze the dough logs for up to 3 months.
Q: My “blood” isn’t splattering well. What am I doing wrong?
A: This usually means the mixture is a bit too thick. Try adding a tiny, and I mean *tiny*, amount of water or more corn syrup to thin it out slightly. It should easily drip off your spoon or toothbrush. Also, make sure you’re not loading too much onto the brush at once.
Q: How far in advance can I make these?
A: The cookies (without icing) will stay fresh in an airtight container at room temperature for about 3 days. Once iced and splattered, they are best enjoyed within 24-48 hours. The icing can start to soften and the colors might bleed slightly after that.
Nutritional Information (Per Cookie – Approximate)
Calories: 160 | Protein: 2g | Carbohydrates: 26g | Fat: 6g | Sugar: 16g
Prep Time: 20 min | Cook Time: 12 min | Decorating Time: 15 min | Total Time: ~50 min
Print
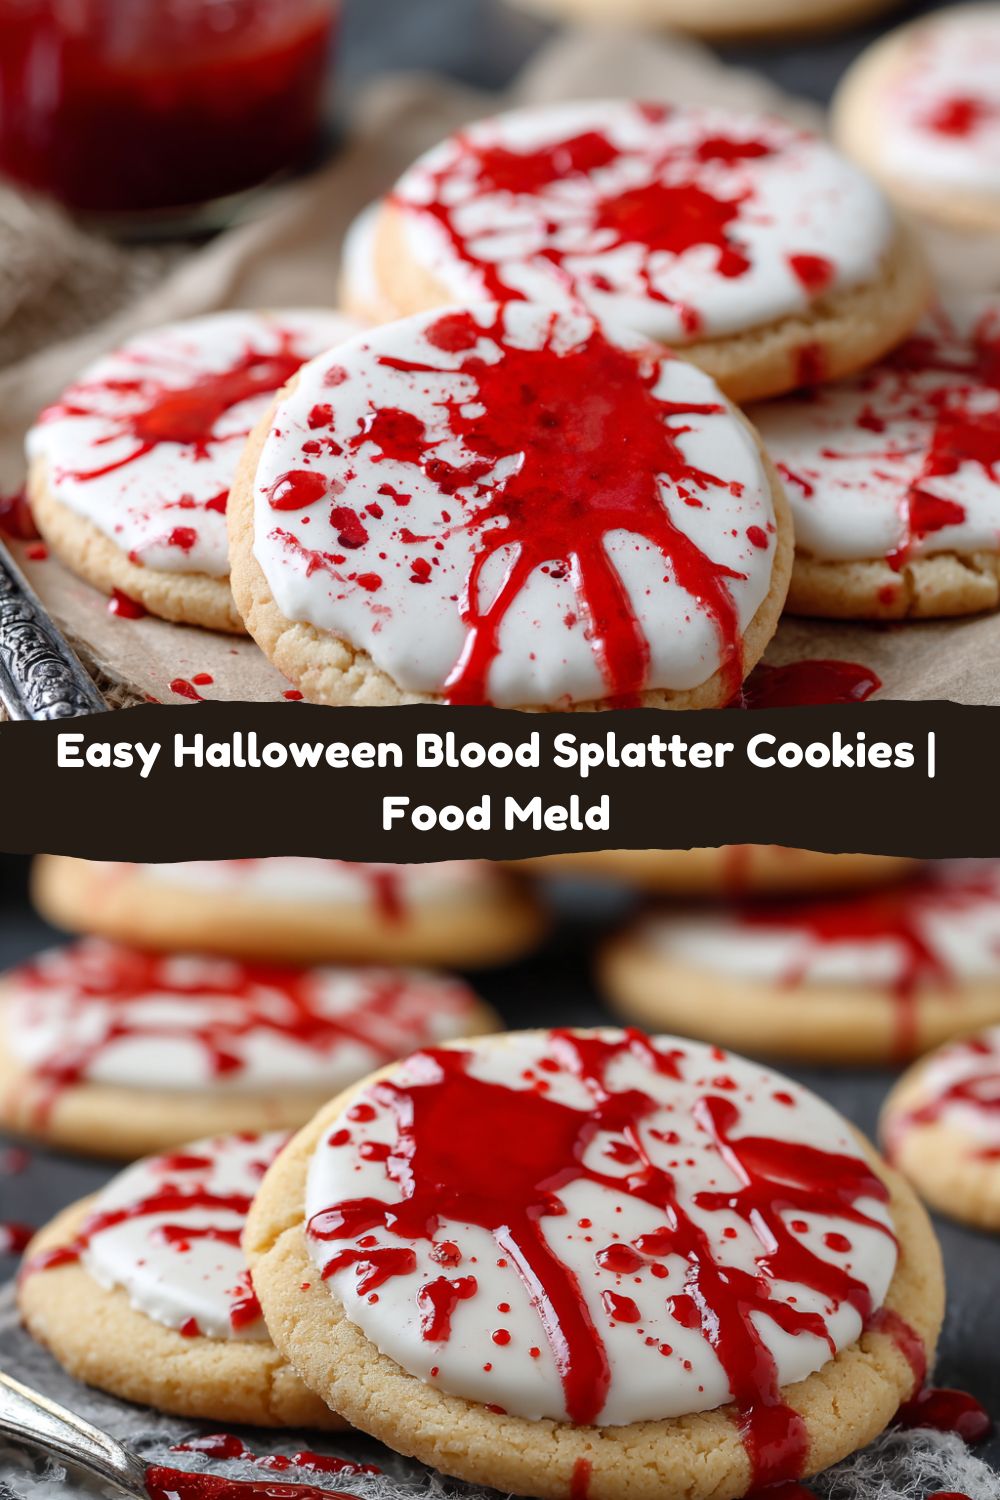
EASY HALLOWEEN BLOOD SPLATTER COOKIES
- Total Time: 50 minutes
- Yield: 18 - 20 Cookies 1x
Description
These Blood Splatter Cookies are the perfect mix of sweet and spooky. Crisp sugar cookies are iced in white, then splattered with edible “blood” for a dramatic Halloween effect. They’re easy to make, fun to decorate, and a guaranteed conversation starter.
Ingredients
For the Cookies:
2 1/2 cups all-purpose flour
1/2 tsp baking powder
1/4 tsp salt
3/4 cup unsalted butter, softened
3/4 cup sugar
1 egg
1 tsp vanilla extract
For the Icing:
2 cups powdered sugar
2–3 tbsp milk
1 tsp vanilla extract
For the “Blood”:
1/2 cup corn syrup
1–2 tbsp red food coloring
1 tsp cocoa powder (for darker, realistic blood tone)
Instructions
Preheat oven to 350°F (175°C). Line baking sheets with parchment paper.
Cream butter and sugar until fluffy. Add egg and vanilla, then mix in flour, baking powder, and salt until dough forms.
Roll dough to 1/4-inch thick, cut into circles, and bake 10–12 minutes. Cool completely.
Whisk icing ingredients until smooth, then spread over cookies. Let set until slightly firm.
Mix “blood” ingredients in a small bowl. Dip a clean brush or toothbrush into the mixture and flick or splatter onto cookies for a gory effect.
Let dry before serving.
- Prep Time: 20 minutes
- Decorate Time: 15 minutes
- Cook Time: 15 minutes
Nutrition
- Calories: 160 / Cookie
- Sugar: 16g / Cookie
- Fat: 6g / Cookie
- Carbohydrates: 26g / Cookie
- Protein: 2g / Cookie
Final Thoughts
Halloween recipes should never be about perfection—they’re about fun, a little mischief, and plenty of flavor. These Blood Splatter Cookies are living proof. They’re simple enough for beginner bakers, yet bold enough to steal the spotlight at any party. Best of all, they invite you to lean into the mess, embrace the chaos, and let your creativity run wild.
Whether you’re splattering with kids, whipping up a tray for the office, or just indulging your inner horror-movie fan, these cookies are guaranteed to bring laughs, gasps, and empty plates. So grab your whisk, your food coloring, and maybe some parchment for your counters—you’re about to make a Halloween memory as unforgettable as the treats themselves.
Happy haunting, and may your kitchen always be filled with spooky-good vibes (and cookies that disappear faster than you can say trick or treat). 🎃👻🩸


