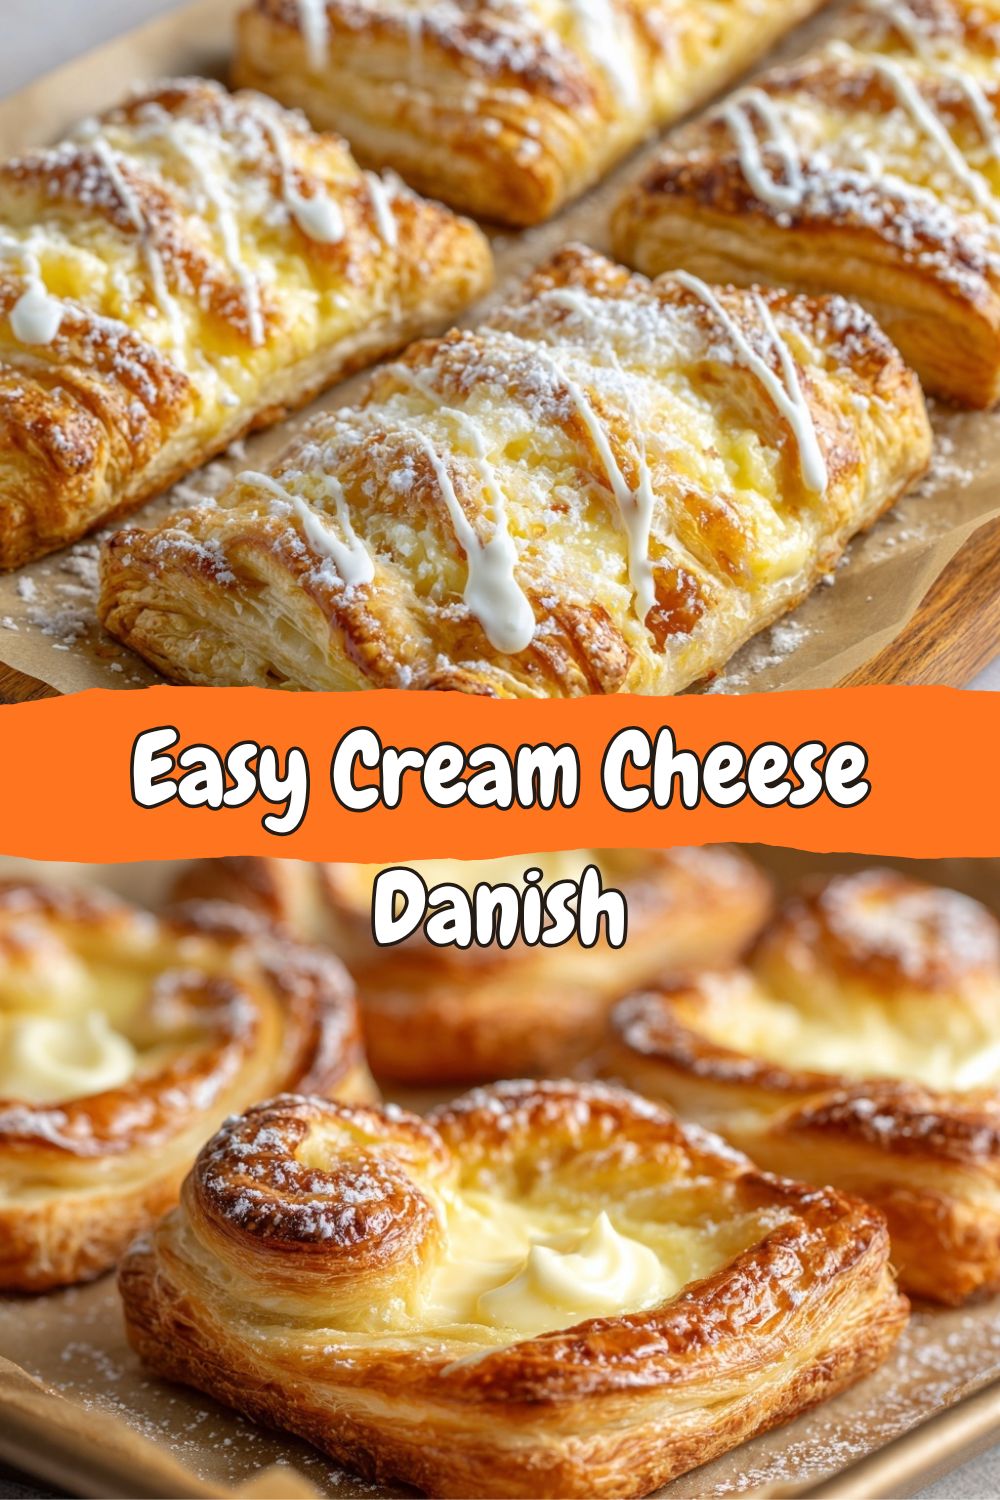
Easy Cream Cheese Danish – Your Secret to Impressive Mornings (No Baker’s Hat Required!)
Well, I’m here to flip that script with you. What if I told you that you could have that exact same feeling—the flaky, buttery layers, that sweet-tangy cream cheese filling, the gorgeous golden sheen—in about the same time it takes to brew a pot of coffee and scroll through your phone? This Easy Cream Cheese Danish recipe is my absolute favorite kitchen hack for turning an ordinary Tuesday into a “heck yes, I’m treating myself” kind of day.
We’re keeping it simple, real, and packed with flavor—just like I promise here at Food Meld. We’re using a brilliant shortcut (store-bought puff pastry, my beloved) that does all the heavy lifting on the flaky layers, so we can focus on the fun part: whipping up that luscious filling and creating something that looks and tastes straight from a patisserie window. This is the kind of recipe that’ll make your family pause mid-bite and ask, “You made these?” So, tie on your apron, and let’s cook something awesome together. Welcome to bakery-style bliss, simplified.
The Diner Booth That Started It All
This recipe takes me right back to a sticky vinyl booth in a 24-hour diner just outside of Atlanta. Every Sunday after church, my grandma would take me. It wasn’t fancy, but to my eight-year-old self, it was heaven. The waitress, Betty, knew our order by heart: black coffee for Grandma, chocolate milk for me, and one cream cheese danish to share.
She’d always put it right in the middle of the table with two extra plates. I’d watch, fascinated, as Grandma used the side of her fork to carefully divide it, making sure we each got an equal share of the flaky edges and the creamy center. That ritual—the sharing, the anticipation, the absolute mess of puff pastry flakes everywhere—was about more than breakfast. It was about connection, a little moment of sweet joy before the week began. This easy version I’m sharing with you today is my way of capturing that feeling any day of the week, without needing a time machine or a diner waitress named Betty. It’s the spirit of that shared treat, simplified for your own kitchen.
Gathering Your Flavor Arsenal
Here’s the beautiful part: the ingredient list is short and sweet. Each one plays a starring role, so let’s talk about them.
- 1 sheet frozen puff pastry, thawed: This is our magic wand. Look for an all-butter puff pastry if you can find it—the flavor is incomparable. Keep it cold until you’re ready to use it for the flakiest results. Chef Insight: Thaw it in the fridge overnight, not on the counter. We want it pliable but still chilly.
- 4 oz (115 g) full-fat cream cheese, softened: Go for the block style, not the spreadable tub. The higher stability gives us that perfect, defined filling that doesn’t run everywhere. Sub Tip: For a tangier kick, swap in Neufchâtel cheese.
- 3 tbsp granulated sugar: Just enough to sweeten the cheese without making it dessert-sweet. We’re aiming for balance.
- 1 tsp pure vanilla extract: The secret whisper of warmth that elevates the filling from good to “what is in this?!”
- 1 large egg (for the filling): This acts as a binder, giving our cream cheese mixture a little structure and a lovely richness.
- 1 large egg + 1 tbsp milk or water (for egg wash): Don’t skip the wash! This is what gives our pastry that gorgeous, professional-looking golden brown shine and crisp texture.
- Fruit preserves (optional but awesome): A tiny dollop of strawberry, cherry, raspberry, or apricot jam in the center of the filling creates a gorgeous flavor swirl. It’s my favorite “what if we tried this?” move here.
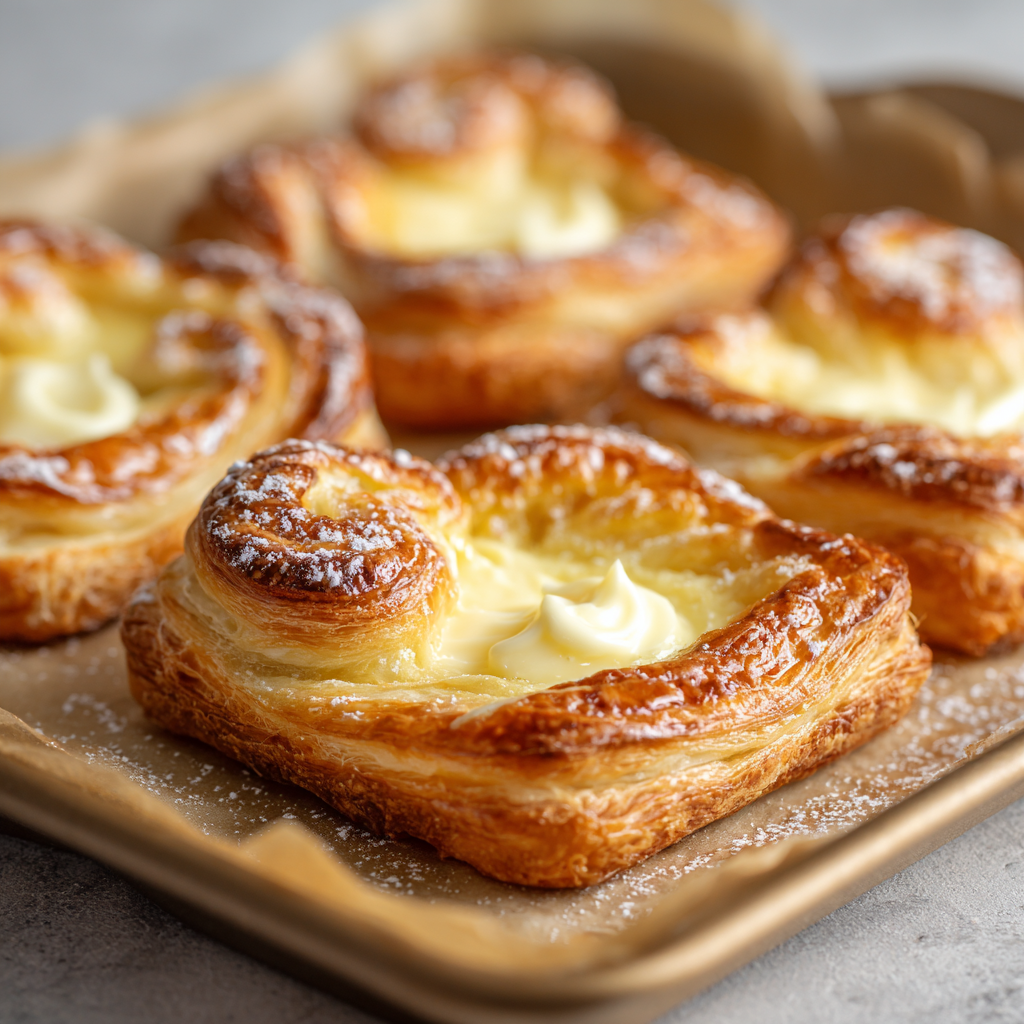
- Powdered sugar glaze or dusting (for finishing): A simple mix of powdered sugar, a splash of milk, and vanilla makes a pretty drizzle. Or, just dust with powdered sugar for a snowy, elegant look.
Let’s Build Some Pastry Magic: Step-by-Step
Ready to see how quickly this comes together? Follow these steps, and you’ll be a danish-dealing pro.
- Prep Your Stage. Preheat your oven to 400°F (200°C). This is a hot oven, and we need that instant blast of heat to make the pastry puff. Line a baking sheet with parchment paper. Chef Hack: The parchment isn’t just for no-stick ease; it ensures the bottom browns evenly without burning.
- Shape Your Canvas. On a lightly floured surface, unfold your thawed puff pastry sheet. Give it a few gentle rolls with a rolling pin just to smooth out any fold seams. Using a sharp knife or a pizza cutter, slice it into 6 or 8 even rectangles. Place them on your prepared baking sheet, giving them a little room to puff and spread their wings.
- Create the “Wall.” This is a pro trick that’s stupidly easy. Take a small, sharp knife and lightly score a smaller rectangle inside each pastry piece, about ½ inch from the edge. Do not cut all the way through! You’re just making a shallow indent. This border will rise up and contain the filling like a beautiful, edible picture frame.
- Whip Up the Star. In a medium bowl, beat the softened cream cheese, sugar, vanilla, and that one egg until it’s completely smooth and creamy. No lumps allowed! A hand mixer makes this a 30-second job, but a sturdy whisk and some elbow grease work just fine.
- Fill ‘Er Up. Spoon a generous tablespoon or two of the cream cheese mixture into the center of each pastry, inside the scored border. If you’re using fruit preserves, now’s the time: drop a scant ½ teaspoon right into the middle of the cheese filling.
- The Golden Touch (Egg Wash). In a small bowl, whisk the remaining egg with a tablespoon of milk or water. Using a pastry brush (your finger works in a pinch!), gently brush this wash over the exposed pastry borders you created. This is what gives us that iconic bakery gloss. Avoid getting egg wash on the filling.
- Bake to Perfection. Slide your masterpiece into the hot oven. Bake for 15-18 minutes. You’re looking for the pastry to be explosively puffed, deeply golden brown, and the filling to be set. Your kitchen will smell unreal.
- The Finishing Flourish. Let the danishes cool on the sheet for at least 10 minutes. They’re molten lava inside right out of the oven! Once slightly cooled, drizzle with your simple glaze or dust generously with powdered sugar.
Serving Up the Good Vibes
Presentation is part of the fun! For a casual family breakfast, pile them high on a rustic wooden board right in the middle of the table. For a more elegant brunch, plate each danish individually on a simple white plate. Add a few fresh berries on the side and a mint sprig for a pop of color. The most important serving suggestion? A big pot of freshly brewed coffee or a pot of tea. The bitter note of coffee cuts through the sweet, rich pastry perfectly, making each bite feel balanced and luxurious. These are best enjoyed the day they’re made, ideally while still slightly warm, when the pastry is at its peak flakiness.
Make It Yours: Creative Twists & Swaps
This recipe is a fantastic blueprint. Once you’ve mastered the basic move, let’s play with some “what if we tried this?” energy.
- Lemon-Blueberry Bliss: Add the zest of one lemon to the cream cheese filling. Use blueberry preserves for the fruit dollop. Bright, fresh, and incredible.
- Chocolate-Hazelnut Swirl: Swap the fruit preserve for a dollop of high-quality chocolate-hazelnut spread. Sprinkle chopped, toasted hazelnuts on top before baking for crunch.
- Cinnamon Sugar Apple: Sauté finely diced apple in a little butter and cinnamon until soft. Let it cool, then mix it right into the cream cheese filling. Autumn in pastry form.
- Savory Spin: Omit the sugar and vanilla from the filling. Mix the cream cheese with shredded cheddar, chopped chives, and crumbled cooked bacon. A mind-blowing appetizer or brunch option.
- Dairy-Free Friendly: Use your favorite plant-based cream cheese and a vegan puff pastry (many are accidentally vegan!). For the egg wash, a simple brush of maple syrup or plant milk will still give a nice color.
Chef’s Notes: A Few Truths from My Kitchen
I’ve made these danishes more times than I can count—for lazy Sundays, for last-minute guests, even as a “sorry I burnt the main course” peace offering. They’ve never let me down. The recipe has evolved in tiny ways: I now always add that fruit dollop because the burst of jammy flavor in the center is just too good. I’ve also learned that if your pastry feels like it’s getting too soft and sticky while you’re working, just pop the whole baking sheet into the freezer for 5 minutes. Cold pastry equals maximum puff. And the biggest lesson? Always make a few extra. They disappear faster than you can say “Food Meld.”
FAQs & Quick Fixes
Q: My filling bubbled over! What happened?
A: No sweat, it still tastes amazing! This usually means you overfilled slightly, or your scored border wasn’t deep enough. Next time, make sure that border is a clear, shallow cut and don’t exceed the recommended filling amount. It’s a forgiving pastry.
Q: Can I make these ahead of time?
A> You can assemble them the night before! Keep them covered on the baking sheet in the fridge. In the morning, brush with egg wash and bake. You may need to add 1-2 extra minutes to the bake time since they’re starting from cold.
Q: My pastry didn’t puff up very much. Why?
A: The most common culprit is the pastry getting too warm before baking. Remember: cold = puff. Ensure your pastry is thawed but still chilly, and don’t let the assembled danishes sit out for long before baking. Also, check your oven temperature with a thermometer to ensure it’s hitting a true 400°F.
Q: Can I use phyllo dough instead?
A> I wouldn’t recommend it for this recipe. Phyllo has a different, shatteringly crisp texture and doesn’t provide the same buttery, layered lift as puff pastry. Stick with puff for the true danish experience.
Nutritional Info (Because Knowledge is Power!)
Alright, let’s keep it real. This is a treat, a celebratory breakfast, a special brunch centerpiece. It’s not your everyday oatmeal, and that’s perfectly okay! Here’s a general breakdown per danish (based on 6 servings, without glaze): approximately 290 calories, 19g fat, 24g carbohydrates, and 5g protein. The majority of the fat comes from the butter in the puff pastry and the cream cheese, which is also what makes it so deliciously satisfying. My philosophy is to enjoy these kinds of foods mindfully and joyfully, as part of a balanced life full of flavor. So, savor every flaky, creamy bite without an ounce of guilt!
Final Thoughts: You’ve Got This!
And that’s it, friends! You now hold the secret to creating a bakery-worthy treat that looks like you spent hours, but secretly only took minutes and a whole lot of love. This Easy Cream Cheese Danish recipe is everything I love about cooking: it’s approachable, it’s deeply satisfying, and it has the power to turn a regular moment into a little celebration.
I hope you’ll give it a try this weekend. Or, you know, on a Wednesday just because. Tag me over on @FoodMeld if you do—I absolutely love seeing your creations and your kitchen victories. Remember, cooking shouldn’t be intimidating. It should be fun, a little messy, and full of those “you’ve gotta try this!” moments. Thanks for letting me share this one with you. Now go enjoy every single, glorious bite.
With flavor and fun,
Jackson Walker


