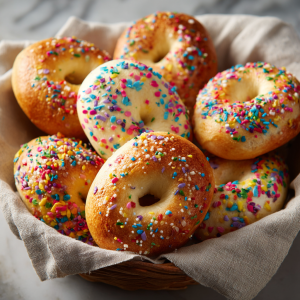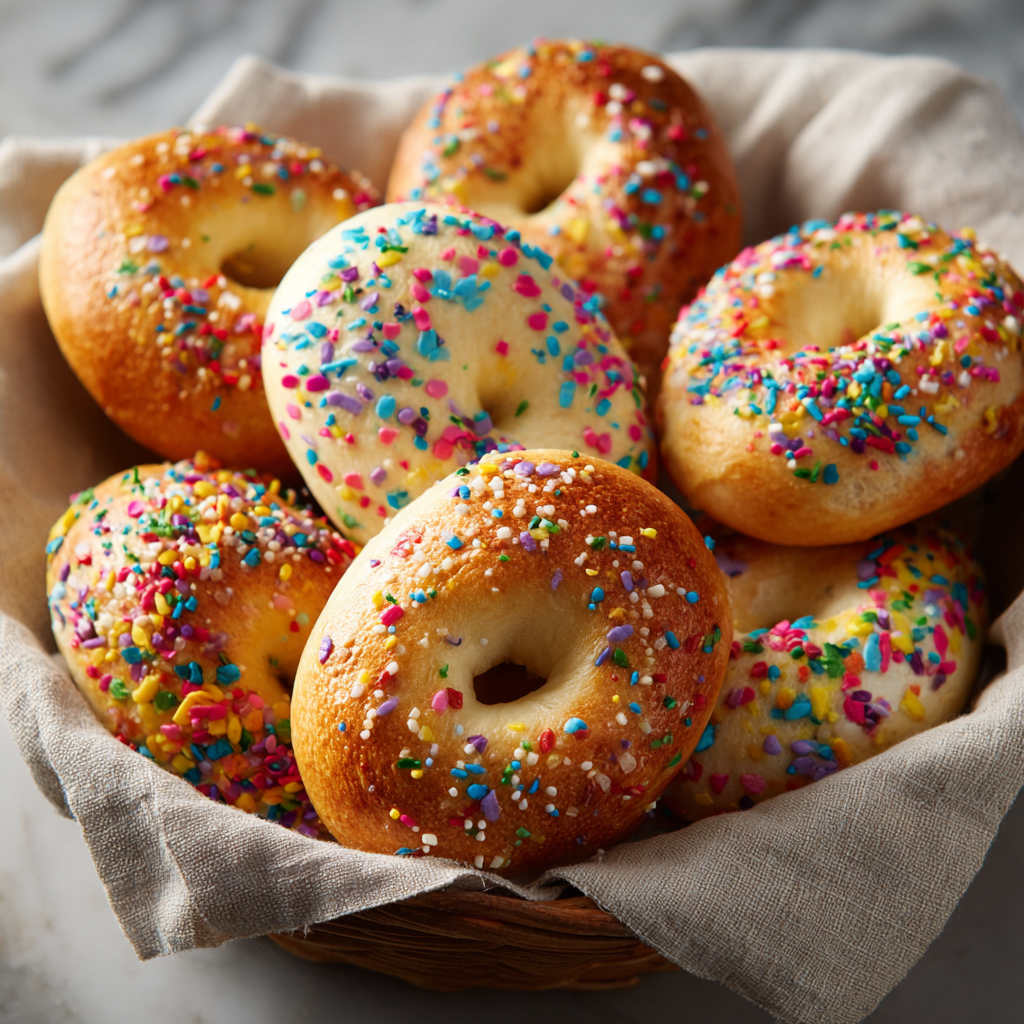
Easter Morning Magic: Let’s Bake Some Egg-cellent Bagels!
Hey friends, Jackson here from Food Meld. Is there anything better than the smell of something baking on a holiday morning? That warm, yeasty, “something amazing is happening in the kitchen” aroma just sets the tone for a perfect day. This Easter, let’s trade the same-old store-bought pastries for something that’s pure, hands-on, edible joy: Homemade Easter Egg Shaped Bagels.
I know what you might be thinking: “Bagels? From scratch? On a busy holiday?” Trust me, I get it. But here’s the Food Meld promise: we keep it simple, real, and packed with flavor. This recipe isn’t about fussy techniques; it’s about the fun of creating something special. We’re taking the classic, wonderfully chewy bagel and giving it a playful Easter twist. Shaping them like little eggs is the kind of simple, satisfying kitchen magic that turns a regular brunch into a core memory. Imagine your table filled with these golden, slightly irregular, totally charming bagels—ready to be slathered with honey butter, loaded with smoked salmon, or simply enjoyed warm from the oven.
This is more than a recipe; it’s an invitation to slow down and make something together. Whether you’re wrangling little helpers who love to roll dough or you’re treating yourself to a quiet, creative morning bake, these bagels are your ticket to an unforgettable Easter. So, tie on your apron, clear some counter space, and let’s dive in. We’re about to mix, shape, boil, and bake our way to the star of your holiday table. Let’s cook something awesome together.

The Bagel That Started It All: A Messy Memory
My love for homemade bagels started not in some fancy culinary school, but in my Grandma Lou’s kitchen, which was always about 10 degrees warmer than the rest of the house. She wasn’t a bagel-making purist from New York; she was a Southern lady who saw a recipe and thought, “I bet we could make that fun.” One spring, she decided our usual Easter biscuits needed a shake-up. She pulled out her big yellow mixing bowl and declared we were making “Easter Egg Bread.”
The result was… lumpy, vaguely egg-shaped rolls that were denser than a doorstop. But the process? Pure magic. I was covered in flour, fascinated by the way the yeast bubbled, and completely in charge of poking the holes in the middle. They weren’t pretty, but slathered in her peach preserves, they tasted like victory. That “what if we tried this?” spirit stuck with me. Years later, when I perfected my own bagel recipe, that memory came flooding back. I realized the shape itself could be the celebration. So, this recipe is a tip of the hat to Grandma Lou—to the joy of trying, the beauty of a little mess, and the undeniable truth that food shaped like something fun just tastes better. It’s that “Food Meld” energy: taking a tradition, adding a dash of creativity, and making it your own.
Gathering Your Flavor Arsenal
Here’s everything you’ll need. Don’t stress about perfection—this is a forgiving dough, and I’ve got swaps for you!
- 4 cups (480g) Bread Flour: This is the MVP. The higher protein content in bread flour gives our bagels that iconic chewy, substantial pull. Chef’s Insight: If you only have all-purpose, it’ll work, but your bagels will be a bit softer and less chewy.
- 1 ½ cups (360ml) Warm Water (110°F/43°C): Think baby bottle warm, not hot. Too hot and you’ll send the yeast to an early grave; too cold and it won’t wake up. A quick tip? If it feels comfortably warm on your wrist, it’s perfect.
- 2 teaspoons Active Dry Yeast: Our little flavor and rise engine. Make sure your packet isn’t expired! That foamy bloom in the first step is your sign that all systems are go.
- 2 tablespoons Sugar or Honey: A little snack for the yeast to get it going. I love the subtle flavor honey adds, but plain white sugar works flawlessly.
- 1 ½ teaspoons Salt: Crucial for flavor. Don’t skip it! It balances everything and strengthens the gluten. Add it to the flour, not directly to the yeast water.
- 1 tablespoon Vegetable Oil (or any neutral oil): This keeps the dough supple and makes your bowl easier to clean. A little fat goes a long way.
- 1 tablespoon Baking Soda (for boiling!): This is the **bagel game-changer**. Boiling the dough in a baking soda bath is what gives bagels their distinctive shiny, crisp-yet-chewy crust. It’s non-negotiable and the coolest part of the process!
- Your “Make It Yours” Add-Ins: This is where the fun begins! See the variations section for ideas, but have your food coloring (gel works best!), chocolate chips, cinnamon sugar, or everything seasoning ready for after the first rise.
Let’s Get Our Hands Doughy: The Step-by-Step
Ready? Let’s do this. I’ll walk you through each step with all my favorite kitchen hacks.
Step 1: Wake Up the Yeast. In your big mixing bowl, combine the warm water, yeast, and sugar/honey. Give it a quick stir and walk away for 5 full minutes. You’re looking for a foamy, creamy layer on top—that’s your yeast saying “Hello, let’s bake!” If you don’t see foam, your yeast might be old or your water was too hot/cold. Start over; it’s worth it.
Step 2: Mix & Knead to Glory. To the yeasty water, add the bread flour and salt. I start with a wooden spoon until it’s a shaggy mess, then I ditch it and use my hands. Dump the dough onto a clean, lightly floured surface. Now, knead! Push the dough away with the heel of your hand, fold it back, give it a quarter turn, repeat. Do this for 8-10 minutes. You’ll feel it transform from sticky and ragged to smooth, elastic, and almost bouncy. Pro Tip: Set a timer! It’s longer than you think. If the dough sticks, flour your hands, not the dough. Too much extra flour makes tough bagels.
Step 3: The First Rise (aka the Patience Part). Clean that mixing bowl, drizzle in a tiny bit of oil, and place your beautiful dough ball inside, turning it to coat lightly. Cover the bowl with a damp kitchen towel or plastic wrap. Tuck it in a warm, draft-free spot (I like my turned-off oven with the light on). Let it rise for 60-90 minutes, until it’s roughly doubled in size. Don’t rush it—this is where flavor develops.
Step 4: Shape Those Easter Eggs! Gently punch down the dough to release the air. Turn it out onto your surface. Using a bench scraper or knife, divide it into 8 equal-ish pieces. Now, the fun part: to shape our “eggs,” we’re not making the traditional hole-in-the-middle bagel. For each piece, roll it into a smooth ball. Then, gently roll and press the ball into a plump oval shape, slightly pointed at both ends like an egg. Place your shaped eggs on a parchment-lined baking sheet, cover again, and let them rest for 15 minutes. They’ll puff up just a bit.
Step 5: The Famous Boil (Don’t Skip This!). While the bagels rest, preheat your oven to 425°F (220°C) and bring a large, wide pot of water to a boil. Add the 1 tablespoon of baking soda—it will foam up! Now, working in batches of 2-3, gently lower each bagel dough-egg into the boiling water using a slotted spoon. Boil for 30 seconds, flip, and boil another 30 seconds. This sets the crust. Remove, let excess water drip off, and place them back on the baking sheet. They’ll look a little wrinkled and weird—that’s perfect!
Step 6: Bake to Golden Perfection. If you’re adding any toppings like seeds, do it now while the surface is wet and sticky. Pop the baking sheet into your hot oven. Bake for 18-22 minutes, rotating the pan halfway through, until the bagels are a deep, glorious golden brown. Your kitchen will smell incredible. Transfer to a wire rack to cool for at least 15 minutes before you tear into one. I know, it’s hard!
How to Serve Up the Easter Fun
Presentation is part of the joy! For a stunning Easter brunch spread, arrange these golden egg bagels on a big wooden board or a festive platter. Create a “bagel bar” with bowls of toppings and spreads so everyone can build their dream bite.
Sweet Easter Vibes: Offer a bowl of pastel-colored cream cheese (whip a block of cream cheese with a drop of food coloring!), honey butter, fruit preserves, lemon curd, and a pile of fresh berries. Perfect for a sunny morning.
Savory Brunch Heaven: Set out scallion cream cheese, thinly sliced smoked salmon, capers, red onion, fresh dill, and juicy tomato slices. It’s a classic for a reason—the chewy bagel is the perfect vehicle for all those bold flavors.
Beyond the Board: These also make the most adorable edible addition to an Easter basket. Wrap one in a little cellophane bag with a ribbon for a delicious homemade gift. Or, slice them in half horizontally, toast them up, and use them as the best “bun” for your Easter morning breakfast sandwiches.
Make It Your Own: 5 Fun Twists
The basic dough is your blank canvas. Here are a few ways to run with it:
- Confetti Funfetti Bagels: After the first rise, knead in ½ cup of rainbow sprinkles along with 1 teaspoon of clear vanilla extract. Shape, boil, and bake as usual. Top with a simple vanilla glaze and more sprinkles after baking for pure joy.
- Cinnamon Sugar Swirl Eggs: Roll out each dough portion into a small rectangle. Brush with melted butter and sprinkle generously with a cinnamon-sugar mix. Roll up tightly, shape into your egg, and proceed. The boil and bake will create a beautiful, swirled interior.
- Everything But The… Egg? Bagels: Before baking, brush the boiled bagels with an egg wash (1 egg + 1 tbsp water) and dip the tops into a classic everything bagel seasoning. Savory, salty, and utterly addictive.
- Chocolate Chip Hot Cross “Eggs”: Knead in ¾ cup of mini chocolate chips to the dough. After baking and cooling, pipe two lines of a simple powdered sugar glaze (milk + powdered sugar) to form a cross on top of each “egg.” A delicious mash-up!
- Naturally Colored Dough: Skip the food coloring and go natural! Divide the dough after the first rise. Knead a teaspoon of beet powder into one portion for pink, matcha powder for green, or turmeric for yellow. Shape and bake as usual for beautifully subtle, earthy-toned eggs.
Jackson’s Kitchen Notes
This recipe has seen some… experimental phases in my kitchen. There was the “great bagel blob incident” of 2019, where I didn’t boil them in batches and they all merged into one giant, pot-shaped monstrosity in the water. Delicious, but not egg-shaped! Lesson learned: give them space to swim. I’ve also learned that the shaping is meant to be charming, not perfect. If your eggs look a little lopsided or rustic, that’s character! They taste the same. Over the years, I’ve landed on this ratio of ingredients as my gold standard—chewy but not tough, flavorful but not overly sweet. The best evolution? Seeing friends text me pictures of their own versions, covered in crazy toppings. That’s the whole point of Food Meld. Make it, share it, enjoy it.
Your Questions, Answered
Q: My dough didn’t double in size during the rise. What happened?
A: The most likely culprits are old/dead yeast or an environment that was too cold. Yeast is a living thing! Make sure your water is warm but not hot, and your yeast is fresh. If your kitchen is chilly, let the dough rise in an oven with just the light on (no heat!) for a cozy proofing box effect.
Q: Can I make these ahead of time?
A> Absolutely! You have two great options. 1) Overnight, Cold Rise: After shaping the bagel eggs, place them on the baking sheet, cover tightly with plastic wrap, and refrigerate overnight (up to 24 hours). The next morning, let them sit at room temp for 20 minutes, then boil and bake. The flavor is even deeper! 2) Freeze for Later: Bake them completely, let them cool fully, then store in a freezer bag for up to 3 months. Thaw and toast to refresh.
Q: My bagels came out kind of tough/dense. Where did I go wrong?
A> This usually points to two things: over-kneading the dough (developing too much gluten) or using too much flour during kneading/shaping. Remember, the dough should be smooth and elastic, but can still be slightly tacky. It’s better to use wet hands or a bench scraper to handle it than to keep adding flour.
Q: Why boil them in baking soda? Can I use salt?
A> The alkaline bath created by the baking soda is what gives bagels their signature chewy crust and deep golden color when baked. It’s a chemical reaction you can’t get with just salt. Some traditional recipes use malt syrup or barley malt in the water, but baking soda is a fantastic and accessible home-kitchen hack that delivers amazing results.
A Quick Nutritional Glance
Let’s keep it real—these are a celebratory homemade treat! The nutritional information below is a rough estimate for one plain Easter Egg Bagel, without any toppings, spreads, or mix-ins. The values can change significantly based on what you add (chocolate chips, cream cheese, etc.).
- Calories: ~260
- Carbohydrates:~52g
- Protein: ~9g
- Fat: ~3g
- Fiber: ~4g
- Sugar: ~4g
These values are estimates for one plain bagel made with whole wheat dough and no toppings or spreads. Add-ins, glazes, or cream cheese will change the numbers—and that’s totally okay. This is a holiday bake meant to be enjoyed.
Final Thoughts: Bake the Memory, Not Just the Bagel
And there you have it—Easter Egg Shaped Bagels that are as joyful to make as they are to eat. This is the kind of recipe that turns a morning into a moment. Flour on the counter, laughter in the kitchen, maybe a slightly misshapen “egg” that becomes everyone’s favorite. That’s the good stuff.
These bagels aren’t about perfection. They’re about slowing down, getting your hands doughy, and starting a tradition that feels warm and personal. Whether you go sweet, savory, pastel-colored, or classic everything-style, you’re baking more than breakfast—you’re baking a memory.
If you make them, I’d love to see your egg shapes and creative twists. Tag @FoodMeld so I can cheer you on and maybe borrow an idea or two for next Easter.
Until then—happy baking, happy Easter, and never underestimate the power of homemade bread on a holiday morning.
– Jackson 🥯🐣