Let’s Make Dessert the Main Event
Hey friends, Jackson here from Food Meld. Let’s get one thing straight: dessert should be an experience. It should be fun, a little bit messy, and absolutely, undeniably delicious. And if there’s one treat that nails that description every single time, it’s the mighty cake pop. We’re not talking about dry, crumbly orbs from a coffee shop case. Oh no. We’re creating Decadent Chocolate Cake Pops with Cream Cheese Frosting that are so moist, so rich, and so downright fun to make, they’ll become your new go-to for every celebration, potluck, or “I-deserve-this” Tuesday night.
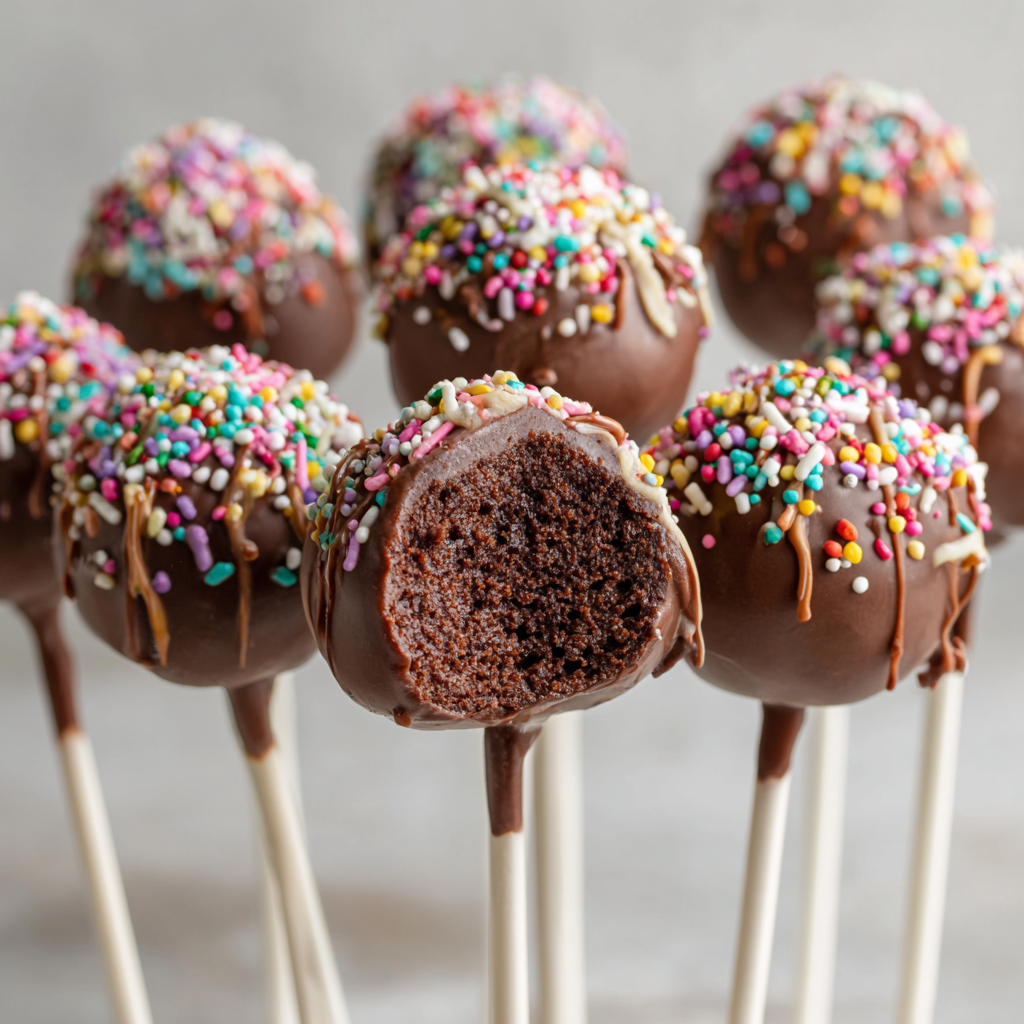
Imagine this: the deepest, darkest chocolate cake you can think of, crumbled up and mixed with a velvety, tangy cream cheese frosting. We roll that heaven into bite-sized balls, give them a quick chill, and then dunk them in a luxurious coat of silky melted chocolate. A shower of colorful sprinkles is the final confetti on this flavor party. The result? A perfect little pop of joy that’s creamy, crunchy, and impossibly moist all at once. They’re the ultimate shareable dessert, a total crowd-pleaser, and honestly? They’re way easier to make than you might think. So, grab your favorite mixing bowl and let’s turn that kitchen into a dessert workshop. You’ve got this, and I’m right here with you every step of the way.

The Cake Pop That Started It All
I’ll never forget the first time I truly fell for a cake pop. It wasn’t in a fancy bakery; it was at my niece’s fifth birthday party. She had decided on a “Fairy Princess & Superhero” theme (a bold fusion, I know), and her mom, my sister, was in a full-blown panic trying to make cake pops that wouldn’t fall off their sticks. I swooped in, chef’s apron donned like a cape, and we spent the afternoon in a cloud of cocoa powder and laughter. We over-mixed the first batch until they were like hockey pucks, and we definitely learned the hard way that you can’t skip the freezing step (R.I.P. to those first few fallen soldiers). But when we finally got it right? The look on my niece’s face when she bit into that chocolatey, sprinkle-covered wonder was pure magic. It was a “you’ve gotta try this” moment that cemented these little guys as a forever favorite in my book. They’re not just dessert; they’re a memory on a stick.
Gathering Your Flavor Arsenal
This is where the magic begins. We’re using a simple box mix as our base—no shame in that game! It’s a fantastic shortcut that lets us focus our energy on the real star: that homemade cream cheese frosting. Here’s everything you’ll need.
For the Chocolate Cake
- 2 boxes chocolate cake mix: Use your favorite brand! A dark chocolate or devil’s food mix works beautifully for a rich, deep flavor. This is our “Southern roots” move—simple, reliable, and always a crowd-pleaser.
- Ingredients as listed on the box (typically eggs, oil, water): Just follow the package directions. This is all about keeping things easy and approachable.
For the Cream Cheese Frosting (The Secret Weapon)
- 1 cup (2 sticks) salted butter, softened: I like using salted butter here because it creates a fantastic sweet-and-salty balance that cuts through the richness. Chef’s Tip: Your butter needs to be truly soft at room temperature to avoid lumpy frosting. If you forgot to take it out, you can gently microwave it for 5-7 seconds, but no more!
- 16 oz plain cream cheese, softened: Full-fat cream cheese is non-negotiable for the creamiest, most stable frosting. Make sure it’s softened too!
- 4 teaspoons vanilla extract: That’s a full tablespoon plus a teaspoon. It might seem like a lot, but trust me, that bold vanilla flavor is what makes this frosting taste homemade and incredible.
- 6 cups powdered sugar: We’ll add this gradually. It sweetens and thickens our frosting to the perfect “glue” consistency for our cake pops.
For Assembly & Decoration
- 24 oz chocolate melting wafers: I highly recommend wafers (like Candy Melts or Ghirardelli melting wafers) over chocolate chips. They’re specifically designed to melt smoothly and harden with a perfect snap, making your dipping experience so much easier. Substitution Tip: You can use high-quality dark or semi-sweet chocolate, but you may need to add a teaspoon of coconut oil to help it thin out for dipping.
- Lollipop sticks: You can find these at any craft store or online.
- Sprinkles, for decoration: This is where you get to have fun! Use jimmies, nonpareils, sanding sugar—whatever makes you happy. This is the “global inspo” and “what if we tried this?” energy in sprinkle form!
Let’s Build Some Cake Pops: A Step-by-Step Journey
Alright, team, it’s go-time. Put on some music, clear some counter space, and let’s dive in. I’ll be with you for every step, sharing all the little hacks I’ve learned along the way.
- Bake the Cake & Let it Cool Completely. Go ahead and bake both cake mixes according to their package directions in a 9×13 inch pan. Once they’re out of the oven and your kitchen smells like a chocolate wonderland, this is the hardest part: let them cool completely. I mean it! If you try to crumble a warm cake, it will turn into a gummy, mushy mess. I usually bake the cakes the night before or let them cool for a few hours on a wire rack. Patience is your best friend here.
- Whip Up That Dreamy Frosting. While the cakes are cooling, let’s make the frosting that will change everything. In a large bowl, beat the softened butter and cream cheese together with an electric mixer on medium-high speed until it’s completely smooth and lump-free. This should take about 2 minutes. Scrape down the sides of the bowl, add the vanilla, and mix again. Now, with the mixer on low, gradually add the powdered sugar, one cup at a time. Once it’s all incorporated, crank the speed back up to medium-high and beat for another 1-2 minutes until it’s light, fluffy, and utterly irresistible. Try not to eat it all with a spoon!
- The Great Crumble & Combine. Time to get your hands dirty! Take your completely cooled cakes and crumble them finely into a very large bowl. You want no large chunks left. Now, we add the frosting. Start with about 3/4 of the frosting and use your hands or a spatula to mix it in. Chef’s Hack: The goal is a Play-Doh-like consistency—moist enough to hold its shape when you squeeze it, but not so wet that it’s sticky. If it’s too dry, add a bit more frosting. If it’s too wet, well, you might have to bake another cake (just kidding… mostly).
- Roll ‘Em Up & Chill Out. Using a small cookie scoop or a tablespoon, portion out the mixture and roll it into smooth, tight balls about 1.5 inches in diameter. Place them on a parchment-lined baking sheet. Once they’re all rolled, pop the entire tray into the freezer for at least 1 hour. This chilling step is NOT optional! It firms up the cake balls so they don’t fall apart when we dip them.
- The Stick-To-Itiveness Dip. When your cake balls are almost frozen, melt your chocolate wafers according to the package directions. Now for a pro trick: take a lollipop stick, dip about 1/2 inch of the tip into the melted chocolate, and then push it about halfway into a cake ball. That little bit of chocolate acts like edible super glue, securing the stick in place and preventing your cake pop from taking a swim later. Repeat with all the balls.
- The Big Dip & Decorate. Now for the main event! Holding the stick, dip a cake pop straight down into the melted chocolate until it’s completely submerged. Gently lift it out and, without spinning it, gently tap your wrist while rotating the pop to let the excess chocolate drip off. This is the key to a smooth, non-drippy coating. Immediately, while the chocolate is still wet, hold it over a separate bowl and shower it with your sprinkles. Don’t wait, or they won’t stick!
- Let Them Set in Style. To let your masterpieces dry, you’ll need a way to stand them up. You can buy a styrofoam block, use the holes in an upside-down cardboard box, or even a colander. Just stick the other end of the lollipop stick into your stand and let them set at room temperature for about 30 minutes. Do not refrigerate them to set, as this can cause the chocolate coating to sweat.
Showing Off Your Sweet Creations
You’ve just created a platoon of delicious, adorable dessert soldiers! Now, how do you present them? For a party, that styrofoam block you used for drying can double as a fantastic display. Just stick them all in and let guests help themselves. You can also arrange them upright in a tall, heavy vase filled with sugar or coffee beans to hold them in place. For gifting, I love placing a few in a clear cellophane bag, tying it with a cute ribbon, and giving someone a truly unforgettable treat. They’re perfect for bake sales, birthday party favors, or just brightening your coworker’s day. Pair them with a cold glass of milk, a hot coffee, or just a big smile—they’re the complete package.
Mix It Up & Make It Yours!
This recipe is a perfect canvas for your creativity. Don’t be afraid to play with the formula! Here are a few of my favorite twists:
- Cookies & Cream Dream: Use a chocolate cake mix, but swap the cream cheese frosting for a simple vanilla buttercream. After dipping in chocolate, roll them in crushed Oreo cookie crumbs for an epic texture and flavor combo.
- Salted Caramel Swirl: Add a tablespoon of good-quality salted caramel sauce to the cream cheese frosting. Dip in dark chocolate and finish with a tiny flake of sea salt. *Chef’s kiss*.
- Peanut Butter Paradise: Mix 1/2 cup of creamy peanut butter into your cream cheese frosting. Use milk chocolate for dipping and chopped peanuts for garnish. It’s like a peanut butter cup, but better.
- Funfetti Fiesta: For a vanilla version, use a vanilla or funfetti cake mix with vanilla frosting. Mix a handful of rainbow sprinkles right into the cake ball mixture before rolling, then dip in white chocolate and add more sprinkles! It’s a party in every bite.
- Gluten-Free/Dairy-Free Friendly: You can easily adapt this! Use your favorite gluten-free cake mix. For the frosting, use dairy-free butter and cream cheese alternatives, and be sure to use dairy-free chocolate wafers for coating.
Jackson’s Kitchen Confidential
This recipe has seen a lot of iterations in my kitchen. I used to be a purist and make the cake from scratch every time, but you know what? On a busy week, the box mix is a lifesaver and tastes fantastic. The real evolution was nailing the frosting-to-cake ratio. I can’t tell you how many times I’ve added too much frosting and ended up with a mixture so wet I had to call it “cake pop truffle dip” (which, honestly, was still delicious eaten with a graham cracker). The other big lesson was the freeze. I learned the hard way that a 15-minute chill in the fridge just doesn’t cut it. That deep freeze is what gives you the structural integrity for a perfect, crack-free dip. Every batch is a learning experience, and that’s what makes cooking so much fun.
Your Cake Pop Questions, Answered!
I’ve gotten a lot of questions about these over the years, so here are the answers to the most common head-scratchers.
Q: My cake pops are cracking after I dip them! What did I do wrong?
A: This is usually a temperature issue. If your cake balls are too cold (like, frozen solid) and your coating is too hot, the thermal shock can cause the shell to crack. Let your cake balls sit out at room temperature for 5-10 minutes after freezing to take the deep chill off before dipping. Also, make sure your coating isn’t scalding hot.
Q: Why are my cake pops falling off the stick?
A: Two main culprits: 1) You skipped the “chocolate glue” step. Always dip the stick in chocolate first to cement it in place. 2) The cake ball mixture is too wet. If you add too much frosting, the mixture becomes heavy and loose, and it can’t hold onto the stick. Next time, use a bit less frosting.
Q: Can I make these ahead of time?
A: Absolutely! They are a fantastic make-ahead dessert. Once fully set, store them in a single layer in an airtight container at room temperature for up to 3 days, or in the fridge for up to a week. If refrigerating, let them come to room temperature for about 30 minutes before serving for the best texture and flavor.
Q: My chocolate coating is too thick and clumpy. Help!
A: This happens if the chocolate gets too hot or isn’t melted properly. Always melt your wafers slowly, in short bursts in the microwave, stirring frequently. If it’s still too thick, you can add a tiny bit of paramount crystals or a teaspoon of coconut or vegetable oil to thin it to a dipping consistency.
Nutritional Info (For Your Inner Foodie Nerd)
Okay, let’s be real—we’re not eating cake pops for their kale content. But it’s always good to know what you’re enjoying! This is an approximate breakdown per cake pop (assuming you get 48 from the batch).
- Calories: ~160
- Fat: 9g
- Carbohydrates: 18g
- Protein: 2g
Remember, these are treats, and treats are meant to be savored and enjoyed without guilt. The joy of making them and sharing them with people you love is part of the nourishment, too!
You Did It! Now Go Celebrate.
Look at you, you magnificent kitchen wizard! You started with a few simple ingredients and transformed them into a stunning, professional-looking dessert that’s bursting with flavor and fun. I’m so proud of you for diving in and giving it a shot. This is what Food Meld is all about—taking the intimidation out of cooking and baking and replacing it with creativity, bold flavors, and a whole lot of “heck yeah, I made that!” energy.


