Crispy, Crunchy, Protein-Packed Joy: Your New Snack Obsession Awaits
Hey there, friend! Jackson here from Food Meld. Ever have one of those afternoons where a craving hits you like a freight train? Not for something sweet, but for something savory, something crunchy, something you can just pop in your mouth that feels like a treat but also fuels you up? Yeah, me too. All the time. And for the longest while, my go-to fix was… well, let’s just say it wasn’t winning any nutrition awards.
I wanted that perfect bite—crispy on the outside, tender on the inside, packed with flavor and ready in minutes. But I also wanted it to be something I could feel awesome about eating. Enter the humble block of tofu. Now, I know what you might be thinking. Tofu? Bland? Rubbery? Trust me, I’ve been there. But what if I told you we could transform that unassuming block into golden, crispy, utterly addictive nuggets with zero oil, minimal fuss, and a protein punch that’ll keep you going?
That’s exactly what these Crispy Vegan Air-Fried Tofu Nuggets are all about. This isn’t just a recipe; it’s a game-changer. A 10-minute, pantry-staple, “why-didn’t-I-think-of-this-sooner” kind of magic. We’re talking about a snack that’s meal-prep friendly, kid-approved (seriously!), and so versatile it can go from game-day food to a killer salad topper in a heartbeat. It’s my mission to prove that plant-based eating can be bold, comforting, and ridiculously fun. So, grab your air fryer, and let’s turn that tofu into the crispy, crave-worthy star of the show. Get ready to make your kitchen smell amazing.

The Nugget That Started It All: A Little Southern Reinvention
This recipe actually has its roots deep in my Southern upbringing. Growing up, “nuggets” meant one thing: perfectly fried, buttermilk-soaked, crispy chicken bites. They were the highlight of any family gathering, a symbol of comfort. When I started exploring more plant-based cooking, I missed that specific experience—the ritual of coating, the satisfying crunch, the fun of dipping.
One rainy Tuesday, staring at a block of tofu and feeling that nostalgic craving, I had my “Food Meld” moment. What if I could capture that soul-satisfying crunch and fun, but make it align with a lighter, plant-forward lifestyle? I grabbed cornstarch (my grandma’s secret for the crispiest fried okra), my basic spices, and my then-new air fryer. The first batch was… okay. The fifth batch, where I finally nailed the press-and-toss technique? Revelation. My wife, who’s usually skeptical of my “tofu experiments,” ate half the batch straight off the tray. That’s when I knew this was more than a snack—it was a bridge between the flavors I loved growing up and the creative, healthy cooking I love now. It’s proof that you don’t have to give up comfort to gain something awesome.
Gathering Your Flavor Arsenal
Here’s the beautiful part: you probably have most of this in your kitchen right now. Simple ingredients, massive flavor payoff. Let’s break it down.
- 1 block (14 oz) firm or extra-firm tofu, pressed and cubed: This is our canvas. Extra-firm is the MVP here—it holds its shape beautifully and gets the crispiest. Pressing is NON-NEGOTIABLE for getting rid of excess water and allowing that crunch to form. No tofu press? No sweat! Wrap it in a clean kitchen towel and set a heavy pan on top for 15-20 minutes.
- 2 tablespoons cornstarch: The wizard behind the crispy curtain. This is what creates that incredible, shatteringly crisp exterior without any oil. It’s a gluten-free miracle worker. If you’re out, arrowroot powder works in a pinch.
- 1 tablespoon soy sauce or tamari: Our flavor base and “glue.” It gives the tofu that essential savory, umami depth and helps the cornstarch coating stick. Use tamari for a gluten-free option. In a rush? You can even skip this and the nuggets will still crisp up, but you’ll miss that flavor layer.
- ½ teaspoon garlic powder: Adds a warm, savory note that permeates every bite. Granulated garlic works too. Fresh garlic will burn in the air fryer, so powder is our friend here.
- ½ teaspoon paprika: For a subtle smokiness and that gorgeous golden color. Smoked paprika is a fantastic swap if you want to turn up the flavor dial.
- Optional: 1 tablespoon sesame seeds for coating: My little chef’s hack for extra texture and a nutty flavor. Toasting them first in a dry pan is next-level, but straight from the jar works wonders too.
Let’s Build Some Crunch: Your Step-by-Step Roadmap
Ready? This is where the fun happens. I’ll walk you through each step with all my favorite hacks to guarantee success.
- Press & Cube with Confidence. After you’ve pressed your tofu (remember, heavy pan on a towel-wrapped block!), cut it into bite-sized cubes, about 1-inch. Uniform size is key for even cooking. Don’t stress about perfection—rustic is charming!
- The Flavor Toss. Place your tofu cubes in a medium bowl. Drizzle with the soy sauce or tamari. Gently toss with your hands or a spoon until every cube is lightly coated. This should only take a minute. See how they already look happier?
- Craft Your Crispy Coat. In a separate bowl (a shallow dish works great), whisk together the cornstarch, garlic powder, and paprika. If you’re using sesame seeds, add them here. This is your magical dust.
- Coat Like a Pro. Here’s a tip: add a few tofu cubes at a time to the cornstarch mix. Gently toss or shake the bowl to coat them evenly. I find this gives a lighter, crisper coat than dumping them all in at once. You want a fine, powdery layer on each cube.
- Air Fry to Perfection. Place the coated tofu cubes in your air fryer basket in a single layer. Don’t crowd them! They need space for the hot air to circulate and work its magic. Air fry at 375°F (190°C) for 10-12 minutes. Here’s the secret: at the 6-minute mark, pause the fryer and give the basket a really good shake. This ensures every side gets golden and crispy. They’re done when they’re firm, golden brown, and sound hollow when tapped.
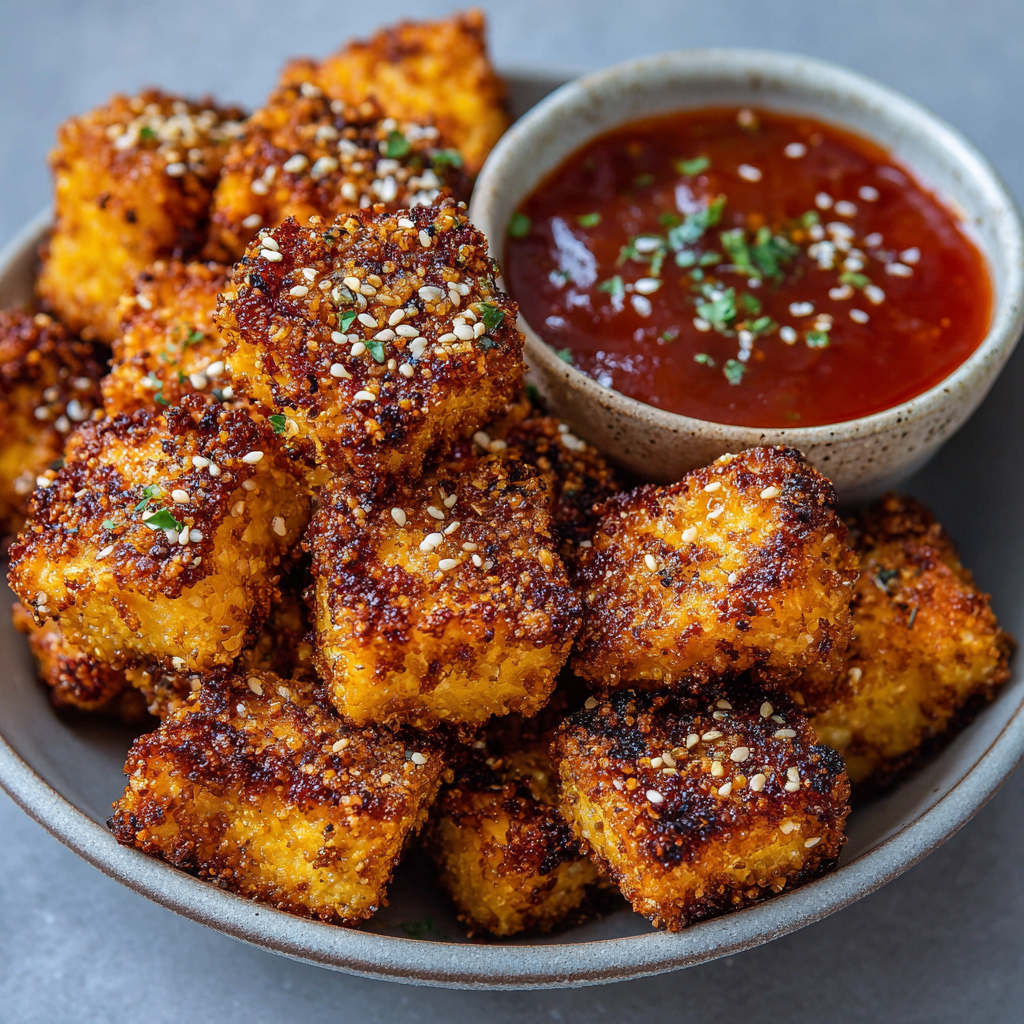
- The Grand Finale. Carefully remove the nuggets. They’ll be HOT and incredibly crisp. You can serve them immediately as-is, or take them to flavor town by tossing them in a bowl with your favorite sauce—a few gentle folds is all it takes.
From Snack to Feast: How to Serve These Golden Gems
Okay, you’ve got a basket of perfect crispy tofu nuggets. Now what? The possibilities are endless, which is why I make a double batch every time.
For the Ultimate Snack Spread: Serve them hot with a trio of dips. My go-tos are a creamy vegan ranch, a spicy sriracha mayo (just mix vegan mayo with sriracha!), and a sweet chili sauce. Let everyone dig in.
Bowl Life, Elevated: Pile these nuggets on a bed of fluffy rice or quinoa, add a big handful of fresh greens, some quick-pickled veggies (red onion + vinegar = 5-minute magic), and a drizzle of tahini or peanut sauce. Instant, satisfying meal.
The Salad Game-Changer: Transform any boring salad into a protein-packed main event. Let the nuggets cool slightly so they stay crisp, then scatter them over your greens. They’re like the best croutons you’ve ever had, but with 14 grams of protein per serving.
Family-Friendly Fun: Serve them in a basket with baked fries and grilled veggie sticks. It’s a familiar, fun format that everyone loves.
Make It Yours: Creative Twists & Swaps
The basic recipe is your springboard. Here’s where you can fly with that “what if we tried this?” energy.
- Buffalo “Wings”: After air frying, toss the hot nuggets in a mixture of 3 tbsp hot sauce (like Frank’s) and 1 tbsp melted vegan butter or olive oil. Serve with celery sticks and vegan blue cheese dip. Game. Day. Ready.
- “Chicken” Parmesan Style: After the initial cook, top the nuggets with a spoonful of marinara sauce and a sprinkle of vegan mozzarella. Pop them back in the air fryer for just 1-2 minutes to melt the cheese. Incredible over pasta.
- Spicy Korean BBQ: Swap the paprika for ½ tsp of gochugaru (Korean chili flakes). After cooking, toss in a store-bought Korean BBQ sauce or a mix of 1 tbsp gochujang, 1 tbsp maple syrup, and 1 tsp soy sauce.
- Lemon-Pepper Zing: Add the zest of one lemon and a full teaspoon of cracked black pepper to your cornstarch mixture. Light, bright, and so refreshing.
- Nut-Free “Breaded” Option: For a more traditional breading, replace the cornstarch with ¼ cup fine almond flour or crushed cornflakes for a different kind of crunch (note: this may alter cook time slightly).
Jackson’s Kitchen Notes: The Inside Scoop
This recipe has become a weekly staple in my house, and it’s evolved with every batch. My biggest lesson? Don’t skip the press. I’ve tried to rush it, and you end up with steamed tofu rather than crispy nuggets. Patience is a key ingredient here.
Also, my air fryer is my co-pilot, but all machines have their own personalities. The first time you make these, peek in at the 9-minute mark. You know they’re done when they look like little golden brown pillows and feel firm to the touch. And here’s a funny truth: the messier your hands get during the coating process, the better the nuggets turn out. It’s a fact. Embrace the messy, fun part of cooking—that’s where the magic is!
Your Questions, Answered
Q: My tofu came out soggy/not crispy. What happened?
A: The #1 culprit is not pressing the tofu enough. Water is the enemy of crispiness! Press for a full 20 minutes if you can. Also, make sure your cubes are in a single layer with space between them in the air fryer. Crowding steams them.
Q: Can I bake these instead of using an air fryer?
A: Absolutely! Preheat your oven to 400°F (200°C). Place the coated tofu on a parchment-lined baking sheet and bake for 20-25 minutes, flipping halfway through. They won’t get quite as crackly-crisp as the air fryer version, but they’ll still be deliciously golden.
Q: How do I store and reheat leftovers?
A: Store cooled nuggets in an airtight container in the fridge for up to 3 days. To reheat, pop them back in the air fryer at 375°F for 3-4 minutes. This will revive the crunch much better than a microwave.
Q: Can I freeze the coated, uncooked nuggets?
A> Yes! After coating, place them on a baking sheet to flash freeze for an hour, then transfer to a freezer bag. Cook straight from frozen, adding 2-4 minutes to the air fry time. Perfect for future snack emergencies.
Fueling Your Fun: The Nutritional Lowdown
Let’s talk about why these nuggets make you feel so good! This info is per serving (about ⅓ of the recipe) and is an estimate. Using extra-firm tofu and no oil keeps this recipe incredibly lean and protein-focused.
Calories: ~160 | Protein: 14g | Fat: 5g | Carbohydrates: 10g | Fiber: 2g
That 14 grams of protein is a major win. It comes from the tofu, which is a complete plant-based protein, meaning it contains all nine essential amino acids your body needs. The carbs are minimal and come primarily from the cornstarch coating. The fat is the natural, healthy fat from the soybeans. It’s a balanced, satisfying snack that delivers energy without the heaviness of traditional fried foods. You’re getting the crunch and satisfaction with a clean, fuel-filled ingredient list. That’s a Food Meld win in my book.
Let’s Keep the Conversation (and the Cooking) Going!
And there you have it—my blueprint for crispy, crave-able, impossibly easy tofu nuggets. This recipe is everything I stand for at Food Meld: bold flavor from simple ingredients, a creative twist on a classic concept, and a result that’s just downright fun to make and eat.
I hope this recipe becomes a trusted friend in your kitchen, the thing you whip up when you need a quick win. Remember, cooking is about playing, tasting, and making it yours. Add more spice, try a wild dipping sauce, or toss them in a salad you love. You’ve got this.
If you make these (and I really hope you do!), tag me @FoodMeld on Instagram or Pinterest. I live for those “you’ve gotta try this” moments from you all. Now go forth, press that tofu, and let’s make your kitchen the source of your next awesome snack. Happy cooking!
— Jackson


