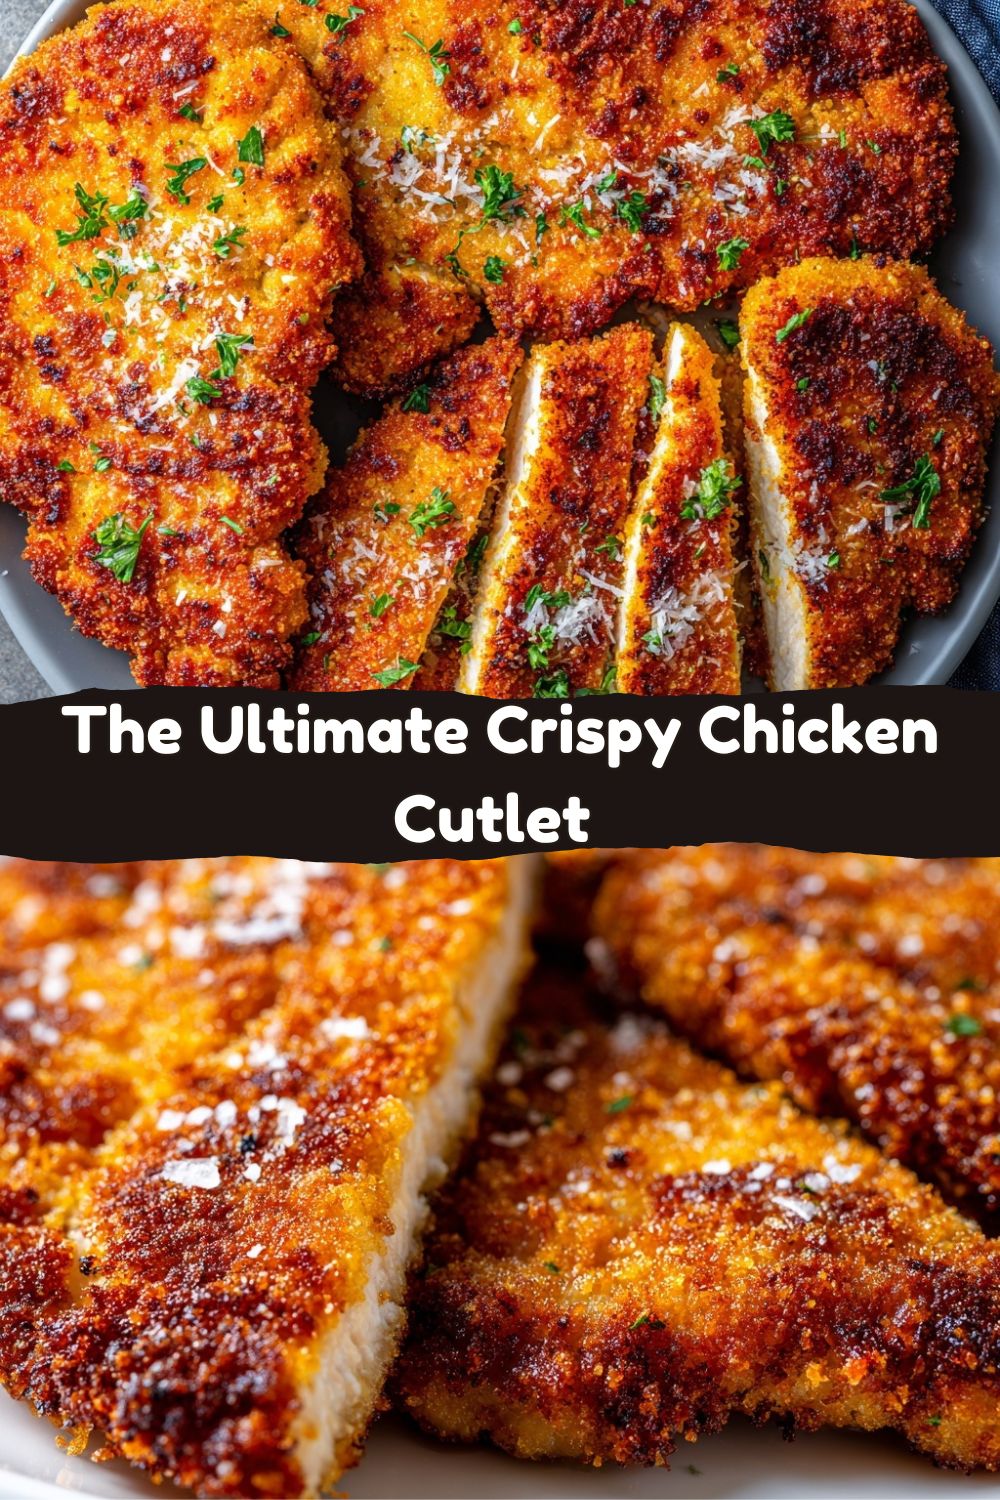
The Ultimate Crispy Chicken Cutlet: Your New Kitchen Hero
Hey there, friend. Can we talk about that magical moment when you bite into a piece of chicken that’s shatteringly crisp on the outside, yet impossibly juicy and tender on the inside? That perfect crunch, the burst of herby, savory flavor… it’s pure, unadulterated comfort. It’s the kind of food that makes everyone at the table go quiet for a second, then immediately ask, “How did you make this?” That’s the power of a perfectly executed chicken cutlet.
Maybe you’re dreaming of a killer chicken Parmesan, a next-level sandwich that puts any deli to shame, or just a simple, spectacular dinner that feels like a hug on a plate. Whatever the destination, it all starts right here, with this blueprint. I’m Jackson, and at Food Meld, we’re all about demystifying those “wow” dishes and making them totally doable in your kitchen. Forget complicated techniques or a mountain of dishes—this is about straightforward, foolproof methods that deliver maximum flavor and that iconic texture every single time.
Today, I’m giving you the master recipe for Crispy Fried Chicken Cutlets, complete with two paths to glory: the classic, irresistible pan-fried method for when you want that diner-style perfection, and a fantastic oven-baked option for a lighter, just-as-crispy (and less messy!) weeknight win. We’re going to walk through this together, step-by-step, with all my favorite chef hacks and “why this works” insights sprinkled in. So, tie on your apron, and let’s turn some simple chicken into something truly unforgettable. Get ready for that crunch.
My Grandma’s Countertop & The First Real Crunch
My love for a great cutlet has deep roots—specifically, in my Southern grandma’s sun-drenched kitchen. She didn’t call them “cutlets,” though. To her, they were simply “fried chicken,” albeit a quicker, weeknight version. I can still see her, sleeves rolled up, with three pie tins lined up on the counter: one with flour seasoned with a heavy hand of black pepper, one with beaten eggs the color of sunflowers, and one with finely crushed saltine crackers (her breadcrumb of choice).
The ritual was everything. The rhythmic *thump-thump-thump* of her old wooden mallet tenderizing the chicken. The careful, almost reverent dredging—flour, egg, crumbs—her fingers moving with a practiced, effortless grace. The sizzle as the chicken hit the hot cast iron skillet, a sound that promised goodness. She’d let me drain the finished pieces on her old brown paper grocery bags, and the reward was always the first, hottest, most dangerously crispy bite from the smallest piece. It was more than food; it was a lesson in patience, in technique, and in the profound joy of making something from scratch that makes people light up. This recipe is my homage to that feeling—streamlined with a few of my own twists, but always carrying the soul of that simple, perfect crunch.
Gathering Your Flavor Arsenal
Here’s the beautiful part: the ingredient list is short, sweet, and probably already in your pantry. Each one plays a crucial role in building flavor and texture. Let’s break it down.
- 2 large boneless, skinless chicken breasts: The canvas. Slicing them in half lengthwise (butterflying) and pounding them thin is non-negotiable for quick, even cooking and that ideal meat-to-crust ratio. Chef Insight: If you’re nervous about slicing, just place your hand on top of the breast and slice horizontally, working away from your hand. Or, ask your butcher to do it for you!
- 1 cup all-purpose flour: The first layer of our “glue.” It helps the egg wash adhere to the chicken, creating the foundation for our crispy shell. Sub Tip: For a gluten-free version, a 1:1 GF flour blend works perfectly here.
- 2 large eggs: The binder. Beaten well, they create the crucial layer that catches and holds the final breadcrumbs. Chef Insight: A splash of milk or buttermilk in your eggs adds a touch more tenderness and helps the coating brown beautifully.
- 1½ cups seasoned breadcrumbs (Italian-style works great): The star of the crunch show. Pre-seasoned crumbs are a fantastic shortcut packed with herbs and flavor. Chef Insight: For ultimate control, use plain Panko breadcrumbs and season them yourself with dried oregano, basil, thyme, onion powder, and extra salt & pepper.
- ½ cup grated Parmesan (optional for added flavor): The flavor bomb. Mixing this into your breadcrumbs adds a deep, savory, umami richness that takes the cutlets from great to “what is *in* this?!” levels. Highly recommended.
- Salt & pepper to taste: Season every layer! I season the chicken directly, and my breadcrumb mix always has extra.
- ½ tsp garlic powder & ½ tsp paprika: My dynamic duo. Garlic powder for that background savory note, and paprika for a subtle sweetness and gorgeous golden color. Smoked paprika is a fun twist here.
- Oil for frying (vegetable, canola, or avocado oil): You need a neutral oil with a high smoke point. We’re not deep-frying, just pan-frying with about ¼ inch of oil. Chef Insight: For an ultra-crispy, golden crust, a blend of butter and oil is magic. The milk solids in the butter brown beautifully. Just watch the heat so it doesn’t burn.
Let’s Build Some Crunch: Step-by-Step
This is where the fun begins. We’re setting up a simple assembly line (the “standard breading procedure”) that guarantees perfect coverage every time. Read through once, then let’s get cooking.
Step 1: Prep the Chicken. Place one chicken breast half between two sheets of plastic wrap or inside a large zip-top bag. Using the smooth side of a meat mallet, a rolling pin, or even a heavy skillet, pound it gently but firmly until it’s an even ¼-inch thick. This tenderizes the meat and ensures it cooks quickly and evenly. Repeat with all pieces. Season both sides generously with salt, pepper, and a light dusting of your garlic powder and paprika. Chef Hack: Pounding the chicken not only tenderizes it but also makes the pieces larger, giving you more glorious surface area for that crispy coating!
Step 2: Create Your Dredging Station. Get three shallow bowls or plates. In the first, place your all-purpose flour. In the second, beat the two eggs until completely smooth (add a tablespoon of water or milk if you like). In the third, mix your breadcrumbs with the grated Parmesan (if using). Line them up in that order: Flour, Egg, Breadcrumbs. This is your flavor highway. Pro Tip: Keep one hand for “dry” duties (flour and breadcrumbs) and one for “wet” (egg). This keeps your fingers from becoming a breaded mess!
Step 3: The Breading Ballet. Take a seasoned chicken cutlet and dredge it fully in the flour, shaking off any excess. This dry layer is key. Next, dip it completely into the beaten egg, letting the excess drip off. Finally, place it in the breadcrumb mixture. Now, press down firmly and scoop the crumbs over the top, ensuring every millimeter is coated. Gently press the crumbs into the chicken—this is the secret to a coating that stays put! Place the breaded cutlet on a clean plate or wire rack. Repeat with all pieces. Chef Hack: Let the breaded cutlets rest for 5-10 minutes before cooking. This helps the coating set and adhere better during frying or baking.
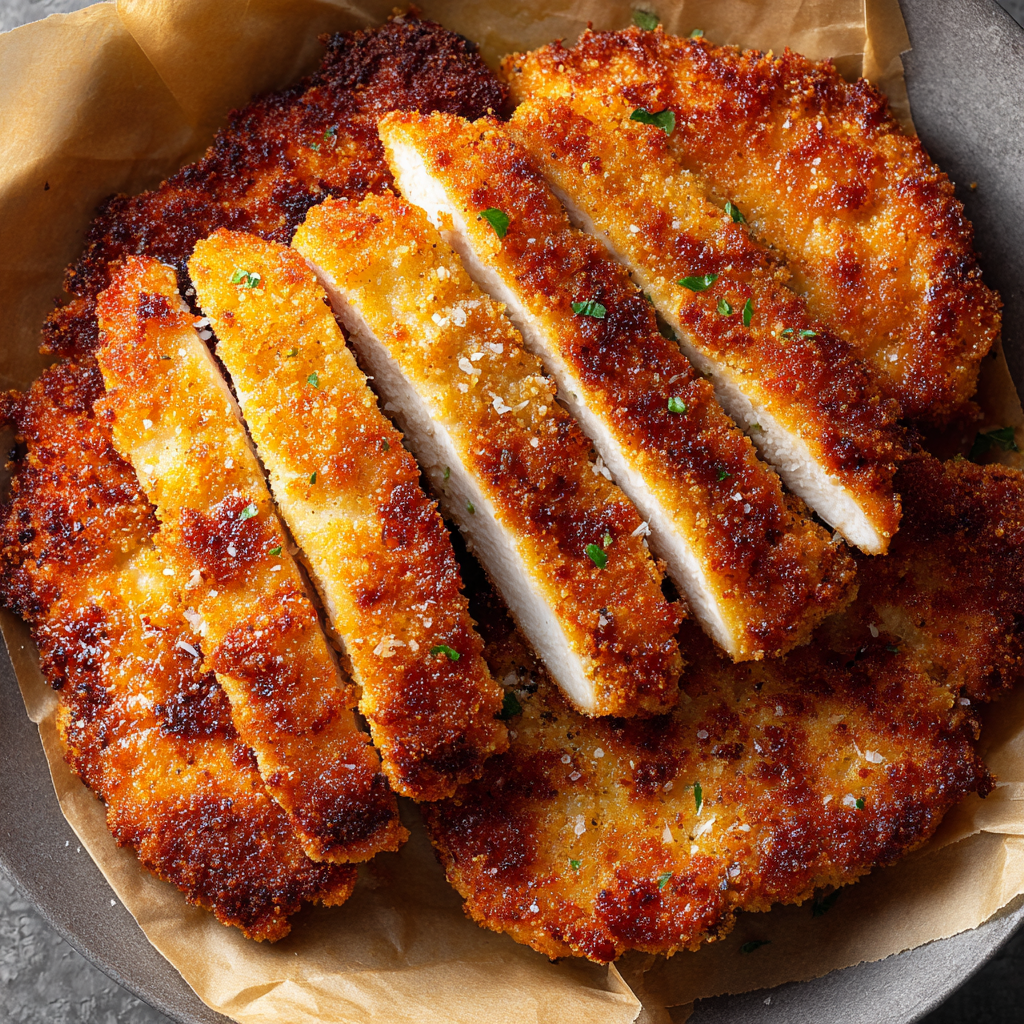
Step 4A: Pan-Frying to Golden Perfection. Heat about ¼ inch of oil in a large, heavy-bottomed skillet (cast iron is king here) over medium-high heat. To test if it’s ready, flick a tiny breadcrumb into the oil. If it sizzles immediately, you’re good to go. Carefully lay the cutlets in the hot oil, without crowding the pan (cook in batches if needed). Fry for 3-4 minutes on the first side, until deeply golden brown. Flip carefully and fry for another 3-4 minutes on the second side, until the internal temperature reaches 165°F. Critical Tip: Don’t move them around once they’re in the oil! Let them develop that gorgeous crust. Transfer to a wire rack set over a baking sheet (this keeps them crispy on all sides—paper towels can make the bottom steam and get soggy).
Step 4B: The Oven-Baked Brilliance. Preheat your oven to 425°F (220°C). Line a baking sheet with parchment paper or foil and place a wire rack on top. Lightly spray the rack with oil. Prepare your breaded cutlets as above. Place them on the rack and spray or brush the tops lightly with oil (this mimics frying and promotes browning). Bake for 10 minutes, carefully flip each cutlet, and bake for another 8-10 minutes, until golden brown and cooked to 165°F internally. The rack allows hot air to circulate for all-over crispiness.
How to Serve Your Masterpiece
Now for the best part: eating! These cutlets are incredibly versatile. For a classic dinner plate, slice one on the bias and fan it out alongside some creamy mashed potatoes and simple steamed green beans. Drizzle a little pan sauce (deglaze that skillet with some lemon juice, white wine, or chicken broth and a pat of butter) over the top for extra luxury.
Want sandwich nirvana? Toast a brioche bun, slather it with garlic aioli or spicy mayo, add a crispy cutlet, and top with crisp lettuce, a juicy tomato slice, and maybe some pickled onions or pepperoncini for a kick. It’s life-changing.
They’re also fantastic cold! Chop them up and toss them into a Caesar salad for the ultimate protein boost, or slice them thin for a hearty chef’s salad. And let’s not forget the gateway to Chicken Parmesan: simply top a baked or fried cutlet with warm marinara sauce and a handful of melted mozzarella and Parmesan, then broil for a minute until bubbly. Dinner is served, and you are the hero.
Make It Your Own: Creative Twists
The basic formula is your playground. Here are a few of my favorite ways to mix it up:
- The “Everything Bagel” Cutlet: Swap the seasoned breadcrumbs for a mix of Panko and everything bagel seasoning. The sesame seeds, garlic, and onion create an insane flavor crust. Perfect for a breakfast-for-dinner sandwich with a fried egg.
- Spicy Nashville-Style Hot: After frying, brush the hot cutlets with a mixture of melted butter, a big spoonful of cayenne pepper, a pinch of brown sugar, and a touch of paprika. Fiery, sweet, and addictive.
- Gluten-Free & Extra Crunchy: Use gluten-free flour and gluten-free Panko breadcrumbs. For extra texture, add a handful of crushed gluten-free cornflakes or rice crackers to the crumb mix.
- Herb Garden Delight: Add a ¼ cup of finely chopped fresh herbs (parsley, dill, chives) to the breadcrumb mixture. The fresh flavor is bright and beautiful.
- Protein Swap – Pork or Turkey: This method works wonderfully with thin pork chops (pounded) or turkey cutlets. Adjust cooking time slightly based on thickness.
Jackson’s Kitchen Notes
This recipe has been my weeknight dinner MVP for years, and it’s evolved through plenty of happy accidents. I once ran out of breadcrumbs and used crushed pretzels in a pinch—salty, crunchy, and a total win! The biggest lesson I’ve learned? Patience with the oil temperature. If it’s not hot enough, the coating will absorb oil and become greasy. If it’s too hot, the outside burns before the inside cooks. That flick-of-a-breadcrumb test is your best friend. Also, don’t be afraid to season aggressively. The chicken itself needs flavor, not just the coating. Most of all, have fun with it. Put on some music, pour yourself a drink, and enjoy the process. That’s what cooking with Food Meld is all about.
Your Questions, Answered
Q: My breading keeps falling off in the pan! What am I doing wrong?
A: This usually comes down to two things: not shaking off the excess flour after the first dredge (it creates a barrier), or not pressing the breadcrumbs firmly into the chicken. Also, make sure your oil is hot enough before adding the chicken—a proper sear “sets” the crust instantly. Letting the breaded cutlets rest for a few minutes before cooking also helps bind everything.
Q: Can I make these ahead of time?
A: You can bread the cutlets up to 4 hours ahead, keep them covered on a rack in the fridge, and then cook when ready. I don’t recommend cooking them too far in advance, as the crust will soften. However, reheating in a 400°F oven or air fryer for a few minutes works great to bring back the crunch.
Q: Oven vs. Fry: Is there a big difference?
A> Pan-frying gives you that quintessential, rich, diner-style crisp with a slight shatter. The oven method yields a slightly lighter, drier crunch (still delicious!) and is hands-off. Both are winners—it just depends on your mood and dietary preference.
Q: What’s the best way to reheat leftovers?
A> To avoid sogginess, skip the microwave. Reheat in a toaster oven, conventional oven, or air fryer at 375°F for 5-8 minutes, until hot and re-crisped.
Nutritional Information (Per Serving – Pan-Fried)
Disclaimer: The following is an estimate based on the pan-fried method using the specified ingredients and 1 tbsp of oil absorbed per serving. Values will vary based on specific brands, exact portion sizes, and cooking method (baking will reduce fat/calories).
- Calories: ~390
- Total Fat: 18g
- Saturated Fat: 3g
- Cholesterol: 145mg
- Sodium: ~500mg (varies greatly with seasoning)
- Total Carbohydrates: 25g
- Dietary Fiber: 1g
- Sugars:2g
-
Protein: 32g
To lighten it up, choose the oven-baked method, reduce the Parmesan slightly, or use whole wheat breadcrumbs. To lean into full comfort mode… don’t change a thing. Some days call for the crunch.
Final Thoughts: Your New Go-To, Forever Recipe
This crispy chicken cutlet isn’t just a recipe—it’s a foundation. It’s the starting line for a hundred great meals, the answer to “what’s for dinner?” when your brain is tired, and the dish that quietly turns you into that cook everyone asks for tips from.
Whether you fry it golden and glorious, bake it for an easy win, or spin it into sandwiches, salads, or parm perfection, this cutlet shows up every single time. Reliable. Crowd-pleasing. Deeply satisfying.
So keep this one close. Tape it inside a cabinet. Memorize the feel of the breading and the sound of the sizzle. This is kitchen confidence food—and once you master it, your dinner game levels up permanently.
From my countertop to yours,
Jackson
Food Meld — where everyday food becomes unforgettable


