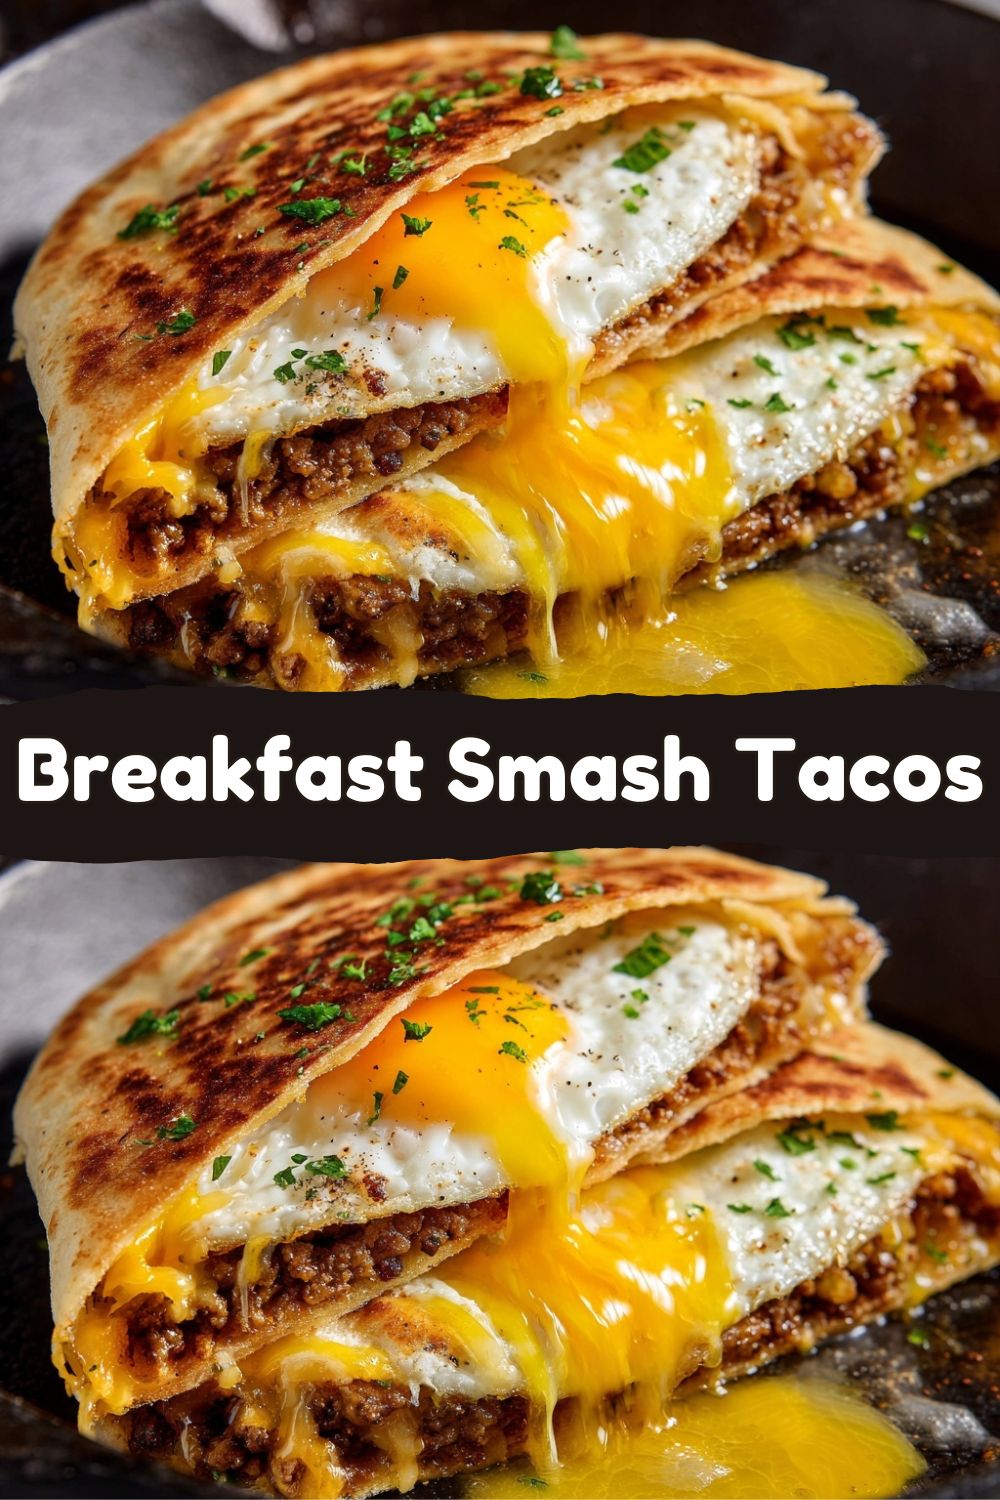
Crispy Breakfast Smash Tacos with Egg and Cheese: Your New Favorite Morning Ritual
What if I told you the answer—the crispy, cheesy, incredibly satisfying answer—has been hiding in your fridge and pantry this whole time? And it takes exactly one skillet and about 10 minutes from craving to chewing.
Enter the Breakfast Smash Taco. This isn’t just a recipe; it’s a kitchen hack, a mood-lifter, and a handheld masterpiece all rolled into one. We’re taking the viral “smash” technique usually reserved for burgers and applying it to the humble breakfast taco with glorious, golden-brown results. You literally crack an egg right onto a tortilla, give it a gentle smash in a hot pan, and let magic happen. The egg cooks into the tortilla, creating a unified, crispy-yet-tender base that’s sturdy enough to hold a molten river of cheese and all your favorite toppings.
It’s the ultimate “I-want-something-awesome-but-I-don’t-want-to-think” breakfast. It’s customizable, it’s fun to make (seriously, the flip is so satisfying), and it delivers that perfect contrast of textures we all crave. So, grab your favorite non-stick skillet, and let’s turn a chaotic morning into a delicious one. Welcome to the smash taco revolution—Food Meld style.
The “Aha!” Moment: Where This Taco Was Born
This recipe was born from a beautiful, messy kitchen accident. A few years back, I was making a quick breakfast burrito, rushing as usual. I had my tortilla warming in one pan and an egg frying in another. In my hurry to multitask, I went to transfer the egg onto the tortilla and completely fumbled it. The egg slid off the spatula and landed, yolk-side-up, right on top of the tortilla already in the other skillet.
Instead of a disaster, I saw an opportunity. I thought, “Well, it’s already there…” and just pressed down on the tortilla with my spatula. I heard that fantastic sizzle and watched the egg white instantly creep and set around the edges of the tortilla. A minute later, I flipped the whole thing, added cheese, folded it, and took a bite. My mind was blown. The texture was unlike any breakfast taco I’d ever made—the tortilla was crisp, the egg was perfectly integrated, and every bite had that cheesy, golden goodness. It was a total “you’ve gotta try this” moment that I’ve been refining and sharing ever since. Sometimes, the best recipes come from embracing the happy little kitchen mishaps!
Gathering Your Flavor Toolkit: Ingredients & Insights
Here’s the beautiful part: the base recipe requires just a handful of pantry staples. But each one plays a starring role. Let’s break it down like we’re prepping for a fun, tiny cooking project.
- 1 Large Egg: This is your glue and your protein. Room temperature eggs are less likely to cause the tortilla to stick, but cold straight from the fridge works just fine, too. For a richer flavor, seek out pasture-raised eggs—that deep orange yolk makes everything taste better.
- 1 Small Flour or Corn Tortilla (6-inch): The foundation! Flour tortillas give you that classic, pliable, slightly chewy crisp. Corn tortillas offer a more authentic, toasty corn flavor and get super crisp. Chef’s Insight: If using corn, warm it for a few seconds first to make it more flexible and less likely to crack when you press.
- ¼ cup Shredded Cheese: Melty is the mission here. Sharp cheddar gives a tangy punch, Monterey Jack is beautifully mild and oozy, and a Mexican blend covers all the bases. Pre-shredded works in a pinch, but block cheese you shred yourself melts creamier (it doesn’t have anti-caking agents).
- 1 tsp Butter or Oil: Butter equals flavor and that gorgeous golden-brown color. A neutral oil like avocado or light olive oil is great for higher heat. For the best of both worlds, I often use a half-and-half mix!
- Salt and Freshly Cracked Black Pepper: Never an afterthought. Season your egg directly for the most impact. This simple step elevates the entire taco.
- Optional Boosters (The “Make It Yours” Bar): This is where your personality shines. A few dashes of hot sauce (Cholula or Tapatío are my go-tos), a few slices of avocado, a spoonful of pico de gallo, a slice of crispy turkey bacon, or a handful of baby spinach added with the cheese.
Let’s Get Smashing: Your Foolproof Step-by-Step Guide
Ready to create some crispy magic? Follow these steps, and you’ll be a smash taco pro in no time. I’ve packed each step with my personal tips to ensure your success.
- Preheat Your Skillet: Place your trusty non-stick skillet over medium heat. Add the butter or oil and let it get hot, but not smoking. You should see a little shimmer. This ensures an instant sizzle when the egg hits the pan, which is key for that crisp edge.
- The Crack & Smash (The Fun Part): Crack your egg directly into the center of the pan. Now, quickly take your tortilla and gently place it on top of the raw egg. Immediately, use the back of a flat spatula to press down evenly on the tortilla. You’re not trying to obliterate it—just a firm, gentle press to spread the egg white underneath and create that bond. You’ll hear a fantastic sizzle! Chef’s Hack: Give the tortilla a little circular wiggle with the spatula to help spread the egg evenly to the edges.
- Cook the First Side: Let it cook, undisturbed, for 2-3 minutes. This is patience time. You’ll know it’s ready to flip when the edges of the tortilla look dry and slightly lifted, and you can see the egg white is fully set around the sides. A quick peek underneath should reveal a beautiful golden-brown color.
- The Flip & Fill: Here’s the moment of truth! Slide your spatula confidently underneath and flip the whole egg-tortilla union in one smooth motion. The tortilla side should now be face-down. Immediately sprinkle your cheese (and any other optional fillings like spinach or crumbled bacon) over one half of the egg. The residual heat from the pan and the hot tortilla will start melting the cheese instantly.
- Fold & Crisp to Perfection: Using your spatula, fold the empty half of the tortilla over the cheesy half, creating a perfect half-moon. Press down gently. Let it cook for another 1-2 minutes on this side until the tortilla is beautifully crisp and the cheese is audibly melty. If you want extra crispness, you can flip it once more for a final 30-second sear.
- Serve Hot & Enjoy: Slide your masterpiece onto a plate. I like to slice mine in half diagonally—it just looks more inviting and is easier to handle. Then, dig in immediately! That first crispy, cheesy, warm bite is pure morning joy.
How to Serve Your Smash Taco Masterpiece
While this taco is a complete meal in your hand, a little plating love makes it feel extra special. Serve it sliced in half on a simple plate with a colorful side. A dollop of cool, creamy avocado or a spoonful of vibrant salsa (roja or verde!) on the side is perfect for dipping. For a bigger breakfast spread, pair it with a simple fruit salad or a few slices of crispy air-fryer bacon. My personal favorite? A quick “deconstructed” side: a few cherry tomatoes and cucumber slices with a squeeze of lime and a pinch of salt. It’s all about that contrast—the hot, rich, crispy taco with something fresh and bright.
Mix It Up! 5 Delicious Variations to Try
The true beauty of this recipe is its canvas-like quality. Once you’ve mastered the basic smash, the world is your taco. Here are a few of my favorite twists:
- The “Southwest Fiesta”: Add a tablespoon of canned black beans (rinsed and drained) and a sprinkle of corn kernels with the cheese. Top finished taco with a drizzle of chipotle crema (mix mayo with a little adobo sauce).
- The Green Machine: Before adding the cheese, layer on a few slices of ripe avocado and a handful of baby spinach. The heat wilts the spinach perfectly. Great for a veggie-packed start.
- The Everything Bagel Smash: Use everything bagel seasoning instead of just salt and pepper on the egg. Use a schmear of cream cheese under the shredded cheddar. Trust me on this one.
- Keto/Low-Carb Version: Use a low-carb tortilla or a sturdy, large piece of lettuce (like romaine or butter lettuce) as your “wrap” after the egg is cooked. All the flavor, fewer carbs.
- The Pizza Party: Sprinkle the egg with a little dried oregano and garlic powder. Use shredded mozzarella and pepperoni slices with the cheese. Fold, cook, and serve with a side of marinara for dipping. Breakfast pizza taco, done.
Chef’s Notes: Stories from the Smash Lab
This recipe has evolved in my kitchen more than almost any other. I’ve learned that the perfect smash is about confidence—don’t be timid with that press! I also used to try and add toppings before the flip, which just made a mess. The “flip-then-immediately-fill” method was the game-changer. One funny story: I once was filming this for a reel and was talking to the camera while cooking. I got so distracted explaining the “wiggle” technique that I completely burned the first side. The smoke alarm joined the tutorial! It was a great reminder to keep the heat at a solid medium, not medium-high. Now, it’s my most-requested breakfast by friends who crash on my couch after a game night. It’s the ultimate “chef, feed me” dish that feels fancy but is secretly effortless.
FAQs & Troubleshooting: Your Questions, Answered
Q: My tortilla is sticking to the pan when I try to flip it. What did I do wrong?
A: This usually means the first side isn’t cooked enough, or your pan wasn’t properly preheated/oiled. Be patient! Wait until you see the edges look dry and can easily slide your spatula underneath. A good non-stick pan is also key here.
Q: Can I make more than one at a time?
A: Absolutely! Use a large skillet (12-inch) and cook two side-by-side. Just make sure you have enough space to flip them comfortably. You can also keep finished tacos warm on a baking sheet in a 200°F oven while you batch-cook.
Q: My egg yolk broke. Is it ruined?
A: Not at all! A broken yolk just means you’ll have a more uniformly cooked, slightly less runny interior. It will still taste amazing. For a guaranteed runny yolk, be extra gentle when cracking and pressing.
Q: Can I prep these ahead of time?
A: They are best fresh, but you can prep components. Have your cheese shredded and toppings chopped. For a true reheat, wrap a cooled taco in foil and warm in a 350°F oven for 10 mins, or in a toaster oven/toaster (carefully!) to re-crisp.
Nutritional Info (A General Guide)
Please note: This is an estimate for one basic taco (with a flour tortilla, cheddar cheese, and 1 tsp butter) using online nutrition calculators. Values will change with your specific ingredients and additions.
- Calories: ~240
- Protein: 13g
- Carbohydrates: 16g
- Fat: 14g
- Fiber: 1g
This taco provides a solid balance of protein to keep you full and carbs for energy. To boost fiber, use a whole-wheat tortilla and add veggies like spinach or black beans. For lower fat, use a light spray of oil and reduced-fat cheese.
Final Thoughts: Let’s Keep the Smash Going
And there you have it, friends—your ticket to the easiest, most satisfying breakfast (or let’s be honest, breakfast-for-dinner) in your repertoire. The Breakfast Smash Taco is more than a recipe; it’s a reminder that incredible food doesn’t have to be complicated. It’s about a clever technique, a few good ingredients, and the joy of creating something delicious with your own two hands.
I hope this recipe brings a little crispy happiness to your mornings. Give it a try, make it your own with those fun variations, and most importantly, have fun in the kitchen. If you make it, I’d love to see your creation! Tag me @FoodMeld on socials so I can cheer you on.
Now, go forth and smash! Until next time, keep mixing it up and enjoying every bite.
– Jackson