Creamy Garlic Parmesan Sauce – Your New Kitchen Secret Weapon
Hey friends, Jackson here from Food Meld. Let’s talk about that moment. You know the one. It’s been a long day, your brain is fried, and your stomach is loudly suggesting that cereal is an acceptable dinner. But then, a little voice (probably coming from your stomach) whispers, “But what if dinner could be… awesome?” What if, in the time it takes to scroll through your phone debating takeout, you could whip up something that tastes like a hug in a bowl, something rich, comforting, and seriously impressive?
That, my friends, is the magic of a truly great sauce. And today, we’re making the MVP, the GOAT, the one you’ll make on a Tuesday just because: my Creamy Garlic Parmesan Sauce. This isn’t just a recipe; it’s a foundation. It’s a velvety, garlicky, cheesy blank canvas that transforms the simple into the sublime. We’re talking 15 minutes, one pan, and a handful of ingredients you likely already have. This sauce clings to pasta like a dream, blankets a chicken breast in glory, turns roasted veggies into a party, and sits in a bowl as a dip that will make your chips feel very, very lucky.
I built Food Meld on the idea that unforgettable flavor doesn’t have to be complicated. It’s about knowing a few core techniques and then having the confidence to play. This sauce is a perfect example. So, tie on your apron, grab your favorite whisk, and let’s cook something awesome together. We’re about to make your kitchen smell incredible and your weeknight dinner routine a whole lot more exciting.
The “Aha!” Moment That Started It All
This sauce has roots. Deep, buttery, garlicky roots. It all goes back to my early days of culinary “experimentation” (read: me as a teenager, armed with ambition and a distinct lack of patience). I was obsessed with recreating the fettuccine Alfredo from our local Italian spot. My early attempts were… educational. Let’s just say I learned that dumping a bag of pre-shredded cheese into hot cream creates a grainy, clumpy situation that is more “science experiment” than “dinner.”
The breakthrough came on a visit to my grandma’s. She wasn’t making Italian food; she was teaching me her sawmill gravy. As she whisked flour into bacon drippings, then slowly streamed in milk, she explained the “why.” “You cook the flour to get rid of the raw taste, baby,” she said. “And you add the liquid slow so it don’t get lumpy. It’s all about patience.” That was my lightbulb moment. The roux! That was the secret body and stability my cheesy sauce was missing.
I raced home, swapped butter for bacon fat, added a reckless amount of garlic (a personal trademark), and used her technique. When I stirred in the good Parmesan and saw it melt into a smooth, glossy, perfect sauce, I did a little dance right there at the stove. That fusion of Southern gravy know-how and big, bold Italian flavor? That’s the heart of Food Meld. And it all started with a failed attempt and a grandma’s wisdom.
Gathering Your Flavor All-Stars
Here’s the beautiful part: this powerhouse sauce comes from a humble lineup. Quality here makes a difference, but I’ve got swaps for everything. Let’s break it down.
- Butter (2 tbsp): Our rich, flavorful base. It’s going to cook our garlic and form the roux with the flour. Unsalted is best so you control the salt, but salted works in a pinch—just taste before adding extra salt later. For a dairy-free version, a high-quality plant-based butter works great.
- Garlic Cloves (4, minced): The star of the show! Fresh is non-negotiable for me here. That jarred pre-minced stuff often has a preservative tang. Mincing your own lets their sweet, pungent aroma truly shine. Don’t be shy—four cloves give you that robust, “you can definitely taste the garlic” flavor we love.
- All-Purpose Flour (2 tbsp): This is our thickener and the “body” builder. When cooked with the butter, it forms the roux, which prevents the sauce from being thin and separates. For a gluten-free sauce, use an equal amount of a 1:1 gluten-free flour blend (like Bob’s Red Mill).
- Milk (1 cup): The liquid foundation. Whole milk gives the best richness, but 2% works perfectly. My pro-tip? For an outrageously luxurious, velvety sauce, use half-and-half or even heavy cream. The higher the fat, the creamier the result. For dairy-free, unsweetened, unflavored almond, cashew, or oat milk are good choices.
- Grated Parmesan Cheese (½ cup): Please, for the love of all that is cheesy and good, grate it yourself from a block. Pre-shredded cheese contains anti-caking agents (like cellulose) that prevent it from melting smoothly, leading to a grainy sauce. The extra 60 seconds of grating is the single biggest upgrade you can make. Use authentic Parmigiano-Reggiano if you can—its nutty, complex flavor is unmatched.
- Black Pepper (¼ tsp) & Salt to taste: Seasoning superheroes. Freshly cracked black pepper adds a gentle warmth. Salt is to taste because Parmesan is already salty. Always add, taste, and adjust.
- Optional: Pinch of red pepper flakes or Italian seasoning: This is where you make it yours! Red pepper flakes add a subtle, welcome heat. A teaspoon of Italian seasoning (or just dried oregano) brings an herby, rustic note. Try it!
Let’s Make Some Magic: Step-by-Step
Okay, team. Fire up the stove. We’re going for low and slow confidence, not high-heat frenzy. Grab a medium saucepan—one with a heavier bottom is ideal for even heat.
- Melt & Infuse: Place your saucepan over medium heat. Add the butter and let it melt, swirling the pan. Once it’s foamy, add all your gorgeous minced garlic. Here’s the key: sauté just until fragrant, about 45-60 seconds. We want it soft and golden, not browned or bitter. If it starts to color quickly, your heat is too high. This buttery garlic infusion is flavor base #1. Smell that? That’s the sound of success.
- Build the Roux: Sprinkle the flour evenly over the butter and garlic. Immediately start whisking! You’ll create a pasty mixture called a “roux.” Cook this, whisking constantly, for a full 1-2 minutes. This cooks out the raw flour taste and gives our sauce a stable, non-gloopy texture. It should look like a loose, blonde paste and smell a bit nutty.
- Whisk in the Liquid – Slowly! Now, with the pan still on medium heat, pour in about ¼ cup of your milk. Whisk like your sauce depends on it (it does!) until the roux is completely dissolved and smooth. This initial slow addition prevents lumps. Once it’s incorporated, you can confidently whisk in the rest of the milk in a steady stream.
- Thicken to Perfection: Keep whisking frequently as the sauce comes up to a gentle simmer. You’ll feel it start to thicken on the bottom. Let it bubble softly for 3-5 minutes, whisking the entire time, until it coats the back of a spoon nicely. If you draw a line with your finger on the coated spoon, the line should hold. This is your sauce body! Too thick? Whisk in a splash more milk. Too thin? Let it simmer a minute longer.
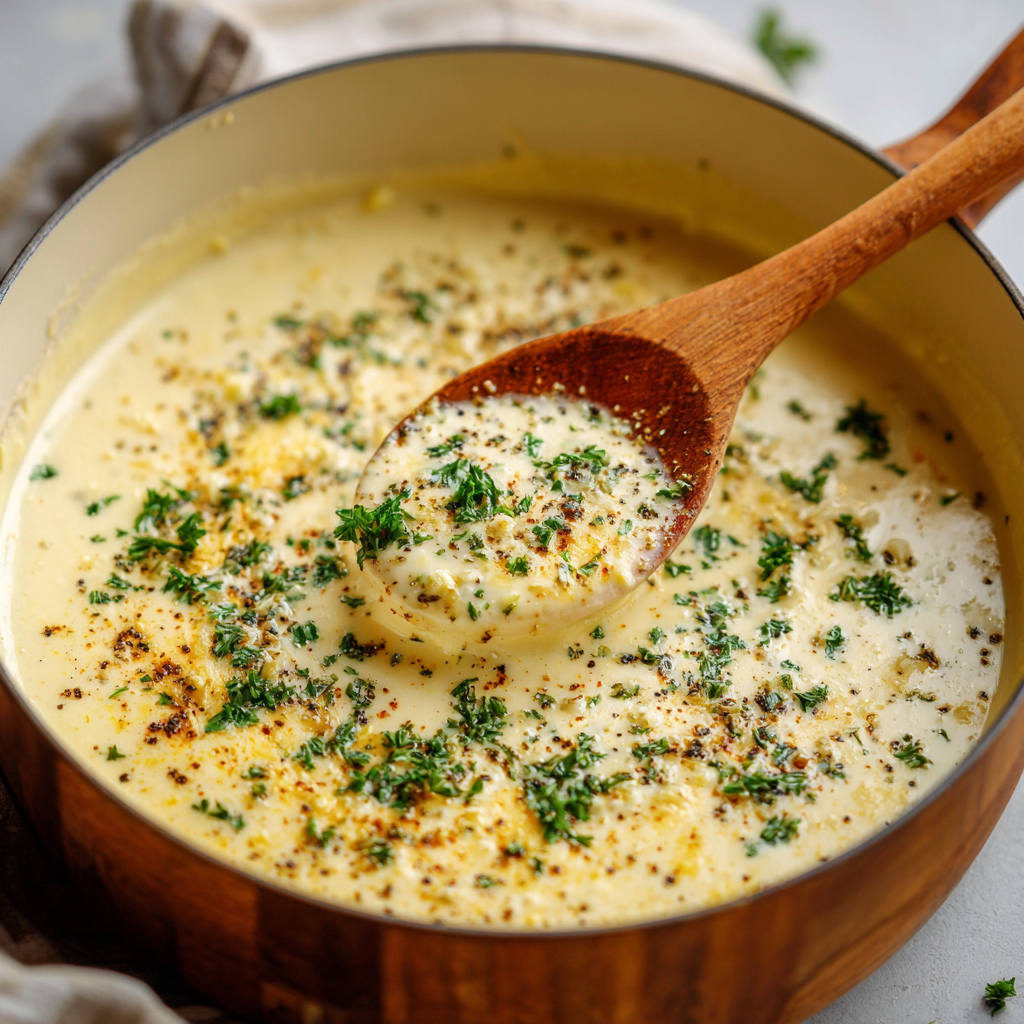
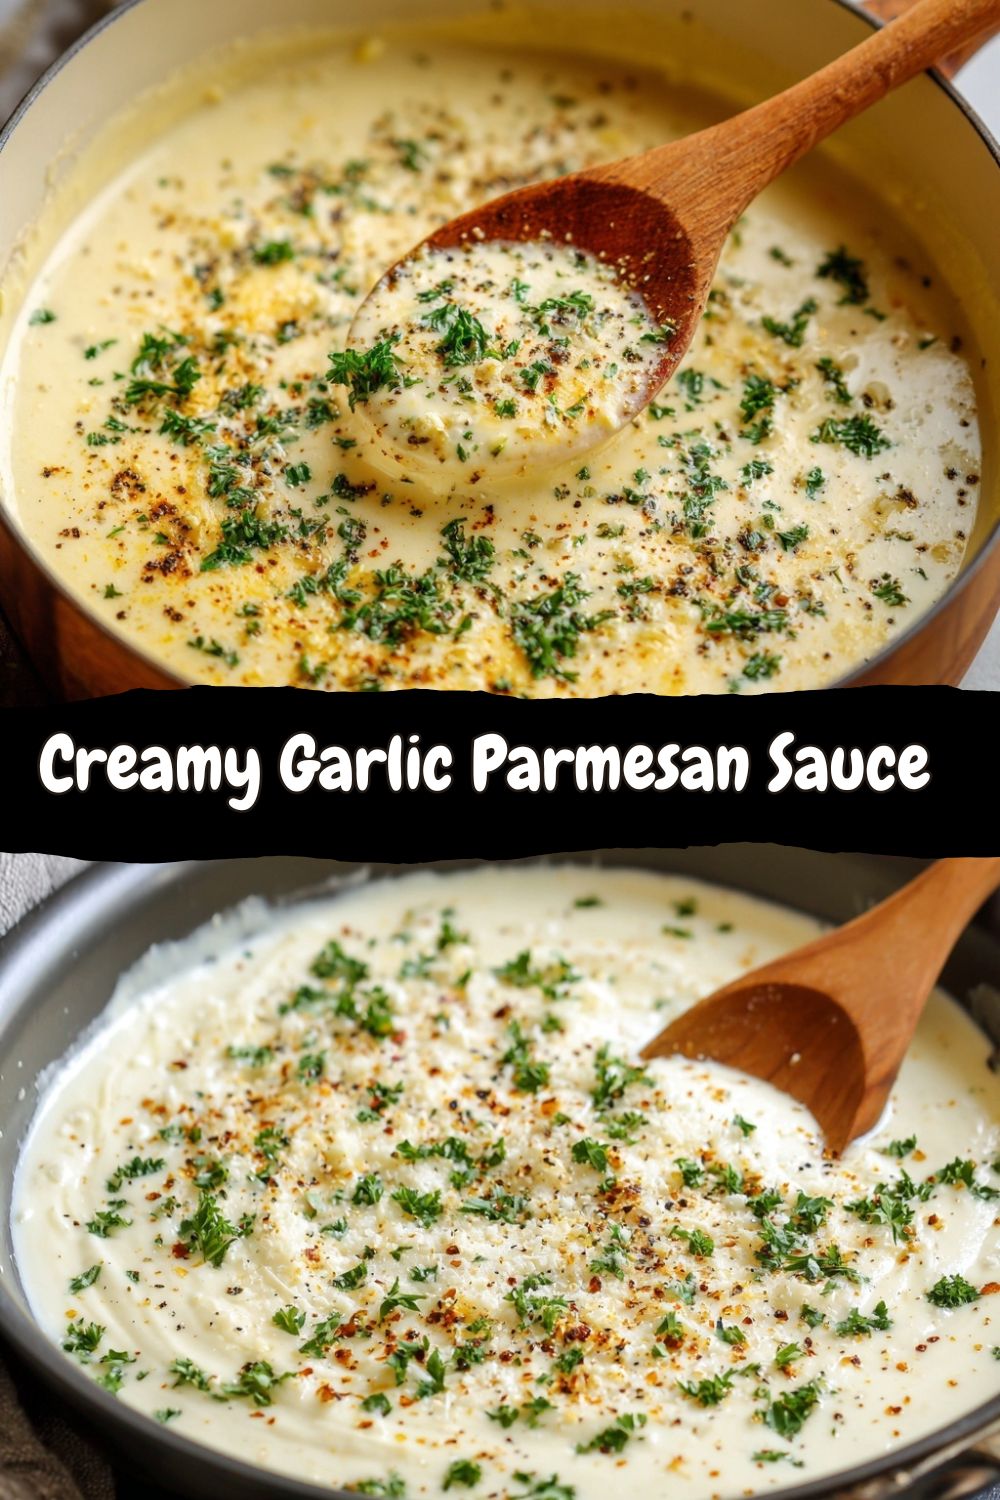
- The Cheesy Finale: Turn the heat down to low. This is crucial. High heat can make cheese seize up. Now, sprinkle in your freshly grated Parmesan and add the black pepper. Whisk steadily until the cheese is fully melted and the sauce is gloriously smooth and uniform. Taste it! This is your moment. Add salt if needed, and stir in your red pepper flakes or herbs if using.
- Serve it Up: Remove the pan from the heat. Your sauce is ready to coat, drizzle, or dip! It will continue to thicken slightly as it cools, so if using for pasta, it’s perfect straight from the pan. If it thickens more than you like while sitting, just whisk in a tiny bit of warm milk or pasta water to loosen it up.
How to Serve This Saucy Superstar
This is the fun part! Here’s how to plate it like a pro (or just dump it happily into a bowl—no judgment here).
For Pasta Perfection: Toss the sauce immediately with 8-12 oz of freshly cooked pasta (fettuccine, linguine, or rigatoni are my faves). Pro Chef Hack: Reserve about ½ cup of the starchy pasta water before you drain. If your sauce needs loosening up, add a splash of this magic water—it helps the sauce cling to every noodle. Finish with an extra sprinkle of Parmesan and fresh parsley.
For Chicken or Shrimp: Pan-sear your protein until cooked through. Plate it up, then ladle a generous amount of this warm sauce right over the top. For extra flair, pop it under the broiler for a minute to get the sauce bubbly and golden.
As a Divine Dip: Transfer the warm sauce to a small serving bowl. Surround it with warm breadsticks, crispy garlic bread, pretzels, or a platter of raw veggies (broccoli, carrots, bell peppers). Watch it disappear.
Next-Level Pizza or Casserole: Use it as a white pizza sauce instead of tomato. Spread it on your dough before adding toppings. Or, mix it with cooked chicken and broccoli, top with more cheese, and bake for a quick casserole.
Make It Your Own: Flavor Twists & Swaps
Once you’ve mastered the base, the world is your cheesy oyster. Here are a few of my favorite ways to play with this recipe.
- The “Kitchen Sink” Protein Boost: Add 1 cup of chopped, cooked chicken, shrimp, or crispy bacon to the finished sauce. You’ve got a complete meal ready to toss with pasta or spoon over rice.
- Sun-Dried Tomato & Spinach: Stir in ¼ cup of chopped oil-packed sun-dried tomatoes and a big handful of fresh spinach right after adding the cheese. The heat will wilt the spinach beautifully. The tomatoes add a sweet, tangy punch.
- Mushroom Lover’s Dream: Slice 8 oz of cremini mushrooms. Sauté them in the butter until golden before you add the garlic. Remove them temporarily, then proceed with the recipe, adding them back in with the cheese.
- Lemon Herb Brightness: Add the zest of one lemon and 2 tablespoons of chopped fresh herbs (like basil, parsley, or chives) with the cheese. It lightens the whole dish and feels super fresh.
- Fully Dairy-Free/Vegan: Use plant-based butter, unsweetened oat milk (it’s creamy!), and a high-quality vegan Parmesan alternative. The technique remains exactly the same.
Jackson’s Chef Notes
This recipe has been my faithful companion for years, and it’s evolved from that first “aha!” roux moment. I’ve made it in a dorm kitchen, for first dates (it’s a winner), and in a mad dash to feed my whole family during the holidays. One time, I was filming a video for the blog and was talking so much I almost let the garlic burn! The key is to stay present with it—those 10 active minutes are kitchen therapy.
My biggest tip? Don’t rush the roux. Giving that flour and butter mixture a full minute or two of cooking is what gives the sauce its professional, non-chalky finish. And seriously, grate that cheese fresh. I promise it’s the difference between a “good” sauce and a “can I have this recipe?!” sauce. This recipe is forgiving, so relax, taste as you go, and make it yours. That’s what cooking is all about.
FAQs & Quick Fixes
Q: My sauce is too thin! What did I do wrong?
A: No worries! This usually means it just needs more time. Keep it simmering on medium-low, whisking frequently. It can take a few extra minutes to reach the perfect coating consistency. If you’re really in a hurry, make a “slurry”: mix 1 tsp of flour with 1 tbsp of cold milk until smooth, then whisk it into the simmering sauce. Cook for another 1-2 minutes to thicken.
Q: My sauce is too thick/lumpy!
A> Too thick is an easy fix: just whisk in additional warm milk, a tablespoon at a time, until it’s your desired consistency. For lumps, don’t panic. First, try whisking vigorously—they often break up. If stubborn lumps remain, simply pour the sauce through a fine-mesh strainer into a new pot, pressing it through with a spatula. You’ll have a perfectly smooth sauce.
Q: Can I make this ahead of time?
A> Absolutely! Let it cool completely, then store it in an airtight container in the fridge for 3-4 days. It will solidify when cold. Reheat it gently in a saucepan over low heat, whisking in a little milk or cream to bring it back to a saucy consistency.
Q: Why did my cheese clump up and get grainy?
A> Two likely culprits: 1) The heat was too high when you added the cheese. Always reduce the heat to low first. 2) You used pre-shredded cheese. The anti-caking agents in it resist smooth melting. Freshly grated is the way!
Nutritional Info (A Quick Note!)
Here’s a rough breakdown per 2-tablespoon serving (based on using whole milk and real Parmesan). Remember, this is a rich, flavorful sauce meant to elevate other ingredients, so a little goes a long way!
-
Calories: ~70
-
Fat: 6g
-
Saturated Fat: 4g
-
Carbohydrates: 2g
-
Protein: 3g
-
Sodium: ~120mg
Values will vary depending on milk choice, cheese brand, and portion size. For a lighter version, use 2% milk or thin with extra milk or broth.
The Takeaway: A Sauce Worth Memorizing
If there’s one recipe I want you to feel confident making without a recipe card someday, it’s this one. This Creamy Garlic Parmesan Sauce is more than just a condiment—it’s a skill. Once you’ve got it down, you’re never more than 15 minutes away from a dinner that feels intentional, comforting, and just a little bit indulgent.
This is the sauce you pull out when plain chicken feels boring, when pasta night needs a glow-up, or when your fridge is whispering, “We could do better than cereal.” It’s forgiving, endlessly customizable, and built on simple techniques that will serve you for the rest of your cooking life.
So save it. Make it once just to learn it. Make it again to play with it. And then make it your own—because that’s where the real magic happens.
As always, if you try this sauce, I’d love to hear how you used it. Drop a comment, share it with a fellow garlic lover, or bookmark it for the next night you want dinner to feel like a win.
Until next time—
Keep it simple. Keep it bold. And keep melding flavors.


