Let’s Bake a Little Bit of Magic: Magnolia Bakery Cupcakes at Home
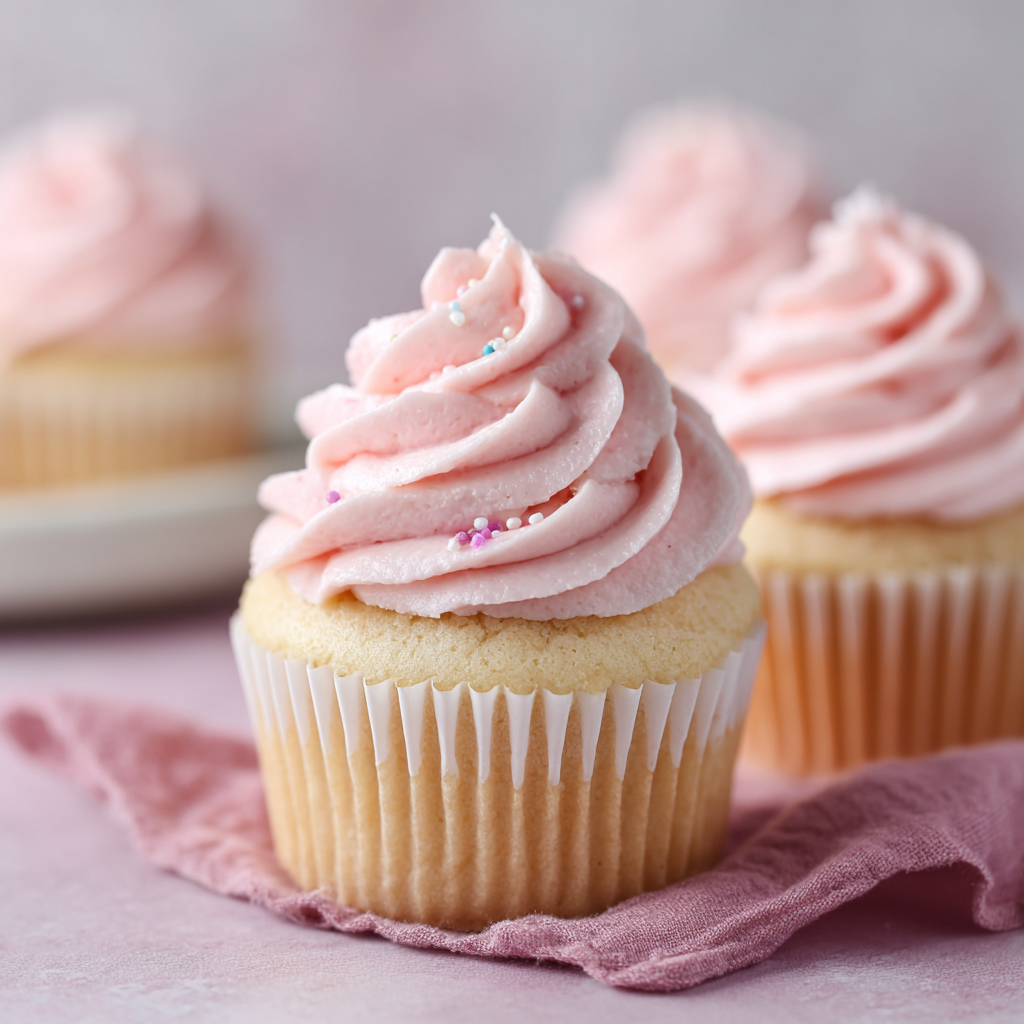
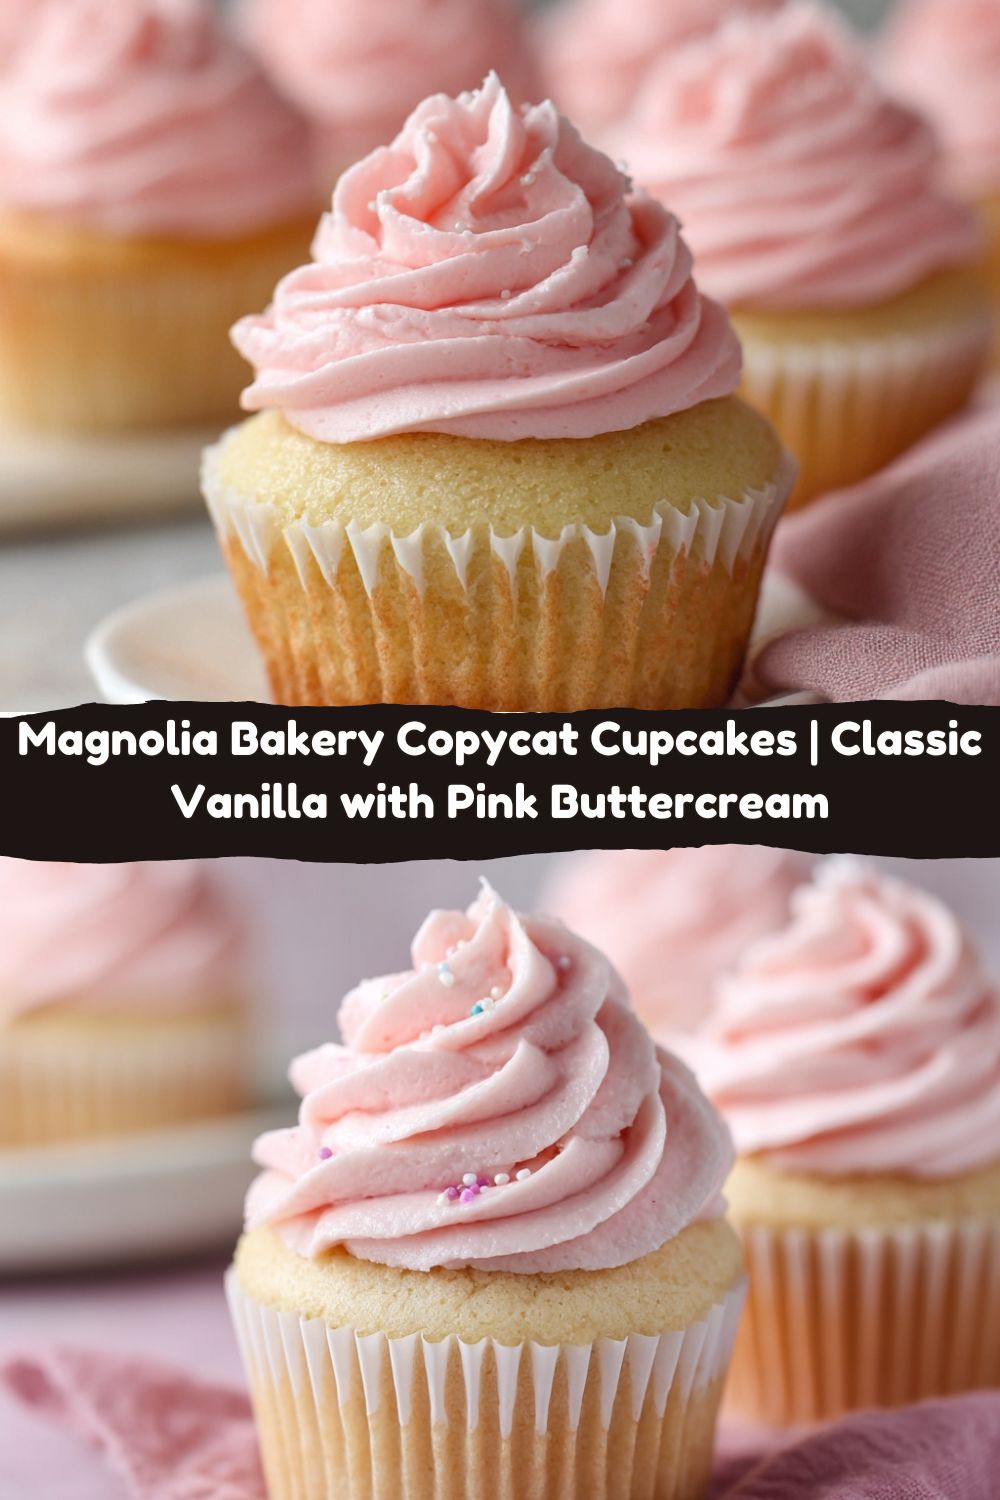
Hey friends, Jackson here from Food Meld. You know that feeling? You’re strolling down a sunny street, maybe in the West Village, and you catch a whiff of pure, sweet vanilla and sugar. You follow it like a cartoon character floating on a scent cloud, and there it is: the iconic pale blue awning of Magnolia Bakery. Inside, the cases are lined with perfect, cloud-like cupcakes topped with those famously swirled pink buttercream peaks. It’s a bite of pure, uncomplicated joy.
But what if you could capture that magic in your own kitchen, on a random Tuesday, just because? That’s exactly what we’re doing today. We’re not just making vanilla cupcakes; we’re creating a bakery-style experience—the tender, moist crumb, the impossibly light and sweet frosting, the whole delightful package. I’ve spent some quality time in my kitchen (my favorite lab) tweaking and tasting to get this copycat recipe just right. The goal? To be unforgettably simple. No fancy techniques, no weird ingredients. Just straightforward, bold flavor and that “wow, I made this?!” feeling.
So, whether you’re prepping for a birthday, need a treat to brighten your week, or just want to impress your friends with your newfound bakery skills, you’re in the right place. Grab your favorite mixing bowl, and let’s cook something awesome together. We’re about to make your kitchen smell like a New York City dream.
The Cupcake That Started It All: A Sweet Memory
My love affair with this particular cupcake goes way back. Years ago, on my first-ever trip to New York, I was utterly overwhelmed—in the best way. The noise, the energy, the sheer scale of it all. In the middle of that sensory overload, a friend dragged me into Magnolia Bakery. It was a tiny oasis of calm and sweetness. I got a vanilla cupcake with that pink buttercream, took a bite standing right there on the sidewalk, and everything just… paused.
It wasn’t just a cupcake. It was a moment of pure, delicious comfort. In the middle of this huge, intimidating city, here was this simple, perfect, happy thing. It felt familiar and special all at once. That’s the power of food, right? It ties memory to flavor. I’ve been chasing that feeling in my own cooking ever since—creating food that’s an experience, a little escape, a moment of “ahhh.” Every time I bake these cupcakes now, I’m back on that street, a little less overwhelmed and a whole lot more inspired. It’s my reminder that the best recipes aren’t just lists of ingredients; they’re vessels for joy.
Gathering Your Flavor Arsenal: What You’ll Need
Here’s where the fun begins. We’re using simple, high-quality ingredients. Remember, in baking, ingredients are your teammates. Treat them right, and they’ll perform for you. Let’s break it down.
For the Cupcakes:
- 1½ cups all-purpose flour: The backbone. It gives our cupcakes structure. For a slightly lighter crumb, you can swap in cake flour, but all-purpose works beautifully here.
- 1½ teaspoons baking powder: Our leavening agent. This is what gives the cupcakes their lift and soft, airy texture. Make sure yours is fresh! If it doesn’t fizz when you add a pinch to hot water, it’s time for a new tin.
- ½ teaspoon salt: The secret weapon. Salt doesn’t make things taste salty; it makes the vanilla and sugar sing louder. Never skip it.
- ½ cup (1 stick) unsalted butter, softened: The key to richness and moisture. Softened is crucial—it should leave a slight indent when you press it. If it’s melted, the texture changes. No time? Grate cold butter with a cheese grater; it’ll soften in minutes.
- 1 cup granulated sugar: Sweetness and, importantly, it helps create a tender crumb by interacting with the butter and eggs.
- 2 large eggs, at room temperature: They bind everything together and add richness. Room temp eggs incorporate much better into the batter. To quickly warm them up, place them in a bowl of warm water for 5 minutes.
- 2 teaspoons vanilla extract: The star! Use the best pure vanilla extract you can. This is not the place for imitation. That warm, fragrant flavor is the soul of the cupcake.
- ½ cup whole milk, at room temperature: For moisture and tenderness. Whole milk gives the best results, but 2% will work in a pinch. Room temp is important to keep our softened butter from seizing up.
For the Pink Buttercream Frosting:
- 1 cup (2 sticks) unsalted butter, softened: Yes, another full cup! This is American buttercream, friends—light, sweet, and indulgent. Properly softened butter is non-negotiable for a silky, pipeable frosting.
- 3 cups powdered sugar (confectioners’ sugar), sifted: Sifting is your friend here. It prevents lumps and makes for an ultra-smooth frosting. You can adjust by a half cup if you prefer a less sweet or stiffer frosting.
- 2 tablespoons heavy cream or whole milk: This loosens the frosting to a perfect, spreadable (and pipeable!) consistency. Start with one tablespoon and add the second only if needed.
- 1 teaspoon vanilla extract: A touch more vanilla for the frosting rounds out the flavor perfectly.
- A few drops of red food coloring: For that iconic pale pink hue. I prefer gel food coloring as it’s more potent and won’t thin your frosting. Start with one drop, mix, and add more as needed. Remember, you can always add more, but you can’t take it away!
Let’s Get Baking: The Step-by-Step Play-by-Play
Ready? Put on some tunes, clear your counter, and let’s dive in. I’ll walk you through every step with my favorite little hacks.
- Prep Like a Pro: Preheat your oven to 350°F (175°C). This isn’t just a suggestion—an accurate oven temp is critical for even baking. Line a standard 12-cup muffin tin with your favorite paper liners. Pro tip: If you have a second tin, line a couple cups in it too. This batter usually makes about 14 cupcakes, and it’s better to bake them all at once than in batches.
- Combine the Dry Team: In a medium bowl, whisk together your flour, baking powder, and salt. Whisking does two things: it combines them evenly, and it aerates the flour a bit. Set this bowl aside—it’s ready for its moment.
- Creaming is Key: In a large mixing bowl (or the bowl of a stand mixer fitted with the paddle attachment), beat the softened butter and granulated sugar together on medium-high speed. We’re not just mixing; we’re “creaming.” Beat for a good 2-3 minutes until the mixture is light in color, fluffy, and almost looks like pale yellow frosting. This step incorporates air, which is essential for that perfect rise and tender texture. Don’t rush it!
- Incorporate the Eggs & Vanilla: With the mixer on medium, add the eggs one at a time, letting each fully incorporate before adding the next. Scrape down the sides of the bowl with a rubber spatula. Then, beat in the 2 teaspoons of vanilla. Your kitchen should already smell incredible.
- The Alternating Add: Reduce the mixer speed to low. Here’s the method to avoid over-mixing: Add about one-third of your dry ingredients and mix until just combined. Pour in half of the milk and mix. Repeat with another third of the dry, the rest of the milk, and finish with the last of the dry ingredients. Mix until the last streaks of flour disappear, then STOP. Over-mixing at this stage develops gluten and leads to tough cupcakes. A few tiny lumps are totally fine.
- Portion and Bake: Using a spoon, cookie scoop, or even a measuring cup, divide the batter evenly among the liners, filling each about ¾ of the way full. This is the sweet spot for a perfect dome. Slide the tin(s) into the preheated oven and bake for 18-22 minutes. The true test? A toothpick inserted into the center of a cupcake should come out clean or with a few moist crumbs (not wet batter). They should also spring back lightly when touched.
- The Crucial Cool Down: Let the cupcakes cool in the pan for 5 minutes, then transfer them to a wire rack to cool completely. I mean it—totally, utterly cool. Frosting a warm cupcake is a recipe for a melty, sad mess. Use this time to make your frosting!
- Make the Signature Frosting: In a clean bowl, beat the softened butter on medium-high speed for 2-3 minutes until it’s very pale and creamy. Reduce speed to low and gradually add the sifted powdered sugar until it’s mostly combined. Add the cream and vanilla. Now, crank the speed back up to medium-high and beat for a full 2-3 minutes. This is where the magic happens—it becomes light, fluffy, and almost whipped. Add your food coloring one drop at a time until you achieve that perfect soft pink.
- Frost & Finish: Once cupcakes are cool, load your buttercream into a piping bag fitted with a large open star tip (like a Wilton 1M) for that classic bakery swirl. If you don’t have a bag, a knife or offset spatula works beautifully—just pile it on high! The goal is a generous, celebratory swirl.
Presenting Your Masterpiece: How to Serve
These cupcakes are a celebration in themselves! For that true Magnolia vibe, serve them on a simple white platter or a vintage cake stand. They speak for themselves. A glass of cold milk, a hot coffee, or even a bubbly prosecco for the adults makes the perfect pairing.
If you’re gifting them, those clear bakery-style pastry boxes are easy to find online and make anyone feel like they just picked up something special from the shop. Sprinkle on a few pastel sprinkles or edible pearls right after frosting if you want a little extra sparkle. The most important step? Take a second to admire your work before you dig in. You made this!
Make It Your Own: Fun Flavor Twists
Once you’ve mastered the classic, the “what if we tried this?” energy can take over. Here are some of my favorite spins:
- Chocolate-Vanilla Swirl: Divide the cupcake batter in half. Mix 2 tablespoons of cocoa powder into one half. Alternately spoon the vanilla and chocolate batters into the liners and give a quick swirl with a toothpick before baking.
- Funfetti Celebration: Gently fold ½ cup of rainbow sprinkles (jimmies, not nonpareils) into the batter just before portioning. Instant party!
- Lemon Zest Infusion: Add the zest of one large lemon to the batter along with the vanilla. For the frosting, use lemon extract instead of vanilla and a drop of yellow food coloring. So bright and fresh!
- Cookies & Cream: Fold ¾ cup of finely crushed Oreo crumbs (filling and all) into the batter. Top with vanilla buttercream and sprinkle with more crumbs.
- Dairy-Free/Vegan Friendly: Use a high-quality vegan butter stick (for both cake and frosting) and flax eggs (1 tbsp ground flax + 2.5 tbsp water per egg). Swap milk for unsweetened almond or oat milk. The texture will be slightly different but still delicious.
Jackson’s Kitchen Notes: The Inside Scoop
This recipe has evolved in my kitchen from a “close enough” attempt to my absolute go-to. The biggest lesson? Patience with the creaming and the cooling. I once tried to frost a cupcake that was still slightly warm because I was too excited, and let’s just say it turned into a cupcake soup situation. We live and we learn!
Also, I’ve found that using European-style butter (with a higher fat content) in the frosting makes it even silkier and less likely to get greasy. And don’t be afraid of the food coloring—that soft pink just makes people smile. It’s part of the experience. Finally, these cupcakes taste even better the next day, as the flavors fully meld. Just store them in an airtight container at room temperature.
Your Questions, Answered: FAQ & Fixes
Q: My cupcakes domed too much/cracked on top. What happened?
A: This usually means your oven was too hot, causing the edges to set before the center could rise evenly. Invest in an inexpensive oven thermometer to check your oven’s true temp. Also, make sure you’re not over-filling the liners.
Q: Why is my buttercream grainy or runny?
A: Grainy frosting means your powdered sugar wasn’t fully sifted or incorporated. Beat it longer on low speed first. Runny frosting is often from butter that was too soft or adding too much liquid. Pop the whole bowl in the fridge for 15-20 minutes to firm up the butter, then re-whip.
Q: Can I make these ahead of time?
A: Absolutely! Bake the cupcakes up to 2 days ahead, let them cool completely, and store unfrosted in an airtight container at room temp. Frosting can be made 2-3 days ahead and stored covered in the fridge. Let it come to room temp and re-whip before using. Frost the day you plan to serve for the best texture.
Q: My batter curdled when I added the eggs. Did I ruin it?
A: Not at all! This is usually because the eggs or milk were too cold compared to the creamed butter. It will almost always come back together once you add the dry ingredients. Keep going—they’ll be fine.
Nutritional Information*
Let’s keep it real—this is a special occasion treat, a celebration in cupcake form. Here’s a general breakdown per cupccake (frosting included), but remember, joy is an important ingredient too!
Calories: ~370
Fat: ~20g
Carbohydrates: ~45g
Protein: ~3g
Sugar: ~34g
These numbers will vary depending on frosting amount (I’m a “pile it high” kind of guy), but remember: this is joy food. A treat, a memory, a moment. Not everything has to fit into a macro box. Sometimes it’s okay to make something simply because it makes you smile.
The Sweetest Finish: Final Thoughts from My Kitchen
Here’s the thing I hope you take away from this recipe: baking isn’t about perfection. It isn’t about the fanciest tools or the most complicated techniques. It’s about the moment you pause, inhale that vanilla-scented air, and feel something soften in your chest. It’s about sharing something warm and sweet with people you love—or keeping a cupcake for yourself because you earned it today.
These Magnolia Bakery–style cupcakes capture that magic for me. They remind me of a time when I was young and overwhelmed and found unexpected comfort in a paper-wrapped swirl of pink frosting. And every time I recreate them at home, I get to step back into that feeling for a moment—and share it with someone else.
I hope when you make these, you find your own moment of that. Maybe it’s licking the frosting off the beaters. Maybe it’s watching someone’s face light up when they take the first bite. Maybe it’s just standing quietly in your kitchen, tasting the still-warm cupcake top and thinking, “Dang. I made this.”
From one home baker to another, I’m proud of you already.
If you bake a batch of these (and I hope you do), tag me @FoodMeld so I can cheer you on. I love seeing your kitchen wins, your creative twists, and the stories behind what you make.
Until next time—keep baking bravely, keep eating joyfully, and keep remembering that the sweetest things in life often start with a little butter, a little sugar, and a whole lot of heart.
— Jackson


