Cool Whip Crinkle Cookies – 3-Ingredient Cake Mix Cookie Recipe
Hey friends, Jackson here from Food Meld. Let’s be real for a second. We all have those days. The kids are declaring a state of emergency because there are “no snacks,” you just got a last-minute text that friends are swinging by, or you simply need a win in the kitchen that doesn’t involve a sink full of dishes. You need something fast, foolproof, and so delicious it feels like a little bit of magic.
Well, my friends, today is your day. I’m about to hand you the keys to one of the easiest, most satisfying cookie recipes in my entire arsenal: Cool Whip Cookies. Now, before you raise an eyebrow, just trust me. These aren’t just any cookies. They’re the cloud-like, melt-in-your-mouth, perfectly crinkled wonders that look like you spent hours on them, but secretly come together with just three main ingredients and a single bowl. We’re talking minimal effort for maximum “WOW.”
I’m all about bold flavor without the burnout, and these cookies are the perfect example. That box of cake mix in your pantry? It’s about to become your new best friend. That tub of Cool Whip in your freezer? It’s the secret to an incredibly light, almost meringue-like texture. And that final roll in a mountain of powdered sugar? That’s what gives them that gorgeous, snow-capped, bakery-style look. So, tie on your apron, grab a bowl, and let’s cook something awesome together. You’re about to become a cookie legend.

Aunt Carol’s Laughter and a Little Kitchen Magic
This recipe always takes me right back to my Aunt Carol’s kitchen. She wasn’t a fancy chef, but she was a wizard of “semi-homemade” long before it was a TV show. One sweltering summer afternoon, with a dozen cousins running around, she declared it was cookie time. We all groaned, imagining the oven heating up the house for hours.
But then she pulled out a box of devil’s food cake mix, a tub of Cool Whip, and a single egg. We were skeptical. I remember watching her mix the sticky, thick batter with a grin, her hands getting coated in powdered sugar as she rolled the dough. The whole process took maybe 10 minutes. When those first trays came out of the oven, puffed up and beautifully cracked, the whole kitchen fell silent except for the sound of happy chewing. They were light, fudgy, and disappeared faster than you could say “seconds.” It was a lesson I never forgot: the most unforgettable food moments aren’t about complexity; they’re about joy, a little ingenuity, and sharing something truly delicious with the people you love.
Gathering Your Cookie Dream Team
Here’s the beautiful part: you probably have most of this in your pantry right now. This is the ultimate “pantry raid” cookie.
- 1 box cake mix (any flavor!) – This is your flavor base and your flour-sugar-leavening all-in-one. I’m using classic chocolate today for that deep, fudgy vibe, but this is where you get to play. Chef’s Insight: I don’t recommend “pudding in the mix” varieties, as they can make the dough too wet. A standard cake mix gives you the perfect structure.
- 1 (8 oz) tub Cool Whip, thawed – This is the magic ingredient! The stabilizers and air in the Cool Whip are what give these cookies their signature airy, tender, almost brownie-like crumb. Substitution Tip: There isn’t a perfect 1:1 swap for the unique texture Cool Whip provides, but in a pinch, you can try 2 cups of stabilized homemade whipped cream. The results will be slightly different, but still tasty!
- 1 large egg – Our binding agent. It brings the sticky dough together and adds just enough structure so the cookies don’t spread into puddles.
- 1 cup (or so) of powdered sugar, for rolling – Don’t be shy with this! This creates that classic crinkle cookie look and a delicate, sweet crust. It’s what makes them look so professional.
Let’s Make Some Magic: The Foolproof Method
Ready? This is so simple, you barely need instructions. But I’m gonna walk you through it with all my best chef hacks to ensure cookie perfection.
- Preheat and Prep. Fire up your oven to 350°F (175°C). Line your baking sheets with parchment paper or a silicone baking mat. Chef’s Hack: This is non-negotiable for me. It prevents sticking without adding extra grease and makes cleanup an absolute dream. No scrubbing pans today!
- The Big Mix. In a large bowl, combine the cake mix, thawed Cool Whip, and the egg. Now, the batter will be thick and very sticky—that’s exactly what you want! I like to start with a sturdy spatula, but don’t be afraid to finish mixing with your hands if you need to. Just make sure there are no dry pockets of cake mix hiding at the bottom. Little Story: The first time I made these, I thought I’d messed up because the dough was so tacky. I almost added flour! Resist the urge—this sticky situation is the secret to their fluffy texture.
- The Powdered Sugar Plunge. Pour a generous amount of powdered sugar into a separate shallow bowl. Now, here’s the fun (and slightly messy) part. Drop a heaping teaspoonful of the sticky dough right into the powdered sugar. Gently roll it around until it’s completely coated. You want a nice, thick, snowy blanket on there. Pro Tip: I keep one “wet” hand for scooping the dough and one “dry” hand for rolling in the sugar. It keeps things much neater!
- Space Them Out. Place your little sugar-dusted dough balls about 2 inches apart on your prepared baking sheet. They don’t spread a ton, but they do puff up beautifully, so they need a little room to breathe.
- Bake to Perfection. Slide the tray into your preheated oven and bake for 10-12 minutes. You’re looking for set edges and those beautiful crinkles and cracks on top. The centers might still look a tiny bit soft—that’s perfect! They will firm up as they cool. Don’t Overbake! This is the most common mistake. If you wait for the tops to look fully dry, you’ve gone too far. We want them chewy and soft, not crisp.
- The Patient Cool Down. This is the hardest part. Let the cookies cool on the baking sheet for at least 5-10 minutes before you try to move them. They are very delicate when they first come out of the oven. Letting them rest allows them to set up, so you can transfer them to a wire rack without them falling apart.
Sharing the Joy: How to Serve These Beauties
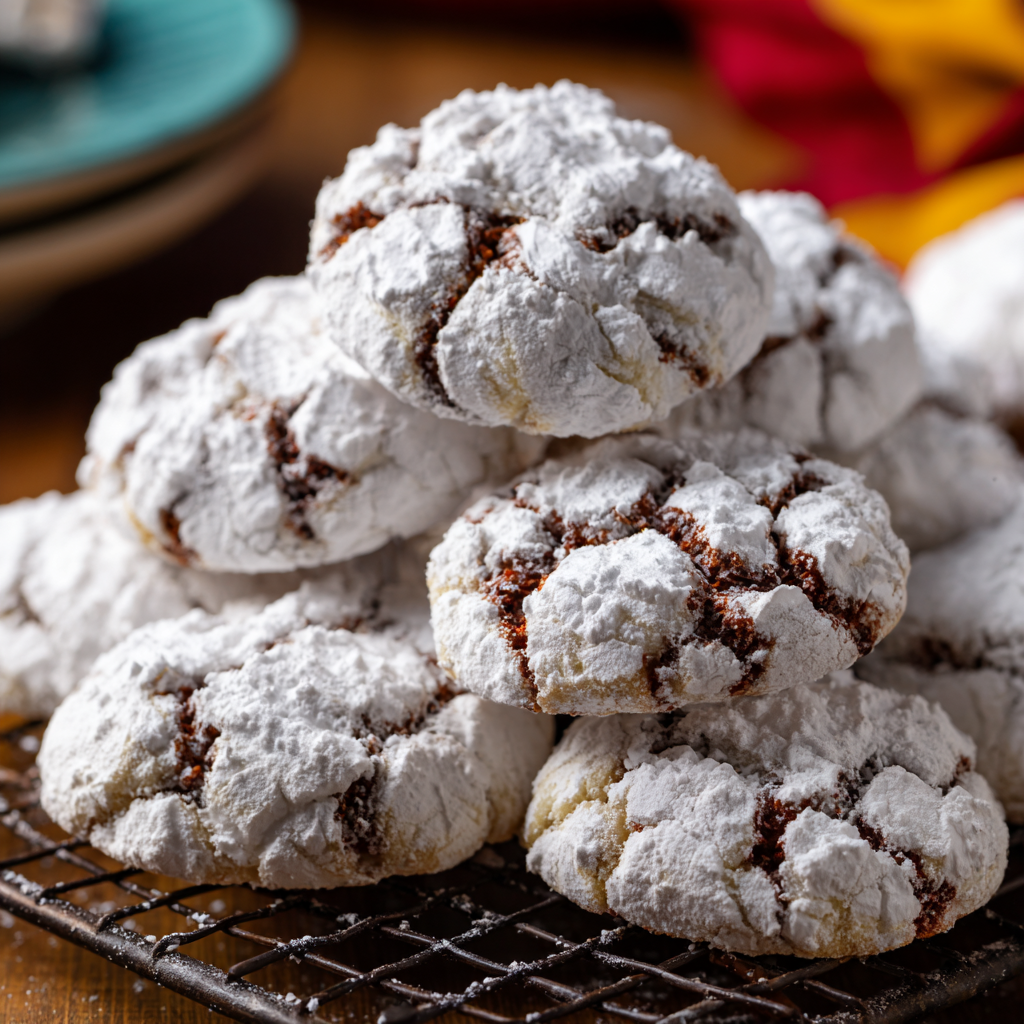
Okay, you’ve resisted eating them straight off the pan (mostly). Now, how do you make them look as good as they taste? I love stacking these cookies high on a rustic wooden board or a simple white plate—that contrast really makes the powdered sugar pop. For a special touch, place them in little decorative paper liners, like you’d see in a fancy bakery.
These are the ultimate sharable cookie. Pile them onto a plate for your book club, pack them up for a picnic, or arrange them on a holiday tray—they always get rave reviews. And let’s talk beverages. A cold glass of milk is the classic pairing, but for the adults, a rich, dark roast coffee or even a glass of red wine (like a Cabernet with the chocolate version) is an absolutely sublime experience. Trust me on that one.
Mix It Up! Your Canvas for Creativity
This is where the “Meld” in Food Meld really comes to life. The basic formula is your playground. Here are a few of my favorite twists:
- Lemon Sunshine: Use a lemon cake mix and add the zest of one lemon to the batter. The bright, citrusy punch against the sweet powdered sugar is a game-changer.
- Red Velvet Rendezvous: Swap in a red velvet cake mix. They look stunning for Valentine’s Day or Christmas, and that hint of cocoa is just divine.
- Funfetti Party: Use a funfetti cake mix and roll the dough balls in rainbow sprinkles after the powdered sugar for an extra festive look. Instant party!
- Chocolate Mint: Use a devil’s food cake mix and add ½ teaspoon of peppermint extract. It’s like a light, fluffy Thin Mint cookie.
- Gluten-Free Friendly: Simply use your favorite gluten-free cake mix! The recipe works exactly the same way.
Jackson’s Notebook: A Few Parting Thoughts
Over the years, I’ve probably made these cookies a hundred times, and they’ve never failed me. The recipe has evolved in little ways—I started adding a pinch of salt to chocolate mixes to deepen the flavor, and I learned that a cookie scoop (about 1 tablespoon size) is the best tool for getting evenly sized, perfectly round cookies.
I’ll never forget the time I brought these to a big neighborhood potluck. A woman who owned a local bakery cornered me, demanding the recipe for these “incredible from-scratch meringue cookies.” I laughed and told her the three-ingredient secret. Her jaw literally dropped. We spent the next twenty minutes geeking out about the science of it. It just goes to show that sometimes, the simplest recipes create the biggest reactions.
Your Questions, Answered!
Q: My dough is SO sticky! Did I do something wrong?
A: Nope! You did everything right. The dough is meant to be very sticky and tacky. That’s what gives the cookies their light, airy texture. Just make sure you’re using plenty of powdered sugar when rolling, and don’t be afraid to get your hands a little messy. It’s part of the fun!
Q: Can I make the dough ahead of time?
A: I don’t recommend it. The Cool Whip can start to deflate over time, which might affect the cookies’ rise and texture. For the best results, mix and bake them right away. The good news is, it only takes 10 minutes to get them in the oven!
Q: Why are my cookies flat and not puffy?
A: This usually happens if the Cool Whip was over-mixed and lost its air, or if the dough was over-handled. Mix just until combined, and be gentle when rolling them in the sugar. Also, double-check that your baking powder in the cake mix isn’t expired!
Q: How should I store these?
A: Keep them in a single layer in an airtight container at room temperature for 2-3 days. They are best enjoyed fresh! If you stack them, put a piece of parchment paper between layers so the powdered sugar doesn’t all stick together.
Let’s Talk Nutrition (The Real Talk)
Look, we’re here for a good time, not a long time. These are a treat, through and through. Since they start with a cake mix, they contain sugar, processed flour, and other ingredients. But the beauty of this recipe is that you control the portion size and the flavor. Making them small means you can enjoy one or two without overdoing it.
Based on a standard cake mix, here’s a general estimate per cookie (this will vary based on your specific brand of ingredients):
Calories: ~90 | Fat: 4g | Carbohydrates: 13g | Protein: 1g
My philosophy? Enjoy your food mindfully and joyfully. Bake these, share them with people you love, and savor every single fluffy, delicious bite.
Go Forth and Bake Something Unforgettable
And there you have it! The legendary 3-ingredient Cool Whip cookie. It’s a recipe that proves you don’t need a diploma from culinary school or a kitchen full of fancy equipment to create something truly special. All you need is a little curiosity, a willingness to get your hands a little dusty with powdered sugar, and the desire to share something made with love.
I hope this recipe becomes your new secret weapon, your go-to for last-minute guests, and your guaranteed smile-maker. So, what flavor are you going to try first? Tag me on social @FoodMeld with your creations—I love seeing your kitchen wins! Now get out there, mix it up, make it yours, and enjoy every single bite. Until next time, happy baking!
– Jackson


