Let’s Talk About The Perfect Party Starter: Classic Deviled Eggs
Hey friends, Jackson here from Food Meld. Let’s be real for a second. You walk into a potluck, a family reunion, or a holiday spread. Your eyes scan the table. There might be a glistening ham, a beautiful casserole, but what’s the thing that always, always disappears first? The humble, glorious deviled egg. It’s the undisputed champion of the appetizer world. And today, we’re not just making them; we’re giving them the full Food Meld love. We’re going to master the classic—that perfectly creamy, tangy, just-salty-enough filling nestled in a tender white boat. This isn’t about being fancy for the sake of fancy. It’s about nailing the fundamentals with so much flavor and fun that your guests will be begging you for the secret. I promise you, my version is simple, reliable, and packed with the kind of “why does this taste so good?” magic that comes from a few chef-approved tweaks. Whether you’re a total kitchen newbie or a seasoned pro looking to perfect your craft, this recipe is your new go-to. So, tie on that apron, grab a dozen eggs, and let’s cook something awesome together. Get ready to make deviled eggs that don’t just sit on the plate—they vanish.
Why Deviled Eggs? A Story From My Grandma’s Table
For me, deviled eggs aren’t just a recipe; they’re a time machine. I can’t smell vinegar and paprika without being instantly transported to my Grandma Walker’s linoleum-floored kitchen in Georgia. It was always buzzing before a family dinner. My job, from the time I could safely stand on a stool, was the “Egg Peeler.” It was a title I wore with immense, six-year-old pride. Grandma would boil the eggs, cool them in her old turquoise mixing bowl, and then hand me the whole batch. “Be gentle, but get every last bit of shell, Jack,” she’d say, already whipping up her famous cornbread. I’d sit there, meticulously peeling, sometimes leaving a tiny divot in the white, which she’d just smile at and say, “That’s where the flavor escapes to, honey. It’s fine.” She’d mash the yolks with her fork, using Duke’s mayo, a splash of her homemade pickle juice, and a big pinch of paprika from the tin that seemed ancient even then. She never measured, just tasted. That ritual—the peeling, the mashing, the final sprinkle of rust-red paprika—was my first lesson in the soul of cooking. It’s about the hands that make it and the people you’re excited to share it with. Every time I make these, I’m channeling a bit of her “don’t overthink it, just make it taste good” energy. And that’s the spirit I want to bring to your kitchen today.
Gathering Your Flavor Crew: The Ingredients
Here’s the beautiful part: the ingredient list is short and sweet. But as with all simple recipes, the quality and little choices here make a world of difference. Let’s break it down.
- 6 large eggs: The stars of the show. I always use large eggs for consistency. Pro-tip: Older eggs (about 1-2 weeks old) actually peel easier than super fresh ones! The air pocket inside is a bit bigger.
- 3 tablespoons mayonnaise: This is the backbone of our creamy filling. I’m a Duke’s or Hellmann’s/Best Foods loyalist for their tangy, rich flavor. This is not the time for a light mayo—go for the full-fat goodness. For a tangier twist, try a bit of Greek yogurt mixed in with the mayo.
- 1 teaspoon Dijon mustard: Our secret flavor weapon. Dijon adds a sophisticated, sharp tang that plain yellow mustard can’t match. It brings depth and helps emulsify the filling. No Dijon? A good stone-ground mustard works wonderfully too.
- 1 teaspoon white vinegar or lemon juice: The brightening agent! White vinegar gives that classic “deviled” zing. But if you want a slightly fresher, floral acidity, fresh lemon juice is an incredible swap. I often use half of each.
- Salt and pepper to taste: Don’t you dare forget to season your filling! I use kosher salt and freshly cracked black pepper. Taste as you go!
Optional Toppings (The Fun Part!):
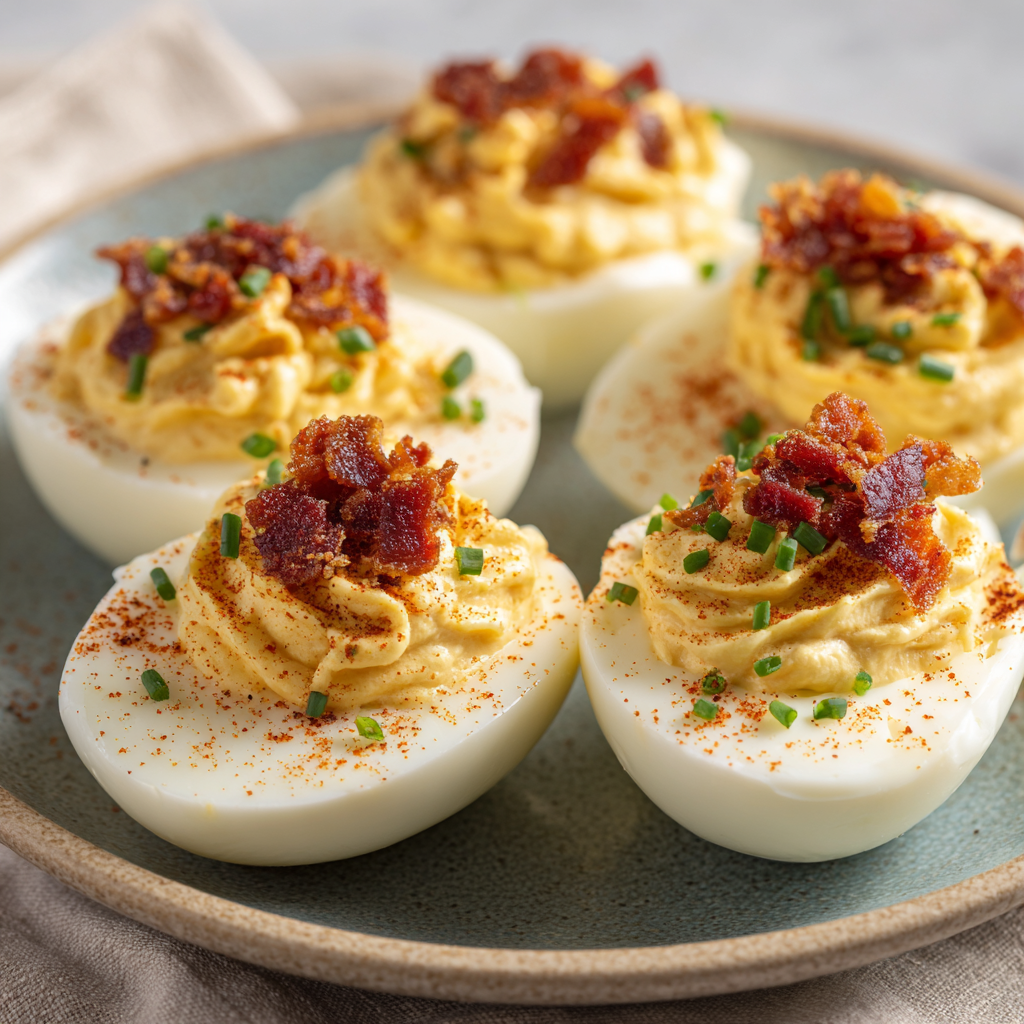
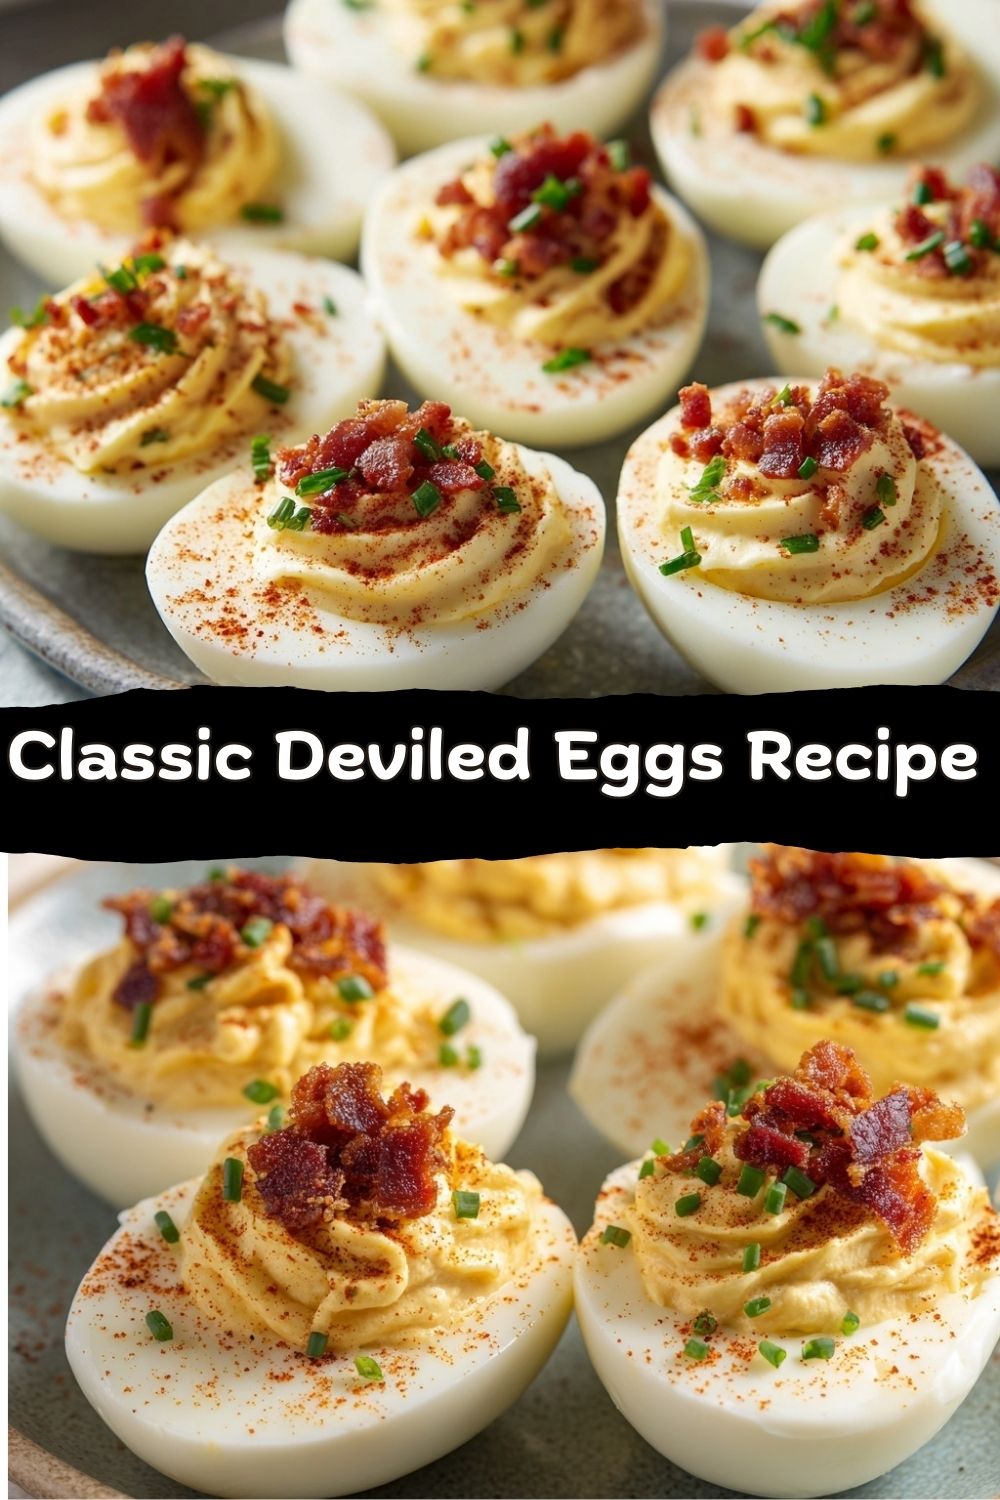
- Smoked paprika: My go-to. It adds a whisper of smoke and a gorgeous color. So much better than regular paprika!
- Chopped fresh chives or dill: For a pop of green and a fresh, oniony or herbal finish.
- Crispy crumbled bacon: Because… bacon. It adds salt, crunch, and makes everything a party.
- Pickled jalapeño slices or a hot sauce drizzle: For my friends who like a little kick. A dot of Sriracha or a slice of pickled jalapeño is perfection.
Let’s Get Cooking: The Step-by-Step
Okay, crew. Let’s dive into the process. I’m giving you my foolproof method for perfect hard-boiled eggs and a filling so smooth you could practically drink it.
Step 1: The Perfect Hard-Boiled Egg (No Green Rings, I Promise!)
Place your eggs in a single layer in a saucepan. Cover them with cold water by about an inch. This is key—starting cold helps prevent cracking. Bring the pot to a full, rolling boil over high heat. The moment it hits a boil, immediately cover the pot with a tight-fitting lid and turn off the heat. Set a timer for 12 minutes. Walk away! Let the residual heat cook the eggs gently. This method gives you tender whites and creamy, perfectly set yolks without that dreaded gray-green sulfide ring. When the timer goes off, drain the hot water and immediately plunge the eggs into a bowl of ice water. Let them chill for at least 15 minutes. This stops the cooking and makes peeling a million times easier.
Step 2: The Great Peel
Tap each egg gently on the counter to crackle the shell all over. Start peeling from the wider end, where that air pocket is. I like to do it under a tiny trickle of cold running water—the water gets under the membrane and helps the shell slide right off. Be patient, and you’ll get beautiful, smooth whites. Pat them dry with a paper towel.
Step 3: Halving & Yolk Extraction
With a sharp knife, slice each egg neatly in half lengthwise. Gently pop out the yolks into a medium bowl. Arrange your beautiful white halves on a serving platter. If any whites are wobbly, you can take a tiny slice off the bottom to make them sit flat—your little secret for a professional look.
Step 4: Crafting the Dreamy Filling
To the yolks, add your mayo, Dijon, and vinegar or lemon juice. Now, mash it all together with a fork. Want it ultra-smooth and luxurious? Push the mixture through a fine-mesh sieve with a spatula. It’s a tiny extra step that makes a HUGE difference in texture. Season generously with salt and pepper. Now, taste it! This is non-negotiable. Does it need more tang? A drop more vinegar. More richness? A tiny dab more mayo. Make it yours.
Step 5: The Fill & The Garnish
You can spoon the filling back into the whites, but for a truly gorgeous look, use a piping bag fitted with a star tip. It looks fancy and distributes the filling evenly. No piping bag? No sweat! A zip-top bag with a corner snipped off works just as well. Fill each white generously, swirling the top. Right before serving, add your toppings. A dusting of smoked paprika, a few chives, that crispy bacon. The final flourish makes them irresistible.
Plating Up & Serving With Style
Presentation is half the fun! Don’t just plop these on a plate. A dedicated deviled egg platter with little divots is a game-changer and prevents sliding. No special platter? Line a beautiful plate or cutting board with a bed of curly kale, lettuce leaves, or even a sprinkle of coarse salt to anchor the eggs. It adds color and makes the eggs pop. I love to serve these as the opening act to a backyard BBQ (perfect with pulled pork!), as the star of a brunch spread alongside fresh fruit, or as a pre-Thanksgiving dinner nibble to keep hungry relatives happy. They’re best served the day they’re made, but you can prep the components ahead: boil and peel the eggs, make the filling, and store them separately in the fridge. Assemble and garnish an hour before your guests arrive!
Mix It Up! Your Deviled Egg Playground
The classic is perfect, but the “Meld” in Food Meld means we love to play. Here are a few of my favorite twists:
- The “Everything Bagel”: Add 1 tbsp of everything bagel seasoning to the yolk mix. Top with extra seasoning and a tiny piece of smoked salmon. Unreal.
- The “Southern Pimento Cheese”: Fold 2 tbsp of finely shredded sharp cheddar and 1 tbsp of chopped pimentos into the filling. Top with a crispy fried onion ring piece.
- The “Avocado Herb”: Replace half the mayo with the flesh of one ripe avocado. Add a big handful of chopped cilantro and a squeeze of lime juice. Top with a sprinkle of chili powder.
- The “Curry & Chutney”: Add 1 tsp of your favorite curry powder to the filling. Top each egg with a tiny dollop of mango chutney and a sliver of green onion.
- The “Vegan Dream”: Use well-drained firm tofu instead of eggs! Crumble and season it with black salt (kala namak) for an “eggy” flavor, then mix with vegan mayo, mustard, and turmeric for color. Pipe into cucumber rounds or mini pepper halves.
Jackson’s Chef Notes & Kitchen Confessions
This recipe has evolved in my kitchen over a hundred picnics and parties. My biggest “aha” moment was the sieving trick for the yolks. I used to just mash, and the filling was good, but sometimes a little grainy. The first time I pushed it through a sieve, it was like tasting deviled eggs for the first time—silky, cloud-like perfection. It’s now my non-negotiable step. A funny story: I once, in a pre-party hurry, mistook cayenne pepper for paprika. Let’s just say those eggs had a lot more “devil” in them than intended! We still ate them (with plenty of cold beer), but it taught me to always, always smell your spices first. And remember, the recipe is a roadmap, but your taste buds are the GPS. Trust them!
FAQs: Your Questions, Answered
Q: My eggs are impossible to peel! What am I doing wrong?
A: This is the #1 question! First, try using slightly older eggs (1-2 weeks old). Second, the ice bath is crucial—it shocks the eggs and contracts the white away from the shell. Peeling under running water also helps immensely. And don’t be too gentle when cracking; get a good, all-over crackle going.
Q: Can I make these ahead of time?
A: Absolutely, but strategically. You can boil, peel, and halve the eggs up to 2 days ahead. Keep them in a sealed container in the fridge. Make the filling 1 day ahead and store it separately in a piping bag or airtight container. Assemble no more than 2-3 hours before serving for the best texture and to prevent the whites from getting soggy.
Q: My filling is a bit runny. How can I fix it?
A: No panic! Chill the filling in the fridge for 20-30 minutes to let it firm up. If it’s still loose, you can gently mix in a tiny bit more mashed yolk or a teaspoon of very finely crushed cracker crumbs to absorb moisture.
Q: What’s the best way to transport deviled eggs?
A: Fear not, picnic-goers! Use a deviled egg carrier (they exist and are brilliant) or a deep platter. Place the eggs snugly, then gently lay a sheet of plastic wrap directly on the surface of the eggs/toppings. Cover the whole platter with more wrap or a lid. Keep it level in the coolest part of your car!
Nutritional Info (For the Curious Cook!)
Let’s keep it real—deviled eggs are an indulgence, but a pretty wholesome one! They’re packed with high-quality protein to keep you full. The fats are mostly from the egg yolks and mayo, which provide energy and help absorb fat-soluble vitamins. This recipe, as written, makes 12 halves. A serving is typically 2 halves. Per serving (2 halves), you’re looking at approximately: Calories: ~120 | Protein: 6g | Fat: 10g | Carbohydrates: 1g | Fiber: 0g | Sugar: 0.5g. Remember, these are estimates and can vary based on the specific brands of mayo and toppings you use. To lighten them up, you can swap half the mayo for plain Greek yogurt, which adds a protein boost and tang. But for a special occasion, I say embrace the classic, delicious version!
Final Thoughts: Your New Secret Weapon
And there you have it—everything I know about making truly unforgettable Classic Deviled Eggs. From my grandma’s kitchen to yours, this recipe is built on love, a few simple techniques, and the absolute joy of sharing great food. They’re more than just an appetizer; they’re a conversation starter, a memory maker, and proof that the simplest things, done with care, are often the most beloved. So go ahead, boil those eggs, whip up that silky filling, and get creative with your toppings. I can’t wait to hear how yours turn out. Snap a pic, tag me @FoodMeld, and let me know which variation you tried! Now get out there and cook something awesome. Until next time, friends—keep it bold, keep it comforting, and always keep it flavorful.


