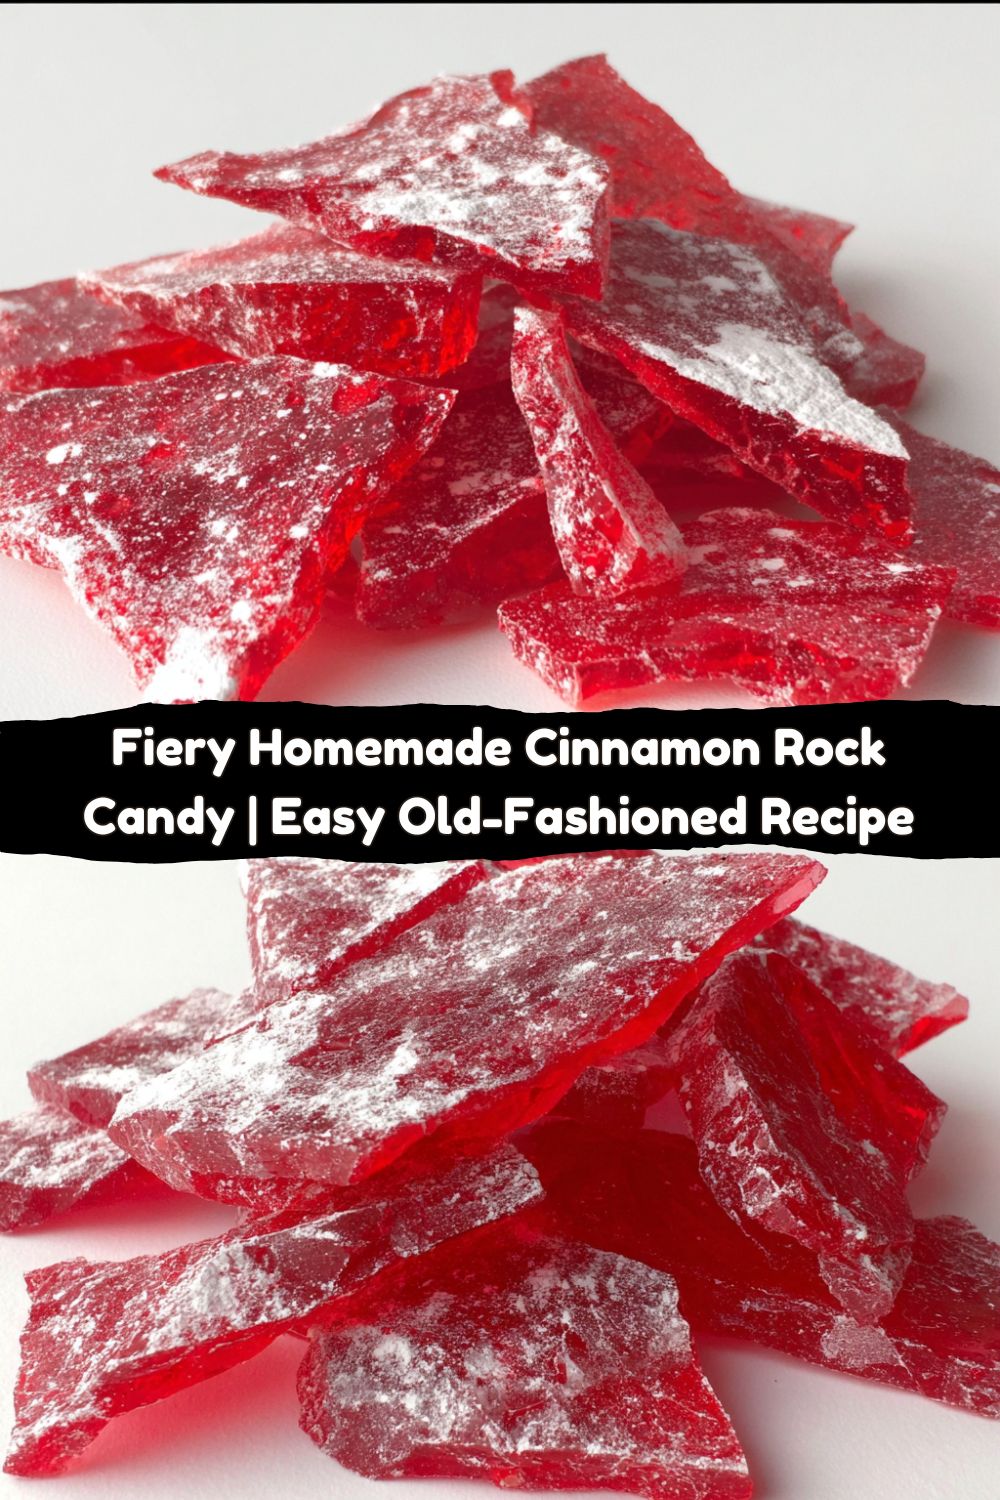
Let’s Make Some Fiery, Nostalgic Magic: Cinnamon Rock Candy
Hey there, Food Meld family! Jackson here. You know me—I’m all about those big, bold flavors that make you close your eyes and just savor the moment. Today, we’re stepping slightly outside the skillet and into the wonderful, sometimes-intimidating world of candy making. But don’t you worry! We’re keeping it simple, real, and packed with that signature “wow” factor. We’re making old-fashioned, fire-engine red, knock-your-socks-off Cinnamon Rock Candy.
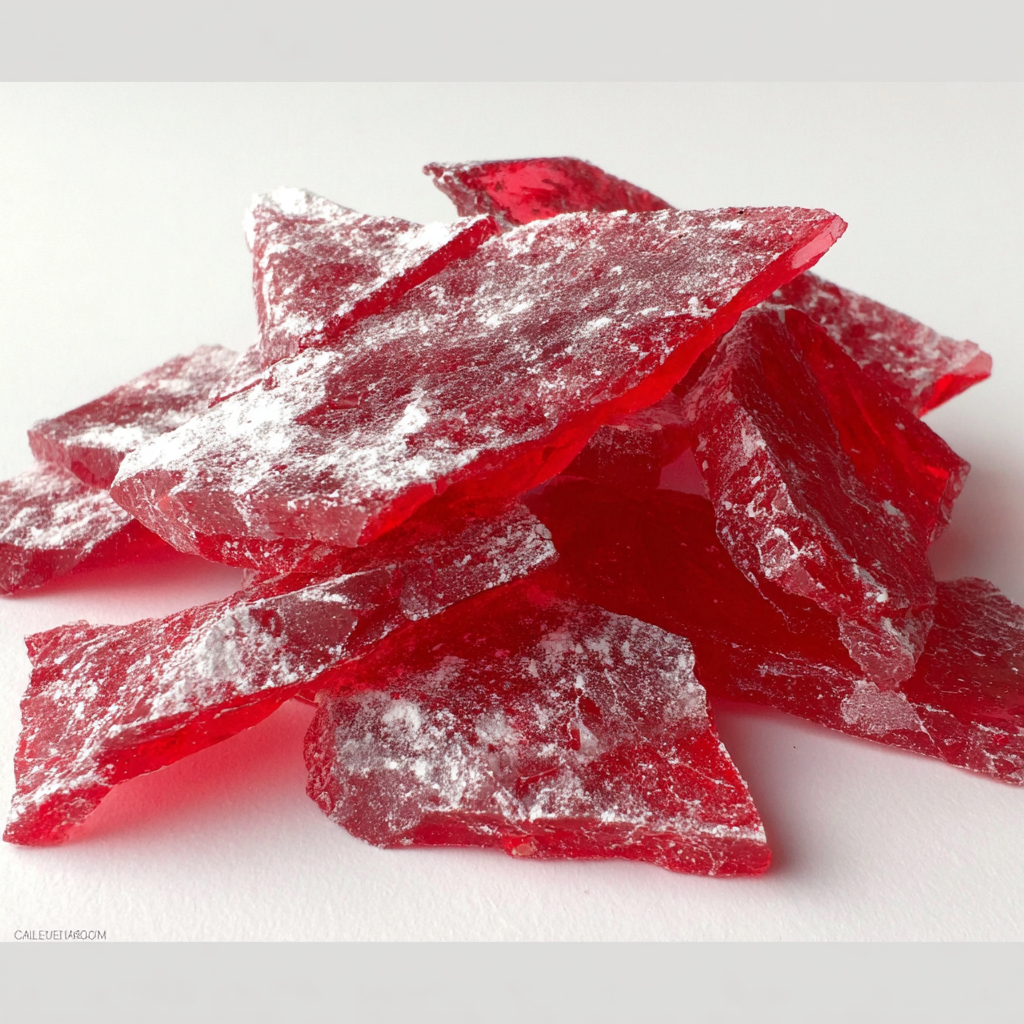
This isn’t just any candy. This is the stuff of childhood memories, holiday magic, and that satisfying *crack* that promises a wave of spicy-sweet warmth. It’s the candy you sneak from your grandma’s special jar, the one that makes your eyes water just a little before it dissolves into pure sugary bliss. I’m talking about that classic, hard crack candy that looks stunning in a glass jar and tastes even better.
I know what you’re thinking: “Jackson, candy thermometers? Hard crack stage? That sounds… precise.” And you’re right, it is. But it’s also incredibly fun and surprisingly straightforward. Think of it as a delicious science experiment. We’re going to walk through this together, step-by-step, and I’ll share all my chef hacks to make sure you succeed. So, grab your pot, and let’s melt some sugar and make some memories. Let’s cook something awesome together!
The Candy That Started It All
My love affair with this candy started not in a fancy kitchen, but in my Great-Aunt Clara’s humid Alabama sunroom. Every Christmas, without fail, she’d emerge from her kitchen with a massive, lidded glass jar filled with what looked like shards of red stained glass. To the other kids, it was a cautionary tale—too spicy, too intense. But to me? It was a dare. I’d always be the first to grab a piece, my small fingers carefully selecting the biggest shard I could find.
The ritual was always the same. I’d pop it in my mouth, and for the first three seconds, it was just pure, sweet sugar. Then… BAM. The cinnamon heat would hit, a wave of spicy warmth that made my nose tickle and my eyes sparkle. I’d suck on it until it was paper-thin, refusing to bite down, making that single piece last an eternity. Aunt Clara would just wink at me from across the room, a silent acknowledgment of our shared appreciation for bold flavor. Making this candy now isn’t just about the recipe; it’s about capturing that feeling—that bold, unapologetic, and joyfully spicy kick of nostalgia.
Gathering Your Candy-Making Arsenal
Here’s the beautiful part: this unforgettable candy only needs a handful of simple ingredients. The magic is in the process. Let’s break down what you’ll need and why each one is a VIP (Very Important Pantry item) for this recipe.
- 3¾ cups Granulated Sugar: This is the foundation of our candy. Sugar crystals are what create the structure. We use a lot because much of the water will cook off, and we need enough volume to create a workable syrup. Don’t try to reduce this!
- 1½ cups Light Corn Syrup: This is our secret weapon against grainy candy. Corn syrup is an interfering agent—it prevents the sucrose molecules in the granulated sugar from crystallizing too early and creating a gritty texture. It’s the key to that gloriously smooth, glass-like finish.
- 1 cup Water: This is the vehicle that allows the sugar to dissolve evenly at the beginning of the cooking process. It will all evaporate as we cook the syrup to 300°F.
- 1 tsp Cinnamon Oil (NOT extract): This is non-negotiable, friends. Extract is mostly alcohol and water, which will cause our molten sugar to seize and splatter dangerously. Oil-based flavoring blends seamlessly into the hot sugar syrup, giving you that potent, authentic cinnamon punch. You can find it in the baking aisle or online.
- ½ tsp Red Food Coloring: Gel or liquid works, but gel coloring gives a more vibrant, deep red hue without adding extra liquid. This is for that classic, fiery look we all know and love.
- Powdered Sugar (for dusting): Our anti-sticking agent. Once the candy is broken up, a light dusting of powdered sugar keeps the pieces from gluing themselves back together in the jar.
- Candy Thermometer: Your new best friend. Eyeballing it is not an option here. A good, accurate candy thermometer is the single most important tool for guaranteed success.
The Step-by-Step: Let’s Get Cooking!
Alright, team. This is where the fun begins. Read through all the steps once before you start. Candy making is a fast-paced dance, and it helps to know the moves beforehand. You’ve got this!
Step 1: Prep Your Setup (Mise en Place!)
First thing’s first: get everything ready. Line a large, rimmed baking sheet with aluminum foil and give it a very light greasing with a neutral oil (like canola or vegetable). Have your cinnamon oil and food coloring measured out and sitting right next to the stove. This process moves lightning-fast at the end, and you won’t have time to rummage through drawers. Also, make sure your candy thermometer is clipped to the side of a heavy-bottomed saucepan (at least 3-quart size) before you even turn on the heat. Chef’s Hack: A heavy pot distributes heat evenly, preventing hot spots that can burn the sugar.
Step 2: Cook the Syrup (The Patient Part)
In your heavy saucepan, combine the granulated sugar, light corn syrup, and water. Place it over medium heat and stir gently but consistently with a wooden spoon or heatproof spatula until the sugar has completely dissolved. This is crucial—you shouldn’t feel any grit at the bottom of the pan. Once it’s clear and bubbling, stop stirring. I mean it! No more stirring. Attach your candy thermometer, making sure the bulb is submerged in the syrup but not touching the bottom of the pan. Let the mixture come to a boil undisturbed.
Step 3: Reach Hard Crack (The Watchful Wait)
Now, we wait. This will take 15-20 minutes. The syrup will boil and the temperature will steadily climb. Watch the thermometer, not the clock. You’re waiting for it to hit exactly 300°F (149°C)—the famous “hard crack” stage. You can test this by dropping a tiny bit of syrup into a glass of cold water; it will form hard, brittle threads that snap when bent. Chef’s Hack: Don’t walk away! The temperature can skyrocket from 290°F to 310°F (burned territory) in a matter of seconds. The second it hits 300°F, pull the pot off the heat.
Step 4: Add Color and Flavor (The Quick & Careful Part)
Here’s the exciting part! Working quickly but carefully (that syrup is crazy hot), stir in the red food coloring and the 1 teaspoon of cinnamon oil. Warning: The fumes from the cinnamon oil will be very strong and potent when they hit the hot syrup. Don’t put your face directly over the pot—lean back a little and maybe turn on your vent hood. Stir just until everything is fully incorporated. The goal is to be swift so the syrup doesn’t start setting in the pot.
Step 5: Cool and Break (The Satisfying Finale)
Immediately pour the hot, red, fragrant syrup onto your prepared baking sheet. You can tilt the pan gently to spread it into a somewhat even layer, but don’t stress about perfection—we’re making rock candy, not windowpanes! Let it cool completely at room temperature. Do not refrigerate, as this can introduce moisture and make the candy sticky. Once it’s fully cooled and hard (about an hour), it’s time for the best part: breaking it! Use the handle of a knife, a meat mallet, or your hands (protected in a clean kitchen towel) to crack the candy into beautiful, irregular pieces. Dust the pieces lightly with powdered sugar to keep them from sticking together. Store in an airtight container.
How to Serve Your Spicy Masterpiece
This candy is a star all on its own, but presentation is half the fun! My favorite way to serve it is in a large, clear glass jar or a vintage-style candy bowl. Let those glossy red shards catch the light. It’s a stunning centerpiece for a holiday party or a cozy night in.
For gifting, divide the candy into small cellophane bags tied with a rustic ribbon, or pile it into decorative mason jars. Attach a little tag with the name “Firecracker Cinnamon Candy” or “Aunt Clara’s Famous Rock Candy.” Homemade gifts like this are always a huge hit because they’re made with love (and a little bit of fiery courage!). Of course, the best way to serve it is to just leave the jar on your counter and watch pieces mysteriously disappear throughout the day. It’s the perfect little pick-me-up with a cup of black coffee or as a bold finish to a meal.
Mix It Up: Creative Twists on a Classic
Once you’ve mastered the basic recipe, it’s time to get creative and make it yours! Here are a few of my favorite twists:
- Orange Cinnamon Fire: Add ½ tsp of orange extract along with the cinnamon oil for a citrusy twist that cuts through the heat beautifully. It tastes like a nostalgic Christmas ornament!
- Sparkling Cinnamon Gems: For a glitter effect, lightly spray the set candy pieces with edible food-grade spray (like Wilton Color Mist) or toss them in a bag with a pinch of edible shimmer dust before the powdered sugar.
- Shape It!: Instead of pouring onto a sheet pan, carefully pour the hot syrup into lightly greased silicone candy molds (hearts for Valentine’s Day, stars for the 4th of July!). This gives you perfectly shaped candies instead of free-form shards.
- Milder “Cinnamon Light”: If you love the flavor but not the intense heat, simply reduce the cinnamon oil to ½ teaspoon. It’ll be warm and spicy without bringing tears to your eyes.
- Apple Cider Candy: Substitute the water with reduced apple cider for a deep, autumnal flavor that pairs incredibly well with the cinnamon.
Jackson’s Chef Notes & Kitchen Stories
This recipe has evolved in my kitchen from a once-a-year holiday event to an anytime-I-need-a-lift treat. The biggest lesson I’ve learned? Respect the thermometer. I once tried to be a cowboy and guess the temperature. I ended up with a pot of caramelized (read: burnt) sugar and a kitchen that smelled like a campfire for two days. Not my finest hour!
Also, a funny note on the cinnamon oil fumes: the first time I made this in my apartment, my dog, Biscuit, trotted into the kitchen, sniffed the air, sneezed dramatically, and then turned around and walked right out. He gives the candy a wide berth to this day. So, ventilate your kitchen and maybe warn any curious pets or family members! It’s powerful stuff, but that’s what makes it so memorable.
FAQs & Candy Troubleshooting
Q: My candy turned out sticky and chewy, not hard and brittle. What happened?
A: This almost always means the syrup didn’t reach a high enough temperature. The most likely culprit is an inaccurate candy thermometer. Test your thermometer by placing it in a pot of boiling water; it should read 212°F (100°C). If it’s off by more than a degree or two, you’ll need to adjust your target temperature accordingly or invest in a new one.
Q: Can I use cinnamon extract instead of oil?
A> I strongly advise against it. As mentioned, extract contains water and alcohol, which will cause the molten sugar to bubble violently and seize up, creating a grainy, messy, and potentially dangerous situation. Oil-based flavoring is essential for candy making.
Q: Why did my candy have a gritty texture?
A: Grittiness is caused by sugar crystals forming during the cooking process. This can happen if you stirred the syrup after it started boiling, if sugar crystals splashed up on the side of the pan, or if your corn syrup wasn’t fresh. To prevent this, use a clean pastry brush dipped in water to wash down any sugar crystals on the sides of the pan during the first few minutes of boiling.
Q: How long does this candy keep, and how should I store it?
A: Stored correctly in an airtight container at room temperature (with that dusting of powdered sugar), your cinnamon rock candy will stay fresh and crunchy for up to 2 months! The key is keeping moisture out, so avoid humid environments.
Cinnamon Rock Candy
- Total Time: 30 minutes
- Yield: 50–60 pieces 1x
Description
This fiery cinnamon candy brings warmth and sparkle to your holiday candy jar. Bright red, glossy, and full of that nostalgic kick, it’s a time-honored treat that’s surprisingly easy to make at home.
Ingredients
3¾ cups granulated sugar
1½ cups light corn syrup
1 cup water
1 tsp cinnamon oil (not extract – must be oil-based for potency)
½ tsp red food coloring (gel or liquid)
Powdered sugar (for dusting)
Candy thermometer
Instructions
Prep your setup
Line a large baking sheet with foil and lightly grease it. Have your cinnamon oil and food coloring ready—this part moves fast!
Cook the syrup
In a heavy saucepan, combine sugar, corn syrup, and water. Stir over medium heat until sugar dissolves. Clip on a candy thermometer and stop stirring.
Reach hard crack
Continue cooking until the mixture reaches 300°F (hard crack stage). Remove from heat immediately.
Add color and flavor
Quickly stir in cinnamon oil and red food coloring. Be careful—fumes can be strong! Pour immediately onto the prepared pan.
Cool and break
Let cool completely, then crack into pieces using a knife or kitchen mallet. Dust with powdered sugar to prevent sticking.
Twists to Try
Orange Cinnamon: Add ½ tsp orange extract along with cinnamon for a citrusy twist
Glitter Effect: Use edible shimmer dust to make it sparkle
Shape It: Pour into silicone candy molds for hearts or stars instead of free-form shards
Less Heat: Use ½ tsp cinnamon oil for a milder version
- Prep Time: 10 minutes
- Cook Time: 20 minutes
Nutrition
- Calories: 60 / Piece
- Sugar: 15g / Piece
- Carbohydrates: 16g / Piece
Nutritional Information (For Your Info!)
Alright, let’s be real: this is a candy. It’s a treat, meant to be enjoyed in moderation for a burst of nostalgic flavor and fun. It’s naturally fat-free and, because it’s essentially sugar, it’s a carbohydrate-heavy treat. Here’s a rough breakdown per piece (assuming the batch is broken into about 55 pieces):
Estimated per piece: ~60 kcal | 0g fat | 16g carbs | 0g protein | 15g sugars
It’s the perfect little hit of sweetness to satisfy a craving without overdoing it. The joy and satisfaction of making it yourself? That’s calorie-free!
Final Thoughts: You’ve Got This!
Making candy at home might seem like a daunting, old-fashioned task, but I hope this guide has shown you how absolutely achievable and fun it can be. It’s about more than just the final product; it’s about the process. It’s about watching simple ingredients transform into something magical right on your stovetop. It’s about the incredible aroma that fills your kitchen and the immense pride you feel when you crack that first piece.
This Cinnamon Rock Candy is a testament to the idea that the most unforgettable foods are often the simplest ones, made with care and a dash of boldness. So, don your apron, trust your thermometer, and embrace the “what if we tried this?” energy. You’re about to create something truly awesome.
I’d love to hear how your candy-making adventure goes! Tag me on social @FoodMeld with your fiery red creations and your best candy-cracking videos. Let’s share the flavor and the fun. Until next time, happy cooking!
Jackson


