
Your New Favorite Holiday Tradition: Christmas Tree Brownie Bites!
Hey friends, Jackson from Food Meld here! Is there anything better than that magical, chaotic, and utterly delicious energy that takes over the kitchen during the holidays? The smell of sugar cookies, the sound of laughter, and the sheer joy of creating something with your own two hands—it’s my absolute favorite time of year. But I also know it can get hectic. Between shopping, decorating, and trying to remember which relative prefers white meat over dark, we could all use a recipe that’s equal parts show-stopping and simple. That’s where these little guys come in.
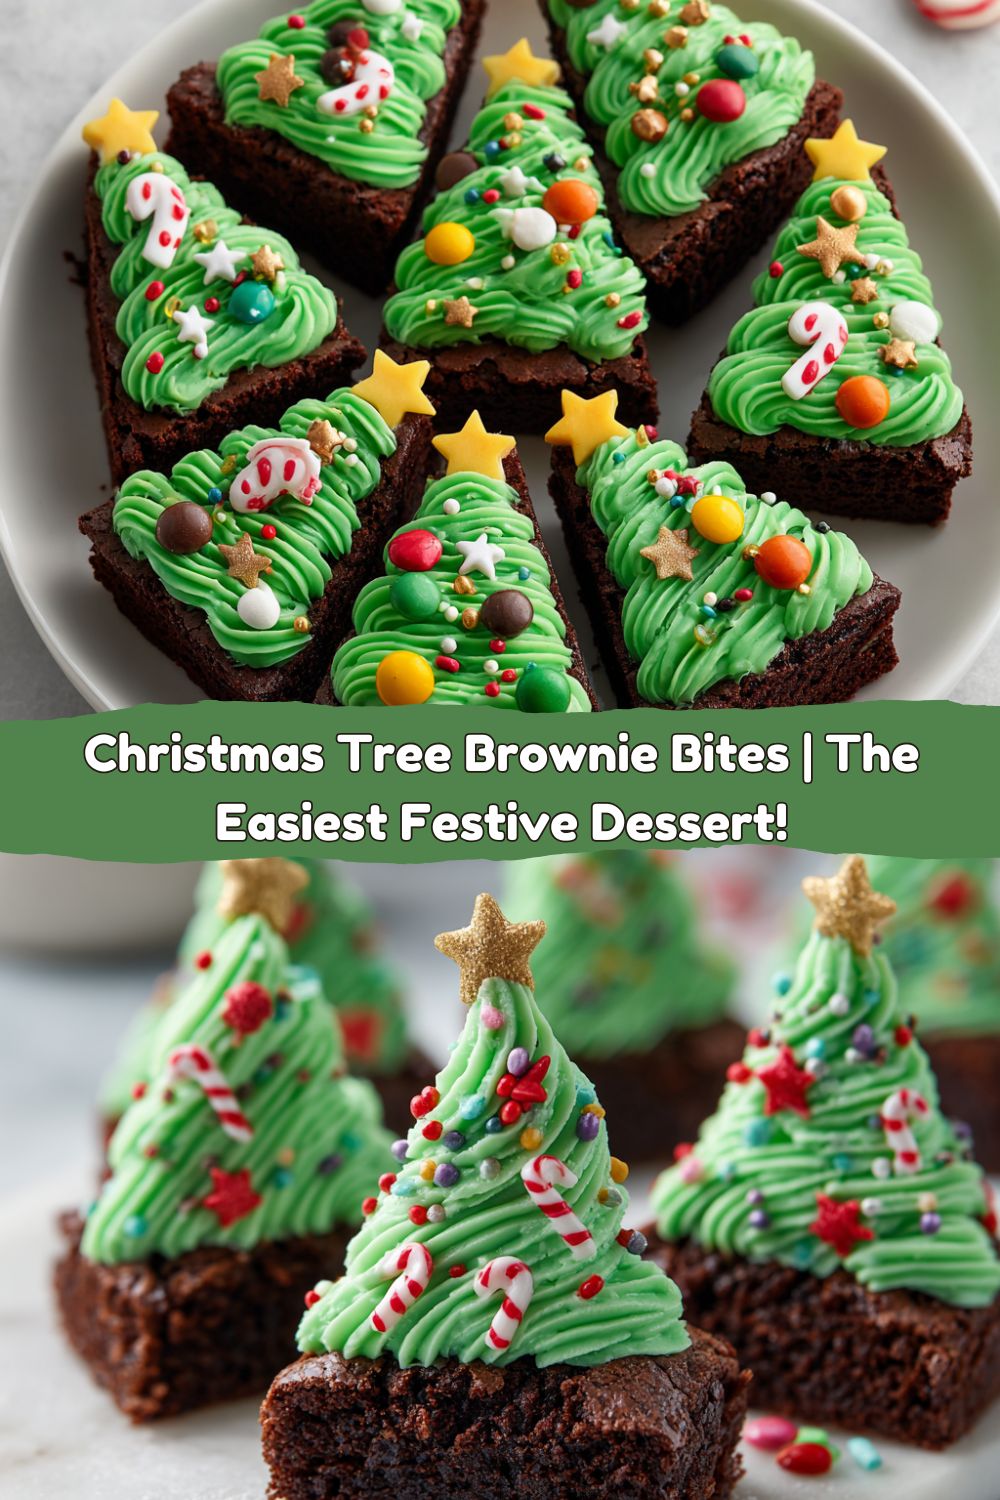
Say hello to your new party secret: Christmas Tree Brownie Bites. We’re talking rich, fudgy brownies transformed into adorable, edible evergreens with a simple swirl of frosting and a avalanche of festive sprinkles. They’re the perfect project to tackle with your kids, your partner, or a glass of eggnog in hand. They come together with minimal fuss but deliver maximum “wow” factor on any dessert platter. So, let’s put on some holiday tunes, preheat that oven, and cook up some awesome (and adorable) memories together. Welcome to the most delicious forest you’ll ever eat!
A Sweet Slice of Holiday Chaos
This recipe always takes me right back to my grandma’s kitchen, circa 1998. My cousin Mia and I were officially declared her “head decorators” for the annual Christmas Eve dessert spread. Our task? A batch of sugar cookies. Well, let’s just say a flour fight broke out, the red food coloring ended up more on our clothes than the icing, and our snowmen looked… traumatized. Grandma, being the saint she was, saw our deflated faces and quickly pivoted. She pulled a pan of basic brownies from the counter, showed us how to cut them into triangles, and handed us a bag of green frosting. “Just make trees,” she said. No rules, no pressure.
What followed was a mess of green frosting, a blizzard of multi-colored sprinkles, and the most lopsided, over-decorated, and profoundly joyful plate of brownie trees you’ve ever seen. They were the hit of the party. Not because they were perfect, but because they were made with pure, unadulterated fun. That’s the spirit I want to bring to you with this recipe. It’s not about perfection; it’s about the laughter, the mess, and the delicious memories you create along the way.
Gathering Your Forest-Friendly Ingredients
Here’s the beautiful part: you probably have most of this stuff already. This is about convenience meeting creativity, my favorite flavor combination!
- 1 Box Brownie Mix (plus the oil, eggs, and water it calls for) – My chef insight? Go for the “fudgy” style mix, not cakey. We want that dense, rich base that can hold all our decorations without crumbling. My personal favorite brand is Ghirardelli, but use what you love! This is a fantastic shortcut that lets us focus on the fun part—decorating!
- 1-2 Cups Green Frosting – You can absolutely use a store-bought tub of vanilla frosting tinted with green food gel (gel gives a richer color than liquid). Or, if you’re feeling fancy, my go-to vanilla buttercream is ready in 5 minutes. Pro tip: If using store-bought, whip it with a hand mixer for a minute to make it fluffier and easier to pipe!
- Holiday Sprinkles Mix – This is where your personality shines! Use classic red and green, go wild with multicolored nonpareils, or grab some festive jimmies. The sprinkles are the ornaments on your edible trees!
- Mini Candy Stars or Yellow M&Ms – The all-important tree topper! A little yellow candy star is classic, but a yellow M&M works beautifully too. It’s the perfect finishing touch.
- Mini Candy Canes (Optional) – Break these in half and poke them into the base of your brownie triangle to make an adorable little “tree trunk.” It adds a cute touch and a hint of peppermint!
Building Your Edible Evergreen Forest
Alright, team, let’s get building. Follow these steps, and you’ll have a forest of brownie trees in no time. I’ve packed this section with all my best hacks to make this process smooth and fun.
- Bake Those Brownies: First, preheat your oven according to your brownie mix package directions. Line a 9×13-inch baking pan with parchment paper, leaving some overhang on two sides. This is my #1 chef hack—it creates a sling that lets you lift the entire cooled brownie block out of the pan effortlessly. No more awkward flipping or breaking! Prepare your brownie batter according to the package instructions, pour it into your prepared pan, and bake until a toothpick inserted into the center comes out with a few moist crumbs (not wet batter). Let them cool completely in the pan on a wire rack. I know, I know—waiting is the hardest part! But decorating warm brownies is a fast track to Frosting Meltdown City.
- The Great Triangle Cut: Once your brownies are completely cool, use the parchment paper to lift the entire slab onto a cutting board. Now, for the geometry! Using a sharp knife or a pizza cutter (my tool of choice for clean edges), first cut the brownies into even squares or rectangles. Then, cut each square diagonally to create two triangles. For super-clean cuts, wipe your blade clean between slices. You should get about 18-24 trees, depending on how you size them.
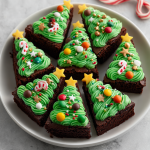
- Pipe Your Christmas Trees: Scoop your green frosting into a piping bag fitted with a star tip (like a Wilton 1M or 2D). No piping bag? No problem! A zip-top bag with a corner snipped off works perfectly. Now, channel your inner pastry artist. Starting at the top of the triangle, pipe a zig-zag line back and forth all the way down to the base to create that classic “Christmas tree” look. Or, for a fancier look, pipe a continuous swirl from the top down. Don’t stress! Every tree has its own character. Lopsided trees have more charm, I promise.
- Deck the Halls (and the Trees!): This is the best part—time for the ornaments! Immediately after piping on the green frosting, generously shower your trees with holiday sprinkles. The frosting is still tacky, so they’ll stick perfectly. Gently press a candy star or yellow M&M onto the very tip-top of each tree. If you’re using the optional candy cane trunks, break them in half and gently insert the straight end into the base of each brownie triangle.
How to Serve Your Festive Masterpiece
Presentation is part of the fun! You’ve created these adorable edible works of art, so let’s show them off. Arrange your Christmas Tree Brownie Bites on a large platter or a wooden cutting board to create a sweet little forest scene. For an extra festive touch, dust the platter with a light shower of powdered sugar “snow” before placing the trees.
These are the ultimate party treat. Set them out as the grand finale to your holiday dinner, bring them to your cookie exchange to absolutely steal the show, or package them up in cute cellophane bags tied with a ribbon as heartfelt homemade gifts for neighbors, teachers, or your mail carrier. They’re a guaranteed smile-maker.
Mix It Up: Creative Twists on the Classic
Feel free to get creative and make this recipe your own! Here are a few of my favorite twists:
- Peppermint Patty Forest: Add a layer of thin peppermint patties or Andes mints to the bottom of your baking pan before pouring in the brownie batter. You’ll get a amazing minty surprise at the base of every tree!
- Nutty Evergreens: Stir ½ cup of chopped toasted pecans or walnuts into your brownie batter before baking for a wonderful crunch that contrasts with the creamy frosting.
- Dark Chocolate Ganache Drizzle: For the chocoholics (I see you!), skip the green frosting and drizzle the trees with a simple dark chocolate ganache. Then decorate with crushed peppermint bits and a gold star topper for a more sophisticated, less-sweet look.
- Gluten-Free & Dairy-Free Friendly: Easily adapt this! Use your favorite gluten-free brownie mix and ensure your frosting and toppings are certified GF. For dairy-free, use a DF brownie mix (or from scratch), and whip up a buttercream using vegan butter and plant-based milk.
Jackson’s Chef Notes & Kitchen Stories
This recipe has evolved so much from those first lopsided trees in my grandma’s kitchen. The biggest game-changer was definitely the parchment paper sling. The first time I made these without it, I tried to cut them in the pan and ended up with scratched-up non-stick coating and crumbly edges. Lesson learned!
Another funny fail: one year I was too impatient and tried to frost slightly warm brownies. Let’s just say my “trees” quickly turned into a “green landslide disaster.” The lesson? Patience is a virtue, especially in baking. Now, I often bake the brownies the night before and decorate them the next day with a cup of coffee and some Christmas music. It’s become one of my favorite peaceful holiday rituals.
FAQs: Your Questions, Answered
Q: My frosting is too runny and won’t hold its shape! What did I do wrong?
A: This usually happens if the butter in homemade frosting is too soft or if you’re using a store-bought frosting that’s been microwaved too long. The fix is easy! For homemade, chill it in the fridge for 20-30 minutes to firm up. For store-bought, you can also chill it or try whipping in a tablespoon or two of powdered sugar to help thicken it up.
Q: Can I make these ahead of time?
A: Absolutely! You can bake and cut the brownie triangles up to 2 days in advance. Keep them in an airtight container at room temperature. I recommend decorating them the day you plan to serve them for the freshest look and texture. The decorated trees will stay great for about 24 hours at room temperature.
Q: My brownies are crumbling when I cut them. Help!
A> Two tips: First, ensure they are completely cool. Warm brownies are fragile. Second, use a sharp knife and clean it with a hot, damp cloth between cuts. For ultra-sharp, clean edges, you can even pop the *fully cooled* brownie slab into the freezer for 15-20 minutes before cutting. It works like a charm!
Christmas Tree Brownie Bites
- Total Time: ~1 hr
- Yield: ~18 tree brownies
Description
These Christmas Tree Brownie Bites are fun, festive, and incredibly easy to make. Rich brownie triangles become merry little trees with a swirl of green frosting and holiday sprinkles. Perfect for parties, cookie platters, or decorating with kids, they’re a sweet way to spread cheer.
Ingredients
1 box brownie mix (plus ingredients to prepare)
Green frosting (store-bought or homemade)
Holiday sprinkles
Mini candy stars or M&Ms (for tree toppers)
Mini candy canes (optional for “tree trunks”)
Instructions
Prepare brownies in a 9×13-inch pan according to package instructions. Let cool completely.
Cut cooled brownies into triangles (use a pizza cutter or knife, clean between cuts).
Pipe green frosting in a zigzag or swirl on each triangle to resemble a tree.
Add sprinkles and candy stars for ornaments and toppers.
Optional: Break candy canes and insert into base of each triangle as a trunk.
- Prep Time: 15 minutes
- Decorate Time: 20 min
- Cook Time: 25–30 min
Nutrition
- Calories: 180 / tree brownie
- Sugar: 18g / tree brownie
- Fat: 8g / tree brownie
- Carbohydrates: 26g / tree brownie
- Protein: 2g / tree brownie
Nutritional Information*
*Please note: This is an approximate estimate based on the ingredients listed and a yield of 18 brownies. Values can vary significantly based on specific brands and ingredient choices.
- Prep Time: 15 min
- Bake Time: 25–30 min
- Decorating Time: 20 min
- Total Time: ~1 hr
- Yield: ~18 tree brownies
Per brownie bite (approximate):
- Calories: 180
- Fat: 8g
- Carbohydrates: 26g
- Sugar: 18g
- Protein: 2g
Let’s Keep the Holiday Spirit Baking!
Well, that’s it, friends! Your guide to creating the most festive, fun, and downright delicious Christmas Tree Brownie Bites on the block. I hope this recipe brings as much joy and laughter to your kitchen as it has to mine over the years. Remember, it’s not about creating a perfect, magazine-worthy dessert. It’s about the flour on your nose, the sprinkles on the floor, and the proud smile on your face when you present your edible forest to the people you love.
I’d love to see your creations! Tag me @FoodMeld on Instagram or Pinterest with your photos. You’re all officially honorary members of the Food Meld family now. From my kitchen to yours, have a happy, safe, and incredibly tasty holiday season. Let’s cook something awesome together again soon!


