
Your New Favorite Holiday Tradition: Christmas Hot Chocolate Cup Stirrers
Hey friends, Jackson from Food Meld here! Is there anything better than wrapping your hands around a steaming mug of hot chocolate on a chilly December day? The rich, chocolatey steam fogging up your glasses, the first sip that just warms you from the inside out… it’s pure, uncomplicated joy. But what if I told you we could take that cozy classic and turn it into something unforgettable, something that’s not just a drink but an experience? Enter: the Christmas Hot Chocolate Cup Stirrer.
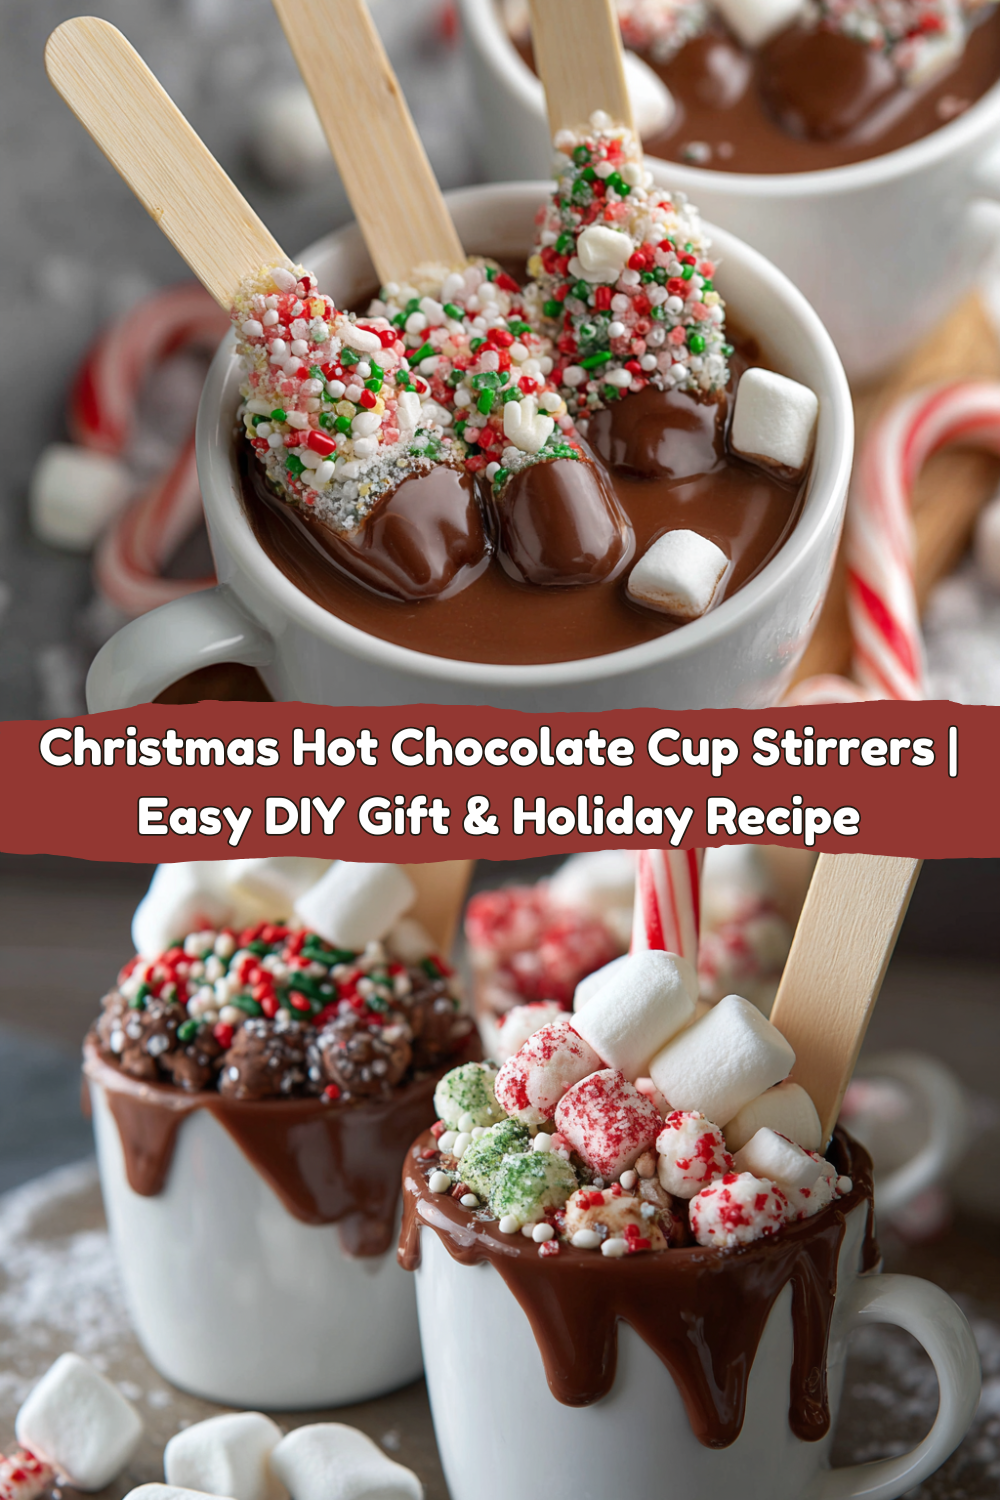
Imagine this: you’re holding a beautiful, festive chocolate cup, loaded with mini marshmallows, crushed candy canes, and holiday sprinkles, perched on the rim of your mug. You pour in hot milk, give it a stir, and watch as the magic happens. The chocolate melts into a velvety pool, the toppings swirl into a festive flurry, and in seconds, you’ve crafted the most decadent, personalized cup of cocoa imaginable. It’s fun, it’s foolproof, and it’s the kind of kitchen magic I live for at Food Meld. Whether you’re making them for a quiet family movie night, a festive party, or as the most adorable homemade gift, these stirrers are about to become your holiday MVP. So, let’s ditch the dusty powder packets and cook something awesome together!
A Stirring of Memories: My First Cocoa Catastrophe
This recipe takes me right back to my grandma’s kitchen, circa 1998. I was “helping” her make Christmas Eve cocoa, which mostly meant I was covertly eating more marshmallows than I was putting in the mugs. Her method was simple: a saucepan, whole milk, and a few squares of baking chocolate she’d whisk until smooth. One year, I decided to be a “creative chef” and added a whole handful of those red and green chocolate mints you get at restaurants. Let’s just say my bold fusion experiment resulted in a weirdly minty, grainy, and frankly, kind of green-tinted concoction. My family still ribs me about the “Grinccholate” incident.
But you know what? That “failure” is exactly the spirit of Food Meld. It was messy, it was fun, and it was a moment we all still laugh about. These stirrers are my redemption arc! They let you channel that “what if we tried this?” energy into a guaranteed success. You get to play with flavors and toppings, but the core—the perfect, rich chocolate—is already locked in. No Grinccholate here, just pure, melty, holiday happiness.
Gathering Your Cocoa Crew: What You’ll Need
Here’s the beautiful part: this is less of a strict recipe and more of a flavorful blueprint. You probably have half of this stuff in your pantry already! This list is your starting point—feel free to get creative and make it yours.
- 2 cups chocolate chips (milk, dark, or white): This is your base, the star of the show! I’m a dark chocolate guy (around 60-70%) for a richer, less sweet cocoa. Chef’s Insight: The quality of your chocolate directly impacts your drink. A good bar of chocolate chopped up will give you an even smoother melt, but high-quality chips work beautifully too. For a dairy-free version, simply grab your favorite vegan chocolate chips!
- 2 tbsp cocoa powder (optional, for extra richness): This is my secret weapon for a deep, double-chocolate flavor. It amps up the chocolate intensity without making it too sweet. If you’re a super-chocoholic like me, don’t skip it!
- Mini marshmallows: The classic. They stay suspended in the chocolate and melt into that wonderful gooey layer on top of your drink. If you can find them, the multi-colored holiday ones add a extra dose of cheer.
- Crushed candy canes or peppermints: This is where that festive “peppermint mocha” vibe comes in. The crunch and cool peppermint flavor cutting through the rich chocolate is *chef’s kiss*. Pro tip: crush them in a zip-top bag with a rolling pin—it’s therapeutic after a long day of holiday shopping!
- Holiday sprinkles: These are purely for joy. They don’t add a ton of flavor, but they make these stirrers look absolutely magical. Use jimmies, nonpareils, or even those little holiday-shaped quins.
- Wooden sticks, spoons, or candy canes for stirring: Your handle! Wooden craft sticks are cheap and perfect for gifting. For serving at a party, little espresso spoons are adorable. And for the ultimate festive touch, use whole mini candy canes as your stirrer—it looks amazing and infuses even more peppermint flavor.
Let’s Make Some Magic: The Simple Steps
Alright, team, let’s get melting! This process is so simple and a fantastic activity to do with kids. Just remember: we’re working with chocolate, which can be a little temperamental. Low and slow is the name of the game.
- Melt your chocolate. Grab a heatproof bowl (glass or metal) and set it over a saucepan of barely simmering water. Make sure the bottom of the bowl isn’t touching the water—we’re using steam heat here, not direct heat. Pour in your chocolate chips and stir gently and constantly as they melt. Chef’s Hack: If you’re in a hurry, the microwave works too! Do it in 20-30 second bursts on 50% power, stirring well between each burst. This prevents the chocolate from scorching and seizing up. We want it smooth and glossy!
- Boost the flavor. Once the chocolate is completely smooth and liquid, take it off the heat. If you’re using that secret weapon cocoa powder, sift it in now and stir until it’s completely combined and lump-free. This is also the time to add a pinch of espresso powder or a dash of cinnamon if you’re feeling fancy!
- Fill your molds. Now for the fun part! You can use dedicated silicone molds (they pop out perfectly), a mini muffin tin lined with paper liners, or even an ice cube tray. Spoon the melted chocolate into your chosen vessel, filling each cavity about 3/4 of the way full.
- Add your stirrer. This is the crucial structural step! Gently press your wooden stick, spoon, or candy cane into the center of each chocolate pool. Push it down so it’s submerged and anchored in the chocolate. This will ensure it doesn’t fall out when you’re stirring your drink later.
- Top it off! Immediately after inserting your stick, while the chocolate is still wet, shower on your toppings. Press a few mini marshmallows into the surface, sprinkle on the crushed candy canes, and go to town with the sprinkles. The chocolate acts as glue, locking all that goodness in place.
- Let them set. Patience, young grasshopper! You can let them set at room temperature if your kitchen is cool, but to speed things up, I always pop the whole tray into the refrigerator for about 30 minutes. You’ll know they’re ready when the chocolate is firm to the touch.
- The grand unveiling. If you used a silicone mold or paper liners, they should pop right out. If you used an ice cube tray, you might need to gently twist them loose. And just like that, you’ve created edible holiday magic!
How to Serve Up the Cozy
Okay, you’ve made these gorgeous stirrers. Now, how do you turn them into the best cup of hot chocolate of your life? It’s a show in itself!
First, warm up your milk. I highly recommend whole milk for the creamiest, richest result, but any milk or milk alternative you love will work beautifully. Heat it in a saucepan over medium heat until it’s steaming hot, but not boiling. Pour it into your favorite festive mug, leaving a little room at the top.
Now for the main event: perch a stirrer on the rim of the mug. I love the moment right before you stir—it looks so pretty and inviting. Then, just dunk it in and start stirring! Watch as the chocolate dissolves into ribbons, the marshmallows start to float, and the candy canes create little bursts of red and white. It’s hypnotic! Stir until it’s all melted into a perfectly unified cup of joy. Top with an extra handful of marshmallows or a drizzle of caramel if you’re feeling extra, and enjoy immediately.
Mix It Up: Creative Twists on the Classic
The fun doesn’t stop with peppermint! This recipe is a blank canvas for your holiday flavor dreams. Here are a few of my favorite ways to mix it up:
- Salted Caramel Pretzel: Use milk chocolate. Before adding the chocolate to the mold, press in a few mini pretzel pieces. Top with a generous pinch of flaky sea salt and a few more pretzel bits. The sweet, salty, crunchy combo is unbelievable.
- Cookies & Cream: Use white chocolate as your base. Stir in 2 tablespoons of crushed Oreo cookie crumbs into the melted white chocolate before pouring. Top with more crushed Oreos. It’s like a liquid cookies and cream milkshake, but warm and cozy.
- Spiced Mexican Hot Chocolate: Use dark chocolate. To the melted chocolate, add a quarter teaspoon of cinnamon and a tiny pinch of cayenne pepper. Top with a cinnamon stick as your stirrer instead of a candy cane for a warm, gently spiced kick.
- Toasted Coconut: Use dark or milk chocolate. Top with a big sprinkle of toasted coconut flakes. It adds a wonderful nutty flavor and a tropical twist that feels surprisingly festive.
- Nutty Buddy: Stir a tablespoon of Nutella or your favorite hazelnut spread into the melted chocolate. Top with chopped, toasted hazelnuts. It’s rich, decadent, and perfect for a grown-up gathering.
Jackson’s Chef Notes & Kitchen Stories
I’ve made a lot of batches of these over the years, and they’ve become my go-to “oh crap, I need a hostess gift” lifesaver. I once showed up to a holiday party empty-handed and whipped up a batch in my host’s kitchen in about 45 minutes flat. They were a bigger hit than the main course! The recipe has evolved from simple chocolate disks to these loaded cup versions because, well, why not go big?
A funny tidbit: my dog, Biscuit, is obsessed with the smell of melting chocolate (don’t worry, he never gets any!). He will park himself directly in front of the oven when these are setting, just hoping for a crumb to fall. It’s our little holiday kitchen standoff. The key takeaway? Have fun with it. Let the kids add way too many sprinkles. Taste-test the melted chocolate. Make a mess. That’s where the best memories are made.
Your Questions, Answered!
Q: My chocolate got clumpy and grainy when I melted it. What happened?
A: Ah, you’ve encountered “seized” chocolate! This usually happens if a tiny drop of water or steam gets into the melting chocolate. It’s frustrating, but not hopeless. You can sometimes save it by immediately stirring in a teaspoon of neutral oil (like vegetable or coconut oil) until it smooths back out. To prevent it, always make sure your bowl is completely dry and avoid letting the simmering water touch the bottom of the bowl.
Q: Can I make these dairy-free?
A: Absolutely! This is a great dairy-free option. Use dairy-free chocolate chips (like Enjoy Life brand) and top with dairy-free marshmallows (Dandies are great). When it’s time to serve, just use your favorite plant-based milk like oat, almond, or coconut. It works like a charm.
Q: How far in advance can I make these? How do I store them?
A: They are a fantastic make-ahead treat! Once set, store them in an airtight container in the refrigerator for up to two weeks. You can also layer them between sheets of parchment paper so they don’t stick together. For gifting, keep them in a cool, dry place (not next to the oven!) for a few days.
Q: My toppings are falling off! How do I make them stick?
A: The key is to add your toppings immediately after pouring the chocolate and inserting the stick, while the surface is still wet and tacky. Gently press them in slightly to help them adhere. If the chocolate has already started to set, they won’t stick as well.
Christmas Hot Chocolate Cup Stirrers
- Total Time: 50 minutes
- Yield: 12 stirrers 1x
Description
Festive, fun, and oh-so-easy—these hot chocolate stirrers are like stirring a little holiday magic right into your mug. Made with chocolate, sprinkles, and seasonal add-ins, they melt into warm milk or cocoa for a rich, cozy drink. They also make great homemade gifts!
Ingredients
2 cups chocolate chips (milk, dark, or white)
2 tbsp cocoa powder (optional, for extra richness)
Mini marshmallows
Crushed candy canes or peppermints
Holiday sprinkles
Wooden sticks, spoons, or candy canes for stirring
Instructions
Melt chocolate in a heatproof bowl over simmering water (or in the microwave in 30-second bursts). Stir until smooth.
Stir in cocoa powder if using.
Pour melted chocolate into silicone molds, ice cube trays, or small paper cups.
Insert a wooden stick, spoon, or candy cane into the center of each mold.
While chocolate is still soft, top with marshmallows, crushed candy canes, or sprinkles.
Let cool at room temperature or refrigerate until set. Remove from molds.
To use, stir one into a cup of hot milk until melted.
- Prep Time: 20 minutes
- Cook Time: 30 minutes
Nutrition
- Calories: 130 / stirrer
- Fat: 8g / stirrer
- Carbohydrates: 15g / stirrer
- Fiber: 1g / stirrer
- Protein: 1g / stirrer
Quick Nutrition Breakdown (Per Stirrer)
Okay, let’s be real: this is a holiday treat, not a health food. But it’s good to know what you’re enjoying! This approximate nutritional info is for one milk chocolate stirrer made with the base recipe, assuming you get 12 stirrers from the batch. Remember, this is just for the stirrer itself, not the milk you add.
- Calories: 130
- Protein: 1g
- Fat: 8g
- Carbohydrates: 15g
- Fiber: 1g
To lighten it up a bit, you can use dark chocolate (which often has less sugar) and opt for lower-fat milk when you prepare your drink. But my professional opinion? Enjoy every single delicious, indulgent bite. It’s Christmas!
Wrapping It All Up
Well, there you have it, my friends—your ticket to the easiest, most festive hot chocolate experience on the block. These Christmas Hot Chocolate Cup Stirrers are more than just a recipe; they’re a little project filled with love, a fantastic gift from the heart, and a surefire way to create a “you’ve gotta try this!” moment this holiday season.
I hope you have as much fun making them as I do. Remember, cooking is about the joy you stir into it. So put on some holiday tunes, get your family involved, and make a beautiful, delicious mess. From my kitchen at Food Meld to yours, I wish you the coziest, most flavor-packed holidays ever. Now, let’s go cook something awesome!


