
Ditch the Dishes, Grab a Cone: Your New Favorite No-Bake Dessert is Here!
Hey friends, Jackson here from Food Meld. Let’s talk about a universal truth: sometimes, you just need dessert. Not a fussy, four-layer cake that dirties every bowl in the kitchen, but something sweet, special, and downright fun. Something that makes you feel like a kid again but tastes like a gourmet treat. That’s exactly the energy I was channeling when I created these Chocolate Strawberry Cheesecake Cones.
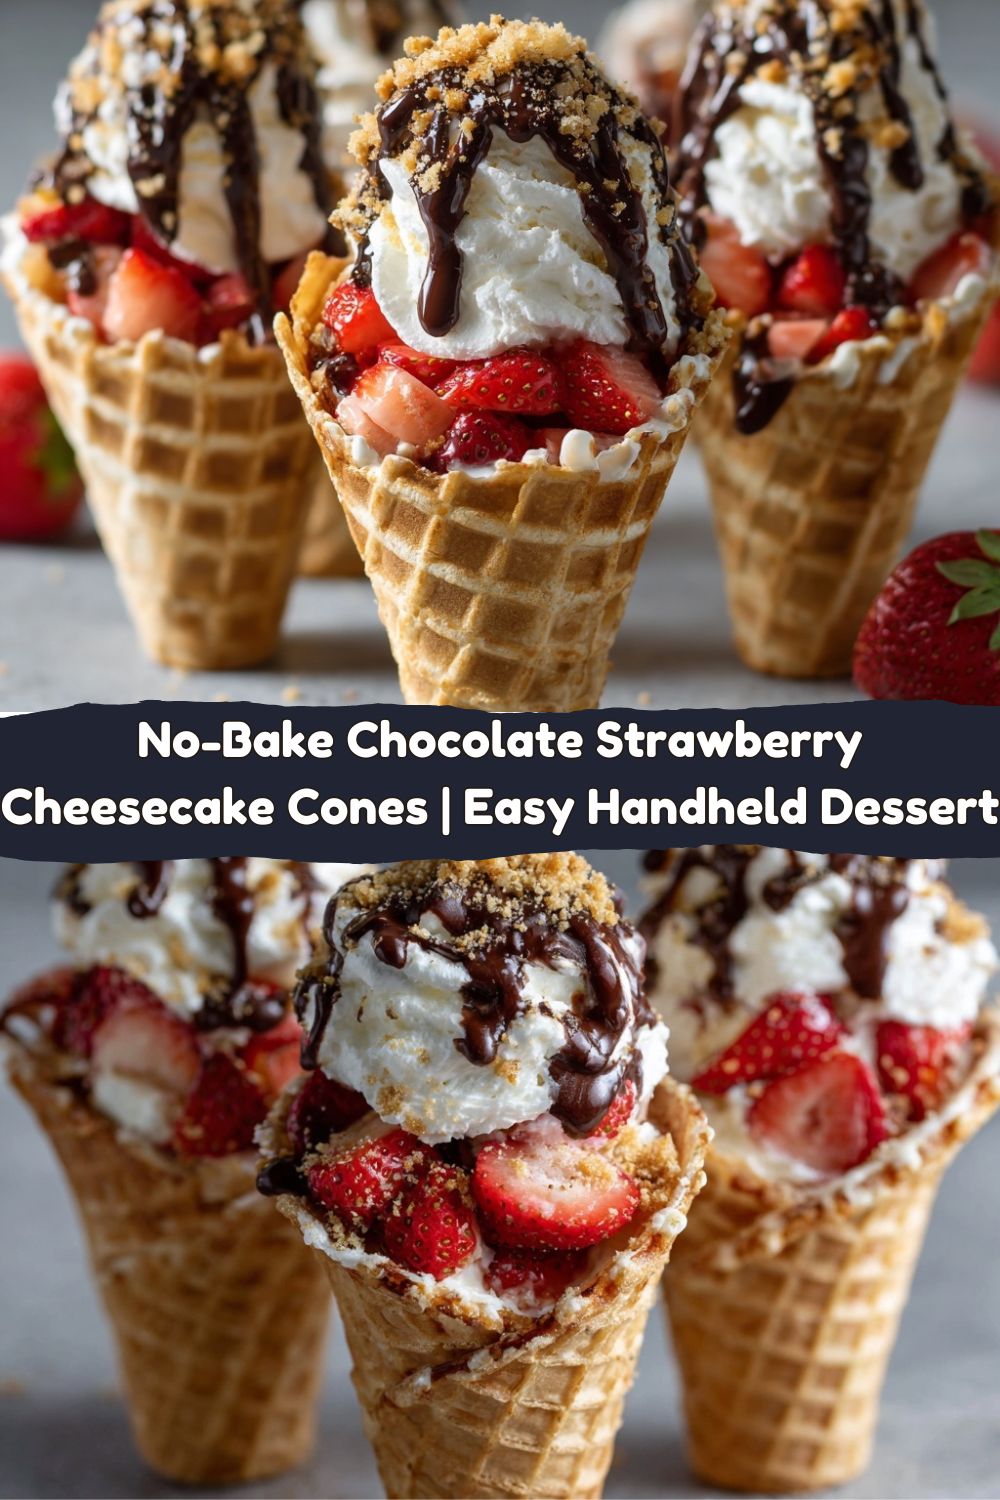
Picture this: a crispy, sweet waffle cone, not filled with ice cream, but with a cloud of creamy, tangy cheesecake mousse. It’s speckled with juicy, ripe strawberries and ribbons of rich, melted chocolate. Every bite is a perfect meld of texture and flavor—crunchy, creamy, fruity, and decadent. And the best part? You don’t even have to turn on your oven. Zero baking required.
These cones are the ultimate solution for those “I-want-something-awesome-now” moments. They’re perfect for beating the summer heat, wowing guests at a party (no forks needed!), or turning a regular Tuesday into a mini celebration. They come together faster than you can decide what to watch on TV, and they have that magical “wow” factor that makes people think you’re a dessert genius. So, let’s toss the rulebook out the window, embrace the mess, and make a dessert that’s as joyful to eat as it is to make. Get ready to fall in love with your new go-to sweet treat.
The Ice Cream Truck & The “What If” Moment
This recipe was born from a serious case of nostalgia. When I was a kid, the sound of the ice cream truck jingle was basically the soundtrack to summer. I’d sprint outside, coins clutched in my sticky hand, and always, always get a chocolate-dipped vanilla cone. That first crack of the shell, the mix of textures… it was heaven.
Fast forward to last summer. I was testing a no-bake cheesecake filling, and my neighbor’s kids were running around with those same classic cones. It hit me like a lightning bolt of flavor inspiration: What if we put the cheesecake in the cone? What if we took that beloved handheld joy and gave it a grown-up, flavor-packed twist? I ran into my kitchen (apologizing to the neighbors mid-conversation, I’m sure), and started playing. The first prototype was messy. The second was a little unstable. But the third? The third was pure magic. It tasted like my childhood summers had a delicious glow-up. It’s that spirit of playful “what if?” that I live for at Food Meld, and friends, I’m so excited to share this happy accident with you.
Gathering Your Flavor Toolkit
Here’s the beautiful part: you only need a handful of simple ingredients to create something extraordinary. Let’s break them down, because knowing your ingredients is the first step to making a dish truly yours.
- 6 Waffle Cones: The edible vessel of joy! I like the classic sugar cones for their sturdiness and slight caramelized flavor. Chef Insight: Give them a quick check for any cracks at the bottom before you start—it prevents any filling leaks!
- 1 cup Cream Cheese, softened: The heart of the operation. Use full-fat for the richest, creamiest texture. Pro Tip: Leave it on the counter for a good 30-60 minutes. Soft cream cheese blends smoothly, preventing lumps in your mousse.
- ½ cup Powdered Sugar: Our sweetener. It dissolves instantly and helps keep the filling smooth. Substitution: For a less sweet option, you can start with ⅓ cup and taste. Maple syrup or honey can work in a pinch, but they will make the filling a bit softer.
- 1 teaspoon Vanilla Extract: The flavor enhancer. Pure vanilla adds a beautiful warmth. Fun Twist: Try almond extract for a different vibe!
- 1 cup Whipped Cream or Whipped Topping: This is what gives our filling its dreamy, airy lift. Chef’s Choice: I love whipping my own heavy cream with a tablespoon of sugar for freshness, but a quality store-bought whipped topping (like Cool Whip) works perfectly for ultimate ease and stability.
- 1 cup Fresh Strawberries, diced: The juicy, tart pop of freshness that cuts through the richness. Insight: Make sure they’re dry after washing! Extra water can make the filling runny.
- ½ cup Melted Chocolate (dark or milk): The glue, the drizzle, the magic shell! Hack: Melt it with a tiny teaspoon of coconut oil to make it more fluid for dipping and drizzling. Semi-sweet chips are my go-to for perfect balance.
- Optional: Crushed Graham Crackers or Sprinkles: The finishing touch! Graham crackers nod to the classic cheesecake crust, while sprinkles scream “party time.”
Let’s Build Some Edible Magic: Step-by-Step
Alright, team. Let’s get our hands delightfully messy. This process is simple, but a few key moves will ensure your cones are Instagram-worthy and, more importantly, mouthwateringly good.
Step 1: The Chocolate Dip (The Fun Foundation)
First, melt your chocolate in a microwave-safe bowl in 20-second bursts, stirring in between. Be patient—burnt chocolate is a sad thing. Once smooth, grab your cones. Dip the top inch or so of each cone into the chocolate, twirling to coat evenly. Let the excess drip off, then place them upright in a glass or a stand (an egg carton works amazingly for this!). This step does two things: it creates a delicious chocolate rim, and it seals the inside of the cone, creating a moisture barrier so your cone stays crisp longer. Let them set while you make the filling.
Step 2: The “No-Stress” Cheesecake Mousse
In a medium bowl, beat your softened cream cheese with a hand mixer (or a strong arm and a whisk!) until it’s completely smooth and creamy. This is crucial—no one wants lumps. Add the powdered sugar and vanilla, and beat again until it’s fully incorporated and fluffy. Now, here’s the gentle part: add your whipped cream. Fold it in with a spatula using big, sweeping motions from the bottom up. We’re not beating; we’re preserving all that lovely air to keep the filling light as a cloud. Fold until you see no more white streaks.
Step 3: The Layered Assembly Line
Time to build! You can spoon the filling in, but for prettier, neater cones, I like to use a piping bag fitted with a large round tip. No piping bag? No problem. A zip-top bag with the corner snipped off is your trusty stand-in. Start with a small layer of filling at the bottom. Add a few pieces of diced strawberry. Pipe in more filling, add more strawberries, and repeat until the cone is filled to the top. The layers create little pockets of fruity surprise in every bite. Don’t pack it too tight—let the mousse stay fluffy.
Step 4: The Grand Finale (Drizzle & Sprinkle!)
Take your remaining melted chocolate and drizzle it artistically over the tops. Go zig-zag, go swirls, go wild! Immediately, while the chocolate is wet, sprinkle on your crushed graham crackers or sprinkles. This is where they stick and create that gorgeous, textured top.
Step 5: The Patient Chill
I know, it’s hard. But pop these beauties on a plate or stand and let them chill in the fridge for at least 15-30 minutes. This firms up the mousse just slightly, sets the chocolate drizzle, and makes them the perfect cool, creamy treat. Trust me, it’s worth the wait.
How to Serve These Showstoppers
Presentation is part of the fun with these cones! Forget plates—these are handheld wonders. I like to stand them up in a tall glass, a mug, or even a cute napkin-lined basket for a casual backyard gathering. For a party, create a “cone stand” by inverting a muffin tin and placing the cones in the cups—it’s a total conversation starter.
Pair them with a glass of cold milk, a shot of espresso, or a bubbly glass of Prosecco for the adults. They’re rich, so one cone is the perfect serving of sweet satisfaction. If you’re feeling extra, set out small bowls of additional toppings like mini chocolate chips, toasted nuts, or even a berry coulis for dipping. Let people customize their second round (because there will be a second round).
Make It Your Own: 5 Flavor Twists to Try
The basic formula here is your playground. Once you master the classic, try one of these delicious spins!
- Lemon Berry Bliss: Add the zest of one lemon to the cream cheese filling. Use a mix of blueberries and raspberries instead of just strawberries. The citrus brightens everything up!
- Cookies & Cream Dream: Fold ½ cup of finely crushed Oreos into the cheesecake mousse. Use chocolate cones if you can find them, and top with more cookie crumbs.
- Tropical Escape: Fold ½ cup of finely diced dried mango and toasted coconut into the filling. Dip the cone rims in white chocolate and roll in more coconut.
- PB&J Nostalgia: Swirl 2 tablespoons of creamy peanut butter into the filling. Layer with strawberry or grape jam instead of fresh fruit. Top with chopped salted peanuts.
- Dairy-Free Delight: Use your favorite vegan cream cheese and coconut whipped cream. Ensure your chocolate is dairy-free. It works like a charm!
Jackson’s Kitchen Notes & Stories
This recipe has seen a few hilarious fails. My first attempt, I used a runny filling and didn’t chill them. Let’s just say it was more of a “cheesecake soup cone” situation—delicious but structurally unsound. Lesson learned: the chill time is non-negotiable!
I also learned that kids are the ultimate taste testers. My little niece declared these “better than birthday cake,” which is the highest honor in my book. Over time, I’ve found that letting the filled cones chill for the full 30 minutes makes them perfect for transporting to a potluck—just keep them upright in a carrier. This recipe is a testament to playing with your food. Don’t be afraid to get creative!
Your Questions, Answered
Q: My cones are getting soggy. What did I do wrong?
A: Sogginess usually comes from two things: 1) The strawberries weren’t patted completely dry, or 2) The cones weren’t eaten quickly enough after filling. The chocolate dip seal helps a LOT, but these are best enjoyed within a few hours of assembly for maximum crunch.
Q: Can I make these ahead of time?
A: Absolutely! You can make the filling and chop the strawberries up to a day ahead, storing them separately in the fridge. Assemble the cones 1-2 hours before serving for the best texture.
Q: Is there a way to make these less sweet?
A> For sure. Use a less-sweet dark chocolate (70%), reduce the powdered sugar in the filling to ⅓ cup, and rely on the natural sweetness of ripe berries. You can also use plain whipped cream without added sugar.
Q: My filling is too runny to pipe. Help!
A> This likely means your cream cheese was too warm or your whipped cream wasn’t stiff enough. Pop the whole bowl of filling into the fridge for 20 minutes to firm up, and it should pipe beautifully.
Nutritional Snapshot (Because We’re Curious!)
Alright, let’s keep it real. This is a dessert, and it’s meant to be enjoyed as a delightful treat! Here’s a general breakdown per cone (approximate, and will vary based on specific ingredients used):
Per Cone: Calories: ~290 | Total Fat: 17g | Saturated Fat: 10g | Carbohydrates: 30g | Sugar: 20g | Protein: 4g
The fat comes from the cream cheese, whipped cream, and chocolate—giving us that luxurious, satisfying mouthfeel. The carbs are a mix from the cone, sugar, and fruit. To lighten it up slightly, you can use neufchâtel cheese (⅓ less fat cream cheese), light whipped topping, and increase the strawberry ratio. But for a once-in-a-while special treat, I say enjoy the full, glorious version!
Your New Go-To Party Trick
And there you have it, friends—the recipe that turns a simple waffle cone into a portable party. These Chocolate Strawberry Cheesecake Cones are more than just a dessert; they’re a reminder that cooking should be playful, approachable, and packed with those “you’ve gotta try this” moments I’m always chasing.
They prove that you don’t need fancy equipment or hours of time to make something unforgettable. You just need a little creativity and the courage to ask, “What if?” I hope you’ll whip up a batch, share them with someone you love, and experience that pure, unadulterated joy of a dessert that’s as fun to hold as it is to eat.
If you make them (and I really hope you do), tag me over at @FoodMeld—I live for seeing your kitchen creations. Now, go forth and meld some flavor! Until next time, keep your spatulas handy and your sense of adventure ready.
Happy cooking,
Jackson Walker


