Forget Everything You Knew About Chocolate Chip Cookies
Hey friends, Jackson here from Food Meld! Let’s get straight to it: we all have a vision of the perfect chocolate chip cookie, right? For some, it’s thin and crispy, shattering into a million buttery pieces. For others (and I’m raising my hand high here), it’s all about that soft, thick, and gloriously chewy center that stays that way for days. Not cakey, mind you, but moist, rich, and begging for a tall glass of cold milk.
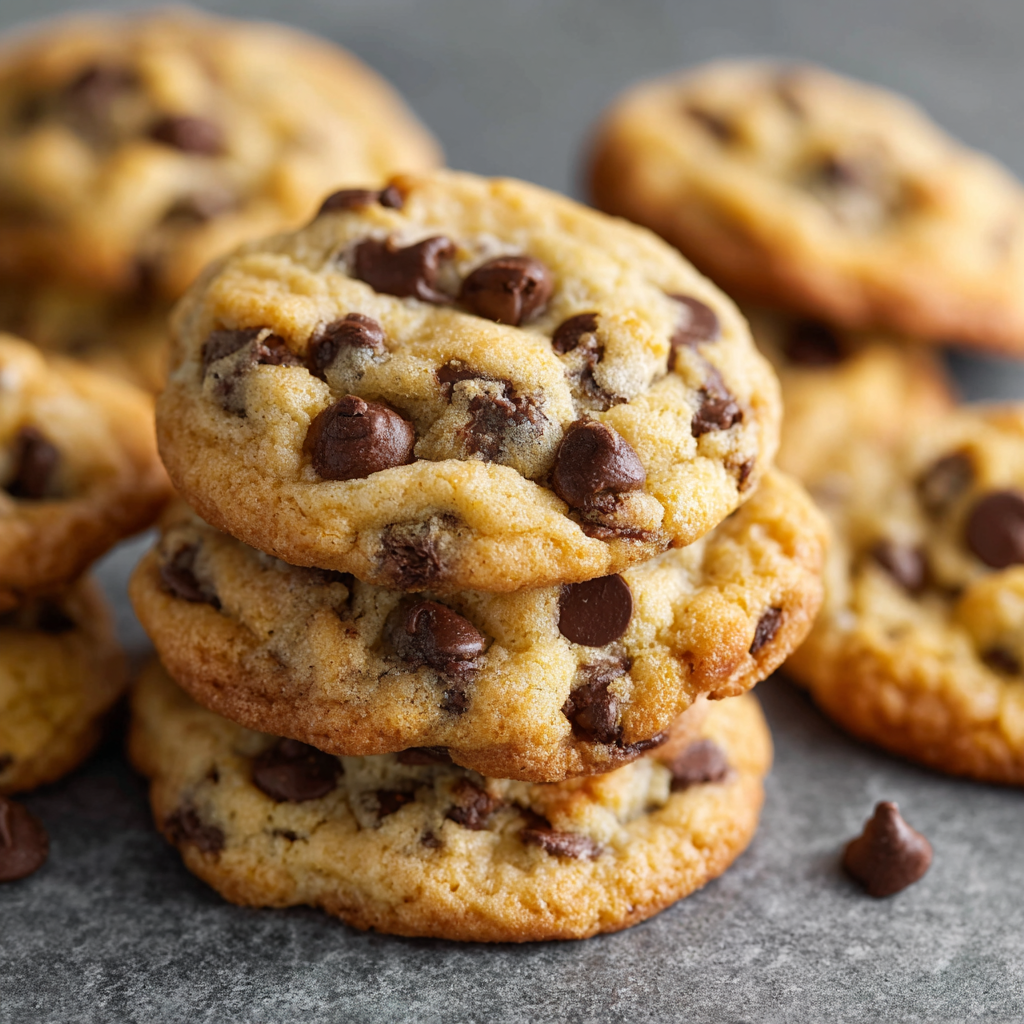
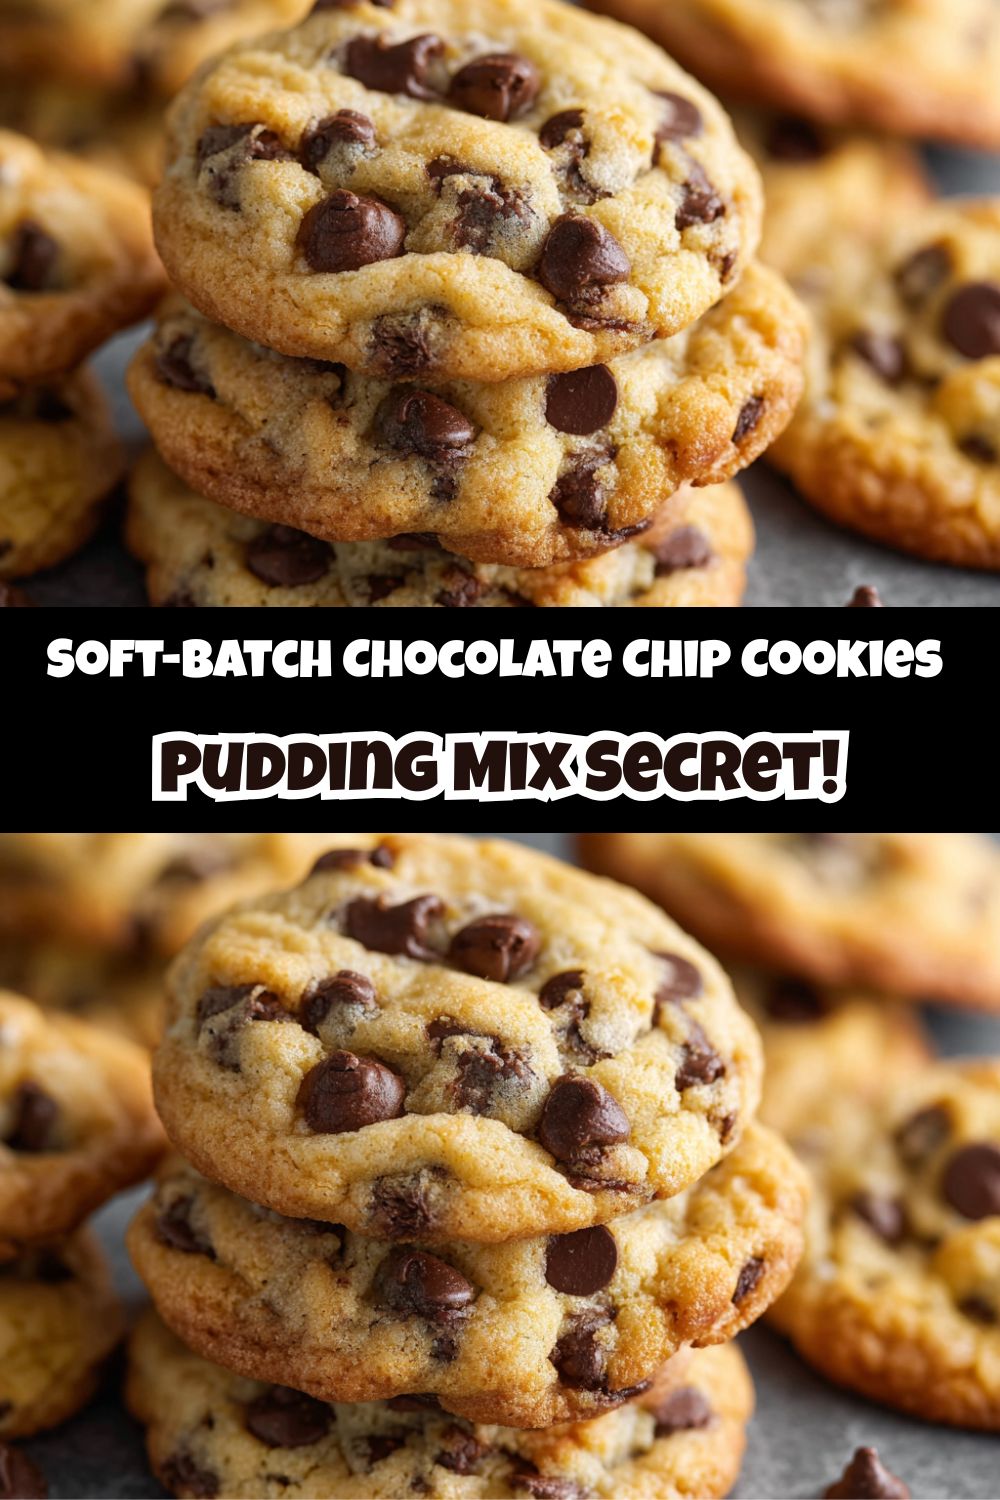
If you’re on Team Chewy with me, I’m about to change your baking life forever. We’re taking the classic chocolate chip cookie and giving it a mega-upgrade with one simple, almost magical secret ingredient. What’s the key to that bakery-style texture you can never quite replicate at home? It’s a box of vanilla instant pudding mix. Yep, you read that right!
This little box is our not-so-secret weapon for creating the softest, most indulgent cookies you’ll ever bake. The pudding mix works behind the scenes to add an incredible amount of moisture and tenderness, ensuring every single bite is pure, unadulterated bliss. We’re talking a perfect balance of sweet vanilla goodness and pools of melted semi-sweet chocolate. This recipe is my ultimate go-to for potlucks, holiday cookie plates, or just a Tuesday night when you need a win. It’s simple, reliable, and always, always gets those “you’ve gotta try this” moments I live for. So, preheat that oven, grab your favorite mixing bowl, and let’s cook something awesome together.
The Cookie That Started It All
I’ll never forget the first time I had a pudding cookie. I was about ten years old, and my Great-Aunt Louise, a woman who believed butter was a primary food group, brought a huge Tupperware container to a family reunion. They looked like normal chocolate chip cookies, but one bite told a completely different story. They were impossibly soft, almost like a cookie and a brownie had a beautiful, delicious baby.
My cousin and I, being the cookie monsters we were, managed to snag a few extras and hide behind the old oak tree in the backyard. We sat there, covered in grass stains and chocolate, in total silence except for the occasional “Mmm.” I remember asking Aunt Louise what her secret was, and she just winked and said, “A little something extra to keep ‘em on their toes.” It took me years to finally pry the recipe out of her! Now, I’ve made it my own, tweaking the ratios and adding my own “what if we tried this?” energy, but the soul of Aunt Louise’s magical, soft cookie is right here in every batch. It’s a taste of pure, uncomplicated joy.
Gathering Your Cookie Crew: The Ingredients
Here’s the lineup for these legendary cookies. The beauty of this recipe is that you probably have most of this in your pantry right now! Let’s break it down.
- 1 cup (2 sticks) unsalted butter, softened: This is the flavor foundation. Using unsalted butter lets us control the salt level perfectly. Chef’s Insight: “Softened” is key! You should be able to press your finger into it easily. If it’s melted, your cookies will spread too much. If it’s too cold, your sugar and butter won’t cream properly.
- ½ cup brown sugar & ½ cup granulated sugar: The dynamic duo! Brown sugar brings that deep molasses flavor and moisture for chewiness, while white sugar helps with spread and crispness on the edges. Using a 50/50 split gives us the best of both worlds.
- 2 large eggs: Our binding agent, bringing everything together. Make sure they’re at room temperature to create a smoother, more emulsified dough.
- 1 tsp vanilla extract: The flavor enhancer. Use the real stuff if you can—it makes a world of difference alongside the vanilla pudding.
- 2 ½ cups all-purpose flour: The structure of our cookie. Pro Tip: For super tender cookies, fluff your flour with a spoon before scooping it into your measuring cup, then level it off. Don’t pack it down!
- 1 (3.4 oz) box vanilla instant pudding mix: The SECRET WEAPON! This is what gives the cookies their legendary soft texture and keeps them moist for days. It’s our magic trick. Do not use cook-and-serve pudding! It has to be the instant kind.
- 1 tsp baking powder & 1 tsp baking soda: Our leavening dream team. Baking soda helps with browning and spread, while baking powder gives them a little lift. Together, they create the perfect thickness.
- ½ tsp salt: The flavor balancer. Salt cuts the sweetness and makes the chocolate taste even more chocolatey. Trust me, don’t skip it.
- 1 ½ cups semi-sweet chocolate chips: The star of the show! I love semi-sweet for its perfect balance, but this is where you can get creative. See the variations section below for more ideas!
Let’s Make Some Magic: The Step-by-Step
Okay, team, let’s get our hands dirty. This is where the fun begins. Follow these steps, and you’ll be a pudding cookie pro in no time.
Step 1: Preheat and Prep. Get that oven heating to a nice 350°F (175°C). This is crucial for even baking. While it’s warming up, line your baking sheets with parchment paper. Chef’s Hack: Parchment paper is a lifesaver. It prevents sticking, makes cleanup a breeze, and helps the bottoms of the cookies bake evenly. If you don’t have it, a light coating of non-stick spray will work in a pinch.
Step 2: Cream the Butter and Sugars. In a large bowl, beat together the softened butter, brown sugar, and granulated sugar. Now, don’t rush this! We’re not just mixing; we’re “creaming.” Beat it on medium-high speed for a good 2-3 minutes until the mixture is pale, fluffy, and well-combined. This step incorporates air into the dough, which helps with the texture. You should see a noticeable change in color.
Step 3: Incorporate the Eggs and Vanilla. Crack in the eggs and add that glorious vanilla extract. Mix on medium speed until everything is perfectly smooth and the eggs are fully absorbed. Scrape down the sides of the bowl with a spatula to make sure no ingredient is left behind. Your dough should look creamy and dreamy at this point.
Step 4: Whisk the Dry Goods. In a separate, medium-sized bowl, whisk together the flour, vanilla pudding mix, baking powder, baking soda, and salt. Why whisk? This ensures our leaveners and salt are evenly distributed throughout the flour, so every cookie bakes up consistently. No one wants a bite with too much baking soda!
Step 5: Combine Wet and Dry. Gradually add the dry ingredient mixture to the wet ingredients, mixing on low speed just until the flour disappears. Do not overmix! As soon as you don’t see any more dry flour pockets, stop the mixer. Overmixing develops gluten, which can lead to tough cookies, and we want tender, soft cookies.
Step 6: The Grand Finale – Chocolate Chips! Switch to a sturdy spatula or wooden spoon for this part. Add in all those beautiful chocolate chips and fold them gently into the dough. This ensures they’re evenly distributed without overworking the dough.
Step 7: Scoop and Space. Using a cookie scoop or a tablespoon, portion the dough into 1½-inch balls. Roll them gently between your palms and place them about 2 inches apart on your prepared baking sheets. This gives them room to spread without becoming one giant cookie sheet (which, okay, doesn’t sound all bad, but we want individual masterpieces).
Step 8: Bake to Perfection. Pop those trays into your preheated oven and bake for 9-11 minutes. The key here is that the cookies will look slightly underdone in the center when you pull them out. The edges should be set and lightly golden, but the centers will still be soft. This is the secret to a chewy center! They will continue to cook on the hot baking sheet.
Step 9: The Patience Test. This is the hardest part. Once out of the oven, let the cookies cool on the baking sheet for at least 5 minutes. This allows them to set up properly. If you try to move them right away, they might fall apart. After 5 minutes, transfer them to a wire rack to cool completely… or, you know, grab a spatula and eat one warm and gooey. I won’t tell.
How to Serve These Superstar Cookies
Honestly, these cookies are phenomenal all on their own, still warm from the oven with the chocolate chips all melty. But if you want to take them to the next level, here are a few of my favorite ways to serve them up:
The Classic Combo: Pile a few onto a plate next to an ice-cold glass of milk. It’s a timeless pairing for a reason.
À La Mode Extravaganza: Place a warm cookie in a bowl and top it with a big scoop of vanilla bean ice cream. The contrast of warm cookie and cold ice cream is pure heaven. For an extra treat, drizzle with caramel or hot fudge sauce.
Cookie Ice Cream Sandwich: Let your cookies cool completely. Take two cookies and sandwich a scoop of your favorite ice cream (coffee ice cream is incredible with these) in the middle. Roll the edges in mini chocolate chips or chopped nuts, wrap them individually in plastic wrap, and freeze for at least an hour. The ultimate summer (or anytime) treat!
Gift Them with Style: These cookies make fantastic gifts! Let them cool completely, then stack them in a cellophane bag tied with a ribbon, or arrange them in a festive tin. They ship surprisingly well, too, so you can send a taste of home to a friend far away.
Mix It Up! Fun Flavor Twists
Once you’ve mastered the base recipe, the “what if we tried this?” fun begins. The pudding mix is a fantastic canvas for other flavors. Here are a few of my favorite twists:
1. Chocolate Explosion: Swap the vanilla pudding mix for chocolate instant pudding. Use dark chocolate chips instead of semi-sweet for the ultimate double-chocolate experience. You might need to add a minute to the bake time as the dough will be darker.
2. White Chocolate Cranberry Delight: Use vanilla pudding mix, but substitute the semi-sweet chips with white chocolate chips and add 3/4 cup of dried cranberries. The tartness of the cranberries cuts the sweetness beautifully.
3. Nutty Buddy: Fold in 1 cup of chopped toasted pecans or walnuts along with the chocolate chips. Toasting the nuts first brings out their incredible flavor and adds a wonderful crunch.
4. S’mores Cookies: Use vanilla pudding mix. Replace the chocolate chips with a mix of 3/4 cup semi-sweet chocolate chips, 3/4 cup crushed graham crackers, and 1/2 cup mini marshmallows. Press a few extra marshmallows on top right after baking for that classic toasted look.
5. gluten-Free Friendly: You can easily make these gluten-free! Use a 1:1 gluten-free all-purpose flour blend (I like Bob’s Red Mill) and ensure your pudding mix is a certified gluten-free brand. The texture is just as amazing!
Jackson’s Chef Notes & Kitchen Confessions
This recipe has been through a lot with me. I’ve made it in a dozen different kitchens, for everything from fancy parties to lazy Sunday afternoons. One time, I was so excited to make them for a date that I accidentally used salted butter AND added the extra salt. Let’s just say they were… intensely savory. We laughed about it over a very salty cookie and ordered pizza. The recipe has been double-checked for salt levels since then!
Over time, I’ve learned that letting the dough chill in the fridge for 30 minutes to an hour can result in an even thicker, chewier cookie, as the flour hydrates fully and the butter firms up. It’s not mandatory, but if you have the time, give it a try! This is a forgiving recipe, so don’t be afraid to make it your own. That’s what cooking is all about.
FAQs & Quick Fixes
Q: My cookies spread out too flat. What happened?
A: This is usually a butter issue! Your butter was likely too warm or even melted. Another culprit could be an old baking soda or baking powder that’s lost its potency. Next time, make sure your butter is just softened (cool to the touch) and check the expiration date on your leaveners.
Q: Can I make the dough ahead of time and bake it later?
A: Absolutely! This dough freezes beautifully. Scoop the dough balls onto a parchment-lined tray, freeze them solid, and then transfer them to a freezer bag. When a cookie craving hits, just bake them straight from the freezer, adding 1-2 minutes to the baking time. No need to thaw!
Q: My cookies are cakey, not chewy. Why?
A: This often means there was too much flour. Remember to fluff your flour before measuring, and use the “spoon and level” method. Also, be careful not to overmix the dough once the flour is added, as this can develop more gluten and lead to a cake-like texture.
Q: Can I use a different flavor of pudding mix?
A: You bet! This is where the fun begins. Butterscotch, cheesecake, or even pistachio pudding can create amazing flavor profiles. Just stick with the instant variety for consistent results.
Nutritional Information*
Okay, let’s be real—we’re not eating chocolate chip cookies for their health benefits. We’re eating them for soul-soothing joy! But for those who like to keep track, here’s a general breakdown per cookie (assuming the recipe makes about 30 cookies).
Per Cookie:
Calories: ~160 | Total Fat: 8g | Saturated Fat: 5g | Carbohydrates: 20g | Sugars: 12g | Protein: 2g | Sodium: 95mg
*Please note: This is an estimate based on the ingredients used. Values can vary depending on specific brands and precise measurements. This information is provided as a courtesy and should not be considered a guarantee.
Your New Go-To Cookie Recipe
And there you have it, my friends—the recipe for what I truly believe are the best soft-batch chocolate chip cookies on the planet. That box of pudding mix might seem like a small addition, but it makes all the difference, giving you a professional, bakery-quality result right in your own kitchen.
I hope this recipe brings you as much happiness and as many satisfied smiles as it has brought me and my family over the years. Remember, cooking is an adventure. Don’t be afraid to get a little flour on your apron and chocolate on your fingers. That’s how you know you’re doing it right.
I’d love to hear how your cookies turn out! Did you try a fun variation? Tag me on social @FoodMeld with your creations. Now, go forth and bake


