Chocolate Chip Pizookie – Gooey, Warm, and Ready to Wow
Hey friends, Jackson here from Food Meld. Let’s get real for a second. You know that magical moment when you pull a batch of chocolate chip cookies out of the oven? The whole kitchen smells like butter and happiness, and you sneak a piece of a still-warm cookie, the chocolate oozing just a little? Yeah. That’s the feeling we’re chasing today—but we’re not just chasing it, we’re supersizing it and serving it straight from the skillet.
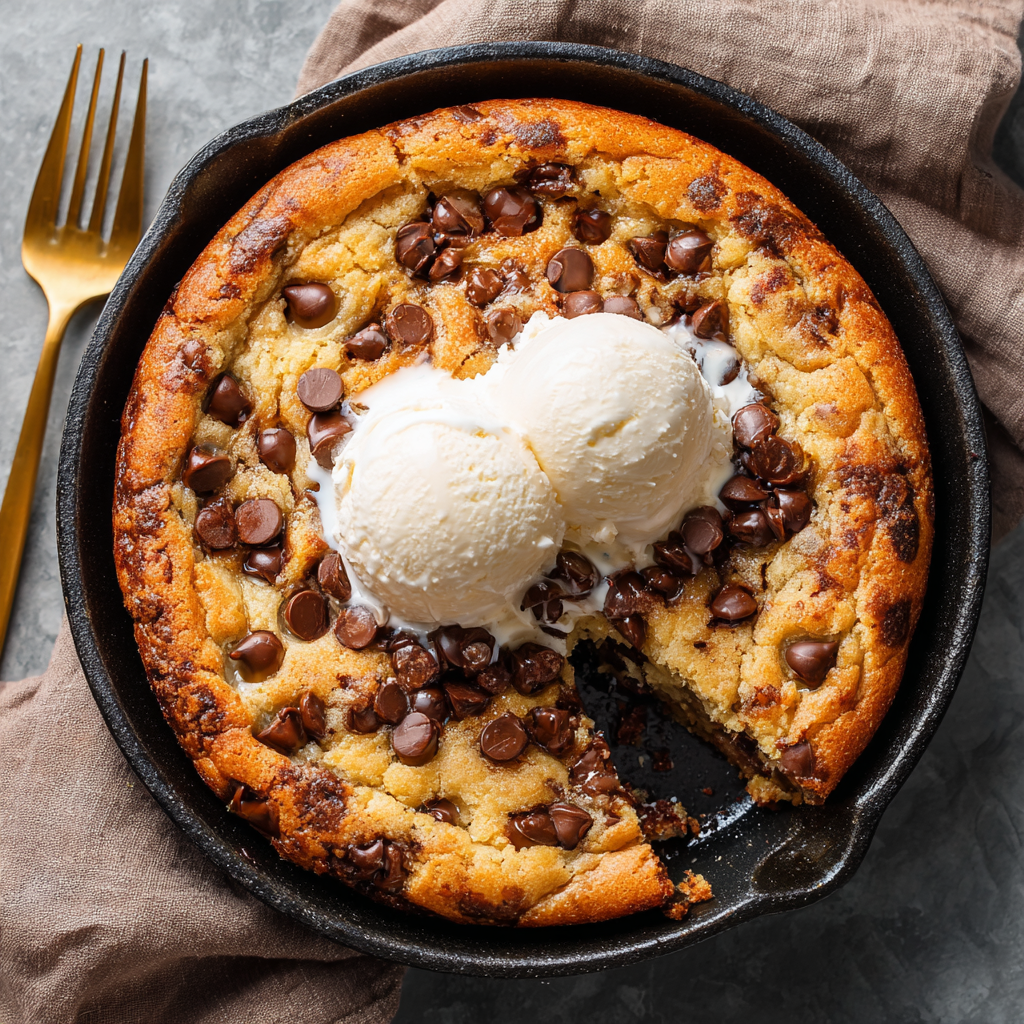
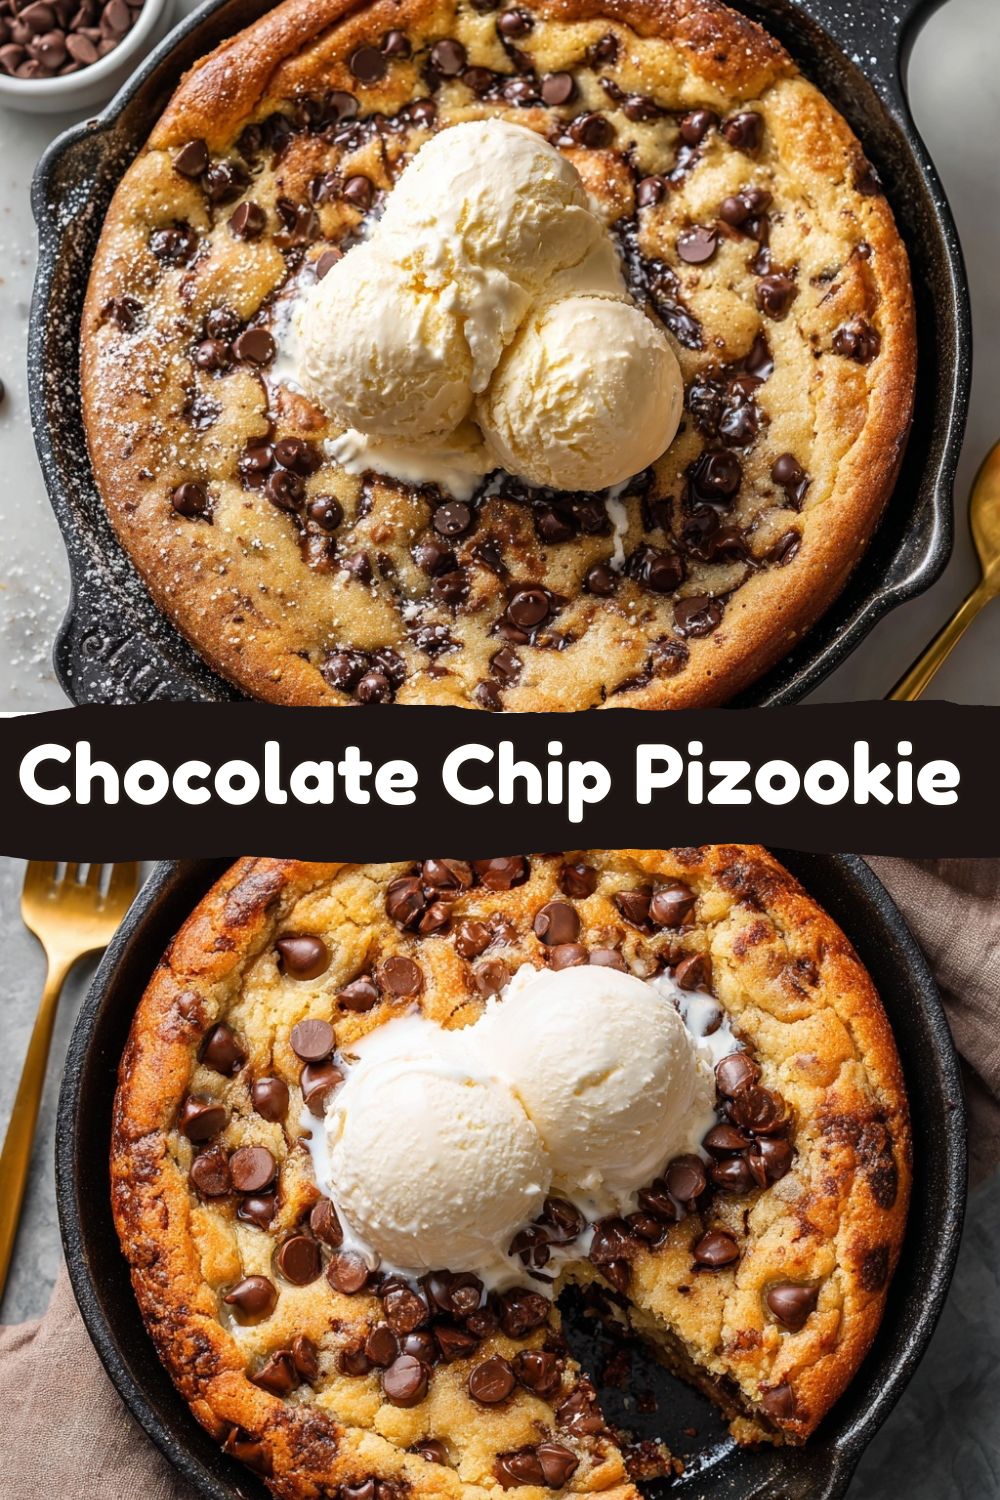
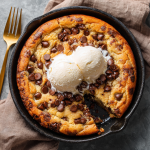
This, my friends, is the glorious Chocolate Chip Pizookie (that’s cookie-pizza, for the uninitiated). It’s the ultimate crossroads of “I want dessert NOW” and “I want to share something awesome.” Imagine a cookie the size of your skillet. Edges crisp and golden, center soft and almost molten, packed with melty chocolate chips. Now, imagine topping that warm, fragrant masterpiece with a cold, creamy scoop of vanilla ice cream. See where I’m going with this? The ice cream starts to melt into the hot cookie, creating rivers of sweet, creamy goodness in every bite.
The best part? This isn’t some fussy, chef-y project. This is 10 minutes of mixing, one bowl to wash, and 20 minutes of baking while you clean up and get the spoons ready. It’s the hero of last-minute gatherings, the savior of “I need something sweet” nights, and the guaranteed star of any casual hang. Whether you’re a kitchen newbie or a seasoned pro, this recipe is your ticket to instant dessert legend status. So, grab your skillet, and let’s cook something awesome together.
The Night That Called for a Pizookie
This recipe takes me back to my college days, crammed into a tiny apartment kitchen with my roommates. Our culinary budget was… inventive. But every few weeks, we’d pool our change for a “family dinner.” One particularly bleak, rainy Tuesday after a brutal round of midterms, we were all dragging. Our morale was lower than our bank balances. We had butter, flour, sugar, and a sad-looking bag of chocolate chips. The idea of rolling out individual cookies felt like a Herculean task none of us had the energy for.
That’s when my roommate Mike, the pragmatic engineer of the group, said, “Why don’t we just bake the whole thing in our one skillet? Like a cookie pie.” Genius. We mixed everything right in the skillet to save a bowl, slapped it in the oven, and 20 minutes later, we were huddled around our rickety table, digging spoons directly into a hot, gooey, chocolate-filled masterpiece. We didn’t have ice cream, so we used cool whip. It was messy, imperfect, and absolutely perfect. That pizookie didn’t just fill our stomachs; it flipped the whole mood of the night. It taught me that the best food isn’t about fancy ingredients—it’s about the vibe, the share, and that glorious, gooey center. That’s the spirit I bake into every one of these.
Gathering Your Flavor Arsenal
Simple ingredients, huge payoff. Here’s what you need and why each one matters. I’ve also tossed in my favorite swaps so you can make this your own.
- 1/2 cup (1 stick) unsalted butter, melted – This is our flavor and texture foundation. Melting the butter (instead of creaming it soft) gives us those denser, chewier edges with that slightly crisp bottom. Chef Insight: Let it cool for a minute after melting so you don’t scramble your egg!
- 1/2 cup packed brown sugar – Hello, moisture and deep caramel notes! The molasses in brown sugar is the secret to that soft, gooey center we’re obsessing over.
- 1/4 cup granulated sugar – The white sugar helps with spreading and gives us those perfect crispy edges. The combo of the two sugars is non-negotiable for the perfect texture.
- 1 large egg – Our binder. It brings everything together and adds structure. Make sure it’s at room temperature to blend smoothly with the melted butter.
- 1 teaspoon pure vanilla extract – The flavor amplifier. It rounds out the sweetness and makes the chocolate taste even more chocolaty. Don’t skip it!
- 1 1/4 cups all-purpose flour – The backbone. I spoon and level my flour into the measuring cup to avoid packing it in, which can lead to a dry pizookie. For a nuttier twist, swap 1/4 cup for oat flour.
- 1/2 teaspoon baking soda – Our leavening agent. It gives the pizookie a little lift and helps it bake evenly. Check the date on your box—old baking soda won’t work its magic.
- 1/4 teaspoon salt – The ultimate flavor enhancer. Salt makes the sweet and chocolate pop. If you only have salted butter, just omit this extra salt.
- 3/4 cup chocolate chips – The stars of the show! I use a mix of semi-sweet and milk chocolate because I can’t choose. Want pockets of gooeyness? Chop up a chocolate bar instead of using chips.
- Vanilla ice cream, for serving – This is not optional, it’s a commandment. The hot/cold contrast is the entire experience. A high-quality vanilla bean is the ultimate partner here.
Let’s Build Some Magic: Step-by-Step
Ready? This is the fun part. I’ll walk you through each step with my favorite little hacks to guarantee success.
- Preheat & Prep: Fire up your oven to 350°F (175°C). Grab your trusty 9-inch cast iron skillet (or an 8×8 baking dish works in a pinch) and give it a light coating of butter, cooking spray, or a brush of oil. A quick pre-grease means your golden cookie will slide right out. Chef Hack: If you’re using cast iron, pop the empty skillet in the oven as it preheats for an even crispier edge!
- Mix the Wet Goodness: In a medium bowl, whisk your melted (and slightly cooled) butter with the brown and granulated sugars. Whisk until it looks smooth and glossy—about a minute. Now, crack in that egg and add the vanilla. Whisk again until it’s all one happy, caramel-colored family. You’ll see the mixture thicken up nicely.
- Bring in the Dry Team: Sprinkle the flour, baking soda, and salt right over your wet ingredients. I like to give the dry stuff a quick stir with a fork before I add it, just to make sure the baking soda is evenly distributed. Now, switch to a spatula and fold everything together. Mix just until you don’t see any more dry flour patches. Overmixing is the enemy of a tender cookie! The dough will be thick and gorgeous.
- Chocolate Chip Bliss: Time for the main event! Dump in those chocolate chips and fold them gently into the dough. I always reserve a small handful to press into the top of the dough in the skillet—it makes for a bakery-style, chip-studded look.
- Skillet Time: Transfer all that doughy goodness into your greased skillet. Use your spatula or lightly oiled fingers to press it out into an even layer, all the way to the edges. This is your canvas!
- Bake to Perfection: Slide the skillet into your preheated oven. Bake for 18-22 minutes. Here’s the KEY: You want the edges to be a deep golden brown and look set, but the center should still look slightly soft and puffy. It will keep cooking from the residual heat once it’s out. Do not overbake! That gooey center is what we live for. If you like a firmer center, go for the full 22.
- The Grand Finale: Pull that beauty out of the oven (the handle is HOT—use a mitt!). Let it sit for just 5 minutes. This lets it settle and makes it easier to slice. Then, scoop that vanilla ice cream right in the middle, grab some spoons or slice it into wedges, and dive in. The melty, messy, wonderful dive is the whole point.
Serving It Up Like a Pro
Presentation is half the fun! Here’s how to make your pizookie the talk of the table:
- The Classic: A single, generous scoop of premium vanilla ice cream melting in the center. Let everyone dig in from the edges towards the gooey, ice-creamy middle.
- Slice & Share: Use a pizza cutter or a sharp knife to slice it into 6 wedges. Place each wedge on a plate and top individually with ice cream, a drizzle of caramel or hot fudge, and a pinch of flaky sea salt.
- Next-Level Toppings Bar: Turn it into an interactive dessert. Set out small bowls with toppings: rainbow sprinkles, crushed pretzels or potato chips (trust me, the salty crunch is insane), chopped nuts, whipped cream, and hot fudge. Let everyone customize their own bite!
- Beverage Pairing: A cold glass of milk is the classic buddy. For the adults, a glass of tawny port, a stout beer, or a cup of strong coffee makes an incredibly sophisticated pairing with the rich chocolate.
Make It Your Own: Creative Twists
Once you’ve mastered the basic blueprint, the world is your skillet cookie. Here are a few of my favorite ways to mix it up:
- Peanut Butter Cup Explosion: Fold in 1/2 cup chopped peanut butter cups along with the chocolate chips. After baking, drizzle with peanut butter and more chopped cups.
- Salted Caramel Pretzel: Fold in 1/2 cup crushed pretzel pieces. After removing from the oven, immediately drizzle with 1/4 cup warm salted caramel sauce and sprinkle with extra pretzel bits.
- Double Chocolate Mocha: Replace 2 tablespoons of flour with unsweetened cocoa powder for a chocolate dough. Fold in chocolate chunks and 1 tablespoon of instant espresso powder for a deep mocha flavor.
- Kitchen Sink Blondie-Pizookie: Skip the chocolate chips! Use a blend of white chocolate chips, butterscotch chips, and toasted pecans or walnuts for a blondie-style skillet treat.
- Gluten-Free & Dairy-Free Friend: Use a 1:1 gluten-free flour blend, vegan butter, and a flax egg (1 tbsp ground flax + 3 tbsp water, let sit 5 min). Dairy-free chocolate chips and coconut milk ice cream finish it perfectly.
Jackson’s Chef Notes & Kitchen Confessions
This recipe has seen a lot of love (and a few happy accidents) in my kitchen. The first time I made it for a date, I was so nervous I forgot the baking soda. Let’s just say we ended up with a very delicious, very dense chocolate chip butter slab. It was still good, but it wasn’t a pizookie! Lesson learned: mise en place (get everything measured and ready) is your friend.
Over the years, I’ve learned that the type of skillet matters. Cast iron gives you the best, most even heat and those incredible crispy edges. But a ceramic oven-safe skillet or even a cake pan works great too—just keep an eye on the bake time. Also, if your skillet is bigger than 9 inches, your pizookie will be thinner and bake faster. If it’s smaller, it’ll be thicker and need a few more minutes. Use the visual cues (golden edges, soft center) as your true guide. This recipe is forgiving. Have fun with it!
FAQs & Quick Fixes
Q: My center is too runny. Did I underbake it?
A: It’s meant to be soft and gooey, but if it’s truly liquid, it just needs a few more minutes. The edges should be fully set and golden. Remember, it continues to set as it cools. If in doubt, you can always pop it back in for 3-5 minute increments.
Q: Can I make the dough ahead of time?
A: Absolutely! Mix the dough, press it into the greased skillet, cover tightly with plastic wrap, and refrigerate for up to 48 hours. When you’re ready, let it sit at room temp for 20 minutes while the oven preheats, then bake as directed. You may need to add 1-2 extra minutes.
Q: Why is my pizookie cakey or dry?
A> Two likely culprits: 1) Too much flour. Always spoon and level your flour, don’t scoop directly from the bag. 2) Overbaking. Pull it when the center still looks a bit soft and underdone. It’s perfect, I promise.
Q: I don’t have a skillet. What can I use?
A> No problem! A 9-inch round cake pan, an 8×8 or 9×9 square baking dish, or even a pie plate will work beautifully. Adjust the bake time if using a different material (glass pans often bake faster).
Chocolate Chip Pizookie : Gooey, Warm, and Ready to Wow
- Total Time: 30 minutes
- Yield: 6 1x
Description
A chocolate chip pizookie is everything you love about cookies, supersized and served warm from the oven. With crisp golden edges and a melty, gooey center, this skillet-baked cookie is perfect for sharing—especially topped with a scoop of vanilla ice cream. It’s indulgent, fast, and guaranteed to steal the show.
Ingredients
1/2 cup unsalted butter, melted
1/2 cup brown sugar
1/4 cup granulated sugar
1 egg
1 teaspoon vanilla extract
1 1/4 cups all-purpose flour
1/2 teaspoon baking soda
1/4 teaspoon salt
3/4 cup chocolate chips
Vanilla ice cream, for topping
Instructions
Preheat oven to 350°F (175°C). Lightly grease a 9-inch cast iron skillet or baking dish.
In a bowl, whisk melted butter with both sugars until smooth. Add egg and vanilla; mix until well combined.
Stir in flour, baking soda, and salt. Fold in chocolate chips.
Press dough evenly into the skillet.
Bake for 18–20 minutes until the edges are golden and center is still soft.
Serve warm, topped with a scoop (or two) of vanilla ice cream.
- Prep Time: 10 minutes
- Cook Time: 20 minutes
Nutrition
- Calories: 420 / Serving
- Sugar: 30g / Serving
- Fat: 22g / Serving
- Carbohydrates: 50g / Serving
- Protein: 4g / Serving
Nutritional Info (Because We’re Curious!)
Okay, let’s be real—this is a treat, through and through. But I believe in transparency! This info is for one serving (1/6th of the pizookie, without ice cream), estimated using standard ingredients. Remember, your specific brands and any substitutions will change these numbers.
- Calories: ~420
- Total Carbohydrates: 50g
- Total Fat: 22g
- Saturated Fat: 13g
- Sugar: 30g
- Protein: 4g
My philosophy? Enjoy food mindfully and joyfully. This pizookie is meant to be shared, savored, and celebrated. It’s not an everyday thing, but for those special, “we deserve this” moments, it’s worth every single delicious bite. Balance is key—so share it with people you love, and enjoy the experience as much as the flavor.
Final Thoughts: Your New Go-To Dessert
So there you have it, friends—your new secret weapon for spontaneous joy. The Chocolate Chip Pizookie is more than a recipe; it’s a vibe. It’s about ditching perfection, embracing the mess, and creating a moment that people remember. It’s the dessert that says, “Hey, let’s just enjoy this together.”
I hope you’ll give it a try and make it your own. Tag me @FoodMeld if you do—I love seeing your kitchen creations! Now, go preheat that oven, grab your skillet, and let’s make some memories, one gooey, chocolatey, ice-cream-topped bite at a time. Happy baking!
Jackson


