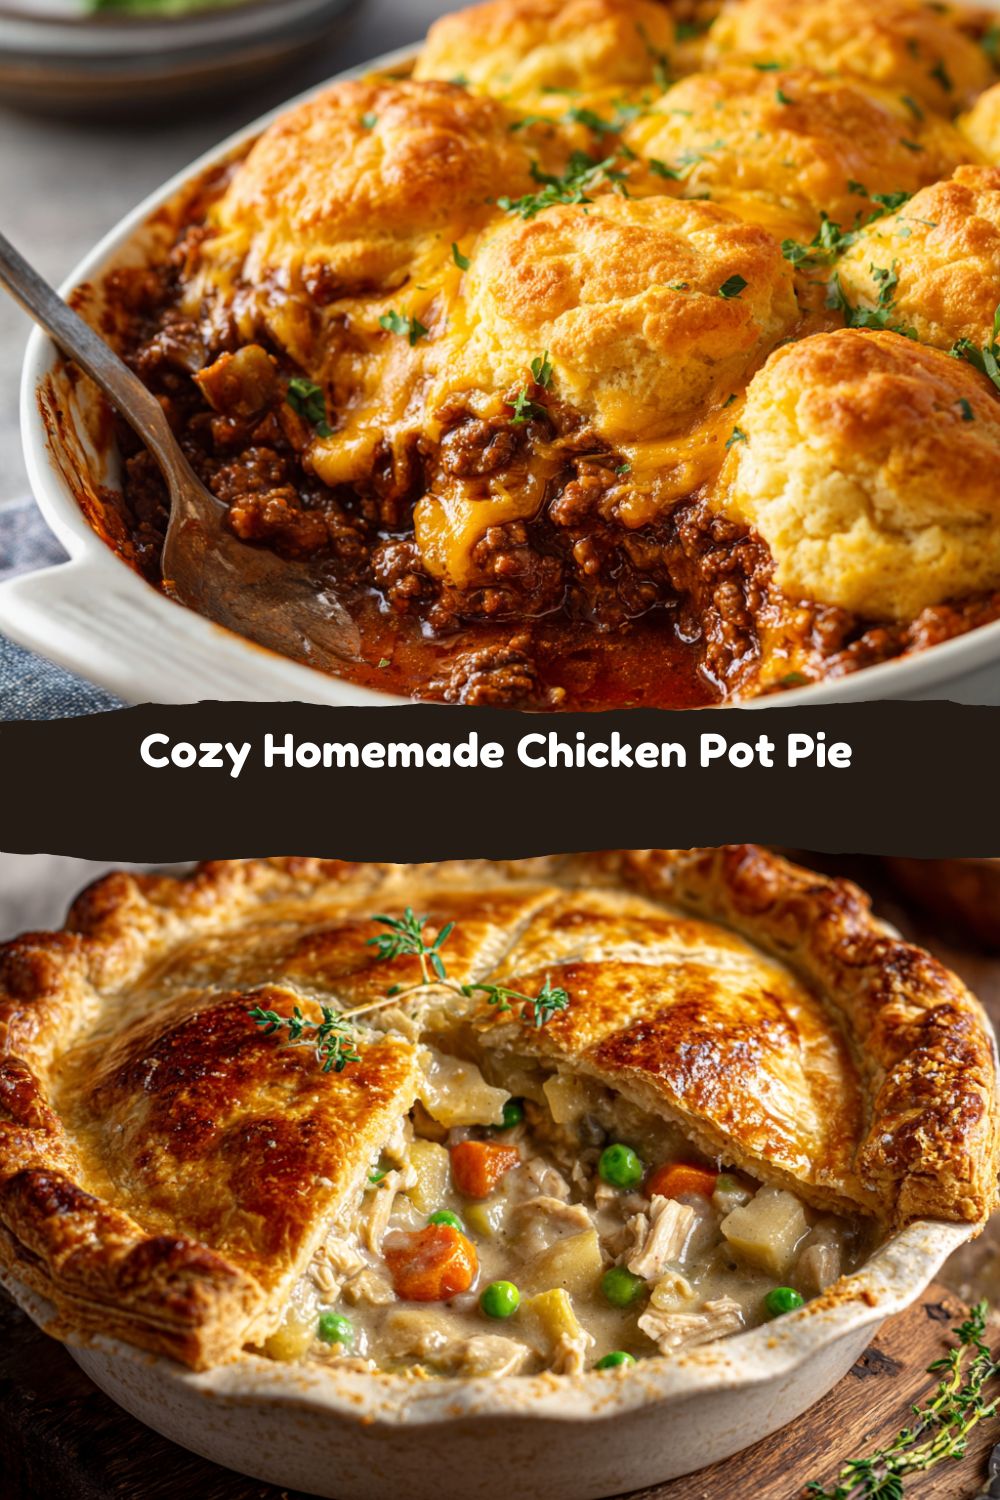
Hey, Let’s Make the Coziest Chicken Pot Pie You’ve Ever Tasted!
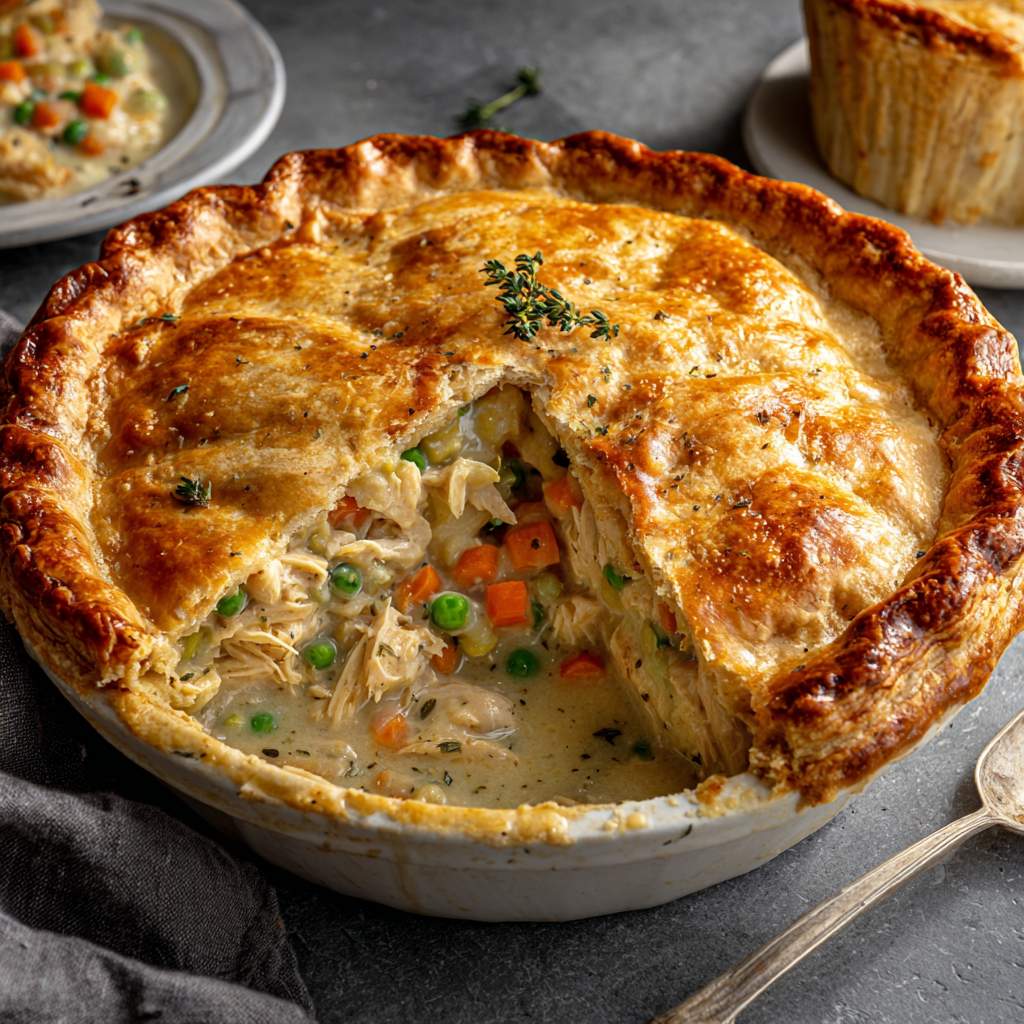
Is there anything in the world that hits the spot quite like a homemade chicken pot pie? I’m talking about that moment you break through a golden, impossibly flaky crust and steam billows out, carrying the incredible aroma of tender chicken, sweet vegetables, and a rich, savory gravy. It’s a hug in a baking dish. It’s the ultimate comfort food, and honestly, it’s one of those dishes that so many people think is a total project to make from scratch. But I’m here to show you that it’s not only totally doable, it’s an absolute blast to create.
Here at Food Meld, we’re all about bold flavor and zero intimidation. This recipe is my love letter to classic comfort, but of course, I’ve sprinkled in a few of my own chef hacks to make it foolproof and packed with even more flavor. We’re using a simple, from-scratch filling that comes together in one skillet (less dishes = winning), and we’re not afraid to use a fantastic store-bought crust to keep things easy. The goal here isn’t perfection; it’s about the fun of creating something incredibly delicious that will have your whole family gathered around the table, asking for seconds before they’ve even finished firsts. So, grab your favorite skillet, and let’s cook something awesome together.
The Pot Pie That Started It All
My love for this dish goes way back to my grandma’s kitchen in Georgia. Her version was a Sunday supper staple, and the rule was simple: if you heard the ceramic pie dish clink on the counter, you dropped whatever you were doing and got to the table. Fast. Her kitchen would be steamy, the windows slightly fogged, and the smell… oh, the smell was pure magic. It was the smell of home.
But my grandma, she was a rebel. She never followed a recipe to the letter. One time, she ran out of peas and tossed in some green beans. Another time, she added a pinch of smoked paprika she’d gotten from a friend, and it changed the game. She taught me that recipes are just guides—the real magic happens when you make it your own. This recipe is built on the foundation of her cozy, no-fuss love but turned up with a little “what if we tried this?” energy that I’ve made my trademark. It’s a taste of my Southern roots, fused with everything I’ve learned about building big, comforting flavor. Every time I make it, I get a little nostalgic, and I hope it becomes a dish that makes its own memories in your kitchen, too.
Gathering Your Flavor All-Stars
Here’s everything you’ll need to build this masterpiece. Don’t stress about exactness—this is a forgiving dish! I’ve included my chef insights and swaps to make it work for you.
For the Incredibly Flaky Crust:
- 2 prepared pie crusts (homemade or store-bought) – Look, life’s short. A high-quality store-bought crust is a fantastic shortcut that I use all the time. If you’re feeling ambitious, my homemade butter crust is a game-changer (link that someday!), but no shame in the store-bought game. Thaw them according to the package directions!
- 1 egg, beaten – This is our egg wash. It’s the secret to that gorgeous, deep golden-brown, shiny top crust that makes everyone say “wow.” A little milk brush works too, but the egg gives it that professional bakery-level shine.
For the Hearty, Savory Filling:
- 2 tbsp butter – This is our flavor base. Unsalted is best so we can control the salt ourselves. It’s going to cook our veggies and form the base of our roux.
- 1 small onion, diced – Yellow or white onion is perfect here. It melts down and adds a sweet, savory backbone to the whole filling.
- 2 carrots, diced – They add a pop of color and a wonderful sweetness. Don’t chop them too big—you want them to be tender after a quick sauté.
- 2 celery stalks, diced – The unsung hero of flavor! Celery adds a crucial earthy note that balances the sweetness of the carrots and onions.
- 2 cloves garlic, minced – Because is there any savory dish that isn’t made better with garlic? I think not. Fresh is best!
- 1/3 cup all-purpose flour – This is what we’ll use to make our roux. It’s the magic dust that will thicken our broth and milk into a luscious, creamy gravy. Gluten-free 1-to-1 flour works great too!
- 2 cups chicken broth – Use a good-quality broth, it makes a difference! This is the main liquid for our gravy. Low-sodium is my go-to for total control over seasoning.
- 1 cup milk or cream – Milk makes a great gravy, but heavy cream or half-and-half will make it extra decadent and rich. Your call based on how luxurious you’re feeling!
- 2 1/2 cups cooked chicken, shredded or cubed – The star of the show! This is the perfect use for leftover roast chicken or a store-bought rotisserie chicken to save tons of time. You could also poach two chicken breasts.
- 1 cup frozen peas – We add these frozen at the end so they stay bright green and don’t get mushy. They add a perfect pop of sweetness and color.
- 1/2 tsp dried thyme – This is the classic herb for pot pie. It’s earthy and slightly floral. If you have fresh, use 1 ½ teaspoons.
- Salt & black pepper, to taste – Season as you go! Taste your filling before it goes into the crust. It should be highly seasoned, as the crust is neutral.
Let’s Build This Beautiful Pie, Step-by-Step
Alright, team! Let’s fire up the oven and get our hands dirty. This is where the magic happens. Follow these steps, and you’ll have a perfect pot pie.
- Preheat and Prep: Crank that oven to 400°F (200°C). This high heat is crucial for getting the bottom crust cooked through and the top crust beautifully puffed and golden. Take your pie crusts out of the fridge to let them warm up just slightly so they’re easier to unroll. Pro Tip: Put a baking sheet on the middle rack while the oven preheats. We’ll put the pie dish on this hot sheet later to ensure the bottom crust gets crispy and doesn’t get soggy!
- Sweat the Veggies: In a large, oven-safe skillet (like cast iron – my favorite!), melt your 2 tbsp of butter over medium heat. Toss in the diced onion, carrots, and celery. Cook them for about 6-8 minutes, stirring occasionally, until they start to soften and the onions become translucent. Now, add the garlic and cook for just one more minute until it’s fragrant. Chef’s Hack: This step is called “sweating” – we’re not looking for color, just to soften them and build a deep flavor base. Don’t rush it!
- Make the Roux: Sprinkle the 1/3 cup of flour over the cooked vegetables. Stir constantly for a full minute. It will look pasty and clumpy – that’s perfect! You’re cooking out the raw flour taste, which is essential for a gravy that doesn’t taste like paste.
- Create the Gravy: Now, slowly pour in the 2 cups of chicken broth and the 1 cup of milk/cream, whisking constantly as you pour. This is the key to a smooth, lump-free gravy! Keep whisking until everything is combined. Bring the mixture to a simmer and let it cook for 2-3 minutes. You’ll see it transform from a thin liquid to a beautifully thick, creamy gravy. Pro Tip: If you do get a few lumps, don’t panic! Just grab a whisk and whisk vigorously until they’re gone. A quick blitz with an immersion blender also works miracles.
- Bring It All Together: Turn the heat down to low. Stir in the cooked chicken, frozen peas, thyme, salt, and a good crack of black pepper. Let it all heat through for about 3-4 minutes. Give it a taste! This is your moment. Does it need more salt? More pepper? Adjust it now. Remember, the filling should be highly seasoned. Remove the skillet from the heat.
- Assemble the Pie: Carefully fit one of your pie crusts into a 9-inch pie dish. Let the edges hang over. Pour the entire skillet of filling into the crust-lined dish. It should be nice and full! Now, drape the second pie crust over the top. Fold the overhanging edges of the bottom crust over the top crust and crimp them together with your fingers or a fork to seal it tightly. This lock is important to keep all that glorious filling inside. Use a sharp knife to cut 4-5 slits in the top crust in a decorative pattern. This isn’t just for looks—it lets steam escape so your pie doesn’t explode! Finally, brush the entire top crust with the beaten egg.
- Bake to Golden Perfection: Carefully place your pie dish onto the preheated baking sheet in the oven. Bake for 35-40 minutes. You’re looking for a deep golden-brown crust and bubbling filling (you should see it bubbling through the slits). Chef’s Hack: If the edges of the crust are browning too quickly, you can make a foil “shield” and loosely cover just the edges for the last 10 minutes of baking.
- The Hardest Part: Wait! I know, I know. It smells incredible and you want to dive right in. But let it rest for at least 10 minutes after pulling it out of the oven. This allows the filling to set slightly so that when you cut into it, it holds its shape and doesn’t flood your plate with liquid. Trust me, it’s worth the wait.
How to Serve This Masterpiece
This pot pie is a complete meal in itself, but a little something on the side never hurts! I love serving generous, steaming wedges right out of the pie dish. Let everyone see that gorgeous cross-section! For a simple, classic pairing, a light, crisp green salad with a tangy vinaigrette is perfect to cut through the richness. If you’re going for ultimate comfort, a side of buttery mashed potatoes or garlicky roasted potatoes turns it into a carb-lover’s dream. And don’t forget a big spoon for that extra gravy!
Make It Your Own: Fun Flavor Twists!
The beauty of this recipe is its versatility. Here are a few of my favorite ways to mix it up:
- Biscuit Topper: Swap the top pie crust for homemade or store-bought biscuits. Drop them right on top of the filling and bake until golden. Chicken and Biscuits, here we come!
- Global Meld: Give it a curry twist! Add 1-2 tbsp of curry powder to the veggies with the flour. Swap the peas for cauliflower florets and use coconut milk instead of regular milk. Incredible!
- Thanksgiving Style: Use leftover turkey instead of chicken and add a handful of dried cranberries to the filling. A pinch of sage and rosemary will make it taste just like the holidays.
- Lighten Up: Use a light cream or even whole milk. You can also load up on more veggies like mushrooms, leeks, or green beans. For a gluten-free version, use a GF flour blend for the roux and a GF pie crust.
- Pot Pie Soup: Love the filling? Thin it out with an extra cup of broth, don’t put it in a crust, and you have the most incredible, chunky pot pie soup. Top with croutons or pie crust crackers!
Jackson’s Chef Notes & Kitchen Stories
This recipe has evolved so much since my grandma’s first version. I’ve probably made a hundred pot pies, and I’ve had my share of kitchen “oops” moments. One time, I was filming a video for the blog and I was talking so much I completely forgot to add the thickener. I poured a very soupy, sad-looking filling into the crust. Let’s just say the resulting “pot pie soup” was delicious, if not structurally sound! It’s how the “soup variation” was born.
My biggest piece of advice? Taste as you go. Get in there and season that filling until it sings. The roux might seem intimidating, but just remember: whisk, whisk, whisk! You’ve got this. This dish is meant to be shared, to be messy, and to be made with a whole lot of love. Don’t strive for perfection, strive for flavor. And I promise, with this recipe, you’ll find it.
FAQs: Your Questions, Answered
1. Can I make chicken pot pie ahead of time?
Absolutely! You can assemble the filling and crust up to 24 hours in advance. Keep it covered in the fridge, then bake just before serving. If baking straight from the fridge, add an extra 10–15 minutes of bake time.
2. Can I freeze chicken pot pie?
Yes! Assemble your pot pie, wrap it tightly in foil, and freeze it unbaked. When ready to enjoy, bake from frozen at 375°F, adding 20–30 extra minutes until the crust is golden and the filling is bubbling.
3. What can I use instead of pie crust?
Not a fan of pie dough? No problem. Top your pot pie with puff pastry for a flaky finish, crescent roll dough for a shortcut, or even buttery biscuits for a cozy twist.
4. How do I thicken my pot pie filling?
If your filling feels too runny, simmer it a bit longer before adding it to the crust. You can also stir in a little cornstarch slurry (1 tablespoon cornstarch mixed with 2 tablespoons cold water) to help it set perfectly.
5. Can I make this pot pie gluten-free?
Yes! Swap the all-purpose flour for a 1:1 gluten-free flour blend and use a gluten-free pie crust or biscuit topping. The result is just as comforting and delicious.
6. What sides go with chicken pot pie?
Pot pie is hearty on its own, but it pairs beautifully with a crisp green salad, roasted veggies, or even cranberry sauce for a cozy, complete meal.
7. Can I use store-bought rotisserie chicken?
Definitely! It’s one of the easiest shortcuts. Shred the chicken and stir it right into the creamy filling for a quicker prep that still tastes homemade.
Final Thoughts
At the end of the day, chicken pot pie is more than just a recipe—it’s a ritual of comfort. It’s the smell that fills the kitchen and makes people wander in asking, “Is it ready yet?” It’s that first crack of the golden crust that gives way to creamy, savory goodness inside. And it’s the kind of dish that brings everyone together around the table, no matter what kind of day they’ve had.
What I love most about this recipe is how forgiving and adaptable it is. Whether you go classic with peas and carrots, sneak in extra veggies, or play with global twists, the result is always the same: pure, soul-soothing comfort. And the best part? You don’t need hours of prep or a culinary degree to pull it off. With a skillet, a good whisk, and a little love, you’ve got yourself the coziest pot pie ever.
So next time the weather turns chilly—or you just need a dinner that feels like a hug—give this pot pie a try. It’s timeless, it’s hearty, and it just might become your family’s new favorite tradition.


