The Coffee Cake That’ll Make You a Brunch Legend
Hey friends, Jackson here from Food Meld. Let’s get real for a second. We’ve all been there. You’re hosting brunch, the coffee’s brewing, and you’re hit with that sudden panic: “Do I have anything impressive to serve?” You want something that looks like you slaved over a hot oven for hours, but secretly, you’re hoping for a shortcut that doesn’t taste like one.
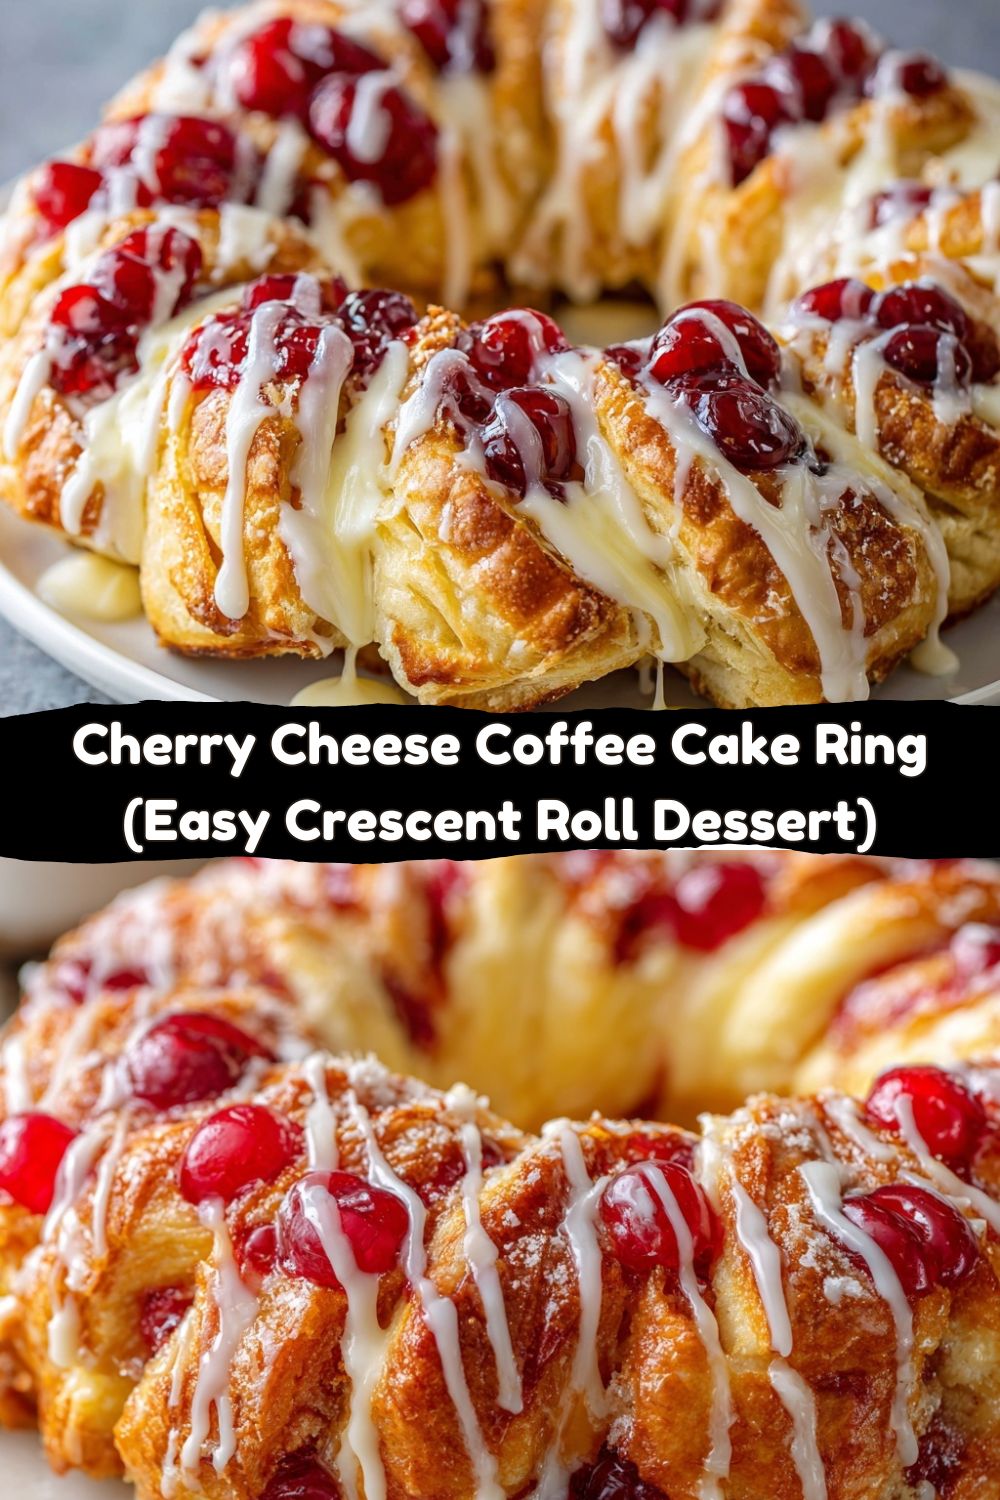
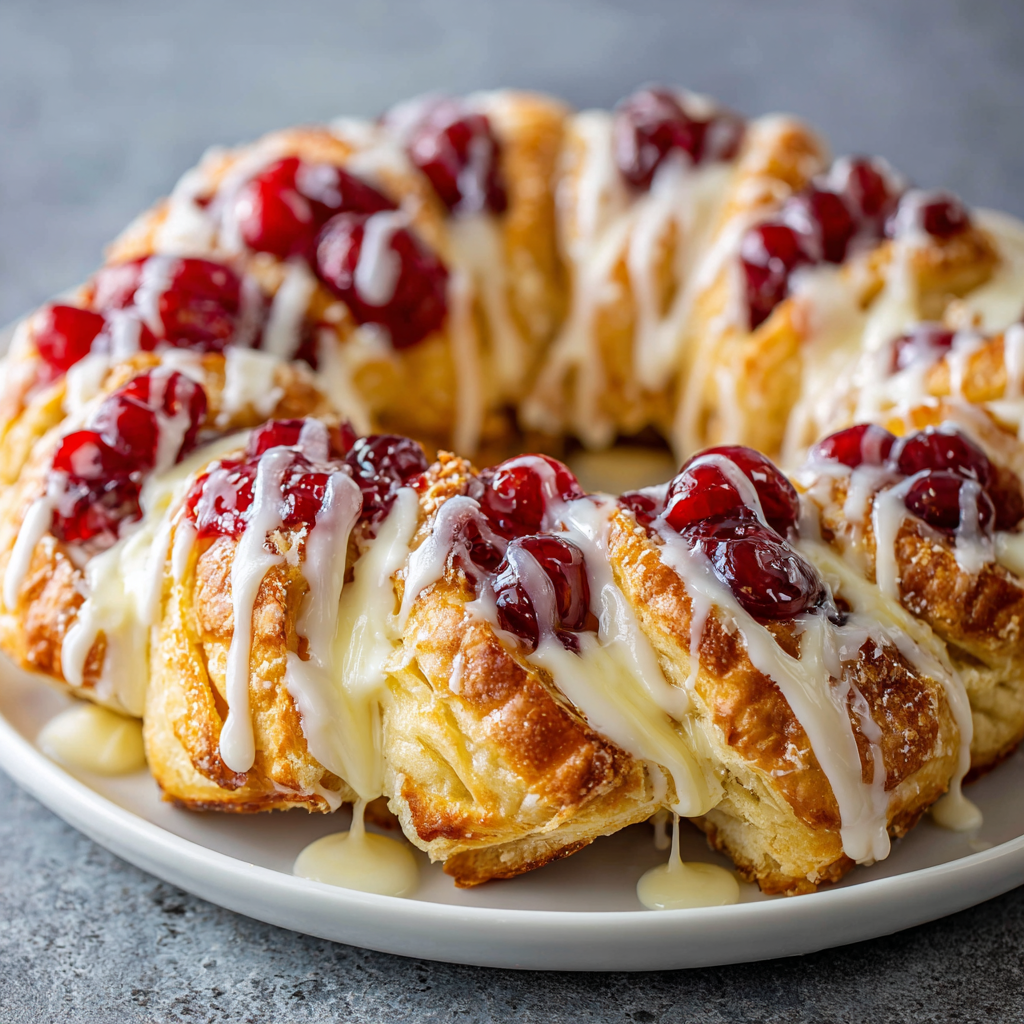
Well, my friend, meet your new secret weapon: the Cherry Cheese Coffee Cake Ring.
This beauty is my kind of kitchen magic. We’re talking flaky, buttery crescent roll dough wrapped around a luscious, creamy cheesecake filling, all topped with a glossy, sweet-tart cherry avalanche and a dreamy vanilla glaze. It’s stunning, it’s decadent, and the best part? It’s unbelievably easy. This isn’t just a recipe; it’s your ticket to becoming the person everyone begs for the recipe. It’s the kind of bold, comforting, “why-didn’t-I-think-of-that” creation that Food Meld is all about. So, preheat that oven, and let’s cook something awesome together.
A Ring Full of Sweet Memories
This coffee cake always takes me right back to my grandma’s kitchen. She wasn’t a fancy pastry chef, but oh, could she make a spread. Her signature move was a cherry pie, the lattice top perfectly golden, juices bubbling like little gemstones. The smell of that baking pastry would fill the whole house, a sweet, warm hug you could literally taste.
One Sunday, I was trying to recreate her pie vibe but was seriously short on time (and, let’s be honest, pie-crust patience). I had a tube of crescent rolls, some cream cheese, and a can of her favorite cherry pie filling staring back at me. In a moment of pure “what if we tried this?” energy, I decided to just go for it—smushing the dough into a ring, piling in the fillings, and folding it over into a rustic, beautiful braid. What came out of the oven was a happy accident that’s now a total classic in my own home. It’s got all the soul of my grandma’s cherry pie but with a fun, modern, and totally Jackson twist.
Gather Your A-Team Ingredients
Here’s the beautiful part: this showstopper comes together with simple, mostly pantry-staple ingredients. Let’s break it down.
For the Cake & Filling:
- 2 (8 oz) cans refrigerated crescent rolls: This is our secret weapon for flaky, buttery layers without the fuss of homemade dough. Keep them cold until you’re ready to use them—they’re much easier to work with that way.
- 8 oz cream cheese, softened: Key word: softened. Leave it on the counter for 30-60 minutes before you start. This is non-negotiable for a silky-smooth filling without any lumps. Full-fat is best for flavor and structure here.
- ¼ cup powdered sugar: It sweetens the filling without the grittiness of granulated sugar. It also helps thicken the cream cheese mixture beautifully.
- 1 large egg: This acts as a binder for our cheesecake layer, giving it a little structure and a richer texture. I usually crack it into a small bowl first, just to make sure no shell hitchhikes in.
- ½ tsp vanilla or almond extract: This is your flavor booster! Vanilla is a classic, but if you really want to level up, use almond extract. It pairs phenomenally well with cherries and makes the whole kitchen smell like a bakery.
- 1 (21 oz) can cherry pie filling: The star of the show! I love the deep color and sweet-tart punch of cherries. Don’t drain it—that glossy sauce is part of the magic.
For the Simple Glaze:
- ½ cup powdered sugar: The base of our simple, sweet drizzle.
- 2–3 tsp milk: Any kind you have—whole, 2%, even almond milk works. We’re just looking for a drizzle-able consistency.
Let’s Build This Beautiful Braid
Ready to see how this all comes together? Follow these steps, and you’ll have a masterpiece in no time. I’ve packed this section with all my favorite chef hacks to make it foolproof.
- Preheat and Prep: Fire up your oven to 350°F (175°C). This is our sweet spot for getting that golden-brown, flaky crust without burning the filling. If you’re using a baking sheet, you can line it with parchment paper for super easy cleanup, but it’s not strictly necessary.
- Create the Base Ring: Open one can of crescent rolls. Now, here’s the trick: instead of separating them, unroll the whole sheet of dough. You’ll see the perforated triangles. Arrange 8 of the triangles in a circle on your baking sheet with the wide ends overlapping in the center (about a 4-5 inch circle) and the points facing out like a sun. Lightly press the overlapping seams together to seal them. You’ve just created the foundation!
- Whip Up the Filling: In a medium bowl, beat the softened cream cheese, ¼ cup powdered sugar, the egg, and your extract of choice with a hand mixer (or a vigorous whisking arm!) until it’s completely smooth and creamy. No lumps allowed! Spread this heavenly mixture evenly over the dough circle, covering all those sealed seams but leaving about an inch border from the outer points.
- The Cherry On Top (Literally): Grab your can of cherry pie filling and spoon it right on top of the cream cheese layer. Spread it out gently, trying to keep most of the cherries inside the ring. Pro-tip: if you spoon too much of the syrupy part, your base can get a little soggy, so aim for a good cherry-to-syrup ratio.
- The Art of the Braid: Time for the final flourish! Take your second can of crescent rolls and separate the triangles. One at a time, take a triangle and cut it lengthwise into three skinny strips. Take one strip and fold the pointy end over the cherry filling, then tuck the end underneath the center base ring to secure it. Repeat with all the remaining strips, working your way around the circle until the filling is beautifully encased in a rustic, braided-looking crown.
- Bake to Golden Perfection: Slide your creation into the preheated oven and bake for 25-30 minutes. You’re looking for a deep, golden-brown crust and a filling that’s set. Your kitchen will smell absolutely incredible. Once it’s done, transfer the whole baking sheet to a wire rack and let it cool for at least 15-20 minutes. I know it’s hard to wait, but this lets the cheese layer set so it doesn’t ooze out when you slice it.
- Finish with the Glaze: While the ring is cooling, make the simple glaze. In a small bowl, whisk the ½ cup of powdered sugar with 2 teaspoons of milk. You want it thin enough to drizzle but thick enough to show up. Add the third teaspoon if needed. Once the ring is just warm (not piping hot), use a spoon or a fork to drizzle that gorgeous glaze all over the top in a zig-zag pattern.
How to Serve This Showstopper
Presentation is part of the fun! I love placing the whole ring right in the center of the table on a nice board or cake stand—it’s an instant centerpiece. For serving, a simple pie server or a sharp knife does the trick. Slice it like a pizza into generous wedges.
This coffee cake is a star all on its own, but if you want to make it a full experience, here are my go-tos:
- A hot cup of strong coffee or a vanilla latte is its best friend.
- For a brunch spread, pair it with something savory like crispy bacon or a simple herby frittata to balance the sweetness.
- A little dollop of freshly whipped cream or a scoop of vanilla ice cream turns it into an unforgettable dessert.
Make It Your Own: Fun Flavor Twists
The beauty of this recipe is its versatility. Once you’ve mastered the classic cherry, the flavor world is your oyster! Here are a few of my favorite twists:
- Blueberry Lemon Zest: Swap the cherry pie filling for blueberry. Add a tablespoon of fresh lemon zest to the cream cheese filling for a bright, sunny flavor explosion.
- Apple Cinnamon Spice: Use apple pie filling and mix a teaspoon of ground cinnamon into the cream cheese mixture. It’s like a cheesecake-stuffed apple pie in ring form!
- Chocolate Hazelnut Delight: Skip the fruit filling. Swirl a cup of chocolate-hazelnut spread right on top of the cream cheese layer. Top with chopped hazelnuts before baking for a decadent, Nutella-lover’s dream.
- Peach & Ginger: Peach pie filling is a fantastic summer swap. Add ¼ teaspoon of ground ginger to the cream cheese for a little warm, spicy kick.
- Dairy-Free Swap: Use your favorite plant-based cream cheese and a non-dairy milk for the glaze. The crescent rolls are often accidentally dairy-free, but always check the label!
Jackson’s Chef Notes & Kitchen Confessions
This recipe has been a work-in-progress for years. The first time I made it, I was so eager I used cold cream cheese. Let’s just say the filling was… lumpy. We called it the “Cherry Cheese Chunky Ring” and laughed the whole way through eating it. It was still delicious, but it taught me the sacred rule: always soften your cream cheese!
I’ve also learned that a pizza stone is my secret weapon for baking this. It gets the bottom crust extra crispy and flaky, preventing any potential sogginess from the juicy filling. If you have one, use it! If not, a standard baking sheet works perfectly. Don’t stress about making the “braid” look perfect. The more rustic, the better—it shows it’s homemade with love.
Your Questions, Answered!
I’ve gotten a lot of questions about this recipe over the years. Here are the big ones to help you out:
Q: My cream cheese filling split/looked watery. What happened?
A: This usually happens if the cream cheese was too warm or over-beaten. Make sure it’s softened but still cool to the touch. Also, mixing just until combined (and not for five minutes straight) is key. If it does split a little, don’t worry—it will still taste amazing!
Q: Can I make this the night before?
A> You can prep components! Make the cream cheese filling, cover it, and keep it in the fridge. In the morning, let it sit out for 15 minutes to soften slightly before assembling. I don’t recommend assembling the whole ring the night before as the dough can get soggy.
Q: The bottom of my ring was a bit soggy. How can I prevent that?
A> A couple of tips! First, make sure your oven is fully preheated. A hot oven will set the bottom crust quickly. Second, try using a light-colored metal baking sheet instead of a dark one, which can over-brown the bottom. And finally, as mentioned, don’t use too much of the syrupy liquid from the pie filling.
Q: Can I use homemade dough or puff pastry?
A> Absolutely! Homemade sweet dough would be incredible. Puff pastry works too, but note that it bakes up a bit flakier and less “bready” than crescent rolls. You might need to adjust the baking time by a few minutes.
Nutritional Information (Because Knowledge is Power!)
Alright, let’s keep it real. This is a celebratory treat, a brunch superstar, not a everyday health food—and that’s perfectly okay! I’m a big believer in enjoying the foods you love mindfully. Here’s a rough breakdown per slice (assuming 12 slices), so you can plan accordingly.
- Calories: ~280
- Carbohydrates: 32g
- Fat: 14g
- Sugar: 14g
- Protein: 4g
Remember, these are estimates and can vary based on the specific brands you use. The main sources of sugar are the pie filling and the glaze, so if you want to lighten it up slightly, you can use a reduced-sugar pie filling or go a little lighter on the drizzle.
You’ve Got This!
And there you have it! The legendary Cherry Cheese Coffee Cake Ring in all its glory. This recipe is a perfect example of what I love to do here at Food Meld: take simple, comforting ingredients and meld them together into something truly special and unforgettable.
It proves that you don’t need to be a professional pastry chef to create a show-stopping bake that will have your friends and family swooning. It’s about the fun, the flavor, and the joy of sharing something delicious. I hope this recipe becomes a new favorite in your home, just like it is in mine.
So, did you try it? What variations did you come up with? Tag me on social @FoodMeld—I love seeing your kitchen creations! Now go on, enjoy every last bite. Until next time, happy cooking!


