Cheesy Garlic Bread Sloppy Joes – The Ultimate Comfort Sandwich
Hey friends, Jackson from Food Meld here! Let’s cut right to the chase: some nights, you don’t need a delicate, fussy, three-hour recipe. Some nights, you need a dinner that feels like a high-five for your soul. You need something unapologetically delicious, a little messy, and so full of flavor that everyone at the table goes quiet except for the sounds of happy chewing.
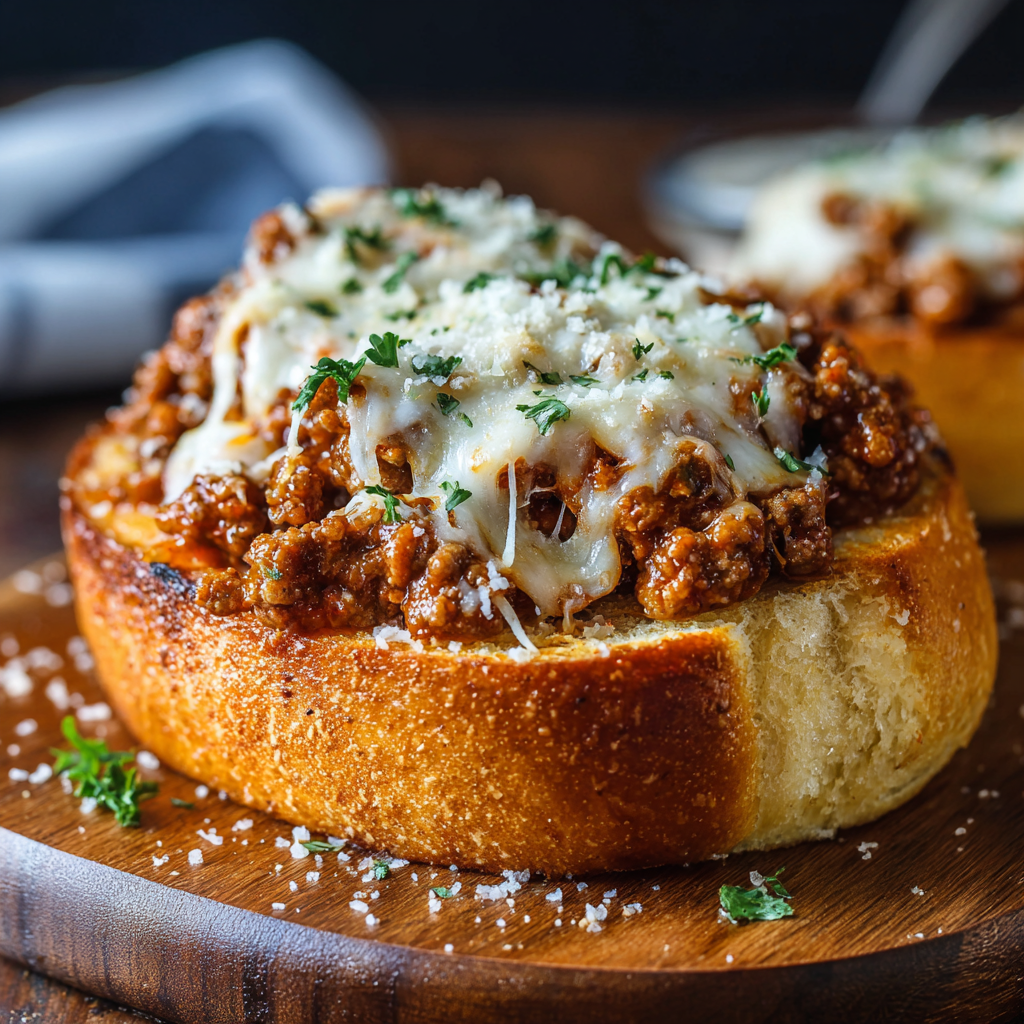
That, my friends, is exactly why I created these Cheesy Garlic Bread Sloppy Joes.
We’re taking two all-time, hall-of-fame comfort food classics—the saucy, savory joy of a Sloppy Joe and the buttery, garlicky perfection of garlic bread—and we’re smashing them together into one epic sandwich. This isn’t just a meal; it’s an experience. It’s the kind of dinner that turns an ordinary Tuesday into a mini-celebration. The sauce soaks into the toasted, garlicky bread, the cheese gets all melty and glorious, and every single bite is a perfect harmony of texture and taste.
I promise you, this is one of those “why didn’t I think of that?!” recipes that’s about to become a regular in your rotation. It’s fast, it’s forgiving, and it’s packed with that “wow” factor we’re always chasing here at Food Meld. So, tie on your apron, and let’s make some kitchen magic happen.

The Beautiful Chaos of a Sloppy Joe
This recipe takes me right back. I didn’t grow up in a fancy-food household. My most cherished food memories are built on the simple, hearty stuff. I can vividly remember my dad manning the stovetop, a big cast-iron skillet sizzling with ground beef and onions. The air would fill with that unmistakable, tangy-sweet aroma of Sloppy Joes, and my brother and I would practically vibrate with excitement.
The best part was always the mess. We’d be sitting at the Formica kitchen table, juice dribbling down our chins, bits of meat and sauce falling onto our plates. My mom would just laugh and say, “Well, they’re not called ‘Neat Joes,’ are they?” It was pure, unbridled joy. That memory is the heart of this recipe. I wanted to capture that same fun, messy spirit but give it a little grown-up flair. By swapping the standard hamburger bun for a crispy, buttery garlic bread vessel, we’re elevating the experience without losing any of that childhood magic. It’s a tribute to the classics, with a serious flavor upgrade.
Gather Your Flavor Arsenal
Here’s everything you’ll need to create this masterpiece. Don’t stress about being exact—cooking is about feeling, and these ingredients are super flexible.
- 1 lb ground beef: I like an 80/20 blend for the best flavor and juiciness, but leaner works too! Chef’s Insight: For a next-level texture, try a mix of ground beef and pork.
- 1/2 onion, finely diced: This is our flavor foundation. The dice doesn’t have to be perfect, but keeping it small ensures a bit in every bite.
- 2 cloves garlic, minced: Fresh is best here! It gives a brighter, sharper punch than the powdered stuff. Sub Tip: No fresh garlic? Use ½ tsp of garlic powder in the meat mixture.
- 1/2 cup ketchup: The sweet and tangy backbone of our sauce.
- 2 tbsp tomato paste: This is our secret weapon for deep, rich tomato flavor without making the filling watery. Chef’s Hack: Freeze leftover tomato paste in tablespoon-sized portions on a baking sheet, then store in a bag for next time!
- 1 tbsp Worcestershire sauce: Don’t skip this! It adds a complex, savory, umami depth that makes the whole thing sing.
- 1 tsp mustard: Yellow mustard is perfect for a little tangy zip. Dijon would also be fantastic for a sharper kick.
- Salt and pepper to taste: Season as you go! Taste your filling before it goes on the bread.
- 4 hoagie rolls or thick sandwich buns, split: You want something sturdy that can hold up to the saucy filling without getting soggy.
- 4 tbsp butter, softened: Unsalted is my go-to, so I can control the salt level. Softened butter is key for easy spreading.
- 1 tsp garlic powder: For the garlic bread. Powdered garlic gives us that classic, evenly distributed garlic bread flavor.
- 1 1/2 cups shredded mozzarella or provolone cheese: Mozzarella for that epic pull, provolone for a sharper, more robust flavor. Or, be a rebel and use a blend! Sub Tip: A Mexican blend or even cheddar would be delicious here.
- Chopped parsley (optional, for garnish): A little sprinkle of green makes it look pretty and adds a fresh flavor contrast.
Let’s Build the Ultimate Sandwich: A Step-by-Step Guide
Okay, team. The game plan is simple: we make the killer filling, we build the ultimate garlic bread base, and then we bring them together in a cheesy, glorious union. Follow these steps, and you really can’t go wrong.
- Preheat and Prep: First things first, get that oven heating to 375°F (190°C). This gives it plenty of time to come to temp while we work on the stovetop. Chef’s Tip: If your oven has a convection setting, use it! It’ll give you a more even, crispier toast on the bread.
- Brown the Beef: Grab a large skillet (I love my trusty cast-iron for this) and set it over medium heat. Crumble in your ground beef and the diced onion. Cook it up, breaking the meat apart with your spoon, until the beef is no longer pink and the onions have turned soft and translucent. This usually takes about 7-8 minutes. Chef’s Hack: Don’t drain all the fat! A little bit left in the skillet adds incredible flavor to our sauce. If there’s a ton, you can spoon some out.
- Garlic Time! Now, stir in your minced garlic. Ah, smell that? That’s the good stuff. Cook it for just about 1 minute until it’s fragrant. You don’t want to burn it, or it’ll turn bitter.
- Build the Sauce: This is where the magic happens. To the skillet, add the ketchup, tomato paste, Worcestershire sauce, mustard, and a good pinch of salt and pepper. Stir everything until it’s beautifully combined and that rich, red color we all know and love. Let it simmer for 5-7 minutes. You’ll see it thicken up and the flavors will meld together perfectly. Give it a taste and adjust the seasoning if it needs it—maybe a pinch more salt or a dash more Worcestershire.
- Create the Garlic Bread Base: While the filling is simmering, let’s make our garlic bread. In a small bowl, mix the softened butter and garlic powder until it’s a smooth, spreadable paste. Take your split rolls and slather this garlic butter generously on the cut sides of *both* halves. We’re toasting the tops and bottoms for maximum crunch and flavor! Place them butter-side-up on a baking sheet.
- Toast Those Buns: Pop the baking sheet into your preheated oven for just 3-4 minutes. We’re not looking for full-on browning yet, just a light toasting to crisp them up and lock in that garlicky butter. This step is crucial—it creates a barrier so the saucy filling doesn’t make the bread soggy!
- The Grand Assembly: Take the baking sheet out of the oven (leave the oven on!). Spoon that glorious Sloppy Joe filling onto the *bottom* halves of the toasted rolls. Pile it high! Now, blanket everything with that glorious mountain of shredded cheese.
- The Cheesy Finale: Switch your oven to BROIL. Carefully place the baking sheet back in the oven, about 6 inches from the heating element. Watch it like a hawk! Broil for 1-3 minutes, just until the cheese is melted, bubbly, and has those gorgeous golden-brown spots. It happens fast, so don’t walk away!
- Serve it Up: Carefully remove your creations from the oven. Place the top half of the roll on each one, sprinkle with a little chopped parsley for a pop of color, and serve immediately. Warning: napkins are mandatory for this next part.
How to Serve These Flavor Bombs
You’ve just created a main event, so you don’t need to go too crazy on the sides. The goal is to keep things simple and satisfying. I like to serve these Sloppy Joes right on the baking sheet (lined with parchment for easy cleanup, of course) for a fun, family-style meal. It leans into the casual, shareable vibe.
For sides, you can’t go wrong with a classic:
- A big, crisp green salad with a sharp vinaigrette to cut through the richness.
- A handful of dill pickle spears on the side—the tangy crunch is a perfect contrast.
- A big bag of kettle-cooked potato chips for that ultimate salty-crunchy element.
- If you’re feeling fancy, some crispy onion rings or sweet potato fries would be absolutely legendary.
However you serve them, just make sure you have plenty of napkins and a big smile. This is food to be enjoyed with your hands and your heart.
Make It Your Own: Fun Flavor Twists
This recipe is like a blank canvas for your cravings. Here are a few of my favorite ways to mix it up:
- Spicy Kick: Add a diced jalapeño (seeds and all for maximum heat) when you cook the onions. A dash of hot sauce or a pinch of red pepper flakes in the sauce will also wake everything up!
- “Pizza-rito” Style: Stir a tablespoon of Italian seasoning into the meat sauce and use sliced pepperoni under the cheese. Finish with a sprinkle of grated Parmesan after broiling.
- BBQ Lover’s Dream: Swap the ketchup for your favorite BBQ sauce and use a smoky cheddar cheese. You’ll get a whole new sandwich with just two simple swaps.
- Turkey or Chicken: For a leaner option, ground turkey or chicken works beautifully. Just add a tablespoon of olive oil to the pan to compensate for the lower fat content.
- Full-On Veggie Power: Skip the meat! Use a plant-based ground “beef” alternative, or for a from-scratch version, sauté finely chopped mushrooms and lentils with the onions for a hearty, satisfying vegetarian version.
Jackson’s Kitchen Notes
This recipe has seen a few iterations in my kitchen. The first time I made it, I got a little overzealous and piled the filling on the untoasted buns before broiling. The result? Soggy-bottomed sadness. Lesson learned! That toasting step is non-negotiable for structural integrity.
Another fun story: I once made a double batch for a game-day party, and a friend tried to eat one like a hot dog, holding it from the ends. It… did not end well for his white shirt, but it created a memory (and a hilarious photo) we still laugh about. Embrace the mess! That’s part of the charm. Over time, I’ve found that letting the filling simmer for those full 7 minutes is what really makes it perfect—it gives the flavors time to get to know each other and become something greater than the sum of their parts.
Your Questions, Answered!
Q: My filling turned out a bit watery. How can I fix that?
A: No worries! The most common culprit is not letting it simmer long enough. Just cook it for a few more minutes over medium heat, stirring often, until the excess liquid evaporates. Also, make sure you’re using tomato paste, which is a thickener, and not tomato sauce.
Q: Can I make this ahead of time?
A: Absolutely! You can make the Sloppy Joe filling up to 3 days in advance and store it in the fridge. When you’re ready to eat, just reheat the filling on the stovetop or in the microwave and pick up from the garlic bread toasting step. Easy weeknight win!
Q: My cheese melted but didn’t get golden. What gives?
A> That usually means you need to move the rack closer to the broiler element. The intense, direct top heat is what creates that beautiful, bubbly, golden-brown crust we’re after. Just watch it carefully up there!
Q: Can I use pre-made garlic bread to save time?
A> You sure can! It’s a great shortcut. Just follow the package directions for the initial toasting, then load it up with the filling and cheese and broil as directed.
Nutritional Info (Because We’re Curious!)
Alright, let’s keep it real. This is a comfort food sandwich, and it’s not pretending to be a salad. But knowledge is power! Here’s a rough breakdown per sandwich (using 85% lean beef and mozzarella cheese). Remember, these are estimates and can vary based on your specific ingredients and portion sizes.
- Calories: ~550
- Protein: 28g (Great for keeping you full and satisfied!)
- Fat: 32g
- Carbohydrates: 38g
If you’re looking to lighten it up a bit, you can easily use lean ground beef (90/10 or 93/7), low-fat cheese, and light butter. But my personal philosophy? Enjoy the real deal, savor every single bite, and balance it out with those healthy sides. It’s all about that Food Meld balance!
Let’s Cook Something Awesome Together
And there you have it! The Cheesy Garlic Bread Sloppy Joe—a recipe that’s built for fun, flavor, and making a mess in the best way possible. I hope this dish brings as much joy and laughter to your table as it has to mine.
This is exactly what Food Meld is all about: taking the familiar, adding a creative twist, and creating something truly unforgettable without a lot of stress. Cooking should be an adventure, not a chore.