That “Holy Wow” Moment: Recreating Cheesecake Factory’s Spicy Cashew Chicken Magic
Hey friends, Jackson here from Food Meld! You know that feeling when you take a bite of something at a restaurant and your taste buds just throw a party? Your eyes widen, you nudge the person next to you (probably spilling your drink, no shame!), and you immediately start plotting how to recreate it at home? That’s exactly what happened the first time I tackled Cheesecake Factory’s Spicy Cashew Chicken. It’s that legendary combo: crispy, golden chicken coated in a sauce that’s sweet, spicy, sticky, and utterly addictive, all tangled up with crunchy cashews and fresh green onions. Seriously, it’s a flavor explosion that makes you forget about the menu entirely. Today, we’re pulling back the curtain and bringing that restaurant wow factor straight to your kitchen. Forget complicated techniques or hard-to-find ingredients – we’re using simple methods with a few chef-y hacks to nail that signature crunch and bold sauce. Whether it’s Taco Tuesday fatigue or you just need a guaranteed crowd-pleaser, this recipe is your ticket to an unforgettable dinner. Grab your skillet, channel your inner kitchen rockstar, and let’s make magic happen. Trust me, your family’s gonna ask for this on repeat!
A Date Night Discovery & The Great Chicken Experiment
Picture this: it’s our anniversary, maybe 5 years back? Sarah (my better half and chief recipe taster) and I were celebrating at the Cheesecake Factory. Now, I’m usually the guy obsessing over the menu, but she spotted the Spicy Cashew Chicken and declared, “That’s the one.” Skeptical chef brain thought, “Chicken? At a place famous for cheesecake? Okay…” Man, was I wrong. That first forkful was a revelation – the crazy-good crunch giving way to tender chicken, then BAM! That sweet-heat sauce hit, followed by the buttery cashews and the fresh bite of scallions. It was messy, saucy perfection. We practically licked the plate clean, talking non-stop about the textures.
Fast forward to the next weekend. Mission: Recreate The Magic. Attempt one? Sauce too thin, chicken soggy. Attempt two? Burnt cashews (oops!). But attempt three? That was the golden ticket (literally!). I remember the sizzle when the battered chicken hit the hot oil, the smell of garlic and sherry filling the kitchen as the sauce thickened, and Sarah’s face when she took that first bite – pure, unadulterated joy, mirroring our date night. That “AHA!” moment, standing in our own kitchen amidst a glorious mess, high-fiving over perfectly crispy, saucy chicken? That’s the heart of Food Meld. It’s not just about copying a dish; it’s about capturing that shared moment of delicious discovery, right at your own stove. This recipe is that victory, shared with you.
Print
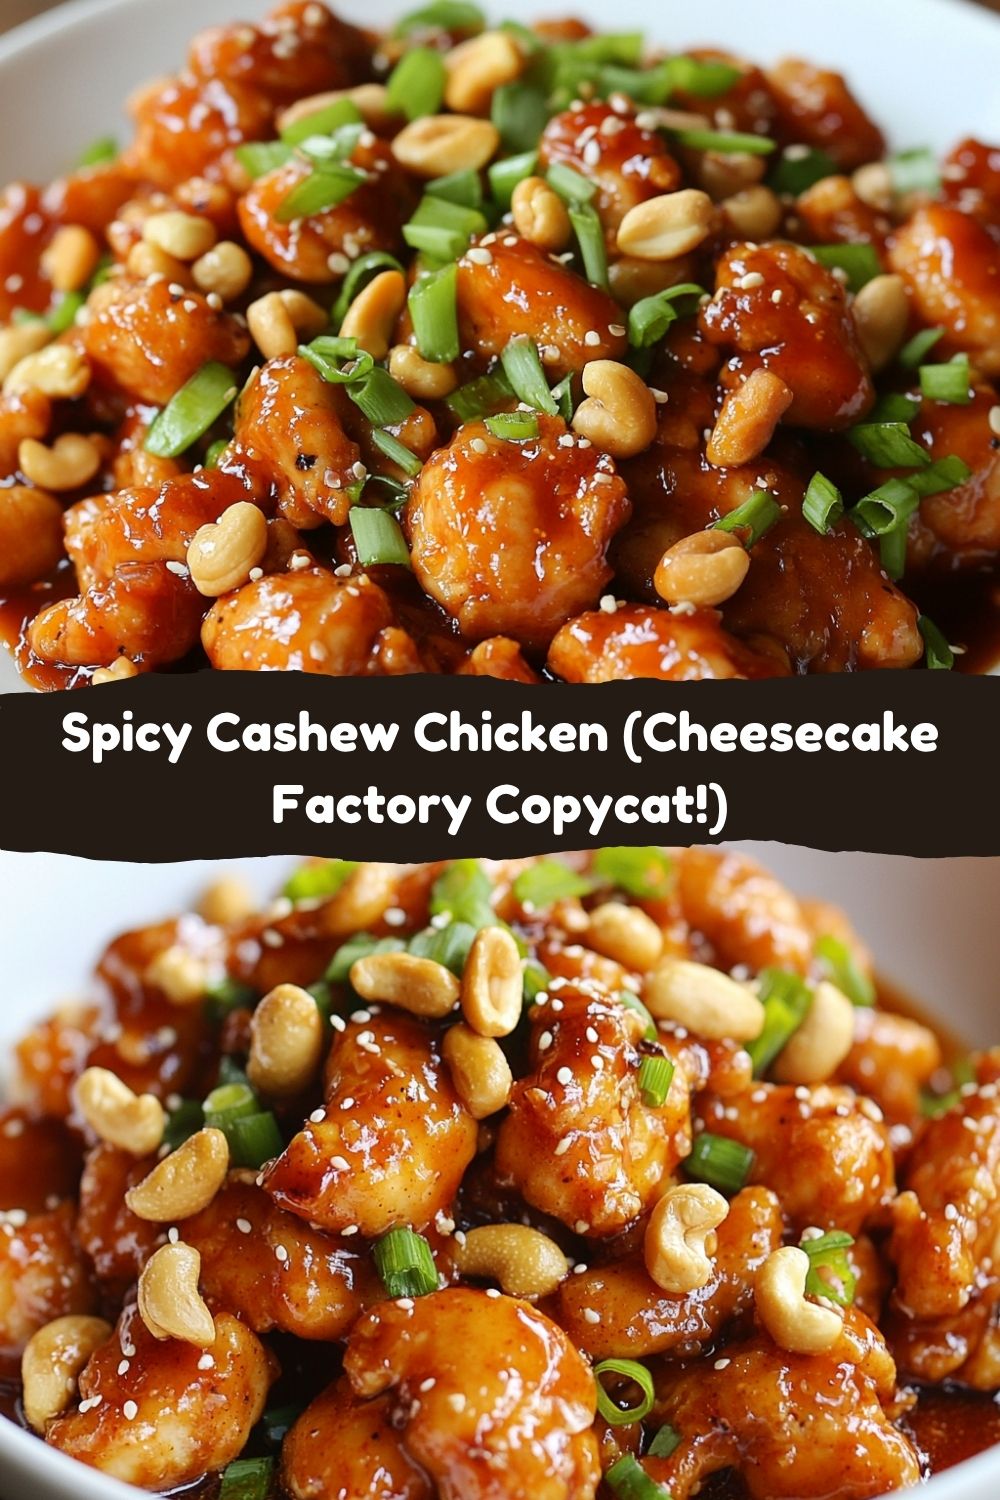
Cheesecake Factory’s Spicy Cashew Chicken
- Total Time: 45 minutes
- Yield: 4 1x
Description
I remember the first time I tried this dish at the Cheesecake Factory—it was love at first bite. Sweet, spicy, crunchy, and packed with flavor, it became our family’s favorite to recreate at home. This homemade version brings restaurant magic to your kitchen—gather your ingredients and make dinner unforgettable tonight.
Ingredients
Main:
⅓ cup canola or vegetable oil
1½ lbs chicken breast, cut into bite-sized chunks
8 oz cashews
6 green onions, sliced ¼-inch
Seasoned Rice Flour:
¾ cup rice flour
¼ tsp kosher salt
⅛ tsp ground black pepper
⅛ tsp paprika
⅛ tsp baking powder
Rice Flour Batter:
1½ cups rice flour
¼ cup all-purpose flour
¼ tsp kosher salt
¼ tsp black pepper
1½ cups ice water
Spicy Soy-Sherry Sauce:
1 cup hoisin sauce
¼ cup soy sauce
¼ cup sherry wine
2 tbsp red wine vinegar
1 tbsp sriracha sauce
¼ cup sugar
2 oz minced garlic
¼ tsp crushed red chili flakes
Instructions
Mix sauce ingredients in a saucepan. Simmer for 5–7 minutes until thickened. Set aside.
Mix seasoned flour ingredients in one bowl. In another, combine all batter ingredients.
Toss chicken in seasoned flour, then dip into batter.
Heat oil in a skillet. Fry chicken in batches until crispy and golden, about 3–4 minutes per side. Drain on paper towels.
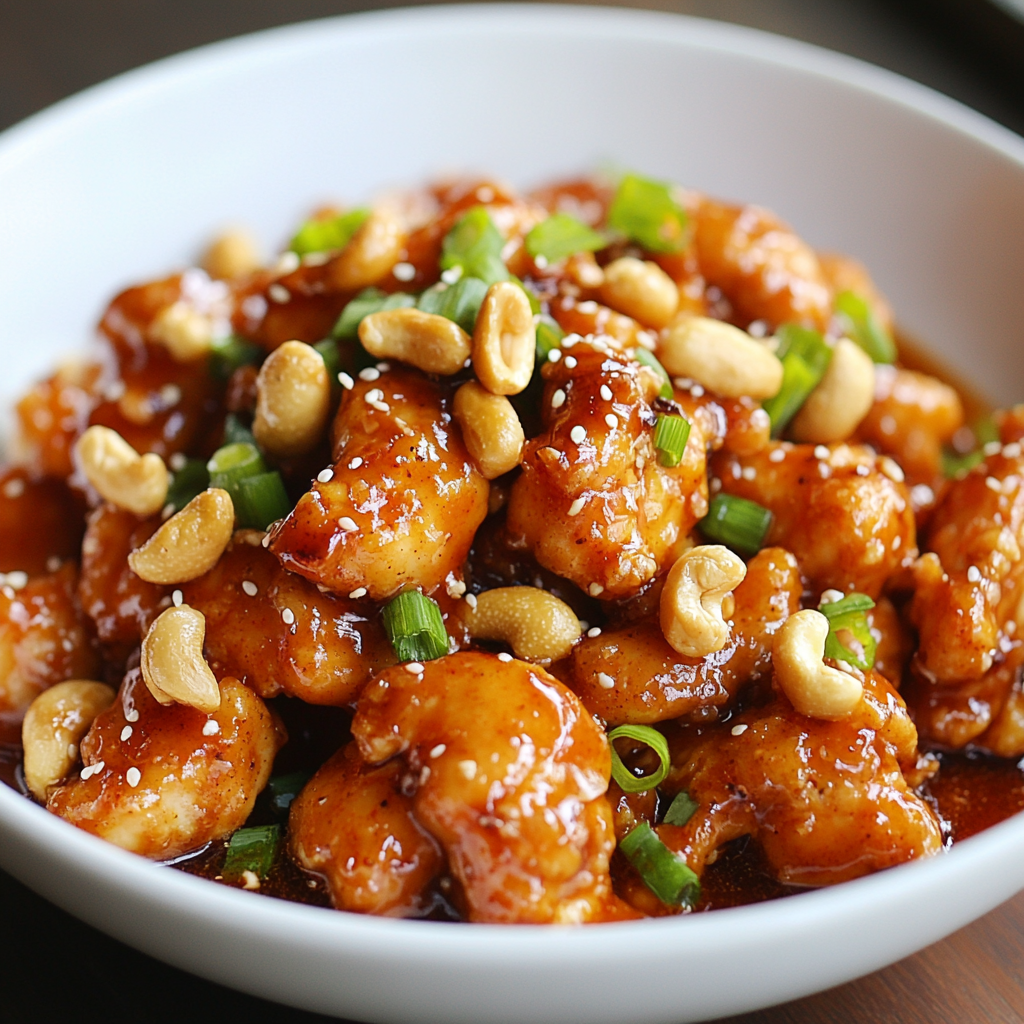
Toss chicken in the warm sauce, add cashews and green onions.
Serve hot with rice or over stir-fried veggies.
Notes
Spicy, saucy, and satisfyingly crispy—this dish is a knockout every time.
- Prep Time: 20 minutes
- Cook Time: 25 minutes
Nutrition
- Calories: 580 per serving
- Fat: 30g per serving
- Carbohydrates: 38g per serving
- Protein: 35g per serving
Gathering Your Flavor Arsenal: What You’ll Need
Don’t let the list fool ya – it’s mostly pantry staples coming together for something extraordinary! Here’s the breakdown:
The Main Event
- ⅓ cup canola or vegetable oil: Our frying workhorse! Neutral flavor, high smoke point. Peanut oil works great too for a slightly nuttier vibe.
- 1½ lbs boneless, skinless chicken breast, cut into bite-sized chunks: Uniform pieces cook evenly. Thighs are a juicy, flavorful swap if you prefer!
- 8 oz raw cashews: The “cashew” star! Raw is key – they toast perfectly while tossing. Salted roasted cashews can work in a pinch, but ease up on salt elsewhere.
- 6 green onions, sliced ¼-inch: Fresh, vibrant color and flavor pop. Slice ’em thin, whites and greens!
The Crispy Secret Weapon: Seasoned Rice Flour
- ¾ cup rice flour: The gluten-free magic dust for ultra-crispiness! Don’t sub AP flour here – rice flour is non-negotiable for that signature crunch.
- ¼ tsp kosher salt, ⅛ tsp ground black pepper, ⅛ tsp paprika: Our simple flavor base. Paprika adds subtle depth, not heat.
- ⅛ tsp baking powder: Chef’s tiny hack! It creates micro-bubbles, making the final coating even lighter and crispier. Seriously, it works!
The Light & Airy Rice Flour Batter
- 1½ cups rice flour: More crisp power! Consistency is key.
- ¼ cup all-purpose flour: Helps the batter cling just right. Gluten-free? Use an extra ¼ cup rice flour.
- ¼ tsp kosher salt, ¼ tsp black pepper: Seasoning the batter itself makes every bite flavorful.
- 1½ cups ICE water: Crucial! Cold water prevents gluten development (from the AP flour) and keeps the batter light, ensuring maximum crispiness. Don’t skip the ice!
The Irresistible Spicy Soy-Sherry Sauce
- 1 cup hoisin sauce: The sweet, thick, savory backbone. Look for it near Asian ingredients.
- ¼ cup soy sauce: Salty depth and umami. Low-sodium works fine.
- ¼ cup sherry wine: Adds complex sweetness and depth. Dry sherry is best. No sherry? Substitute dry white wine or even apple juice in a pinch.
- 2 tbsp red wine vinegar: Bright, tangy balance.
- 1 tbsp sriracha sauce: Our main heat source! Adjust to your spice love (more = more fire!).
- ¼ cup sugar: Balances the tang and heat. Brown sugar adds a hint of caramel if you like.
- 2 oz minced garlic (about 6-8 cloves): Garlicky goodness! Jarred minced garlic is totally acceptable here for speed.
- ¼ tsp crushed red chili flakes: Extra heat kick and visual pop. Optional, but recommended for spice lovers!
Crafting Your Crispy, Saucy Masterpiece: Let’s Get Cooking!
Okay, team! Let’s transform these ingredients into pure deliciousness. This is where the fun (and the sizzle!) happens. Read through once, then dive in!
- SAUCE FIRST IS SAUCE SUCCESS! Grab a medium saucepan. Dump in ALL the Spicy Soy-Sherry Sauce ingredients – hoisin, soy sauce, sherry, vinegar, sriracha, sugar, garlic, and chili flakes. Whisk it like you mean it until smooth. Bring it to a gentle simmer over medium heat. Now, let it bubble happily for 5-7 minutes, whisking occasionally. You’ll see it thicken beautifully and become glossy – it should coat the back of a spoon. CHEF HACK: Taste it now! Want more heat? Add a dash more sriracha or chili flakes. A bit too intense? A tiny splash of water balances it. Once perfect, take it off the heat and set it aside. This resting time lets the flavors meld.
- PREP THE CRUNCH STATIONS! Set up your breading line: Get two shallow bowls or pie plates. In the first bowl, whisk together all the Seasoned Rice Flour ingredients (rice flour, salt, pepper, paprika, baking powder). In the second bowl, whisk together the Rice Flour Batter ingredients (rice flour, AP flour, salt, pepper, and ICE water). CRITICAL TIP: Keep that batter COLD! I sometimes even set the bowl in a larger bowl of ice water while working.
- CHICKEN, MEET YOUR CRISPY COAT! Pat your chicken chunks dry with paper towels – this is essential for the coating to stick! Working with a handful at a time, toss the chicken pieces in the seasoned rice flour. Shake off the excess – you want a light, even dusting. Next, dip the floured chicken into the ice-cold batter. Let any excess batter drip off for a second. CHEF HACK: Use one hand for dry (flour) and one hand for wet (batter) to avoid “claw hand”!
- FRY TIME: GET READY TO SIZZLE! Heat the oil in a large, heavy-bottomed skillet (cast iron is awesome!) or Dutch oven over medium-high heat. To test if it’s ready, flick a tiny drop of batter in – it should sizzle vigorously and float immediately. Carefully add the battered chicken pieces in a single layer – DON’T CROWD THE PAN! This is crucial. Crowding drops the oil temp and makes things soggy. Fry in batches. Cook for about 3-4 minutes per side, turning once, until deeply golden brown, crispy, and cooked through. PRO TIP: The internal temp should hit 165°F (74°C). Transfer the golden beauties to a wire rack set over paper towels to drain. Repeat with remaining chicken.
- THE GRAND MELD: BRINGING IT ALL TOGETHER! Re-warm the sauce gently over low heat if needed. It should be nice and pourable. Place all the crispy fried chicken pieces into a large bowl. Pour that glorious warm sauce over the top. Add the raw cashews and most of the sliced green onions (save some for garnish!). Now, gently toss everything together using a big spoon or spatula until every piece of chicken and every cashew is lovingly coated in that spicy, sticky sauce. BE GENTLE! We want to keep that hard-earned crunch intact.
- FINAL FLOURISH & SERVE! Pile that saucy, crunchy, nutty, spicy chicken high onto your serving platter or individual plates. Scatter the reserved green onions over the top for that fresh pop of color and flavor. Boom! Restaurant magic, achieved.
Plating Up Perfection: How to Serve Your Masterpiece
This Spicy Cashew Chicken is the undisputed star, so let it shine! Pile it high in the center of a big, vibrant platter family-style – that saucy, glossy chicken and golden cashews look incredible. For individual plates, scoop a generous portion beside or over a fluffy bed of steamed jasmine rice (my go-to for soaking up sauce!) or brown rice for a nuttier twist. Feeling veggie-forward? Serve it over a quick stir-fry of crisp broccoli, bell peppers, and snap peas – the sauce coats them beautifully. Keep garnishes simple: those final green onions are perfect. Maybe a tiny extra sprinkle of red chili flakes for the heat-seekers at the table. This dish is bold, so keep sides light: a simple cucumber salad or steamed edamame are fantastic palate cleansers. Now, pass the plates and get ready for the compliments!
Make It Your Own: Delicious Twists on the Classic
Love the base recipe? Awesome! Now let’s play with some “Food Meld” variations:
- Sweet & Smoky Swap: Replace half the hoisin with BBQ sauce and add ½ tsp smoked paprika to the sauce. Use pecans instead of cashews. Hello, Southern-inspired twist!
- Pineapple Punch: Add ½ cup drained pineapple chunks when tossing with the sauce. Swap sherry for pineapple juice in the sauce. Tropical vibes activated!
- Vegetable Power-Up: Make it a fuller stir-fry! After frying the chicken, quickly stir-fry bell peppers, broccoli florets, and carrots in a little oil until crisp-tender. Add them when tossing with the sauce, chicken, and cashews.
- Gluten-Free Guarantee: Already mostly GF! Ensure your soy sauce is gluten-free (tamari). Replace the ¼ cup AP flour in the batter with an extra ¼ cup rice flour or a GF all-purpose blend. Done!
- Extra Heat Seeker: Double the sriracha and crushed red pepper flakes in the sauce. Add a teaspoon of grated fresh ginger with the garlic. Feel the burn (in the best way)!
Jackson’s Kitchen Chronicles: Notes from the Flavor Trenches
This recipe? It’s a labor of love (and crispy chicken obsession). I mentioned my early fails – the soggy chicken disaster of 2019 still haunts me! The real breakthrough was the double-rice-flour technique (seasoned flour + batter) and that ICE-COLD water. It makes the coating insanely crisp and light, almost tempura-like, but sturdier for that thick sauce. Over the years, I’ve tweaked the sauce balance endlessly – finding that sweet spot between hoisin richness, soy saltiness, sherry depth, and sriracha heat is an art! One hilarious kitchen memory: I was filming a reel for this recipe, totally focused, when my dog, Biscuit, decided the sizzling skillet sounded TOO interesting. He tried a flying leap towards the counter! Let’s just say there was a dramatic save (chicken rescued, dog unscathed, my heart rate… elevated). Lesson learned: keep furry sous chefs at a safe distance during fry time! The best part? Hearing from you guys when you make it. Your “OMG, it worked!” messages? Pure gold. That’s why we Food Meld.
Spicy Cashew Chicken SOS: Your Questions Answered
Let’s tackle those common hiccups before they happen!
- Q: My chicken coating turned out soggy/not crispy! What went wrong?A: Sogginess is usually an oil temp issue! Key culprits: Oil not hot enough before adding chicken (test with that batter droplet!), overcrowding the pan (fry in batches, be patient!), or the battered chicken sitting too long before frying (get it into the oil right after battering). Also, ensure you pat the chicken VERY dry before flouring. Finally, draining on a wire rack over paper towels is better than just paper towels – it prevents steaming.
- Q: Can I bake or air fry the chicken instead of frying?A: You can try for a lighter version! For baking: Preheat oven to 425°F (220°C). Place battered chicken on a wire rack set over a baking sheet (crucial for air flow). Spray lightly with oil. Bake 15-20 mins, flip, spray again, bake 10-15 mins more until crispy and cooked. For air frying: Preheat air fryer to 400°F (200°C). Cook battered