
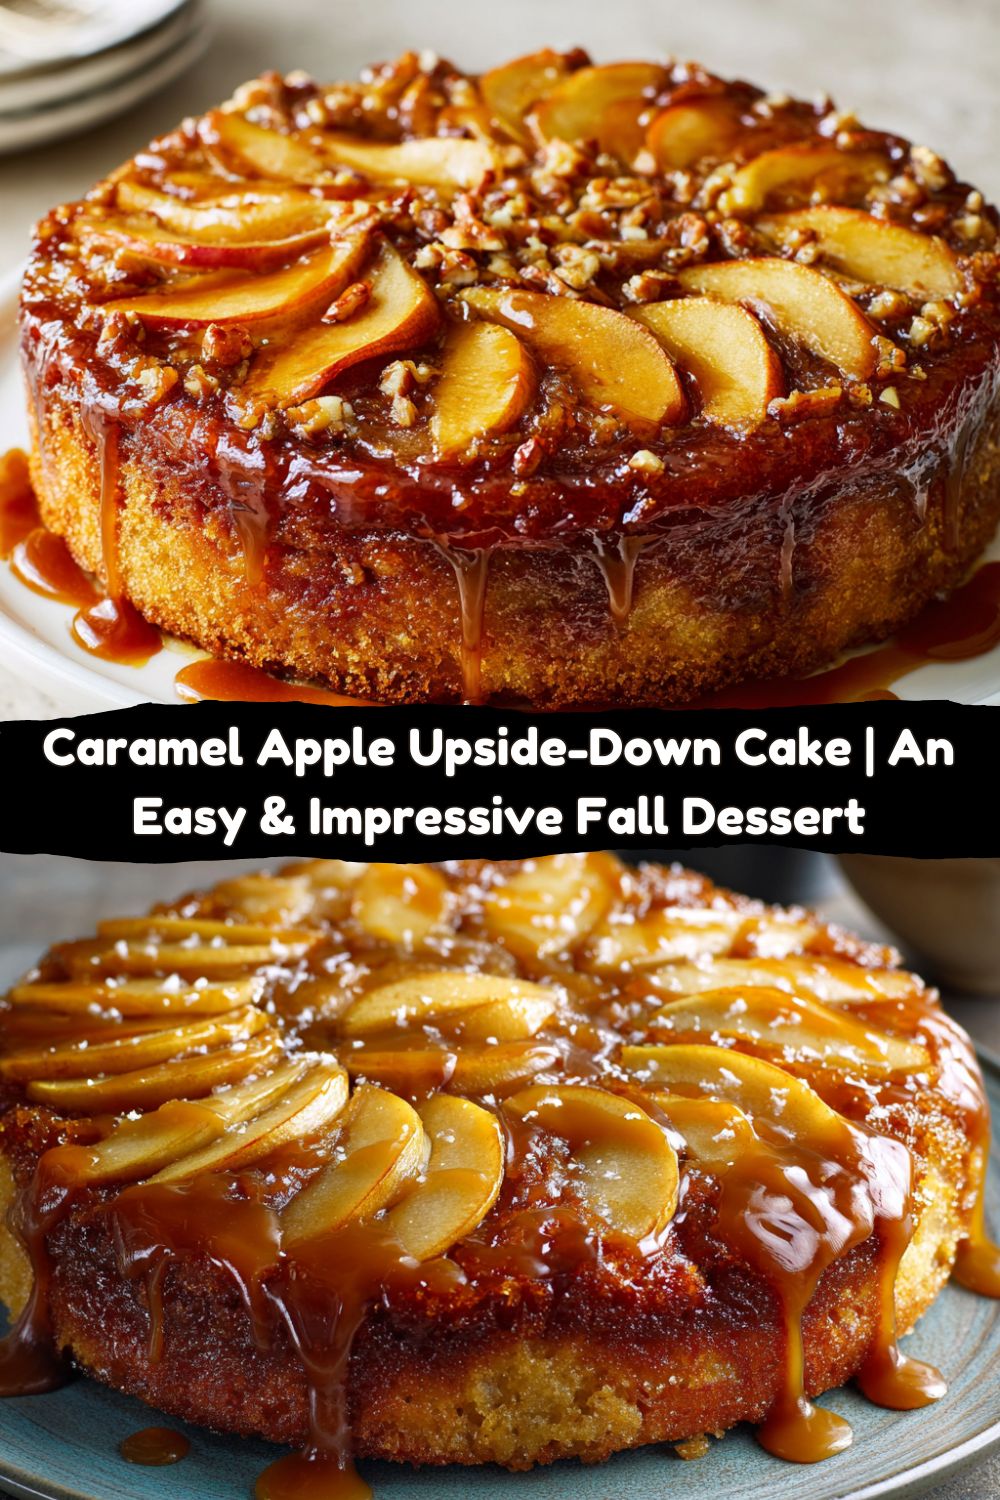
Caramel Apple Upside-Down Cake: Your New Go-To Fall Showstopper
Hey friends, Jackson from Food Meld here. Let’s talk about that moment. You know the one. You bring a dessert to the table, and the conversation just… stops. All you hear is a collective, quiet “whoa.” That’s the power of a great dessert. And let me tell you, this Caramel Apple Upside-Down Cake is a certified conversation-stopper.
I’m not talking about a fussy, complicated pastry that requires a culinary degree and a prayer. I’m talking about cozy, tender cake. I’m talking about buttery apples that have been swimming in a pool of homemade caramel, getting all soft and glorious. I’m talking about that magical flip onto a plate, revealing a glossy, beautiful masterpiece that looks like you spent all day in the kitchen. The best part? You totally didn’t. This is one of those “looks fancy but is secretly easy” recipes that I live for. It’s the kind of dessert that fills your kitchen with the warm, spiced scent of autumn and promises a slice of pure, unadulterated comfort. So, grab your favorite skillet or cake pan, and let’s cook something awesome together.
The Little Bakery That Could (And Inspired This Cake)
This cake takes me right back to my grandparents’ place in Georgia. There was this tiny, no-frills bakery a few towns over that my granddad would drive to every Sunday after church. It was run by a woman named Mae who had flour permanently dusted on her apron and a smile that could light up the whole room. She made the simplest apple cake, but it was legendary. It wasn’t fancy—no intricate piping or exotic ingredients. It was just profoundly good, honest food.
One afternoon, I was watching her through the service window as she prepped for the next day. She wasn’t making a cake; she was making a dozen little caramel apple tarts, arranging the slices in perfect spirals. I remember the smell of sugar and butter hitting the hot pan—a scent that is literally baked into my memory. This cake is my tribute to Mae and that feeling. It’s my “what if we tried this?” energy applied to a classic, taking that homey, comforting vibe and turning it into a showstopping centerpiece dessert that’s just as full of heart.
Gathering Your Flavor Squad
Here’s everything you’ll need to create this caramel apple magic. Remember, great ingredients make a great cake, but don’t stress—I’ve got substitution ideas for ya!
For the Caramel Apple Topping:
- 3 tbsp Unsalted Butter: This is the rich, creamy base of our quick caramel. Unsalted lets us control the salt level. If you only have salted, that’s okay! Just skip the pinch of salt later.
- ½ cup Brown Sugar: Pack it in there! The molasses in brown sugar gives us that deep, caramel flavor and gorgeous color. Light or dark brown works—dark will give you a more robust molasses kick.
- 2–3 Apples, peeled, cored, and sliced: I love using a mix for complexity! Honeycrisp sweetens nicely and holds its shape. Granny Smith gives a fantastic tangy contrast that cuts through the sweetness. Chef Insight: No need to be perfect with the slices! Rustic is charming.
For the Spiced Cake:
- 1½ cups All-Purpose Flour: The trusty foundation of our cake. For a gluten-free swap, a 1:1 GF blend works wonderfully here.
- 1½ tsp Baking Powder & ½ tsp Baking Soda: Our leavening dream team. They work together to give this cake a beautiful, tender lift. Make sure they’re fresh for the best rise!
- ½ tsp Salt: Crucial for balancing all the sweetness and making the flavors pop.
- 1 tsp Cinnamon & ¼ tsp Nutmeg: The dynamic duo of cozy spices. Freshly grated nutmeg is a game-changer if you have it!
- ½ cup Unsalted Butter, softened: “Softened” is key! It should leave a slight indent when you press it. This creams with the sugar to create an airy, light texture.
- ½ cup Brown Sugar & ¼ cup Granulated Sugar: Using both gives us depth from the molasses and a clean sweetness. Don’t skip creaming them with the butter—it’s where the cake’s texture begins!
- 2 large Eggs: Bring them to room temperature! They incorporate into the batter much more smoothly, leading to an even crumb.
- 1 tsp Vanilla Extract: The flavor enhancer. Pure vanilla is always my go-to.
- ½ cup Sour Cream or Plain Yogurt: This is my secret weapon for an incredibly moist, tender crumb that stays that way for days. I almost always have one or the other in the fridge.
- ¼ cup Milk: Whole milk is richest, but any kind you have will work to bring the batter together.
Let’s Build This Beautiful Cake, Step-by-Step
Okay, team. Let’s do this. Read through the steps once before you start—it’s like getting the lay of the land before a road trip.
- Preheat and Prep: Fire up your oven to 350°F (175°C). Grab a 9-inch round cake pan (a springform works great for easy release) or a sturdy oven-safe skillet. Grease the sides well. Chef Hack: I like to put a round of parchment paper on the bottom after greasing for absolute insurance against sticking.
- Create the Caramel Topping: In a small saucepan over medium heat, melt the 3 tablespoons of butter and ½ cup brown sugar together. Stir it almost constantly with a whisk for just 2-3 minutes. It’ll get bubbly, smooth, and smell absolutely incredible. Don’t walk away! This isn’t a deep caramel, it’s a quick one that will finish cooking with the cake. Pour this liquid gold directly into the bottom of your prepared pan and tilt it to coat the base evenly.
- Apple Artistry: Now, arrange your apple slices on top of the caramel. You can do a gorgeous overlapping circular pattern starting from the outside in, or just scatter them artfully. There’s no wrong way! This is the part that will be the top of your cake, so have a little fun with it.
- Whisk the Dry Team: In a medium bowl, whisk together your flour, baking powder, baking soda, salt, cinnamon, and nutmeg. This ensures the leaveners and spices are evenly distributed so you don’t get a random bitter bite of baking soda. Set this aside.
- Cream the Butter & Sugars: In a large bowl, use an electric mixer (or some serious arm power) to beat the softened ½ cup butter with both sugars. We’re not just mixing—we’re creaming. Do this on medium-high speed for a good 2-3 minutes until it becomes light, pale, and fluffy. This incorporates air, which is essential for a soft cake.
- Incorporate the Wet Ingredients: Beat in the eggs, one at a time, letting each one fully incorporate before adding the next. Scrape down the sides of the bowl. Mix in the vanilla. Now, add the sour cream (or yogurt) and milk. It might look a little curdled at this point—that’s perfectly normal! Trust the process.
- Bring It All Together: With your mixer on low speed, gradually add the dry ingredients to the wet ingredients. Mix just until the flour disappears. A few streaks are okay! Overmixing is the enemy of a tender cake—it develops gluten and makes it tough. Use a spatula for a final, gentle fold to ensure nothing is hiding at the bottom.
- Bake to Perfection: Dollop the batter over your apples and gently spread it into an even layer. I like to use an offset spatula for this to avoid disturbing my beautiful apple arrangement. Pop it in the preheated oven and bake for 40-45 minutes. It’s done when the top is golden brown, the cake springs back when lightly touched, and a toothpick inserted into the center of the cake (not the apple) comes out clean.
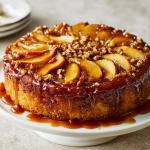
- The Big Flip! This is the most important step. Let the cake cool in the pan on a wire rack for exactly 10-15 minutes. Any less and it might fall apart; any more and the caramel can start to solidify and stick. Place your serving plate upside-down on top of the pan. Using oven mitts (that caramel is still hot!), confidently flip the whole thing over. Gently lift the pan away to reveal your gorgeous, glistening masterpiece.
How to Serve This Stunner
This cake is a performance, and serving it is the grand finale. Let it be the star—serve it right on the plate you flipped it onto. The golden, caramel-coated apples are the decoration!
You absolutely must serve this warm. The cake is at its most tender, and the caramel is at its gooiest. My non-negotiable pairing is a generous scoop of high-quality vanilla ice cream. The hot-and-cold contrast is legendary. The ice cream melts into the caramel crevices, creating a sauce that is… well, I’m getting emotional just thinking about it. A dollop of freshly whipped cream or even a drizzle of cold heavy cream is also a fantastic, slightly less decadent option.
Grab a cup of strong coffee, a glass of cold milk, or even a sweet dessert wine. Gather everyone around the table, slice it up, and get ready for those “you’ve gotta try this” moments.
Mix It Up! Creative Twists on the Classic
Once you’ve mastered the base recipe, the world is your oyster! Here are a few of my favorite ways to play with this formula:
- Bourbon-Spiked: For the adults, add 2 tablespoons of bourbon to the caramel sauce after you take it off the heat. It adds an incredible depth of flavor.
- Pear & Ginger: Swap the apples for ripe but firm pears (like Bosc or Anjou) and add 1 tablespoon of finely grated fresh ginger to the cake batter. Elegant and zingy!
- Pecan Praline: Sprinkle a handful of chopped pecans over the caramel layer before adding the apples. They toast in the caramel and taste like praline.
- Vegan Delight: Use vegan butter and a flax egg (1 tbsp ground flax + 3 tbsp water per egg). Swap the sour cream for vegan yogurt or coconut cream and use a plant-based milk. The structure works perfectly!
- Skillet Style: Make the entire recipe in a well-seasoned 10-inch cast-iron skillet. You can make the caramel right in the skillet, arrange the apples, add the batter, and bake. Less mess, more rustic charm.
Jackson’s Chef Notes
This recipe has evolved so much in my kitchen. The first time I made it, I was so nervous about the flip that I let it cool completely. Big mistake! We had to practically chisel it out of the pan. Lesson learned: timing is everything. Now, I set a timer for 12 minutes and don’t dare wait a second longer.
I’ve also found that this cake somehow tastes even better the next day. The spices meld, and the caramel soaks into the cake a little more. If you have leftovers (a big if!), cover them tightly and keep them at room temperature. A quick 15-second zap in the microwave brings it right back to life.
FAQs & Troubleshooting
Q: My caramel topping stuck to the pan! What did I do wrong?
A: The most common culprit is cooling for too long. That 10-15 minute window is crucial. Also, make sure you greased the sides of the pan well and used that parchment round on the bottom if you have one. If it does stick, don’t panic! Scrape the sticky bits out, warm them slightly, and drizzle them over the salvaged cake. It’ll still taste amazing.
Q: Can I make this cake ahead of time?
A: Absolutely! You can assemble the entire cake in the pan, cover it tightly, and keep it in the fridge for up to 24 hours before baking. You might need to add 3-5 extra minutes to the bake time since it’s starting from cold. You can also bake it a day ahead, let it cool completely after the flip, and cover it. Reheat slices in the microwave or the whole cake, covered, in a 300°F oven for 15 minutes.
Q: My cake is browning too quickly on top!
A: Ovens can run hot. If the top is getting dark brown before the center is cooked, tent it loosely with a piece of aluminum foil for the last 15-20 minutes of baking. This will shield it from direct heat.
Q: Can I use canned apple pie filling?
A> I wouldn’t recommend it. The pre-cooked apples will turn to mush, and the syrupy filling will make the topping way too sweet and liquidy. Fresh apples are essential for texture and flavor here!
Caramel Apple Upside-Down Cake
- Total Time: 1 hour 5 minutes
- Yield: 8 1x
Description
This upside-down cake flips the script with buttery apples swimming in caramel, baked under a soft, spiced cake. When it turns out—warm, glossy, and beautiful—it’s the kind of dessert that makes everyone pause before the first bite.
Ingredients
Topping:
3 tbsp unsalted butter
½ cup brown sugar
2–3 apples, peeled, cored, and sliced (Honeycrisp or Granny Smith)
Cake:
1½ cups all-purpose flour
1½ tsp baking powder
½ tsp baking soda
½ tsp salt
1 tsp cinnamon
¼ tsp nutmeg
½ cup unsalted butter, softened
½ cup brown sugar
¼ cup granulated sugar
2 large eggs
1 tsp vanilla extract
½ cup sour cream or plain yogurt
¼ cup milk
Instructions
Preheat oven to 350°F (175°C). Grease a 9-inch round cake pan or deep pie dish.
Make the caramel topping: In a small saucepan, melt butter and brown sugar until bubbly and smooth (2–3 minutes). Pour into the bottom of the prepared pan and arrange apple slices on top in a circular pattern.
Make the cake batter: Whisk dry ingredients (flour, baking powder, soda, salt, spices) in one bowl. In another, cream butter and sugars until fluffy. Beat in eggs and vanilla. Mix in sour cream and milk, then fold in dry ingredients.
Spread batter over apples gently and evenly.
Bake 40–45 minutes, or until a toothpick comes out clean. Let cool for 10–15 minutes, then invert onto a serving plate.
Serve warm with whipped cream or vanilla ice cream.
- Prep Time: 20 minutes
- Cook Time: 45 minutes
Nutrition
- Calories: 320 / Serving
- Sugar: 28g / Serving
- Sodium: 250mg / Serving
- Fat: 15g / Serving
- Saturated Fat: 9g / Serving
- Carbohydrates: 42g / Serving
- Protein: 4g / Serving
- Cholesterol: 70mg / Serving
Nutritional Information*
*Please note: These are estimates based on the ingredients used and will vary with any substitutions.
Per Serving (1 slice, serves 8):
Calories: ~320 | Total Fat: 15g | Saturated Fat: 9g | Cholesterol: 70mg | Sodium: 250mg | Total Carbohydrates: 42g | Dietary Fiber: 2g | Sugars: 28g | Protein: 4g
This is a dessert, and it’s meant to be enjoyed as part of a balanced diet! The apples provide some fiber and vitamins, and using real ingredients like butter and sugar means you’re enjoying a real, honest treat without any weird additives.
Final Thoughts
This Caramel Apple Upside-Down Cake is more than just a recipe; it’s an experience. It’s about creating something breathtakingly delicious with your own two hands and sharing that joy with people you love. It has that “wow” factor we all crave, without the stress of a complicated recipe.
I hope this recipe becomes a new favorite in your home, a tradition that fills your kitchen with warmth and your table with happy people. Remember, cooking is supposed to be fun—a little messy, full of flavor, and always an adventure. Don’t be afraid to make it yours.
If you make it (and you totally should!), tag me @FoodMeld on social media. I love seeing your creations! Now, go forth and bake. Let’s make some memories.


