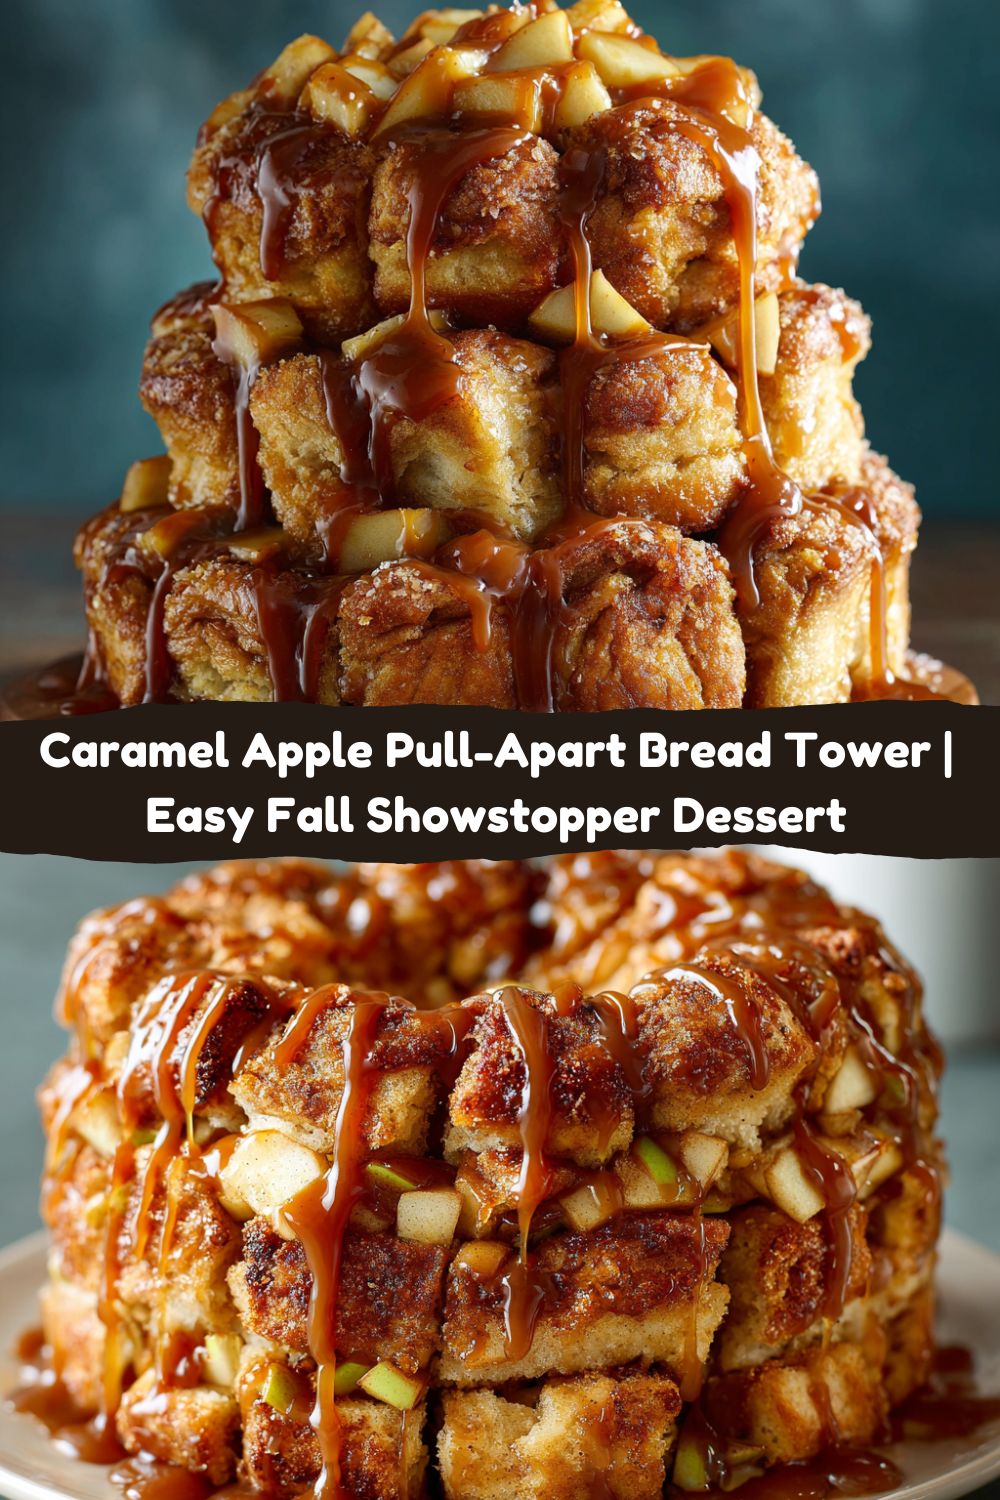
Caramel Apple Pull-Apart Bread Tower: Your New Fall Obsession!
Hey friends, Jackson here from Food Meld! Grab your favorite mug of cider and pull up a stool – we’re about to build something EPIC. Imagine this: layers of buttery, pillowy bread, stuffed with cinnamon-kissed apples, all stacked into a glorious, wobbling tower that looks like it defied gravity. Then? We drown the whole beautiful mess in warm, sticky caramel sauce until it gleams like a dessert disco ball. That’s right, we’re making a Caramel Apple Pull-Apart Bread Tower, and trust me, this isn’t just dessert; it’s an EVENT. It’s the kind of thing that makes people whip out their phones before forks. The best part? It looks fancy-pants complicated, but it’s built on the beautiful simplicity of canned biscuit dough (no judgment here, only genius!). Whether you’re wrangling the family for game night, impressing your book club, or just treating yourself because *why not?*, this tower delivers maximum “WOW” with minimal kitchen stress. It’s Southern comfort meets bakery-worthy drama, pure Food Meld magic. So, ditch the boring pie plate – let’s build high, drizzle hard, and make some unforgettable, sticky-sweet memories together!
That Time Grandma’s Apple Dumplings Grew Up (And Got Ambitious!)
This towering beauty actually sprouted from a very humble, flour-dusted memory. Picture my Grandma Walker’s kitchen in late October, the air thick with the scent of stewing apples and cinnamon. She’d make these incredible, rustic apple dumplings – simple biscuits wrapped around spiced apples, baked until golden, then drizzled with her thin, buttery caramel sauce. We’d fight over the crispy corners! Fast forward a decade or three. I was hosting a big fall bonfire, craving that nostalgic flavor combo, but wanting something… more. Something shareable, dramatic, FUN. I remembered how she’d sometimes nestle dumplings close together in the pan. Lightbulb moment! What if I stacked those little flavor bombs? I grabbed canned biscuits (Grandma would forgive me for the shortcut!), chopped apples like crazy, and started building UP instead of OUT. That first wobbly tower? It looked like it survived a minor earthquake, but the second my friends pulled apart those gooey, caramel-drenched layers, the cheers were deafening. Grandma’s cozy spirit met my “what if we tried this?” energy, and this sky-high sensation was born. Every bite still tastes like her kitchen, just with a little extra Jackson flair reaching for the stars (or at least the top shelf!).
Gathering Your Sweet & Sticky Construction Materials
Here’s everything you need to build your edible masterpiece. Don’t sweat substitutions – cooking’s about making it work for YOU!
- 2 cans refrigerated biscuit dough (8-count each): Our trusty building blocks! Go for the classic “Grands” size flaky layers biscuits – they puff up beautifully and hold the filling. Feeling ambitious? Swap in homemade biscuit dough, but hey, the canned stuff is our secret weapon for speed! (Chef Insight: Let the cans sit on the counter for 5-10 minutes before opening – slightly warmer dough is easier to flatten without tearing.)
- 2 apples, peeled & diced (about 2 cups): The sweet-tart heart of the tower! Granny Smith are my MVP – their firm texture holds up during baking and their tang balances the sweetness perfectly. Honeycrisp or Braeburn work great too. Avoid super soft apples like Red Delicious – they’ll turn to mush. (Sub Tip: No fresh apples? 1 1/2 cups of high-quality canned apple pie filling, roughly chopped, works in a pinch!)
- ½ cup packed brown sugar: Deep molasses flavor for our apple filling and caramel vibes. Light brown sugar works, but dark brown gives a richer, almost toffee-like depth. (Chef Insight: Pack it firmly into your measuring cup! Air pockets = less flavor.)
- 2 tsp ground cinnamon: The quintessential cozy spice! Don’t be shy here. For extra warmth, add a tiny pinch (like 1/8 tsp) of nutmeg or cardamom.
- 4 tbsp butter, melted: The glue and the glorious shine! Salted butter adds that perfect savory edge to cut the sweet. Unsalted works too – just maybe add a tiny pinch of salt to the filling.
- ½ cup caramel sauce, plus extra for drizzling: The liquid gold finale! Use a good-quality store-bought sauce for ease (I love the thick, rich ones near the ice cream toppings) or make your own if you’re feeling fancy. You’ll need WAY more than ½ cup for the final dramatic drenching – have at least another ½ cup ready to go! (Pro Tip: Warm the sauce slightly before drizzling for maximum flow and shine.)
Building Your Tower: Step-by-Step (With All My Favorite Hacks!)
Let’s get stacking! This is where the fun (and maybe a little floury chaos) happens.
- Preheat & Prep: Crank that oven to 350°F (175°C). Generously grease a standard 9×5 inch loaf pan OR a 7-inch round cake pan OR a springform pan (anything with tall-ish sides!) with butter or non-stick spray. Trust me, you want that release! (Chef Hack: Lining the bottom with a small piece of parchment paper makes the final unmolding even easier.)
- Wrangle the Dough: Pop open those biscuit cans (that satisfying *thwump* never gets old!). Separate the biscuits. Working with one biscuit at a time, gently flatten it between your palms into a rough circle, about ¼-inch thick. Don’t go too thin, or they might tear! (Chef Insight: Slightly thicker edges help contain the filling.)
- Butter Up & Fill: Brush the top of one flattened biscuit generously with melted butter. Spoon a heaping tablespoon of your amazing cinnamon-apple mixture right into the center. (Pro Tip: Leave a small border (about ½ inch) around the edge butter-free – this helps the layers seal slightly as they bake.)
- Stack & Roll (Kind Of!): Here’s where it gets fun! Don’t fold it like a dumpling. Instead, gently gather the edges of the biscuit up and *over* the filling, pinching them loosely together *on top* to create a little bundle where the filling is mostly enclosed but the top is pinched shut. It doesn’t need to be perfect! Think rustic charm. Place this bundle seam-side down on your work surface. Repeat with 3-4 more biscuits/apple piles. (Chef Hack: Make 4-5 bundles at a time for efficiency!)
- Build Your Base: Take your first 4-5 little apple bundles and stand them upright, pinched-seam-side down, snugly packed together in the bottom of your greased pan. They should be touching! This is your foundation layer.
- Layer Up! Brush the *tops* of your foundation bundles with a little more melted butter. Make another 4-5 bundles. Carefully place these *on top* of and *in between* the bundles below, standing them upright again. You’re building UP and filling in gaps! Repeat, brushing tops with butter and adding bundles, until you’ve used all your dough and filling. Pack them in tightly – they’ll expand as they bake! The pan should be quite full. (Key Tip: The tighter you pack, the better the tower holds its shape when baked!)
- Bake to Golden Perfection: Slide that gorgeous, lumpy tower-in-progress into your preheated oven. Bake for 35-40 minutes. What you’re looking for: deep golden brown tops, the biscuits looking puffed and cooked through (no doughy streaks when you peek between layers near the center), and bubbling apple-caramel goodness peeking out. (Chef Hack: If the top is browning too fast, loosely tent it with foil for the last 10 minutes.)
- The Crucial Cool Down (Patience, Grasshopper!): This is VITAL. When the tower comes out of the oven, let it cool in the pan for *at least* 15-20 minutes. I know, the smell is torture! But if you try to unmold it too soon, it WILL collapse. Use this time to gently warm up that extra caramel sauce.
- Unmold & Ascend: Carefully run a thin knife around the very edge of the pan to loosen any sticky bits. Place a large plate or serving platter upside down over the pan. Using oven mitts (it’s still warm!), firmly hold the plate and pan together and FLIP! Give the bottom of the pan a few confident taps. Lift the pan off slowly. Behold! Your tower, now upside down on the plate.
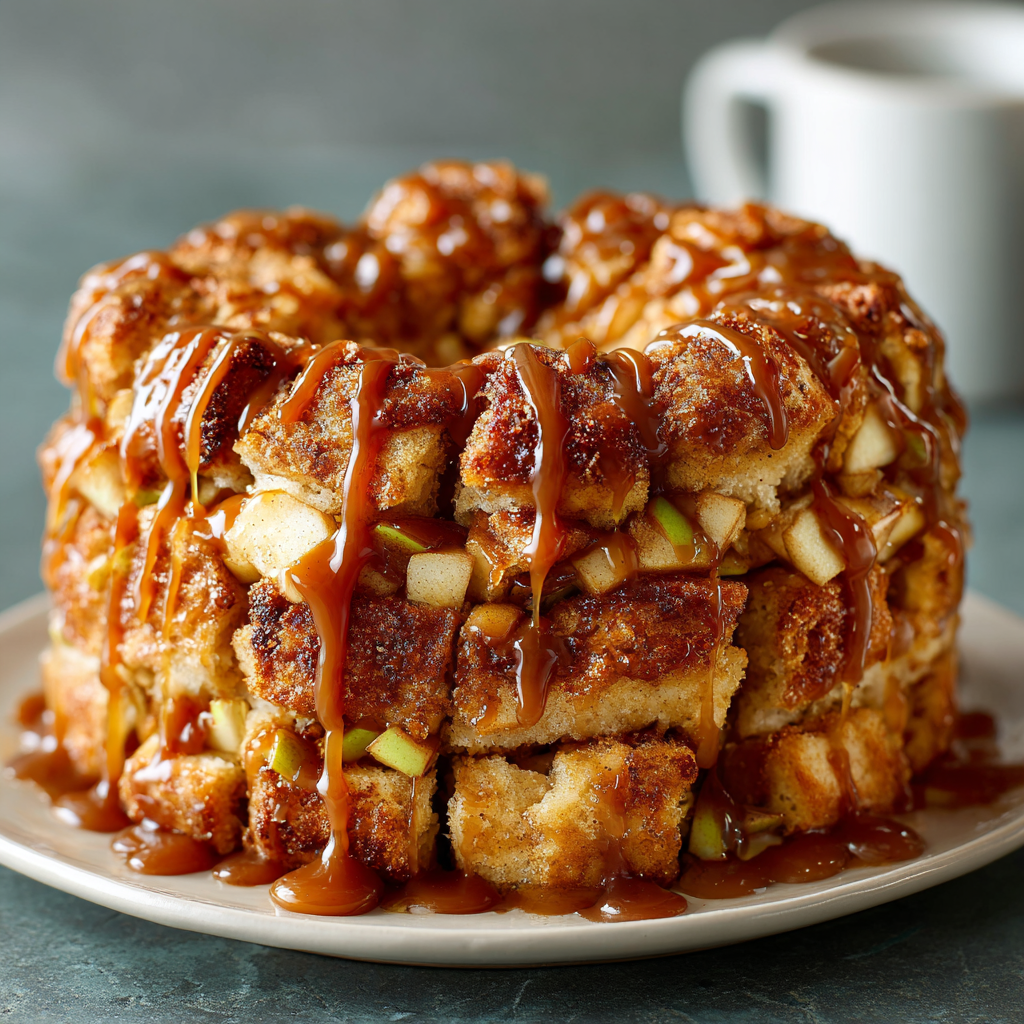
- The Grand Finale: Caramel Avalanche! Immediately flip the tower right-side-up onto your *final* serving platter (so the gorgeous, craggy top is up!). Now, grab that warm caramel sauce. Pour it slowly and generously over the very top center. Watch with immense satisfaction as it cascades down the sides, pooling gloriously at the base. Don’t hold back! (Pro Tip: Sprinkle a tiny pinch of flaky sea salt over the caramel drizzle for an incredible sweet-salty contrast!)
Showtime! Serving Your Masterpiece
Presentation is half the fun! Place your dripping caramel tower right in the center of the table – it’s the star. Let people pull apart warm, gooey chunks with their hands (provide lots of napkins!). For a slightly more polished approach, use a large serrated knife to carefully slice down through the tower segments like a cake. Serve it alongside big scoops of vanilla bean ice cream (the melt is heavenly with the caramel) or dollops of lightly sweetened whipped cream. A sprinkle of chopped toasted pecans adds fantastic crunch and flavor. Keep extra warm caramel sauce on the side for true enthusiasts!
Mix It Up! Tower Twists & Tweaks
This recipe is a flavor playground! Try these spins:
- Pecan Praline Power: Stir ½ cup chopped toasted pecans into the apple filling. After the caramel drizzle, sprinkle more pecans and a dusting of powdered sugar mixed with a pinch of cinnamon.
- Chocolate-Caramel Dream: Sprinkle ¼ cup mini chocolate chips over the apple filling in each bundle before pinching closed. Use a chocolate-caramel swirl sauce for drizzling.
- Savory-Sweet Brunch Tower: Omit cinnamon. Mix diced apples with ¼ cup brown sugar, 1 tsp fresh thyme, and ½ cup crispy cooked bacon crumbles. Serve with a sharp cheddar cheese sauce for dipping instead of caramel!
- Gluten-Free Friendly: Use your favorite gluten-free refrigerated biscuit dough (check it flattens well). Ensure your caramel sauce is GF certified.
- Pear & Ginger Delight: Swap apples for diced, firm Bosc pears. Add 1 tsp grated fresh ginger and ¼ tsp ground cloves to the brown sugar mixture.
Jackson’s Notebook: Lessons from the Tower Trenches
Okay, real talk: my first attempt at stacking looked less like a tower and more like a delicious landslide! The key? PACKING THOSE BUNDLES TIGHTLY in the pan. Seriously, shove ’em in there. They need each other for structural support as they bake and rise. Don’t worry about perfect little bundles either – rustic is charming! Over time, I discovered the magic of brushing the *tops* of each layer with butter before adding the next – it encourages browning and adds flavor. Also, warming the caramel sauce is non-negotiable for that Insta-worthy drip. The funniest moment? When my nephew tried to “help” unmold it after 5 minutes… we ended up with caramel apple bread pudding (still delicious!). This recipe is forgiving. Even if it leans a bit, drown it in caramel, add ice cream, and call it “artisanal.” It’s evolved from a fun experiment into my most-requested fall party trick – proof that sometimes, the messiest ideas are the best!
Your Tower Questions, Answered!
Let’s tackle those common hiccups before they happen:
- Q: My tower collapsed when I took it out of the pan! Help!
A: Oh, the heartbreak! This usually means two things: Either it needed more cooling time in the pan (that 15-20 minute rest is CRUCIAL for the structure to set!), OR the bundles weren’t packed tightly enough during assembly. Next time, really jam those bundles in snugly, shoulder-to-shoulder, and force yourself to wait. If it does collapse? No stress! Break it into chunks in a bowl, drizzle with extra caramel and ice cream, and rebrand it as “Deconstructed Caramel Apple Bread Pudding Parfaits.” Still a win! - Q: The bottom/middle layers seem doughy or undercooked.
A: This happens if the oven temp is too high (causing the top to brown too fast before the center cooks) or if the tower is packed *too* tightly without enough heat circulation. Ensure your oven is properly preheated to 350°F (175°C) – use an oven thermometer! If the top browns quickly, tent it with foil earlier. Also, using a metal pan (especially darker metal) conducts heat better than glass for this recipe. If unsure, insert a toothpick or thin skewer near the center bottom – it should come out clean or with just moist crumbs, no wet dough. - Q: Can I make this ahead of time?
A: You can assemble the entire tower in the pan up to 4 hours ahead! Cover tightly with plastic wrap and refrigerate. Let it sit at room temp for 20-30 minutes before baking (add a few extra minutes to the bake time if it’s cold from the fridge). Bake it fresh for the best texture – reheating can make it tough. The caramel sauce can absolutely be made ahead and warmed up when needed. - Q: My caramel sauce seized up or got too thick when drizzling!
A: Caramel can be finicky! If it’s too thick to drizzle nicely, gently warm it with a tablespoon of heavy cream, milk, or even water over low heat, whisking constantly until it smooths out. Don’t boil it! If it seized (got lumpy/grainy), it might have gotten too hot or had a splash of water. Try warming it very gently with a splash of cream and whisking vigorously – it might come back. If not, have a backup jar ready!
Caramel Apple Pull-Apart Bread Tower
- Total Time: 1 hour
- Yield: 8 - 10 1x
Description
This towering dessert is a feast for the eyes and the sweet tooth — soft, buttery layers of pull-apart bread hiding cinnamon-sugar apples, all stacked into an impressive tower and drenched in warm, drippy caramel sauce. Every slice pulls away with gooey, apple-studded goodness.
Ingredients
2 cans refrigerated biscuit dough (8-count each)
2 apples, peeled & diced
½ cup brown sugar
2 tsp cinnamon
4 tbsp butter, melted
½ cup caramel sauce (plus extra for drizzling)
Instructions
Prep filling: Mix diced apples with brown sugar and cinnamon.
Assemble layers: Flatten biscuit pieces, brush with butter, sprinkle with apple mixture. Stack pieces in small piles, then stand them upright in a greased loaf pan or cake ring.
Bake: Preheat oven to 350°F (175°C) and bake 35–40 min until golden and cooked through.
Build the tower: Once slightly cooled, remove from pan and stack or arrange for dramatic height.
Finish: Pour warm caramel sauce over the top, letting it drip down the sides.
- Prep Time: 20 minutes
- Cook Time: 40 minutes
Nutrition
- Calories: 310 / Serving
- Fat: 13g / Serving
- Carbohydrates: 46g / Serving
- Protein: 4g / Serving
Nutritional Information (Approximate per serving, based on 10 servings)
- Calories: ~310
- Protein: 4g
- Carbohydrates: 46g
- Fat: 13g
(Note: This is an estimate and can vary based on specific ingredients used, especially the caramel sauce and biscuit brands.)
Ready to Build Your Own Sweet Sensation?
If fall had a centerpiece dessert that doubled as entertainment, the Caramel Apple Pull-Apart Bread Tower would be it. It’s the kind of treat that invites everyone to lean in, pull off a warm, sticky bite, and share a few laughs between drizzles of caramel. You get all the cozy nostalgia of Grandma’s apple dumplings, but with a playful, over-the-top twist that turns dessert into a full-blown event.
Whether you serve it at a holiday table, bring it to a potluck, or make it just because a Tuesday needed cheering up, this tower guarantees two things: empty plates and happy hearts. And remember—perfection isn’t the goal here. Even if your tower leans a little, the flavors are pure magic. Stack it high, drizzle it slow, and let the sweet chaos begin.


