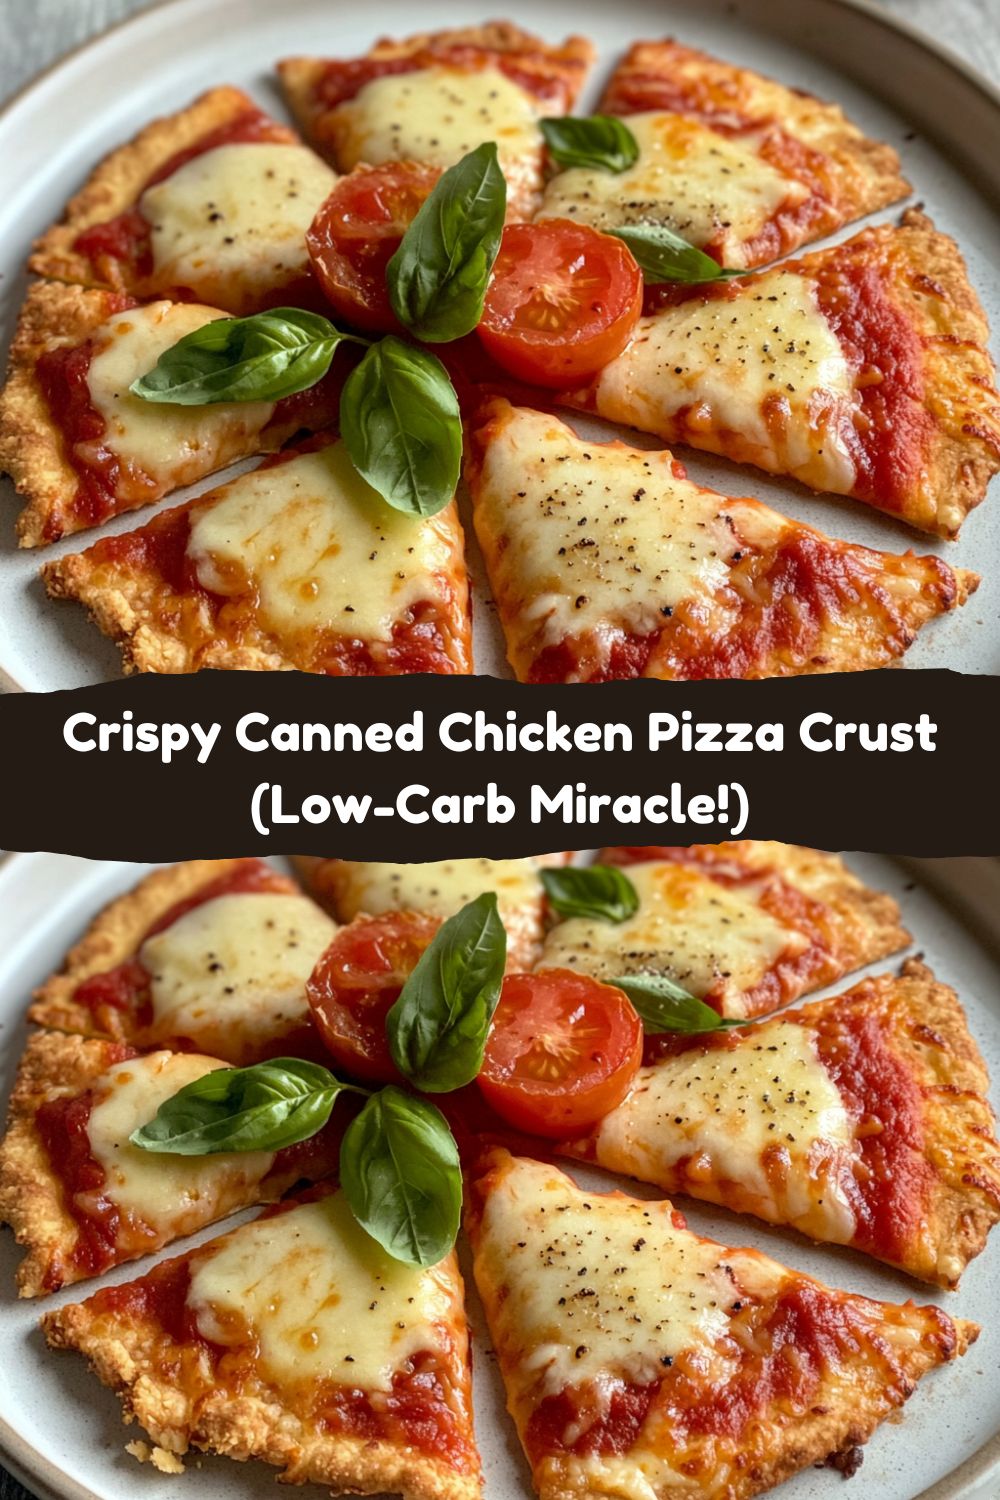
When Pantry Magic Happens: My Crispy Canned Chicken Pizza Crust
Hey friends, Jackson here from Food Meld! Let’s talk about those glorious kitchen moments when “making do” turns into “making WOW.” You know the vibe – it’s 6 PM, the carb-counting gods are whispering in your ear, and pizza cravings hit like a freight train. That’s exactly when this crispy canned chicken pizza crust strutted into my life like a flavor superhero in a flour-dusted cape. Picture this: golden edges shattering at the first bite, that savory chicken-cheese base holding up a vibrant tangle of garlicky tomatoes and basil, all while keeping things low-carb and protein-packed. My grandkids dubbed it “Grandpa’s Chicken Crispies,” and now they request it more than my famous skillet cookies. Whether you’re keto-curious, gluten-free, or just tired of the same old pizza routine, this 30-minute wonder proves that pantry staples can become pure deliciousness. So grab that can opener – we’re about to turn “what if?” into “heck yes!”
The Midnight Experiment That Started It All
Flashback to a rainy Tuesday last year. My fridge was emptier than a politician’s promises, except for one lonely can of chicken and a nub of mozzarella. Desperate times call for delicious measures. I remember thinking, “What if I treated this chicken like dough?” My wife chuckled as I started squishing it with cheese and an egg – looking less like a chef and more like a mad scientist playing with food putty. But when that crust emerged from the oven, crackling and golden? Game. Changer. The real magic happened when my grandkids stormed the kitchen after soccer practice. Four-year-old Leo took one bite, eyes wide as saucers, and yelled, “Grandpa made chicken CHIPS!” Now, every time they visit, I hear tiny footsteps pounding toward the kitchen, chanting “Crispy chicken pizza! Crispy chicken pizza!” That’s the beauty of cooking, y’all – sometimes your biggest kitchen flops become family legends.
Your Flavor Toolkit: Simple Ingredients, Big Impact
- 12 oz canned chicken breast, well-drained – The MVP! (Pro tip: Press it in a sieve with paper towels until bone-dry – soggy chicken = sad crust. Fresh rotisserie chicken? Swap 1.5 cups shredded!)
- 1 cup shredded mozzarella – Our glue with gooeyness. (Chef’s secret: Blend in parmesan for nuttiness, or pepper jack for kick!)
- 1 large egg – The binder boss. (Allergy? Use 1 tbsp flaxseed + 3 tbsp water, but expect a crumblier crust.)
- 1 tsp dried Italian seasoning – Instant flavor depth. (DIY blend: ½ tsp oregano + ¼ tsp each basil, garlic powder, thyme!)
- Salt & black pepper – Wake up those flavors!
- ¼ cup marinara – Sauce royalty. (Pesto or alfredo? Yes please! Just keep it thin.)
- 1 garlic clove, chopped – Fresh bite essential. (Swap ½ tsp garlic powder in a pinch!)
- 1 sliced tomato + fresh basil – The vibrant crown. (No tomato? Roasted red peppers add sweet zing.)
- Olive oil drizzle – Liquid gold finish. (Use your fancy bottle here – it shines!)
- Parchment paper – Non-negotiable for crispiness!
Building Your Crispy Masterpiece: Step-by-Step
Step 1: Fire Up the Oven (400°F/200°C)
Why 400°F? It’s the sweet spot – hot enough to crisp the chicken without burning the cheese. (Chef hack: Slide a baking sheet in while preheating – a hot start = extra crunch!)
Step 2: Chicken Squish Therapy
Dump drained chicken, cheese, egg, Italian seasoning, salt, and pepper in a bowl. Now channel your inner kid – get in there with clean hands and SQUISH until it feels like Play-Doh with ambition. (Watch for: Over-mixing makes tough crust. Stop when no eggy streaks remain!)
Step 3: Shape Your Canvas
Lay parchment on a tray. Plop your chicken mix in the center and pat into a ¼-inch thick circle or rectangle – rustic edges encouraged! (Pro move: Slightly thicker edges prevent topping spillage!)
Step 4: First Bake (20 Minutes)
Bake until golden and firm enough to tap without jiggle. (Critical moment: If center feels soft, bake 3 extra minutes. This crust MUST hold toppings!)
Step 5: Top It Like It’s Hot
Pull that beauty out – it’ll smell like pizza-scented heaven. Spread marinara thinly (thick sauce = sogginess!), then scatter garlic, tomatoes, and basil. Drizzle oil like you’re Jackson Pollock. (Tip: Add delicate greens AFTER final bake!)
Step 6: Final Blast (5-7 Minutes)
Bake just until tomatoes wilt and garlic perfumes the air. (Watch closely: Cheese can go from golden to grief in 60 seconds!)
Step 7: The Grand Finale
Let it rest 5 minutes – patience rewards with clean slices! Cut with pizza wheel or sharp knife. (Confession: I burn my mouth every time because I can’t wait. Don’t be me.)
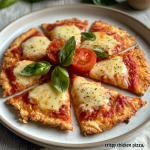
Plating Up the Fun
Slide the parchment right onto your table – that rustic charm needs no fancy plate! Scatter extra basil over the top, then slice into wedges or squares. For the full Food Meld experience? Serve with a zesty arugula salad (lemon juice + olive oil) piled right ON the pizza slice. Crunchy greens against that warm chicken crust? *Chef’s kiss*. Want decadence? Add shaved parmesan and chili flakes at the table – let everyone customize!
Shake It Up: 5 Flavor Twists
Buffalo Ranch: Mix 1 tbsp hot sauce into crust + top with ranch, blue cheese crumbles, and celery.
Taco Fiesta: Swap Italian seasoning for taco spice + top with salsa, avocado, and pickled jalapeños.
Mediterranean Sunshine: Use pesto instead of marinara + add artichokes, kalamatas, and feta.
Breakfast Pizza: Skip tomato/basil. Post-bake, top with fried eggs, bacon, and chives.
Veggie Power: Add 2 tbsp grated zucchini (squeezed dry!) to crust + top with roasted veggies and goat cheese.
Behind the Apron: My Crust Chronicles
This recipe’s gone through more glow-ups than my Instagram feed! Version 1.0 used ONLY chicken – tasty but crumbled like my willpower near donuts. Adding cheese helped, but the egg? That was the “aha!” moment. Funny story: I once subbed cilantro for basil during my “global inspo” phase. Let’s just say… my granddaughter declared it tasted like “chicken soap.” Lesson learned! Now I keep it classic on pizza night but encourage wild riffs for my blog-testing rebels. Pro tip: Double the crust recipe and freeze pre-baked bases between parchment – future you will weep with gratitude on busy nights.
Your Questions, My Answers
Q: Help! My crust is soggy in the middle. What went wrong?
A: Two likely culprits: 1) Not draining chicken enough – press it like you’re juicing lemons! 2) Overloading toppings. Keep sauce thin and layer light.
Q: Can I make this dairy-free?
A: Absolutely! Swap mozzarella for ⅓ cup nutritional yeast + 2 tbsp almond flour. The crust won’t be as stretchy but still crisps beautifully.
Q: Why parchment paper? Can I use foil?
A: Parchment is nonstick magic. Foil sticks unless heavily oiled – and we’re avoiding extra grease! If you MUST use foil, spray it like it’s sunscreen in July.
Q: My crust fell apart when slicing. Fixes?
A: Next time, add 1 extra tbsp cheese or 1 tsp psyllium husk to the mix. For now? Call it “deconstructed chicken pizza bowls” and own it!
Nutrition Per Serving (Serves 2)
- Calories: ~380 kcal
- Protein: 45g (Hello, muscle fuel!)
- Fat: 20g | Sat Fat: 8g
- Carbs: 6g | Fiber: 1g | Sugars: 3g
- Sodium: ~800mg (Tip: Use low-sodium chicken & cheese!)
- Cholesterol: 160mg
- Prep: 10 min | Cook: 25 min
Canned Chicken Pizza Crust
- Total Time: 35 minutes
- Yield: 2 1x
Description
Some of the best recipes come from moments when you’re making do—and then, magic happens. This canned chicken pizza crust is one of those little miracles. It’s perfect when you want something comforting, low in carbs, and packed with flavor. My grandkids call it the “crispy chicken pizza,” and now it’s a family favorite. Give it a try—you might just discover your new go-to weeknight dinner.
Ingredients
12 oz (340 g) canned chicken breast, well-drained
1 cup (100 g) shredded cheese (mozzarella or your favorite)
1 large egg
1 tsp dried Italian seasoning
Salt and black pepper, to taste
¼ cup (60 ml) marinara sauce
1 clove garlic, chopped
1 medium tomato, sliced
Fresh basil, for topping
High‑quality olive oil (optional, for drizzling)
Parchment paper
Instructions
Preheat oven to 400 °F (200 °C).
In a bowl, combine the chicken, cheese, egg, Italian seasoning, salt, and pepper.
Shape mixture into a crust on parchment paper over a baking tray.
Bake 20 min until golden and firm.
Remove, spread on the marinara sauce, top with garlic, tomato, and basil.
Drizzle olive oil if desired.
Bake another 5–7 min.
Let cool slightly, slice, and enjoy!
Notes
Enjoy a nutritious, satisfying meal that’s high in protein, low in carbs, and full of flavor. Perfect for a cozy evening!
- Prep Time: 10 minutes
- Cook Time: 25 minutes
Nutrition
- Calories: 380 per serving
- Sugar: 3g per serving
- Sodium: 800mg per serving
- Fat: 20g per serving
- Saturated Fat: 8g per serving
- Carbohydrates: 6g per serving
- Fiber: 1g per serving
- Protein: 45g per serving
Final Thoughts: Pantry Power Meets Pizza Night Perfection
There’s something deeply satisfying about turning the unexpected into the unforgettable. That’s exactly what this crispy canned chicken pizza crust is—a humble hero born from a moment of kitchen desperation and transformed into a family legend. It’s quick, it’s protein-packed, and it’s so full of flavor, no one will believe it started with a can.
This isn’t just a recipe—it’s an invitation to rethink what “pizza night” can look like. Whether you’re juggling weeknight chaos, cutting carbs, or simply craving something new, this crust delivers. It’s crispy on the outside, tender in the middle, endlessly customizable, and—best of all—it puts that forgotten can of chicken in your pantry to delicious use.
So next time pizza cravings strike and you’re staring down an empty breadbox, remember: all you need is a can, an egg, and a dream. And maybe a few grandkids chanting in the background.
Here’s to bold flavor, simple ingredients, and turning “what do I make?” into “I’m making this again tomorrow.”