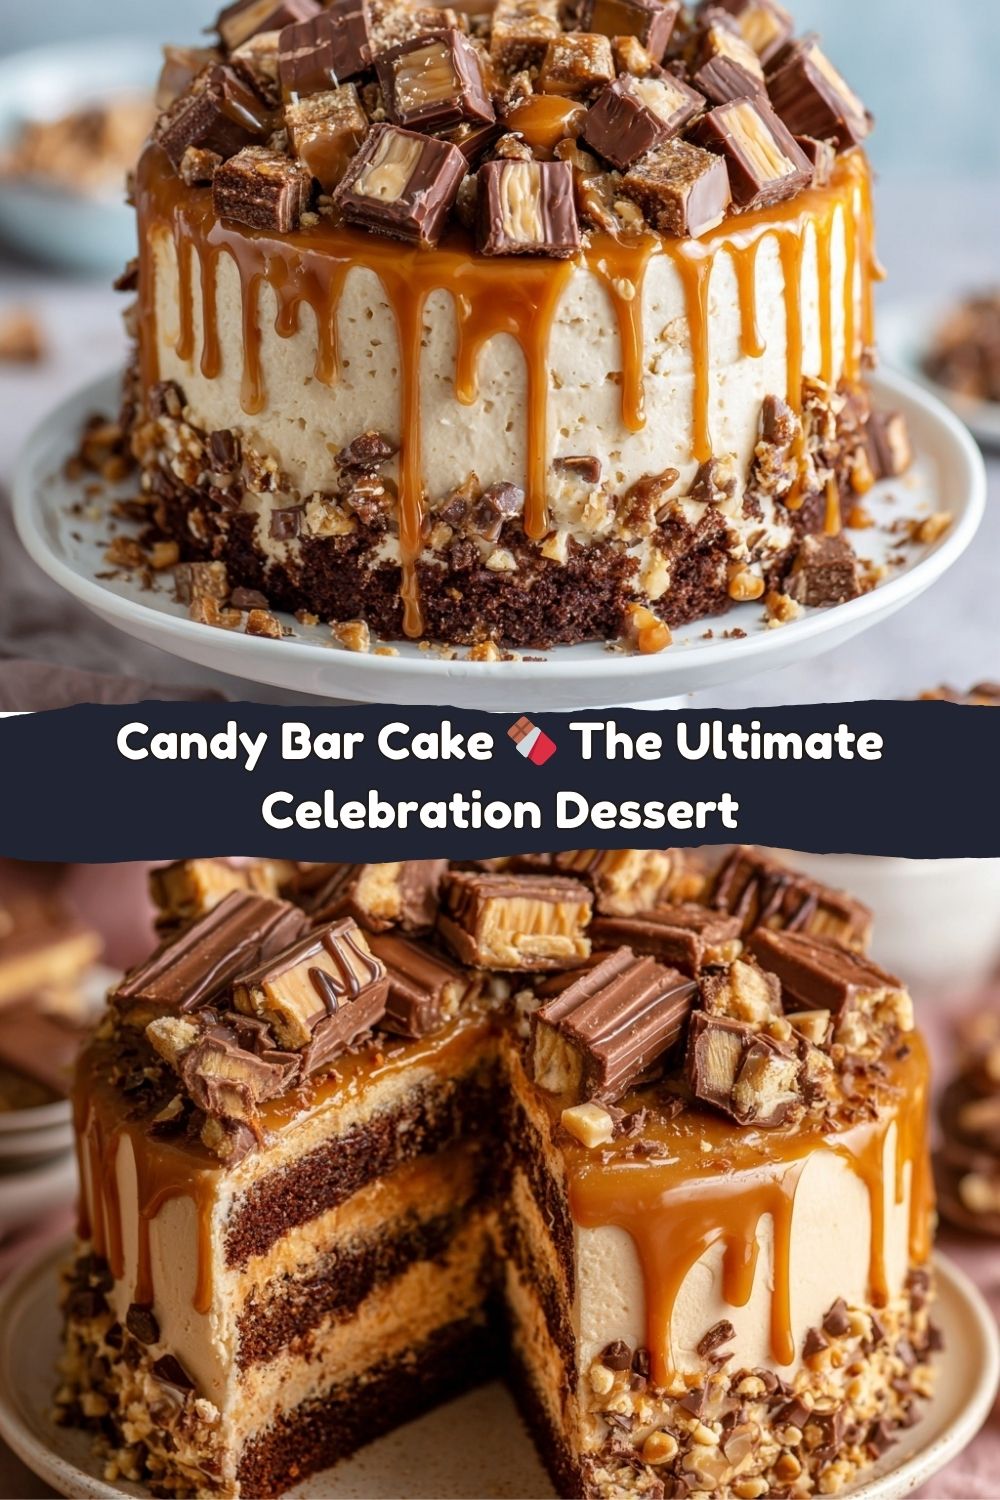
Let’s Bake a Legend: Your New Favorite Candy Bar Cake
Hey friends, Jackson from Food Meld here. Let’s get straight to the point: life is too short for boring desserts. I’m talking about the kind of dessert that doesn’t just sit politely on a plate, but the one that struts into the room, demands attention, and has everyone at the table leaning in for a closer look. The kind of cake that creates a moment. That’s exactly what we’re making today.
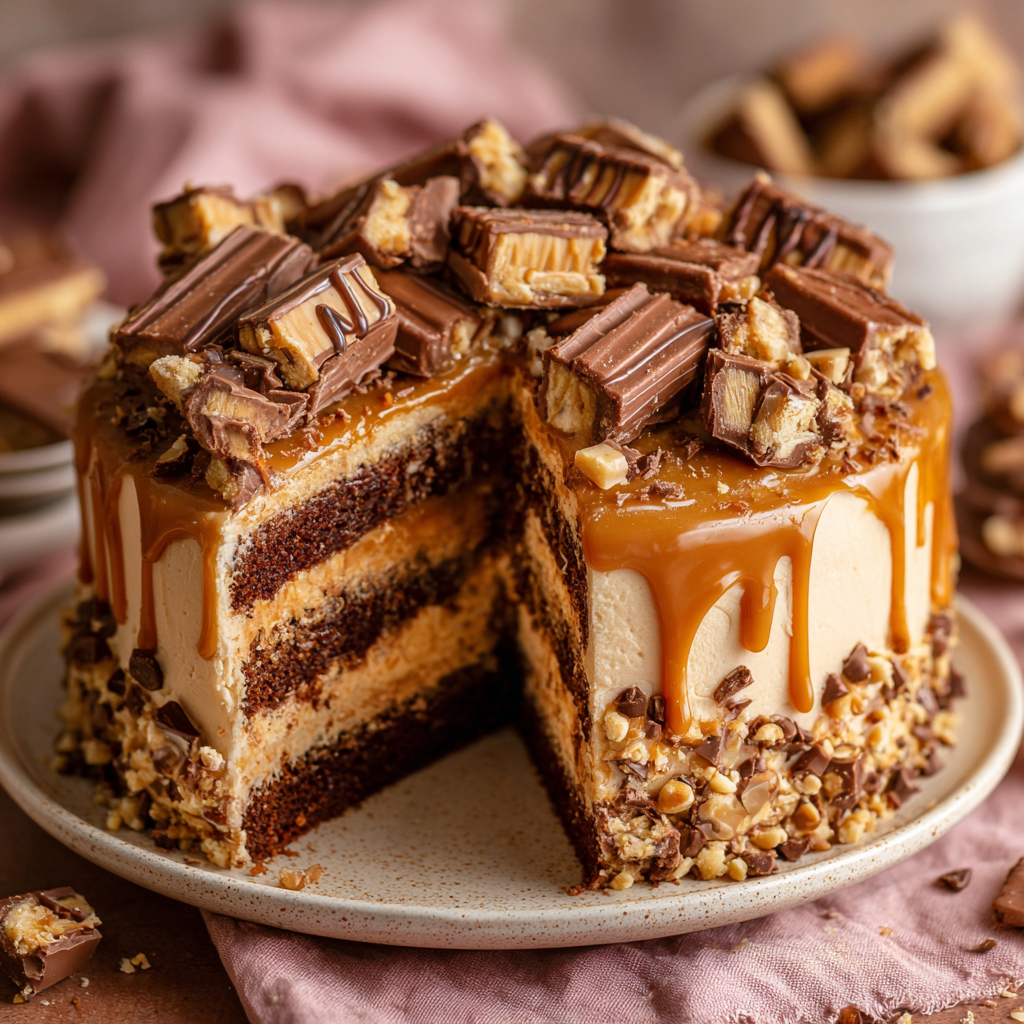
This isn’t just a chocolate cake. Oh no. This is my Candy Bar Cake—a towering, decadent, unapologetically joyful creation that’s about to become your go-to for every birthday, celebration, or “hey, it’s Tuesday” treat. We’re starting with a deeply moist, intensely chocolatey cake that stays tender for days. Then, we’re slathering it in a cloud of silky, dreamy caramel buttercream that’s so good you might just have to hide the bowl from yourself. And the grand finale? A glorious, crunchy, chewy, chocolatey mountain of your favorite chopped-up candy bars.
Think Snickers, Twix, KitKats—this is your chance to raid the candy aisle and make it the star of the show. This cake is the ultimate fusion of homemade comfort and pure, unbridled fun. It’s the dessert version of your favorite playlist: familiar, a little bit nostalgic, and totally hits the spot. So, tie on your apron, preheat that oven, and let’s cook up some unforgettable, shareable (or not-so-shareable) magic. Welcome to the party.
The Cake That Started It All: A Sweet Slice of Memory
This cake recipe has a special place in my heart, and it all goes back to my Grandma Lou’s kitchen. She was the queen of “a little bit of this, a little bit of that” cooking, and her chocolate cake was the stuff of legend. It was the centerpiece of every family gathering, from birthdays to Sunday suppers.
But my favorite memory is of my tenth birthday. I was absolutely obsessed with candy bars—the more, the merrier. Instead of a traditional frosted cake, Grandma Lou, in her infinite wisdom, baked her famous chocolate cake, let it cool, and then handed me a wooden spoon and a giant bowl of chopped Snickers and Twix. “Your cake, your rules, kiddo,” she said with a wink. We “decorated” it together, pressing handfuls of candy into the simple chocolate frosting until you could barely see the cake beneath. It was messy, it was chaotic, and it was the most delicious thing my ten-year-old self had ever seen.
This Candy Bar Cake is my grown-up, slightly more refined (but only slightly!) homage to that day. It captures that same spirit of playful creativity and pure, unadulterated joy. Every time I make it, I’m right back in that sunny kitchen, covered in chocolate, and feeling like the luckiest kid alive.
Gathering Your Sweet Arsenal: The Ingredients
Alright, let’s break down the building blocks of this beautiful beast. Don’t be intimidated by the list—it’s mostly pantry staples coming together to create something extraordinary.
For the Super-Moist Chocolate Cake:
- 2 cups all-purpose flour: The trusty foundation of our cake. For a slightly denser, richer crumb, you can swap in cake flour.
- ¾ cup unsweetened cocoa powder: This is where the deep chocolate flavor lives! Don’t skimp—use a good quality cocoa powder. It makes all the difference.
- 1 ½ tsp baking soda: Our leavening agent, giving the cake its perfect rise and soft texture.
- ½ tsp salt: A chef’s secret weapon! Salt enhances all the other flavors and balances the sweetness. Trust me on this.
- 1 ¾ cups granulated sugar: Sweetness and tenderness, all in one.
- 2 large eggs, at room temperature: Room temp eggs incorporate much more easily into the batter, leading to a smoother, more uniform cake.
- 1 cup buttermilk, at room temperature: The key to unbelievable moisture and a subtle tang. No buttermilk? No problem! Make a quick substitute by adding 1 tablespoon of white vinegar or lemon juice to a cup of regular milk and let it sit for 5 minutes.
- ½ cup vegetable oil: Oil keeps this cake incredibly moist for days longer than a butter-based cake would. I use canola or avocado oil.
- 1 tsp vanilla extract: The flavor enhancer that makes everything taste more… well, like itself.
- 1 cup hot water or hot coffee: This is the magic trick! The hot liquid “blooms” the cocoa powder, intensifying its chocolate flavor. Using coffee won’t make your cake taste like coffee—it just makes it taste more chocolaty. It’s a game-changer.
For the Caramel Buttercream Dream:
- 1 cup (2 sticks) unsalted butter, softened: Softened is key! It should be cool to the touch but leave a slight indent when you press it. This is the base of our fluffy frosting.
- ½ cup caramel sauce: You can use a good-quality store-bought jar or be a total rockstar and make your own. Either way, ensure it’s a thick, spoonable caramel, not a thin ice cream topping.
- 3–4 cups powdered sugar: We’ll start with 3 cups and add more until we hit that perfect, spreadable consistency.
- Pinch of salt: To cut the sweetness and make the caramel flavor pop.
- 1–2 tbsp heavy cream (if needed): This is our backup for getting the perfect silky texture. You might not need it, but it’s good to have on hand.
For the Grand Finale:
- 1 to 1 ½ cups chopped candy bars: This is your canvas! My go-to mix is Snickers (for that chewy, nougat-y goodness) and Twix (for that shortbread crunch). But KitKats, Milky Ways, Butterfingers—the choice is yours. Go wild!
Let’s Build This Masterpiece: Step-by-Step
Ready to get your hands dirty? Follow these steps, and you’ll be a cake-decorating hero in no time. I’ve packed this section with all my best tips and hacks to ensure your success.
- Preheat and Prep. Fire up your oven to 350°F (175°C). Now, let’s get our cake pans ready. Grease two 8-inch round cake pans with a little butter or baking spray. Then, cut out two circles of parchment paper to line the bottoms. This little trick is my #1 secret for guaranteeing your cakes will release perfectly every single time. No more broken cakes!
- Combine the Dry Team. In a large bowl, grab your whisk and vigorously whisk together the flour, cocoa powder, baking soda, and salt. Why whisk? We’re aerating the dry ingredients and making sure our leavening agent is evenly distributed. No one wants a bite of just baking soda! Set this bowl aside.
- Unite the Wet Team. In a separate, medium-sized bowl, combine the granulated sugar, eggs, buttermilk, vegetable oil, and vanilla extract. Whisk it all together until it’s smooth and beautifully homogenous. Now, here comes the fun part: slowly and carefully whisk in the hot water or coffee. The batter will be thin—this is totally normal and exactly what we want! Don’t panic.
- The Big Meld. Pour your wet ingredients into the bowl with the dry ingredients. Using your whisk (or a spatula), gently mix everything together. My rule here is just until combined. A few small lumps are fine! Over-mixing is the enemy of a tender cake, as it develops the gluten and can make it tough.
- Bake to Perfection. Evenly divide the batter between your two prepared pans. Pop them into the preheated oven and bake for 30-35 minutes. You’ll know they’re done when a toothpick inserted into the center comes out with a few moist crumbs attached, not wet batter. Another test is if the center of the cake springs back lightly when you touch it.
- The All-Important Cool Down. This is the hardest part: patience. Let the cakes cool in their pans on a wire rack for about 15-20 minutes. Then, run a knife around the edge, invert them onto the rack, and peel off the parchment paper. Let them cool completely, and I mean completely, before you even think about frosting. Trying to frost a warm cake is a recipe for a melted, sliding mess. Trust me, I’ve been there!
- Whip Up the Caramel Buttercream. While the cakes are cooling, let’s make that frosting. In a large bowl, use an electric mixer to beat the softened butter on medium-high speed for 2-3 minutes, until it’s pale, fluffy, and smooth. Scrape down the bowl, then beat in the caramel sauce and that pinch of salt. Now, with the mixer on low, gradually add the powdered sugar, one cup at a time, until it’s fully incorporated. Crank the speed back up to medium-high and beat for another 2 minutes until super light and fluffy. If it seems too thick, beat in a tablespoon of heavy cream. Too thin? Add a little more powdered sugar.
- Assemble with Flair! Place one completely cooled cake layer on your serving plate or cake stand. Spread a generous, even layer of the caramel buttercream on top. Carefully place the second cake layer on top. Now, frost the top and sides of the entire cake with the remaining frosting. You don’t need to be a professional pastry chef here—a rustic, “naked cake” look is totally charming and intentional!
- The Grand Finale: Candy Bar Avalanche! Take your chopped candy bars and gently press them onto the sides and pile them high on top of the cake. Get creative! You can do a ring around the bottom, cover the entire top, or go for full coverage. There are no wrong answers here.
Showtime: How to Serve This Stunner
You’ve created a masterpiece, now let’s serve it with style! For the cleanest slices, I like to take a large, sharp knife and run it under hot water for a minute. Wipe it dry, then make your cut. The heat will glide right through the candy bars and frosting for a beautiful, clean slice. Repeat the hot-water wipe between cuts for a picture-perfect presentation every time.
This cake is rich, so a modest slice is plenty. I love serving it with a cold glass of milk, a hot cup of coffee to complement the chocolate, or even a scoop of vanilla bean ice cream on the side for the ultimate indulgence. Place it right in the middle of the table and watch as it becomes the main character of your gathering. It’s a cake that invites conversation, laughter, and immediate requests for the recipe.
Make It Your Own: Creative Twists & Swaps
The beauty of this recipe is its versatility. Don’t be afraid to play with it and make it your own! Here are a few of my favorite variations:
- The “Peanut Butter Paradise”: Swirl ½ cup of creamy peanut butter into the caramel buttercream. Then, top the cake with chopped Reese’s Peanut Butter Cups and salted peanuts. It’s a game-changer.
- The “Salty & Sweet Sensation”: Finish the frosted cake with a light sprinkle of flaky sea salt before adding the candy. The salt amplifies every single flavor and cuts through the richness beautifully.
- The “All-The-Crunch” Version: Mix in ½ cup of crushed pretzels with your chopped candy bars. The sweet and salty crunch is absolutely irresistible.
- Gluten-Free Friendly: You can easily make this cake gluten-free by using a 1:1 gluten-free all-purpose flour blend (I’ve had great success with Bob’s Red Mill). Just be sure your candy bar choices are also certified gluten-free.
- Decadent Cupcakes: Turn this into 24 incredible cupcakes! Line your muffin tins, fill the cups ⅔ full, and bake for 18-22 minutes. Frost and top with mini candy pieces for the perfect individual treat.
Jackson’s Kitchen Notes & Stories
This cake has evolved so much since that first birthday version. I’ve made it for probably fifty different occasions now, and no two have ever been exactly the same. Once, I was in a hurry and accidentally used melted butter instead of oil. The result? A slightly denser, pound-cake-like texture that was actually delicious! It just goes to show that sometimes the “mistakes” lead to happy accidents.
My biggest piece of advice? Have fun with it. Don’t stress if your frosting isn’t perfectly smooth or if the cake layers are a little lopsided. That’s the charm of homemade baking! It’s those little imperfections that show it was made with love (and a serious craving for candy). This cake is a celebration, not a competition.
Your Questions, Answered!
I’ve gotten a lot of questions about this cake over the years, so here are the answers to the most common ones.
Q: My cake layers sunk in the middle! What happened?
A: This usually means the cake needed just a few more minutes in the oven, or there was a bit too much leavening. Make sure your baking soda is fresh! Also, resist the urge to open the oven door during the first 25 minutes of baking, as a rush of cold air can cause the cake to fall.
Q: Can I make this cake ahead of time?
A: Absolutely! You can bake the cake layers a day in advance. Let them cool completely, then wrap them tightly in plastic wrap and store at room temperature. You can also frost the entire cake and store it, covered, in the fridge for up to 24 hours. Let it sit at room temperature for an hour or two before serving for the best texture and flavor.
Q: My frosting is too runny/thick. How can I fix it?
A: Kitchen environments vary! If it’s too runny, just beat in more powdered sugar, a quarter cup at a time, until it firms up. If it’s too thick and won’t spread, beat in a tablespoon of heavy cream or milk until it reaches your desired consistency. You’re in control!
Q: What’s the best way to store leftovers?
A> Cover any leftover cake with plastic wrap or store it in an airtight container. It will keep beautifully at room temperature for 2 days, or in the fridge for up to 5 days. The cake stays incredibly moist!
Nutritional Information*
Let’s be real—we’re not eating this cake for its health benefits. We’re eating it for pure, unadulterated joy! But for those who like to know, here’s a general breakdown per slice (assuming 12 slices).
- Calories: ~520
- Fat: 27g
- Carbohydrates: 64g
- Sugar: 45g
- Protein: 5g
*Please note that this is an estimate and can vary significantly based on the specific brands of ingredients and candy you use.
Final Thoughts
And there you have it, my friends—your Candy Bar Cake, a true legend in dessert form. 🍫 This cake isn’t just a treat—it’s a moment. The kind that stops conversations, sparks laughter, and has people hovering over the dessert table for “just one more bite.”
What I love most about this cake is its playfulness. It’s indulgent, sure, but it’s also nostalgic. Every bite is a throwback to childhood joy—the kind of happiness that comes from unwrapping your favorite candy bar, multiplied by ten and served in towering, buttercream-slathered glory.
Bake it for a birthday, a dinner party, or just because the week needs a little more sweetness. Pile it high with your favorite candies, don’t worry about perfection, and let it be what it’s meant to be: fun, bold, and completely unforgettable.
Here’s to messy kitchens, melted chocolate, and the kind of desserts that make you feel like a kid again. 💛


