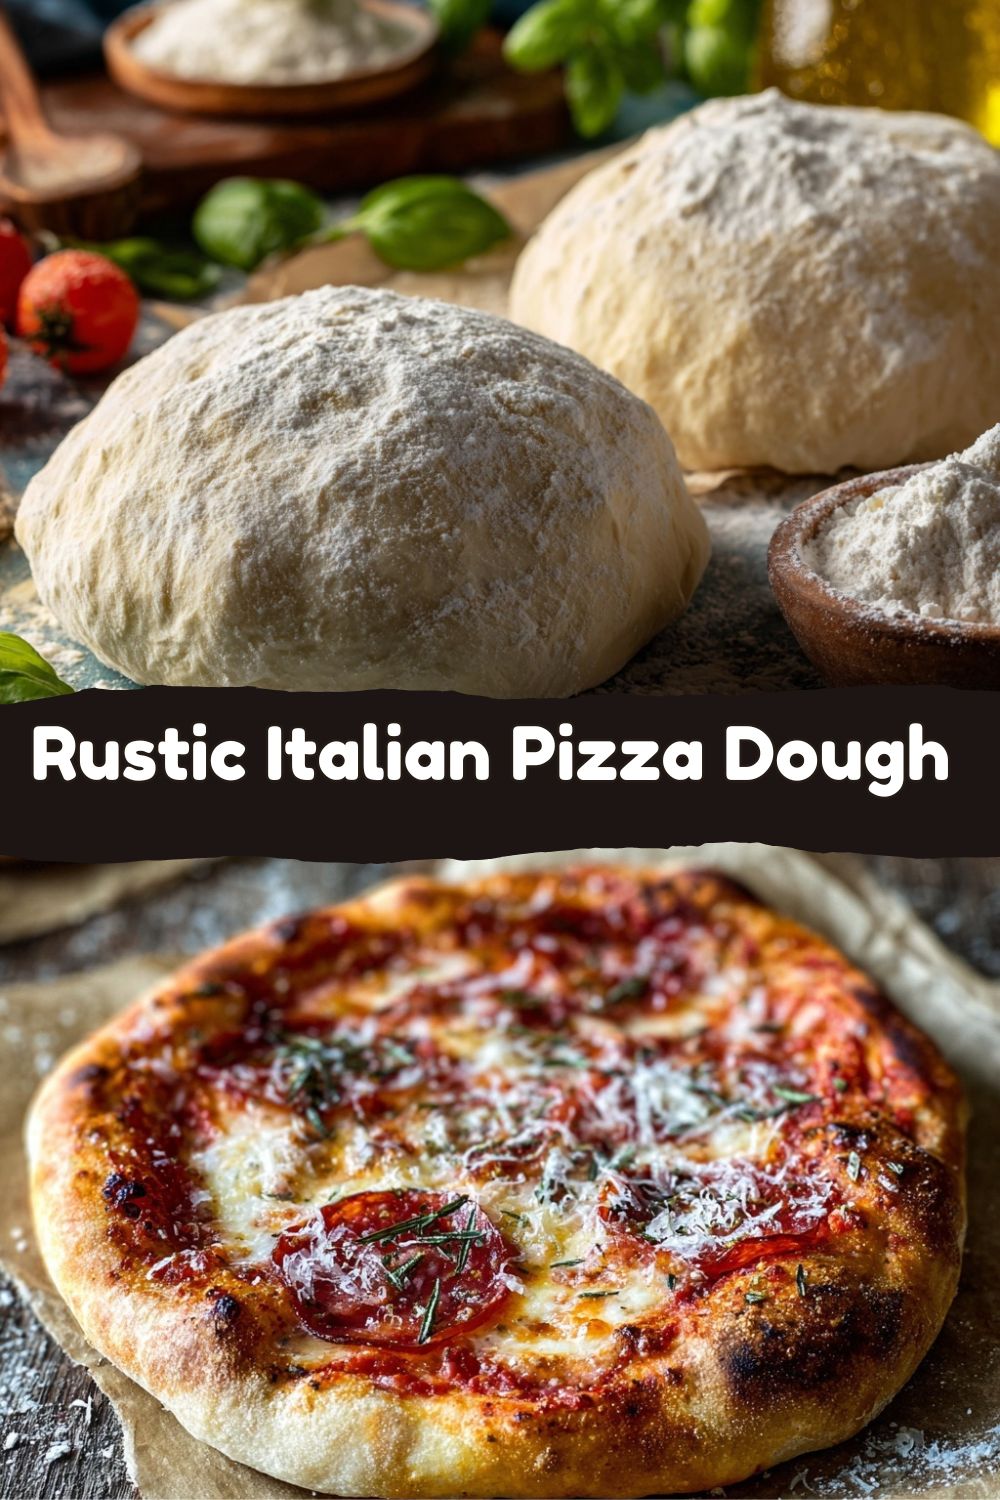
Forget Takeout: Let’s Make Pizza Magic
Hey friends, Jackson here from Food Meld. Let’s talk about one of life’s greatest simple pleasures: a perfect slice of pizza. Not just any pizza, but the kind with a crust that sings—a crispy, chewy, slightly charred, flavor-packed masterpiece that holds up your favorite toppings without becoming a soggy mess. That’s the magic of a truly great rustic Italian pizza dough.
I know what you might be thinking: “Jackson, making pizza dough from scratch sounds like a whole project.” I get it! But what if I told you that with just a handful of pantry staples, a little patience (mostly hands-off, I promise!), and a few of my favorite chef hacks, you can bring the soul of a Neapolitan pizzeria straight to your kitchen? This isn’t about fancy skills; it’s about understanding a few simple principles that unlock incredible flavor and texture.
This recipe is my go-to, my ride-or-die, the foundation for countless epic pizza nights at my place. It’s forgiving, versatile, and honestly, kind of therapeutic to make. There’s something deeply satisfying about turning flour, water, and yeast into a living, breathing dough that bakes up into something spectacular. So, preheat your mind (and eventually your oven!), grab your favorite bowl, and let’s cook something awesome together. Welcome to your new favorite pizza night.
The Roman Alleyway That Changed My Pizza Game
My love affair with this dough started in a dimly lit alleyway in Rome, far from the tourist crowds. I was chasing the scent of woodsmoke and baked bread, which led me to a tiny spot with just three stools. The pizzaiolo, a man with flour-dusted forearms and a focused smile, worked his dough with a quiet confidence. He wasn’t just making food; he was performing a centuries-old ritual. He handed me a simple Pizza Marinara—just tomato, garlic, oregano, and olive oil on that crust.
One bite was a revelation. The crust wasn’t an afterthought; it was the star. It had a crackly, leopard-spotted exterior that gave way to a tender, airy, and slightly chewy interior with complex flavor. It tasted alive. That humble slice taught me that great pizza isn’t about piling on every topping in the fridge. It’s about the quality of the foundation. It’s about respect for the dough. I came home obsessed, testing and tweaking until I captured that spirit in a recipe simple enough for any Tuesday night. This is that recipe. It’s my attempt to bottle that Roman alleyway magic for your kitchen.
Your Pizza Toolkit: Simple Ingredients, Big Flavor
Beautiful food starts with understanding your ingredients. Here’s everything you’ll need and why each one matters.
- 4 cups (500g) All-Purpose or “00” Flour: This is your canvas. All-purpose flour works beautifully and is what most of us have on hand. But if you want to level up, seek out “00” flour (often labeled “doppio zero”). It’s a finely milled Italian flour with a lower protein content, yielding a more tender, delicate crust that still gets wonderfully crisp. Chef’s Insight: I often use a 50/50 blend for the perfect balance of chew and tenderness.
- 1½ tsp Salt: Non-negotiable for flavor. It also strengthens the gluten structure. Use fine sea salt or kosher salt.
- 1 tsp Sugar: Don’t worry, your dough won’t taste sweet. This tiny amount is food for the yeast, helping it activate and giving it a little boost for a better rise.
- 1 packet (2¼ tsp) Active Dry Yeast: Our little fermentation powerhouse. This is what creates the bubbles and airy texture we love. Make sure your yeast isn’t ancient for best results.
- 1½ cups Warm Water (110°F / 45°C): The temperature is key! Too hot and you’ll kill the yeast; too cold and it won’t wake up. Think “baby bottle warm”—comfortable on your wrist. Pro Substitution: For a more complex flavor, replace ½ cup of water with a lager-style beer at the same temperature.
- 2 tbsp Olive Oil: This adds a hint of fruity flavor and, more importantly, richness to the dough. It also makes the dough a bit more pliable and helps create a lovely golden-brown crust. Use a good extra-virgin olive oil here—you’ll taste the difference.
Let’s Get Our Hands Dirty: The Step-by-Step
Ready to make some dough? Follow these steps, and don’t skip the commentary—that’s where all my best kitchen hacks live!
Step 1: Wake Up the Yeast. In a small bowl or measuring cup, combine the warm water, sugar, and yeast. Give it a gentle stir and walk away for 5-10 minutes. You’re waiting for a foamy, creamy layer to form on top—this is your sign the yeast is alive and kicking! If it doesn’t foam, your yeast might be old or the water was too hot/cold. Start over to avoid flat pizza.
Step 2: Mix Until Shaggy. In a large mixing bowl, whisk together your flour and salt. Make a well in the center and pour in the foamy yeast mixture and the olive oil. Using a wooden spoon or your hands, mix everything until it just comes together into a rough, shaggy ball. It will look messy and uneven—that’s perfect! Don’t overthink it here. The goal is just to hydrate all the flour.
Step 3: The Knead (or No-Knead!) Turn the shaggy dough out onto a lightly floured surface. Here’s the fun part: knead it for 8-10 minutes. Push with the heel of your hand, fold it over, give it a quarter turn, and repeat. You’re developing the gluten, which is what gives the crust its wonderful chew. The dough is ready when it’s smooth, elastic, and springs back slowly when you poke it. Chef’s Hack: Short on time or energy? Do a “no-knead” method! After the initial mix, just cover the bowl and let it rest for 20 minutes. The flour will hydrate fully, and you’ll only need to knead for 2-3 minutes to get that smooth texture.
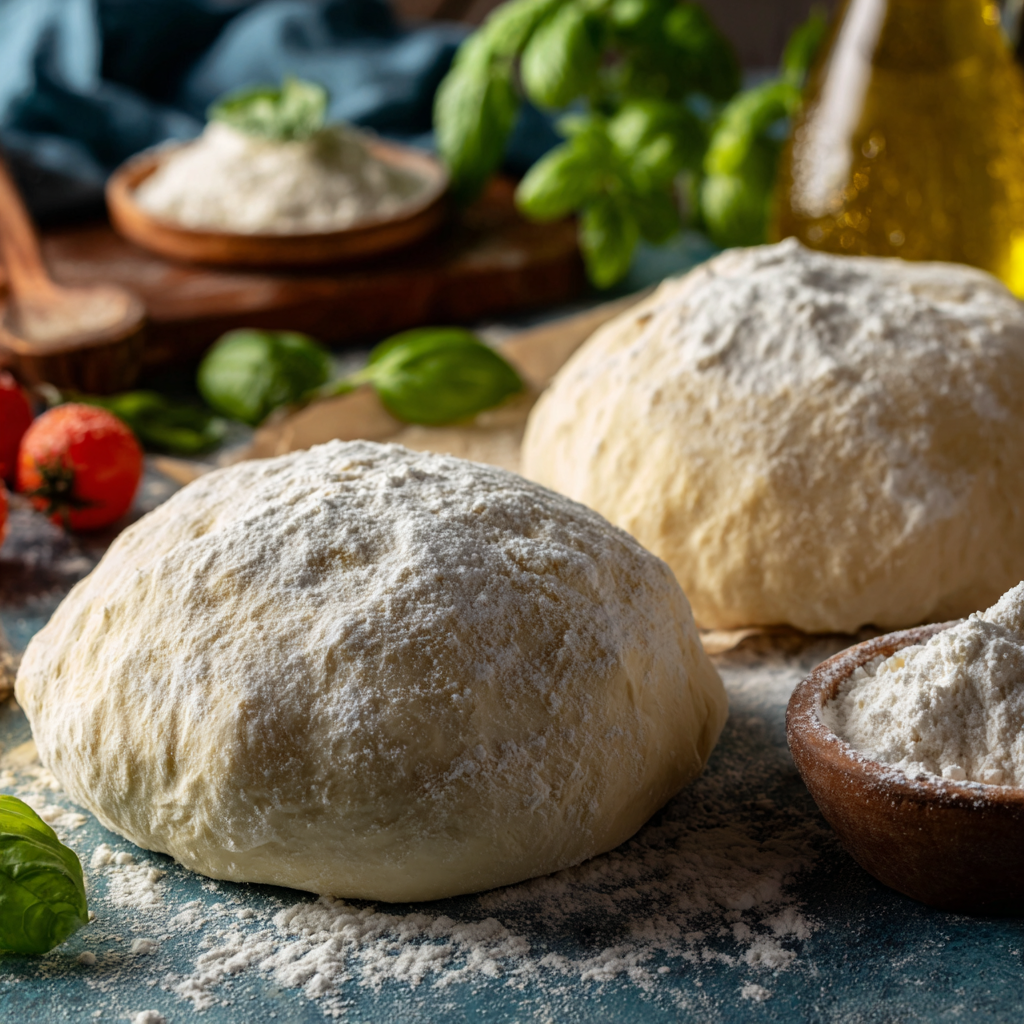
Step 4: The First Rise (Let It Rest!). Place your smooth dough ball into a lightly oiled bowl, turning it once to coat it lightly in oil. This prevents a dry skin from forming. Cover the bowl tightly with plastic wrap or a damp kitchen towel. Let it rise in a warm, draft-free spot for 1 to 1.5 hours, or until doubled in size. Your oven (turned off!) with the light on is a perfect cozy spot. This slow rise is where flavor develops, so patience is a virtue.
Step 5: Divide and Conquer. Once your dough is puffy and doubled, punch it down gently to release the big air bubbles. Turn it out onto your counter and divide it into 2 or 3 equal balls. For large, thin-crust pizzas, make 2 balls. For personal-sized or thicker crusts, make 3. Shape each into a tight ball by pulling the edges down and pinching them underneath.
Step 6: The Second Rest (Crucial for Easy Stretching!). Place each dough ball on a lightly floured tray or plate, cover loosely with plastic or a towel, and let them rest for another 30 minutes. This “bench rest” relaxes the gluten, which means when you go to stretch your dough, it won’t fight you and snap back. This is the secret to getting it thin without tearing!
Step 7: Bake It Hot! At least 30 minutes before baking, place your pizza stone or an inverted heavy baking sheet on the middle rack and preheat your oven to its absolute highest setting (500°F/260°C is common, but 550°F/290°C if you have it!). You want a blazing-hot surface to mimic a pizza oven. To shape, gently press a dough ball from the center outwards on a floured surface, using your fingers. Lift it and let gravity help you stretch it, turning it like a steering wheel. Add your toppings lightly (less is more!), slide it onto your hot stone, and bake for 7-10 minutes until the crust is golden and the cheese is bubbly and spotted.
Slice, Serve, and Celebrate
Once that beauty comes out of the oven, let it rest on a cutting board for just 2-3 minutes—this lets the cheese set slightly so it doesn’t slide off when you cut it. Use a pizza cutter or a large chef’s knife to slice it up.
Presentation is part of the fun! I love serving a big pizza right on the board in the middle of the table for everyone to dig in. For a real “pizzeria at home” vibe, pair it with a simple, crisp side salad (think arugula with lemon vinaigrette) to cut through the richness. A cold beer, a glass of Chianti, or even homemade lemonade are perfect companions. Remember, the best way to eat pizza is with friends, family, and plenty of napkins!
Make It Yours: Creative Twists & Swaps
The beauty of this dough is its versatility. Once you master the base, the world (of pizza) is your oyster!
- Herb-Infused Crust: Add 2 tablespoons of finely chopped fresh rosemary, thyme, or oregano (or a mix!) to the dry ingredients before adding the wet. It bakes up fragrant and incredible.
- Whole Wheat Boost: Substitute up to 1 cup of the all-purpose flour with whole wheat flour for a nuttier flavor and extra fiber. You may need to add a tablespoon or two more water, as whole wheat absorbs more liquid.
- Garlic or Chile Oil Swirl: After the first rise, instead of shaping into plain balls, roll each portion out into a rectangle, brush with garlic-infused oil or spicy chili oil, roll it up like a cinnamon roll, and then shape into a ball for the second rest. This creates stunning, flavorful swirls in your crust.
- Gluten-Free Friendly: Swap the flour for a good-quality 1:1 gluten-free flour blend (like Bob’s Red Mill). The texture will be different—more tender and crisp—but still delicious. Add 1 tsp of xanthan gum if your blend doesn’t include it.
- Venture Beyond Pizza: This dough is also perfect for making focaccia, calzones, or even rustic breadsticks. Just adjust the baking time accordingly!
Jackson’s Kitchen Confidential
This recipe has been a living thing in my kitchen. The first time I made it, I was so impatient I didn’t let it rise fully. Let’s just say I ended up with “pizza crackers”—crispy, but not in the good way! Lesson learned: respect the rise.
Over time, I’ve played with adding a tablespoon of honey instead of sugar, or using a bubbly sourdough starter discard for a portion of the flour and water (reduce both by ½ cup). It adds a fantastic tang. My biggest tip? Don’t be scared of a little char on the crust from a super-hot oven. Those dark, blistered spots are where the flavor lives—it’s not burnt, it’s character. Embrace it!
Your Pizza Dough Questions, Answered
Q: My dough didn’t rise. What went wrong?
A: The usual suspects are old/inactive yeast or water that was too hot (which killed the yeast) or too cold (which didn’t activate it). Always test your yeast with the warm water and sugar first. Also, make sure your rising spot is warm enough—a chilly kitchen can slow things down dramatically.
Q: My dough is too sticky to handle! Help!
A: Don’t panic, and don’t just dump in more flour! First, wet or oil your hands lightly—this prevents sticking. If it’s truly a wet mess, sprinkle a tiny amount of flour (a tablespoon at a time) onto the surface and knead it in until it becomes manageable. Different flours and humid days can affect hydration.
Q: Can I make this dough ahead of time?
A: Absolutely! This is my favorite hack. After the first rise and dividing into balls, you can oil the balls, place them in separate zip-top bags, and refrigerate for up to 3 days (the flavor gets even better!). Or freeze for up to 3 months. Thaw overnight in the fridge or at room temperature for a few hours before the second rest and shaping.
Q: I don’t have a pizza stone. Can I still make good pizza?
A: Yes! Preheat a heavy, rimless baking sheet (or an inverted rimmed sheet) just like you would a stone. You can also bake the pizza on a sheet of parchment paper on a regular baking sheet—you’ll get a softer bottom crust, but it will still be delicious. For maximum crispness without a stone, cook the shaped dough on the stovetop in a screaming-hot cast-iron skillet for 2 minutes, then add toppings and finish under the broiler.
Nutritional Info (For the Dough Itself)
Here’s a rough breakdown for one ball of dough (recipe yields 2-3). Remember, this is just for the crust—toppings will change the numbers!
- Yield: 2-3 medium pizzas
- Prep Time: 15 minutes (plus resting)
- Rise Time: 1.5 to 2 hours
- Cook Time: 10 minutes
- Calories (per pizza dough ball): Approximately 550-600 kcal
Dietary Info: Vegetarian. To make it vegan, ensure your sugar ensure your sugar is vegan-friendly (some refined sugars are processed with bone char).
Final Thoughts: Pizza Night, Upgraded
And there you have it, friends—the dough that turns an ordinary night into an event. This rustic Italian pizza dough isn’t just a recipe; it’s an invitation. An invitation to slow down a little, to get your hands dusty with flour, to gather people you love around something warm and bubbling straight from the oven.
Once you’ve made this dough a few times, it stops feeling like a “recipe” and starts feeling like muscle memory. You’ll know the dough by touch. You’ll smell when it’s ready. You’ll instinctively go lighter on the toppings and hotter on the oven. And that’s when pizza night stops being about food and starts being about confidence.
So forget the delivery app. Forget the soggy box. You’ve got everything you need right in your kitchen to make something deeply satisfying—crispy, chewy, blistered, and alive with flavor. Put on some music, pour a drink, and let the dough do its thing.
If you make this, tag me @FoodMeld or drop a comment on the blog—I love seeing your pizza wins (and yes, your beautiful charred crusts count as wins).
Until next time,
keep melding those flavors,
Jackson 🍕


