Forget Fussy Fudge: This Is the Easiest, Creamiest Peanut Butter Fudge You’ll Ever Make
Hey friends, Jackson from Food Meld here. Let’s talk about something serious for a second: that deep, undeniable craving for something sweet, rich, and just a little bit salty. You know the one. It hits around 3 PM, or after dinner, or honestly, any time you’re within a ten-foot radius of the kitchen. When that mood strikes, nothing—and I mean nothing—hits the spot quite like a perfect piece of peanut butter fudge.
But here’s the thing. Traditional fudge recipes can be intimidating. Candy thermometers, precise softball stages, frantic stirring… it’s enough to make even a seasoned cook break a sweat. I’m here to tell you that incredible, melt-in-your-mouth, “how-is-this-so-good?!” fudge doesn’t have to be complicated. This recipe is my ultimate kitchen hack for satisfying that sweet tooth without the stress. We’re talking five simple ingredients, one saucepan, and about ten minutes of active time. The result? A batch of unbelievably creamy, intensely peanut buttery fudge that’s so smooth it practically dissolves on your tongue. This is the kind of treat that makes people think you slaved away for hours, and friends, that’s going to be our little secret. So, grab your favorite peanut butter and let’s cook something awesome together.
A Sweet Slice of Memory
This recipe takes me right back to my grandma’s linoleum-floored kitchen. She wasn’t a fancy baker, but she was a powerhouse of no-nonsense, delicious treats. Every holiday, without fail, her famous peanut butter fudge would appear on a special crystal plate, cut into these massive, generous squares. My cousins and I would hover like little vultures, waiting for the okay to dive in. She’d always swat at our sneaky hands with a dish towel, laughing, “Hold your horses! It needs to set!” The anticipation was agony, but that first bite was pure magic. It was more than just a dessert; it was a signal that celebration was in the air. This recipe is my homage to her—it’s that same foolproof, soul-warming goodness, stripped down to its essentials. It’s the taste of family, simplicity, and joy, and I’m so excited to share that feeling with you.
Gathering Your Fudge All-Stars
The beauty here is in the shortlist. You probably have most of this in your pantry right now! Using quality ingredients is key to making this simple recipe truly unforgettable.
- 2 cups creamy peanut butter – This is the star of the show, so use a brand you love! I go for a standard supermarket brand like Jif or Skippy. Their consistency is perfect, and they’re already sweetened, which helps our fudge set up beautifully. Chef’s Tip: Avoid using “natural” peanut butter (the kind with oil that separates) as it can make the fudge greasy and prevent it from setting properly.
- 1 cup (2 sticks) unsalted butter – Unsalted is the way to go here, as it lets us control the salt level perfectly. We’re melting it down to create the luscious, creamy base of our fudge.
- 1 teaspoon vanilla extract – A splash of real vanilla extract adds a warm, sweet depth that makes the peanut flavor pop. It’s the secret background singer that makes the lead vocalist sound even better.
- 4 cups powdered sugar – Also known as confectioner’s sugar. This gives our fudge its structure and that classic, smooth melt-away texture. Yes, it’s four cups! It seems like a lot, but trust the process.
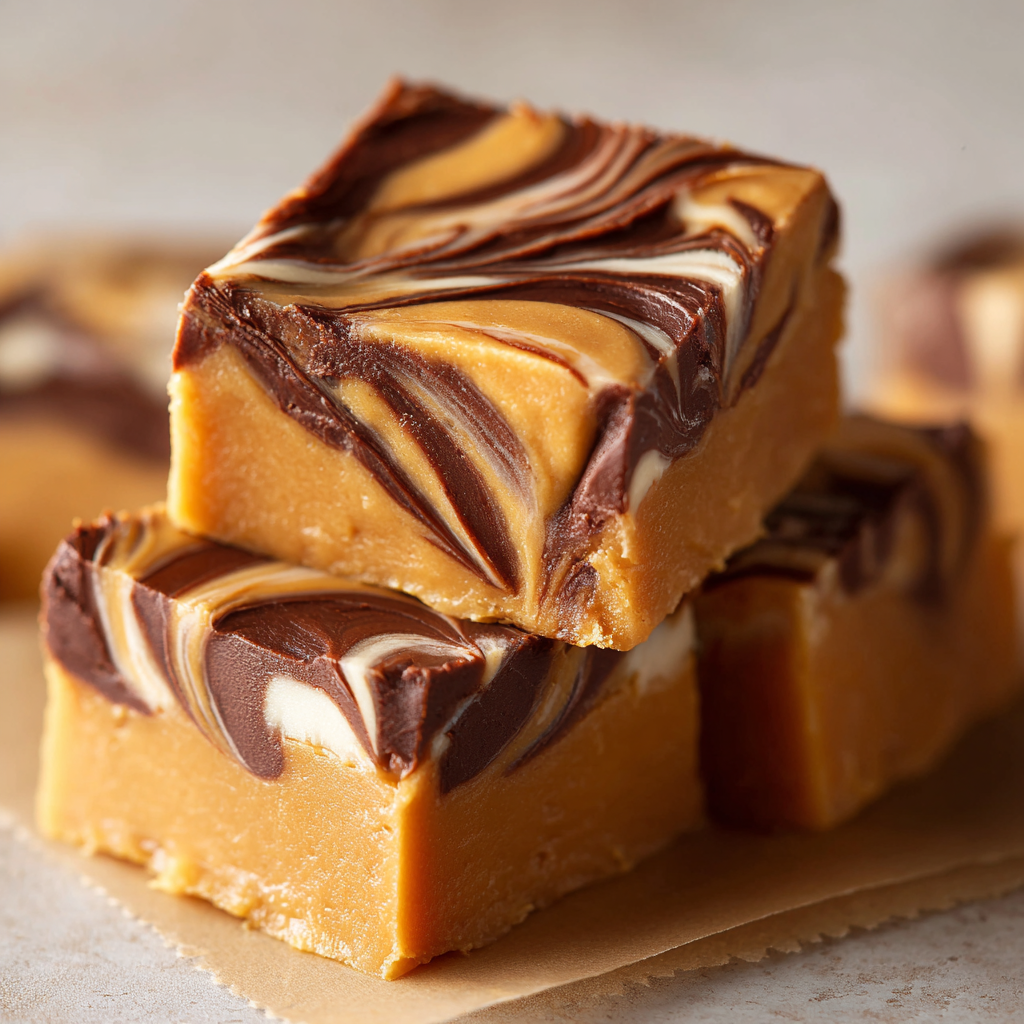
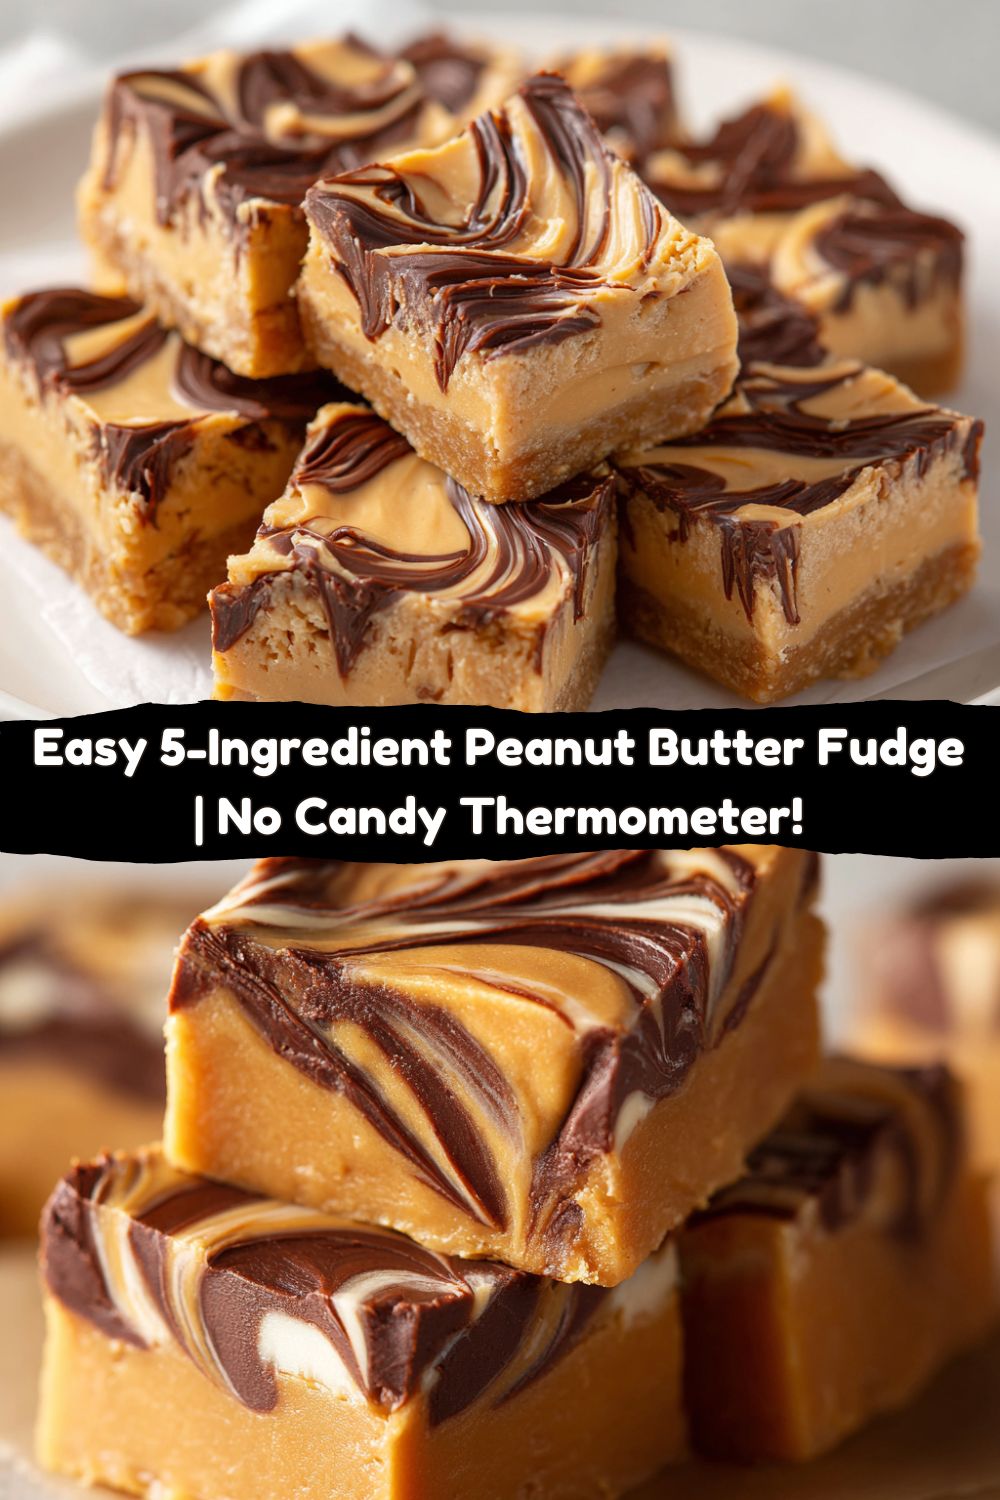
- ½ cup semi-sweet chocolate chips (optional) – Because peanut butter and chocolate are a match made in heaven. This is for a gorgeous drizzle or swirl on top. Feel free to use milk chocolate or dark chocolate chips instead!
Let’s Make Some Magic: Your Foolproof Fudge Steps
See? I told you it was easy. Let’s walk through this together. Read through all the steps once before you start, and you’ll be a fudge pro in no time.
Step 1: Prep Your Pan. Before you even turn on the stove, line an 8×8 or 9×9 inch baking pan with parchment paper. Let the paper overhang on two opposite sides—this creates “handles” that will let you lift the entire block of fudge out later for super clean, easy cutting. No wrestling with the pan! A little spritz of cooking spray on the pan first helps the parchment stick in place.
Step 2: Melt the Dream Team. In a medium-sized saucepan over medium heat, combine the peanut butter and the butter. We’re not trying to boil it, just melt it together until it’s one smooth, gorgeous, bubbling mixture. Stir it almost constantly with a wooden spoon or silicone spatula. This should only take about 3-5 minutes. Once it’s melted and combined, remove it from the heat immediately. Chef’s Hack: This is a great time to add a pinch of salt if your peanut butter isn’t very salty. Taste it! You’re the boss of your fudge.
Step 3: The Vanilla Vortex. Stir in that teaspoon of vanilla extract. It will sizzle and smell amazing. This is a good sign! You’re layering in that flavor.
Step 4: The Sugar Shower. Here’s the only “work” involved. Gradually add the powdered sugar, about one cup at a time. Stir vigorously after each addition until it’s fully incorporated before adding the next cup. The mixture will go from very liquidy to thick and difficult to stir—that’s exactly what we want! I promise, the last cup will mix in. Use some muscle! Chef’s Warning: If you add all the sugar at once, you’ll create a powdered sugar cloud that will coat you and your kitchen. Learn from my mistakes! Gradual is the key.
Step 5: Press and Smooth. Immediately pour the thick fudge mixture into your prepared pan. Use your spatula or—even better—lightly greased hands to press it into an even layer. Getting it smooth on top now means prettier squares later.
Step 6: The Chocolate Finale (Optional, but highly recommended). If you’re going for the chocolate swirl, melt your chocolate chips in a microwave-safe bowl in 20-second bursts, stirring between each, until smooth. Drizzle it over the top of the fudge in the pan. Then, take a knife or a toothpick and drag it through the chocolate to create beautiful marbled patterns. Get creative with it!
Step 7: The Patience Game. This is the hardest part. Place the pan in the refrigerator for at least 2 hours, or until the fudge is completely firm to the touch. Do NOT try to cut it early! You’ll make a mess. Let science do its thing.
Step 8: Slice and Celebrate! Use those parchment paper handles to lift the fudge block out of the pan and onto a cutting board. Use a large, sharp knife to cut it into 1-inch squares. For super clean cuts, you can warm the knife under hot water and wipe it dry between slices.
How to Serve This Masterpiece
This fudge is a star all on its own, but presentation is part of the fun! For a casual family treat, just leave the squares on a plate on the counter (where they’ll disappear at an alarming rate). For a party or gift, stack them on a cute vintage plate or in a festive tin box layered between sheets of parchment paper. They make incredible edible gifts during the holidays! Pair a square with a hot cup of black coffee to cut through the sweetness, or crumble it over a scoop of vanilla ice cream for the ultimate “chef’s snack” after a long day of recipe testing. However you serve it, just be ready to hand out the recipe.
Mix It Up: Your Fudge, Your Rules
Once you’ve mastered the base, the playground is open! Here are a few of my favorite ways to get creative:
- Salty Sweet Sensation: Right after you press the fudge into the pan, sprinkle the top generously with flaky sea salt (like Maldon). It creates an incredible contrast that highlights the peanut flavor.
- The Crunch Factor: Fold in ½ cup of crushed pretzel pieces or chopped, roasted peanuts along with the last cup of powdered sugar. You get that amazing texture in every single bite.
- Chocolate Layer Dream: Instead of a swirl, melt 1 cup of chocolate chips with ½ teaspoon of coconut oil. Pour it over the chilled fudge, spread it into an even layer, and chill again for 30 minutes. You’ve just made peanut butter fudge with a firm chocolate shell!
- Maple Bliss: Add 1 tablespoon of real maple syrup along with the vanilla extract. It adds a warm, autumnal depth that’s just incredible.
- Festive Fun: For the holidays, fold in ¼ cup of holiday sprinkles or crushed candy canes for a colorful and festive twist.
Jackson’s Chef Notes & Kitchen Stories
This recipe is a testament to the fact that the best dishes often come from happy accidents. The first time I made this, I was actually trying to make a peanut butter sauce for ice cream and got the ratios wildly, hilariously wrong. I ended up with this thick, sweet paste that, after a panic-induced chill in the fridge, turned out to be the most delicious fudge I’d ever had. My wife still laughs about the look on my face when I realized my “failure” was a total win. Over time, I’ve tweaked it to perfection. The key takeaway? Don’t be afraid to mess up in the kitchen. Sometimes, the best “meld” of flavors comes from a beautiful mistake.
Fudge FAQs: Your Questions, Answered
Q: My fudge is too soft and won’t set. What happened?
A: The most common culprit is using natural peanut butter. The extra oil prevents proper setting. Another reason could be not using enough powdered sugar or not chilling it for long enough. Pop it back in the fridge for another hour! If it’s truly a lost cause, congratulations, you’ve made an amazing peanut butter ice cream topping.
Q: Can I use crunchy peanut butter?
A: Absolutely! Using crunchy peanut butter is an easy way to add a little texture without any extra ingredients. Just know that your fudge won’t be 100% smooth, but it will be delicious.
Q: How long does this fudge keep?
A: Stored in an airtight container in the refrigerator, it will stay fresh and perfect for up to two weeks. You can also freeze it for up to 3 months! Just thaw it in the fridge overnight.
Q: Why is my fudge grainy?
A: This usually happens if the powdered sugar isn’t mixed in completely. Make sure to stir vigorously after each cup until the mixture is totally smooth before adding the next. Sifting your powdered sugar first can also help prevent any lumps.

Peanut Butter Fudge
- Total Time: 2 hrs 10 minutes
- Yield: ~36 squares
Description
This classic peanut butter fudge is melt-in-your-mouth soft, with just enough richness to satisfy any sweet tooth. Topped with a chocolate swirl or left pure and simple, it’s the kind of treat that disappears fast at any gathering.
Ingredients
2 cups creamy peanut butter
1 cup unsalted butter (2 sticks)
1 tsp vanilla extract
4 cups powdered sugar
Optional: ½ cup semi-sweet chocolate chips (for swirl or drizzle)
Instructions
Melt the base
In a saucepan over medium heat, melt butter and peanut butter together until smooth and bubbling. Remove from heat.
Mix it all
Stir in vanilla extract. Gradually add powdered sugar, one cup at a time, mixing until fully incorporated and smooth.
Pour & set
Spread fudge into a parchment-lined 8×8 or 9×9 inch pan. Smooth the top.
Add chocolate (optional)
If desired, melt chocolate chips and drizzle or swirl over the top of the fudge before it sets.
Chill
Refrigerate for at least 2 hours, or until firm. Cut into squares and enjoy!
Twists to Try
Salty Sweet: Sprinkle with flaky sea salt before chilling
Crunch Factor: Mix in crushed pretzels or chopped peanuts
Chocolate Layered: Pour a melted chocolate layer on top before chilling
Maple Vibe: Add 1 tbsp maple syrup to the mix for depth
- Prep Time: 10 minutes
- Cook Time: 2 hrs
Nutrition
- Calories: 150 / Square
- Fat: 9g / Square
- Carbohydrates: 16g / Square
- Protein: 2g / Square
Quick Nutritional Breakdown
Okay, let’s be real: this is a treat. It’s not health food, but it’s made with real, simple ingredients. This estimated info is per square (based on 36 squares from a 9×9 pan).
Estimated per square: ~150 kcal | 9g fat | 16g carbs | 2g protein
Remember, these are estimates and can vary based on the specific brands of ingredients you use. The joy and happiness it brings, however, are immeasurable.
Your New Go-To Treat
And there you have it! The simplest, most satisfying peanut butter fudge recipe that’s about to become a staple in your kitchen. It’s the answer to potluck panic, the solution for last-minute gifts, and the perfect project for a fun, quick kitchen session. I love this recipe because it proves that you don’t need fancy skills or equipment to make something truly special. You just need a few good ingredients and a willingness to try.
I’d love to hear how your fudge turns out! Tag me on social @foodmeld with your creations so I can see your delicious twists. Now, go forth and make something unforgettable. Until next time, happy cooking!
Jackson


