Forget Everything You Thought You Knew About Biscuits
Hey friends, Jackson from Food Meld here. Let’s talk about a serious breakfast (or brunch, or dinner, or midnight snack) game-changer. I’m holding a warm, flaky, golden-brown biscuit that’s about to make your entire kitchen smell like a hug from your Southern grandma—if your grandma was also a bit of a culinary rebel. We’re making Sweet Potato Biscuits, and trust me, this isn’t just another side dish. This is the main event.
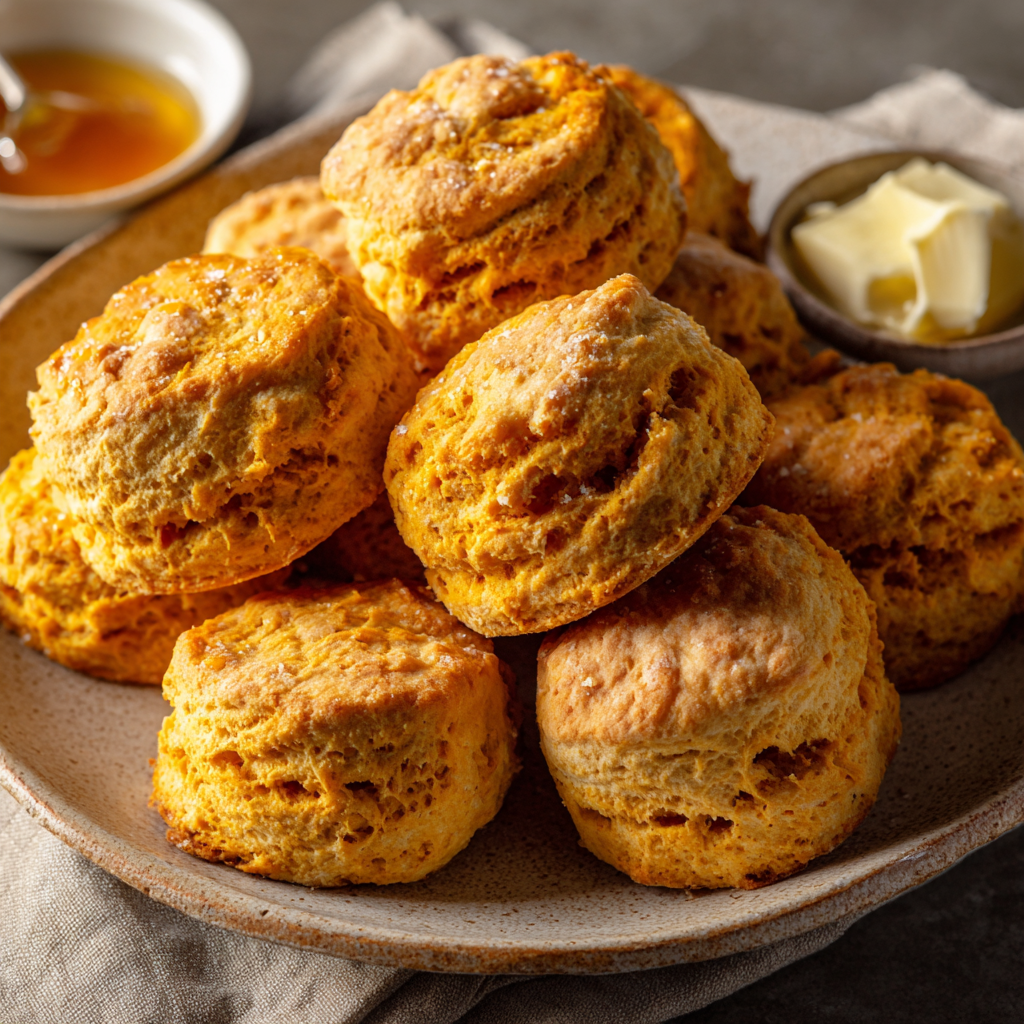
Imagine this: the classic, buttery tenderness of a perfect biscuit, but with a subtle, earthy sweetness that makes it utterly irresistible. They’re soft and pillowy on the inside with those crisp, shatteringly good edges we all fight over. They’re a beautiful sunrise-orange color that just makes you happy to look at. And the best part? They’re unbelievably versatile. Slather them with honey butter for a sublime breakfast, split them open for a killer breakfast sandwich, or serve them alongside a big bowl of chili to absolutely win at life.
I know some of you get a little nervous around pastry. Words like “cutting in butter” or “don’t overwork the dough” can sound intimidating. But I’m here to tell you—and show you—that it doesn’t have to be. We’re keeping things simple, real, and packed with flavor, just like we do here at Food Meld. So, grab your favorite bowl, and let’s cook something awesome together. You’re about to fall in love with your oven all over again.

The Biscuit That Started It All
This recipe takes me right back to my Aunt Shirley’s kitchen in Georgia. It wasn’t a fancy kitchen—countertops were laminate, the oven was older than I was, and it was always about ten degrees warmer in there than anywhere else in the house. But man, was it the heart of the home.
Every Thanksgiving, after the turkey was in and the pies were prepped, she’d pull out a bowl of sweet potato leftovers from the night before. “Don’t let good food go to waste,” she’d say, and like magic, she’d whip up a batch of these biscuits for us to snack on while the big meal finished cooking. We’d stand around that warm kitchen, stealing them off the baking sheet the second they were cool enough to handle, burning our fingers and not caring one bit. It was our little secret pre-feast feast. She taught me that the best recipes aren’t about perfection; they’re about feeling, about using what you have, and about sharing something delicious with the people you love. That’s the spirit I want to bring to you today.
Gathering Your Flavor Squad
This is a simple list, but each ingredient plays a crucial role. Using quality stuff here makes a world of difference! This recipe makes about 10-12 beautifully puffed biscuits.
- 2 cups all-purpose flour – The foundation of our biscuit. It gives structure. For a slightly more tender biscuit, you can swap one cup for cake flour, but all-purpose works perfectly.
- 1 tbsp baking powder – This is our main leavening agent, the magic that makes these guys puff up sky-high. Make sure it’s fresh! If it’s been in your cupboard for a year, it’s lost its power.
- ½ tsp baking soda – Our other leavening helper. It reacts with the acidity in the buttermilk to give us an extra lift and a beautiful golden-brown color.
- ½ tsp salt – Do not skip this. Salt balances the sweetness and enhances all the other flavors. I use fine sea salt.
- 1 tbsp brown sugar – Just a touch to complement the natural sweetness of the potato. It also helps with browning. You can use white sugar if it’s all you have.
- ½ cup cold unsalted butter, cubed – COLD is the most important word here. I pop my cubed butter in the freezer for 10 minutes before I start. This cold butter creates steam pockets as it melts in the oven, which is what gives us those incredible, flaky layers. Unsalted lets us control the salt level.
- 1 cup mashed sweet potato – The star! You can use canned puree (just make it’s plain, not pie filling), but roasting your own is easy and adds a deeper flavor. To roast: prick a medium sweet potato, bake at 400°F for 45-60 mins until soft, scoop out the flesh, and let it cool completely. Cold or room temp is key—don’t add it warm!
- ¼ to ½ cup buttermilk – Buttermilk adds tang and tenderness. The amount you need will depend on the moisture content of your sweet potato. Start with ¼ cup and add more as needed. No buttermilk? Make a quick substitute: add 1 tsp of lemon juice or white vinegar to a measuring cup, then fill with regular milk to the ¼ cup line. Let it sit for 5 minutes to curdle.
Optional Topping: A brush of melted butter right when they come out of the oven is chef’s kiss. Finish with a sprinkle of flaky sea salt for a sweet-salty vibe or a dusting of cinnamon sugar for a dessert-like treat.
Let’s Make Some Magic: Step-by-Step
Ready? Preheat that oven to 425°F (218°C). This hot oven is crucial for the initial big rise. Line a baking sheet with parchment paper. Now, let’s get our hands in it!
- Combine the Dry Goods. In a large bowl, whisk together the 2 cups of flour, 1 tbsp baking powder, ½ tsp baking soda, ½ tsp salt, and 1 tbsp brown sugar. Whisk it really well—we want those leaveners evenly distributed so every bite is consistent. This is your dry team, all ready to go.
- Cut in the Butter. Scatter your very cold, cubed butter over the flour mixture. Now, using a pastry cutter, two forks, or (my favorite method) your clean fingertips, work the butter into the flour. You’re looking for a crumbly mixture with pea-sized and smaller bits of butter throughout. Chef’s Hack: You can also pulse this mixture a few times in a food processor, but be careful not to overdo it! Some visible butter chunks are a good thing—they’re your future flaky layers.
- Bring in the Wet Team. Create a well in the center of your butter-flour mixture. Plop in your 1 cup of mashed sweet potato. Pour in ¼ cup of the cold buttermilk. Now, with a sturdy fork or a spatula, gently stir until the mixture just starts to come together. It will look shaggy and dry in places. That’s okay! If after 30 seconds of mixing there’s still a lot of dry flour, add another tablespoon of buttermilk at a time until it just holds together. Do not overmix! Overworking the dough is the #1 enemy of tender biscuits. It develops gluten and makes them tough.
- Shape with Care. Dump the shaggy dough onto a lightly floured surface. Gently pat it together with your hands into a rough rectangle or circle about 1-inch thick. No rolling pin! We’re patting, not rolling, to keep it tender. If you want layered biscuits, you can fold the dough over onto itself a few times and pat it back down to 1-inch.
- Cut and Place. Dip a 2.5 or 3-inch round biscuit cutter in flour and press straight down into the dough. Do not twist the cutter! Twisting seals the edges and prevents the biscuits from rising properly. Push straight down, pull straight up. Place the cut biscuits on your prepared baking sheet, their sides just touching. This helps them rise up, not out. Re-roll the scraps gently and cut until all dough is used.
- Bake to Golden Perfection. Pop that baking sheet into your preheated 425°F oven. Bake for 12-15 minutes. You’re looking for beautifully puffed biscuits with golden-brown tops and bottoms. Your kitchen will smell incredible.
- The Finishing Touch. The second you pull them out, brush the tops with that optional melted butter. It gives them a gorgeous sheen and an extra hit of buttery flavor. Sprinkle immediately with flaky salt or cinnamon sugar so it sticks.
How to Serve These Golden Gems
Okay, they’re out of the oven. The hard part is waiting the two minutes for them to be cool enough to eat without scorching your mouth (worth it, though). Here’s how to make them shine:
The Classic: Split one open while it’s still steaming. Let a pat of good salted butter melt into its nooks and crannies. Drizzle with a little honey or your favorite fruit jam. This is breakfast heaven.
The Savory Powerhouse: These biscuits are amazing with fried chicken, stew, or a big bowl of spicy chili. They’re also the absolute BEST base for a breakfast sandwich. A slice of sharp cheddar, a fried egg, and a piece of crispy bacon or sausage patty? Game over.
The Holiday Star: Serve them alongside your holiday ham or turkey. They’re a fantastic, unexpected alternative to dinner rolls and the sweetness pairs perfectly with savory mains.
As a Dessert: Split them warm, add a scoop of vanilla bean ice cream, and drizzle with caramel sauce. You’re welcome.
Mix It Up: Your Biscuit, Your Rules
Once you’ve mastered the base recipe, have fun with it! Here are a few of my favorite twists:
- Spiced Sweet Potato: Add ½ tsp of cinnamon, ¼ tsp of nutmeg, and a pinch of cloves to the dry ingredients. Tastes like fall in every bite.
- Cheesy & Herby: Fold in ½ cup of shredded sharp cheddar cheese and 1 tbsp of fresh chopped rosemary or chives into the dough at the end. Incredible with soup.
- Vegan Delight: Use an equal amount of very cold vegan butter (the block kind, not tub spread) and swap the buttermilk for a plant-based milk mixed with 1 tsp lemon juice. The texture is still fantastic.
- Gluten-Free Twist: Substitute the all-purpose flour with a 1:1 gluten-free baking blend. The texture will be a bit more crumbly but still delicious.
- Biscuit Bake: Instead of cutting individual biscuits, pat the whole dough into a greased 8-inch round cake pan or cast-iron skillet. Score the top into 8 wedges. You get soft, pull-apart sides and a crispy top—a real crowd-pleaser.
Jackson’s Chef Notes
This recipe has evolved in my kitchen more times than I can count. I once, in a frantic pre-Thanksgiving panic, used leftover sweet potato casserole with marshmallows melted on top. Don’t do that. It was… gooey. And not in a good way. Plain sweet potato is the way to go!
The biggest lesson? Embrace the mess. Biscuit dough is not meant to be smooth and perfect. It’s meant to be shaggy and a little lumpy. Those lumps and bumps are what create texture and tenderness. So, don’t stress. Trust your hands, trust the process, and most importantly, trust your taste buds. You’ve got this.
Biscuit FAQs & Troubleshooting
Q: My biscuits didn’t rise very much. What happened?
A: The usual suspects: Your baking powder or soda might be old (check the expiration date!). Your butter might have gotten too warm before baking, or you might have overworked the dough, developing too much gluten. Also, remember not to twist the cutter!
Q: My dough is too sticky/wet. How do I fix it?
A: Sweet potatoes vary in moisture. If it’s too sticky to handle, don’t panic! Just add a little more flour, a tablespoon at a time, until it’s workable. Flour your hands and your surface well.
Q: Can I make these ahead of time?
A: Absolutely! You can cut the biscuits and place them on the baking sheet, then cover and refrigerate for up to 24 hours before baking. You can also freeze the unbaked, cut biscuits on the sheet, then transfer to a freezer bag for up to 3 months. Bake from frozen, adding a few extra minutes to the baking time.
Q: Can I use canned sweet potato puree?
A: You sure can! Just make sure you’re getting 100% pure sweet potato puree, not the sweetened pie filling. Drain it well if it seems watery.

Sweet Potato Biscuits
- Total Time: 30 minutes
- Yield: 10 - 12 Biscuits 1x
Description
These sweet potato biscuits are flaky and golden with just the right touch of sweetness. Soft on the inside and crisp on the edges, they pair perfectly with honey butter, jam—or stacked high with leftover ham or turkey.
Ingredients
2 cups all-purpose flour
1 tbsp baking powder
½ tsp baking soda
½ tsp salt
1 tbsp brown sugar
½ cup cold unsalted butter, cubed
1 cup mashed sweet potato (fresh or canned)
¼ to ½ cup buttermilk (as needed)
Optional Topping:
Melted butter + flaky salt or cinnamon sugar
Instructions
Preheat oven to 425°F (218°C). Line a baking sheet with parchment paper.
In a large bowl, whisk together flour, baking powder, baking soda, salt, and brown sugar.
Cut in butter with a pastry cutter or your fingers until pea-sized crumbs form.
Add sweet potato and just enough buttermilk to bring the dough together—start with ¼ cup and add more if needed.
Turn dough onto floured surface, gently pat into a 1-inch thick round. Cut with a biscuit cutter and place on baking sheet.
Bake for 12–15 minutes until puffed and golden. Brush with melted butter if desired.
- Prep Time: 15 minutes
- Cook Time: 15 minutes
Nutrition
- Calories: 200 / Biscuit
- Sugar: 3g / Biscuit
- Fat: 10g / Biscuit
- Saturated Fat: 6g / Biscuit
- Carbohydrates: 24g / Biscuit
- Fiber: 1g / Biscuit
- Protein: 3g / Biscuit
Nutritional Info (Because We’re Curious!)
Okay, let’s be real—these are a treat, but they’re made with real, whole ingredients. Here’s a rough estimate per biscuit (based on 12 biscuits):
Calories: ~200 | Fat: 10g | Saturated Fat: 6g | Carbohydrates: 24g | Fiber: 1g | Sugar: 3g | Protein: 3g
Sweet potatoes are a fantastic source of Vitamin A (over 100% of your daily needs in one biscuit!), Vitamin C, and fiber. Remember, this is just an estimate and can vary based on specific ingredients and sizes. For dietary needs, use the vegan and gluten-free swaps listed above!
Your New Go-To Recipe
And there you have it! My all-time favorite Sweet Potato Biscuit recipe. It’s a recipe built on nostalgia, perfected with a few kitchen hacks, and designed to bring a whole lot of joy to your table. It’s proof that with a few simple ingredients and a little bit of heart, you can create something truly unforgettable.
I want to see your creations! Did you go classic with butter and honey? Or did you get funky with cheese and herbs? Tag me on Instagram @FoodMeld with your photos and stories. Nothing makes me happier than seeing you guys in the kitchen, making a beautiful mess and having a great time doing it.
Now go forth, bake with confidence, and enjoy every last, delicious, crumbly bite. Until next time, friends!
Jackson


