Your Holiday Hero: The Ultimate Guide to Classic Turkey Gravy
Hey friends, Jackson from Food Meld here. Let’s have a real talk for a second. We spend days, sometimes weeks, planning the perfect holiday meal. We brine the turkey, we perfect the stuffing, we whip the potatoes into fluffy clouds of joy. But then, right at the finish line, we sometimes panic and reach for… a jar? A powder? A sad, lukewarm packet of something that promises “homemade” but tastes anything but? Nope. Not on my watch. Not in your kitchen.
I’m here to tell you that the crown jewel of your Thanksgiving or Christmas table isn’t the bird itself—it’s the gravy. That rich, savory, silky-smooth liquid gold that you pour over absolutely everything on your plate. It’s the conductor of the flavor orchestra, bringing every single element together in one glorious, harmonious bite. And the best part? It’s not hard to make. In fact, it’s incredibly simple, and once you know the method, you’ll never look back.
This isn’t just a recipe; it’s a formula for confidence. We’re going to take those incredible, flavor-packed drippings from your roasted turkey and transform them into a gravy that will have your guests asking for the recipe before they’ve even finished their first helping. So, grab your favorite whisk and let’s cook something awesome together. Let’s make a gravy that’s unforgettable.

The Gravy That Started It All
My love affair with gravy started in my Grandma Edie’s kitchen. It was always a chaotic, beautiful mess—aunties arguing over the marshmallows on the sweet potato casserole, uncles “testing” the turkey skin, and us kids underfoot, trying to sneak a dinner roll. But amidst all that beautiful chaos, Grandma Edie had a zone of total, unshakable calm: the gravy station.
I remember watching her, a woman who could command a room of fifty rowdy relatives with a single look, gently pour the turkey drippings into her old, speckled-blue roasting pan. There was no measuring, just a knowing eye. She’d whisk that roux like she was conducting a symphony, and the gradual stream of stock was her crescendo. The entire kitchen would slowly get quiet, one by one, as that incredible, savory aroma began to bloom. It was the signal that feast was truly moments away. That first taste, poured over her buttery mashed potatoes, was pure magic. It tasted like home, like love, like celebration. That’s the feeling I want to help you create in your own kitchen. This recipe is my homage to her and that magic.
Gathering Your Gravy A-Team
See? I told you it was simple. The beauty of classic turkey gravy is in its simplicity. A few powerhouse ingredients are all you need to create something spectacular. Here’s the lineup:
- ¼ cup Turkey Drippings (from roasting pan) or Unsalted Butter: This is the flavor foundation. Those drippings are pure liquid gold, packed with the concentrated essence of the turkey, herbs, and aromatics. Chef’s Insight: If you don’t have enough drippings, supplement with butter. No shame in that game! Using unsalted butter lets you control the sodium level perfectly.
- ¼ cup All-Purpose Flour: This is our thickening agent, and it’s crucial for creating the structure of the gravy. When cooked with the fat, it forms a “roux,” which is the secret to a smooth, lump-free sauce. Substitution Tip: For a gluten-free gravy, you can use a 1:1 gluten-free flour blend. Just note that some blends may require a slightly longer cooking time for the roux to lose its raw flavor.
- 2–3 cups Turkey Stock (or Chicken Stock), warmed: The body of the operation. Using a warmed stock is the #1 professional hack for a lump-free gravy, as it incorporates into the roux seamlessly. Chef’s Insight: Homemade stock is incredible, but a good-quality store-bought low-sodium stock works beautifully. Just warm it up in a separate saucepan or in the microwave before adding it!
- Salt and Black Pepper, to taste: The essential finishers. Always season at the end, after your gravy has thickened, so you can taste and adjust perfectly.
- Optional: Splash of Cream or a Dash of Soy Sauce: These are your secret weapons for next-level depth. A splash of cream adds a touch of luxurious richness and a velvety mouthfeel. A dash of soy sauce (don’t knock it ‘til you try it!) isn’t for saltiness—it’s a powerhouse of umami that deepens the savory flavor without making it taste like soy.
Let’s Make Some Magic: Step-by-Step Gravy Perfection
Alright, the turkey is out of the oven and resting (this is crucial—let that bird rest!). Now it’s our time to shine. Follow these steps, and you’ll have perfect gravy every single time.
Step 1: Collect and Separate Your Gold
Carefully pour all the drippings from your roasting pan into a clear heatproof bowl or a fat separator. Let it sit for a few minutes. The fat will rise to the top, and the darker, delicious juices (the “goodness”) will settle at the bottom. We need the fat for our roux. Skim off ¼ cup of that clear fat. If you don’t have enough, just add enough butter to make ¼ cup total fat. Chef’s Hack: If you don’t have a separator, a simple trick is to put the drippings in the freezer for 10-15 minutes. The fat will solidify on top, making it super easy to scoop off!
Step 2: Build Your Flavor Base (The Roux)
Place a medium saucepan over medium heat. Add your ¼ cup of reserved turkey fat (or butter) and let it melt. Now, sprinkle in the ¼ cup of all-purpose flour. Immediately start whisking! You’re creating a paste called a roux. Cook this, whisking almost constantly, for 2-3 minutes. You’ll know it’s ready when it turns a light golden color and smells a bit nutty and toasty. This cooking step is non-negotiable—it cooks out the raw flour taste and gives your gravy a beautiful, warm base flavor.
Step 3: The Grand Incorporation
Now, here’s where the magic happens. Grab your warm stock. I start with 2 cups. While whisking the roux CONSTANTLY, slowly—and I mean slowly—drizzle in the warm stock. Start with just a few tablespoons at first and whisk until it’s completely smooth before adding more. This gradual addition is the absolute key to preventing lumps. Once the first cup or so is incorporated and smooth, you can add the remaining stock a little more quickly, still whisking. You’ll see it transform from a thick paste to a luxurious, smooth liquid.
Step 4: Simmer and Thicken
Bring the gravy to a gentle simmer. Let it bubble away happily for 5-10 minutes, stirring occasionally. You’ll feel it thicken on your whisk. It should coat the back of a spoon nicely. If it gets too thick, no worries! Just whisk in a little more warm stock or even some hot water until it reaches your perfect, pourable consistency.
Step 5: The Finishing Touches
Turn off the heat. Now, taste it! This is the most important step. Season with salt and black pepper to taste. Remember, your stock might already be salty, so go gradually. Now’s the time to add your optional power-ups: a splash of cream for richness or a dash of soy sauce for that deep, mysterious umami kick. Whisk it in, give it one final taste, and adjust.
How to Serve Your Masterpiece
You’ve done it! You’ve created liquid gold. Now, let’s serve it with the flair it deserves. I’m a big believer that presentation is part of the experience.
First, pour your finished gravy into a warm gravy boat or a small pitcher. A warm vessel keeps the gravy at the perfect temperature throughout the meal. No one likes cold gravy! I sometimes even pop the gravy boat into the (turned-off) oven for a minute to warm it up before pouring.
Place the gravy boat right in the center of the table where everyone can reach it. This isn’t a side dish; it’s the main event! Encourage your guests to pour it liberally. This gravy isn’t just for turkey. It’s for:
- Pooling underneath a scoop of creamy mashed potatoes.
- Drenching your favorite stuffing or dressing.
- Adding moisture to every single bite of that beautiful roasted turkey.
- Even dipping your dinner rolls into! (My personal favorite)
This gravy ties every single element on the plate together. It’s the ultimate connector.
Mix It Up: Creative Gravy Twists
The classic recipe is perfect, but you know me—I always have a little “what if we tried this?” energy. Here are a few fun ways to customize your gravy and make it uniquely yours.
- Herb-Infused Glory: Add a few sprigs of fresh thyme, rosemary, or sage to the stock as you warm it up. Let it steep for 10 minutes, then strain it out before adding the stock to the roux. This gives a beautiful, aromatic herbal note.
- Mushroom Madness: Sauté ½ cup of finely chopped mushrooms (cremini or shiitake are great) in the turkey fat before you add the flour. Let them cook down and get nice and brown. Then, proceed with the roux. This adds an incredible earthy, savory depth.
- Boozy & Brilliant: After making your roux, deglaze the pan with ½ cup of dry white wine, sherry, or even a dry vermouth. Let it simmer and reduce by half before adding your warm stock. The alcohol cooks off, leaving behind a fantastic layer of complex flavor.
- Spicy Kick: For a little warmth, add a pinch of cayenne pepper or a few dashes of your favorite hot sauce at the end with the salt and pepper. It just wakes up all the other flavors!
- Ultra-Rich & Creamy: Swap out ½ cup of the stock for full-fat coconut milk for a dairy-free richness that is absolutely divine.
Jackson’s Chef’s Notes
This recipe has evolved in my kitchen over the years. I’ve had my share of gravy disasters—lumpy gravy that I had to frantically push through a sieve while guests were arriving, gravy that was too thin and turned into a soup, gravy that was so thick you could stand a spoon up in it. The key is to not panic. Gravy is very forgiving. Lumps? Strain it. Too thin? Simmer it longer or make a quick slurry (equal parts soft butter and flour mashed together) and whisk it in. Too thick? Add more liquid! The most important tool in your kitchen isn’t the whisk; it’s your confidence. You’ve got this.
Gravy FAQs: Your Questions, Answered
Q: My gravy is lumpy! What do I do?
A: Don’t worry, it happens to the best of us! The easiest fix is to pour the gravy through a fine-mesh sieve into a clean pot. Press the lumps through with the back of a spoon—they’re just little balls of roux and will dissolve. If it’s really lumpy, an immersion blender or a regular blender will make it perfectly smooth in seconds.
Q: My gravy is too thin. How can I thicken it?
A: The best way is to let it simmer a bit longer to reduce and concentrate. If you’re short on time, make a “slurry.” Mash together equal parts soft butter and flour (e.g., 1 tbsp each) into a paste. Whisk this paste into the simmering gravy a little bit at a time. Let it cook for a minute or two after each addition to see how it thickens.
Q: My gravy is too bland. How can I add more flavor?
A: This is common if your stock was mild. First, make sure you’ve salted it adequately—salt makes flavors pop. Then, think about depth: a dash of soy sauce (for umami), a splash of Worcestershire sauce, a pinch of onion powder, or even a teaspoon of mustard can work wonders. Taste as you go!
Q: Can I make gravy ahead of time?
A: Absolutely! Make it completely, let it cool to room temperature, and store it in an airtight container in the fridge for up to 3 days. When you’re ready, reheat it gently in a saucepan over low heat. It will thicken in the fridge, so just whisk in a little warm stock or water as it reheats to get it back to the perfect consistency.

Classic Turkey Gravy
- Total Time: 20 minutes
- Yield: 2 cups
Description
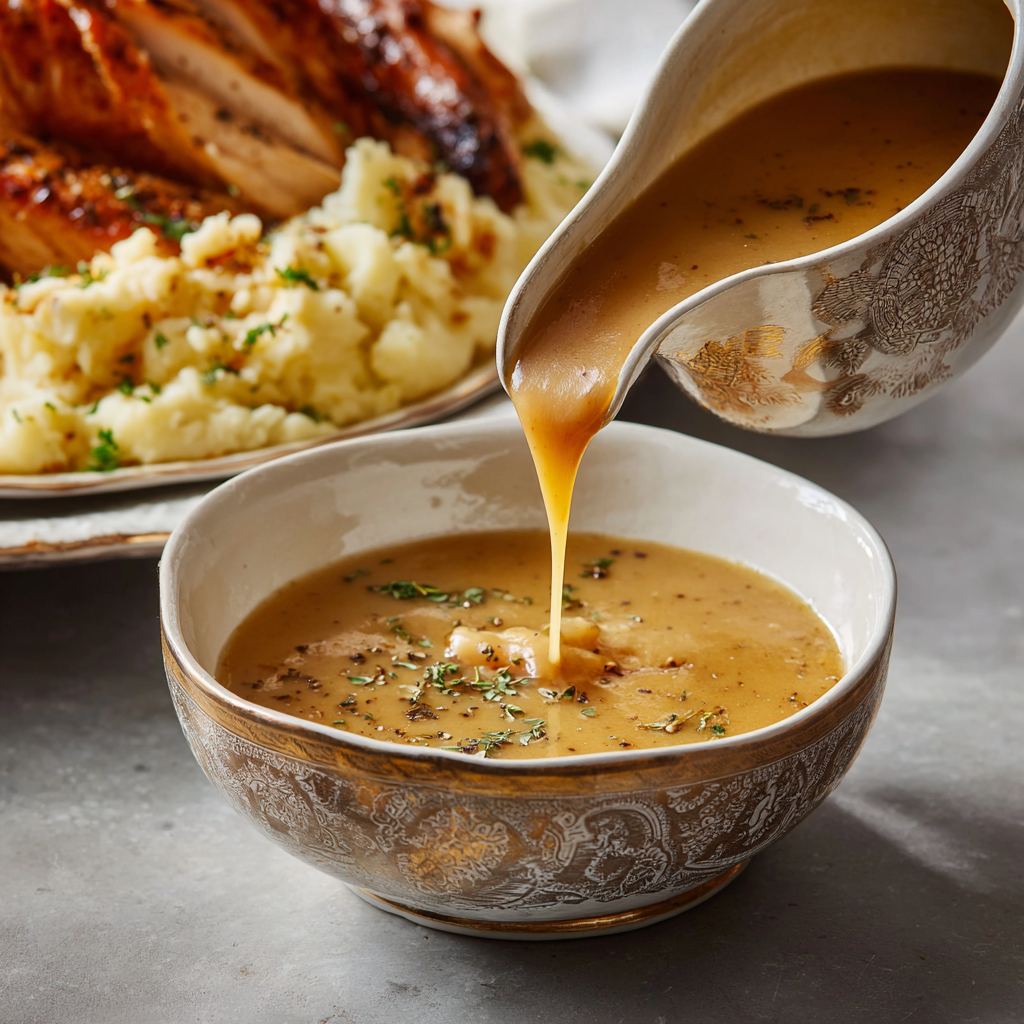
Rich, savory, and silky-smooth, this turkey gravy is the ultimate finishing touch for your holiday feast. Made from the flavorful drippings of a roasted turkey, it brings everything together—mashed potatoes, stuffing, and of course, the turkey itself. No shortcuts here, just honest, homemade goodness.
Ingredients
▢ 1/4 cup turkey drippings (from roasting pan) or unsalted butter
▢ 1/4 cup all-purpose flour
▢ 2–3 cups turkey stock (or chicken stock), warmed
▢ Salt, to taste
▢ Black pepper, to taste
▢ Optional: splash of cream or a dash of soy sauce for depth
Instructions
After roasting your turkey, pour the pan drippings into a bowl. Let them settle, then skim off and reserve 1/4 cup of the fat.
In a saucepan over medium heat, melt the reserved fat or butter. Whisk in the flour and cook for 2–3 minutes to form a golden roux.
Gradually add warm turkey stock, whisking constantly to avoid lumps. Start with 2 cups and add more as needed to reach desired consistency.
Simmer for 5–10 minutes until thickened. Season with salt and pepper to taste.
For extra richness, stir in a splash of cream or a touch of soy sauce.
- Prep Time: 5 minutes
- Cook Time: 15 minutes
Nutrition
- Calories: 90 Per 1/4 cup serving
- Fat: 7g Per 1/4 cup serving
- Carbohydrates: 5g Per 1/4 cup serving
- Protein: 2g Per 1/4 cup serving
Nutritional Information*
*Please note: This is an estimate based on the primary ingredients and can vary significantly based on the specific products you use, especially the fat content of your drippings.
Per ¼ cup serving:
Calories: 90 | Total Carbohydrates: 5g | Total Fat: 7g | Protein: 2g
This gravy is a condiment meant to enhance your meal. While it contains fat from the drippings, that’s where a huge amount of the flavor lives! It’s a wholesome, homemade alternative to processed gravies that often contain additives and preservatives. Enjoy it as part of a balanced holiday feast!
You’re a Gravy Master Now
And there you have it. You’re now armed with the knowledge, the tricks, and the confidence to make the most incredible, show-stopping turkey gravy of your life. This isn’t just about following a recipe; it’s about understanding the simple, beautiful process of turning pan juices into something legendary. It’s about creating those “you’ve gotta try this” moments that I live for.
So this holiday, stand proudly at the stove with your whisk. Be the calm in the kitchen storm. Pour that gorgeous, silky gravy into a boat and present it to your family and friends like the treasure it is. You made that. From scratch. And I guarantee, it will be unforgettable.
I’d love to hear how it goes! Tag me on Instagram @FoodMeld with your gravy victories. Now, go enjoy every single bite.
With flavor and fun,
Jackson


