Your Bakery-Worthy Loaf Awaits (And It’s Stupidly Simple)
Hey friends, Jackson from Food Meld here. Let’s talk about one of life’s greatest, simplest pleasures: the smell of fresh-baked bread wafting through your kitchen. That warm, yeasty, downright magical aroma that makes your house feel like a home and your stomach start doing a happy dance. For a lot of folks, the idea of making that bread from scratch feels… intimidating. Visions of complicated steps, hours of kneading, and tricky techniques are enough to send anyone running back to the supermarket bakery aisle.
But what if I told you that the most incredible, crusty-on-the-outside, soft-and-airy-on-the-inside artisan loaf you’ve ever had requires exactly four ingredients, one bowl, and absolutely zero kneading? No mixer, no bread machine, no fancy skills. Just you, a little bit of patience (the oven does most of the work, I promise), and a whole lot of “wow, I can’t believe I made this!” energy.
This no-knead artisan bread is my go-to recipe for a reason. It’s the ultimate confidence-builder, the perfect weeknight companion to a big pot of soup, and the guaranteed showstopper for your next dinner party. It’s forgiving, flexible, and so, so fun to make. We’re about to demystify bread baking together and unlock a whole new level of kitchen awesome. So, tie on that apron, and let’s cook something unforgettable.
The Bread That Started It All
This recipe takes me right back to my tiny first apartment kitchen. I was just starting to really explore cooking, moving beyond basic pasta and into the “what if” territory. I’d seen a famous baker talk about no-knead bread and I was skeptical. Bread without kneading? Sounded like a kitchen myth.
But one lazy Sunday, with a pot of chili simmering, I decided to go for it. I remember mixing the shaggy dough, looking at it doubtfully, and covering the bowl with a towel. Hours later, I peeked. It was alive! Bubbly, doubled in size, and smelling like promise. The moment I pulled that gorgeous, crackling, golden loaf out of my beat-up secondhand Dutch oven, I was hooked. That first tear of the crust, the steam rising, the taste… it was a revelation. It wasn’t just bread; it was a trophy. A testament to the magic that happens when you trust the process, even the simple ones. That loaf taught me that the most impressive dishes often have the humblest beginnings.
Gather Your A-Team: Just 4 Ingredients to Glory
See? I told you it was simple. Here’s your all-star lineup. Don’t just measure them—get to know them. Each one plays a crucial role in our bread-making symphony.
- 3 cups (450g) all-purpose flour: This is our workhorse. The structure-builder. I use regular all-purpose because it’s accessible and creates a fantastic crumb. Chef’s Insight: For a slightly chewier, more rustic loaf, you can swap out one cup of all-purpose for bread flour. Want to go whole grain? Start by substituting 1/2 to 1 cup with whole wheat flour—any more and you’ll need to adjust the water a bit.
- 2 tsp instant or active dry yeast: Our little miracle workers! These tiny granules are what make our bread rise and develop all those wonderful air pockets. Substitution Tip: Instant and active dry yeast are interchangeable here. If you’re using active dry, you don’t even need to proof it first in this recipe—the long rise time takes care of it. Trust me.
- 1 1/4 tsp salt: This is the flavor booster. It’s not just for taste; it also strengthens the gluten structure and controls the yeast’s activity. Don’t you dare skip it!
- 1 1/2 cups (375 ml) warm water (not hot): The catalyst. Warm water wakes up the yeast and gets the party started. Pro Hack: The perfect temperature is like a warm bath. If it’s too hot, you’ll kill the yeast. If it’s too cold, they’ll just take a nap. Aim for around 105-115°F (40-46°C). When in doubt, cooler is better than hotter.
Let’s Get Baking: The Foolproof Steps
Ready to see some magic? Follow these steps, read my little hacks along the way, and you’ll be golden. Literally.
- Mix the Dry Crew: In a large bowl, grab a whisk and give your flour, yeast, and salt a good whirl. This isn’t just combining; we’re aerating the flour and making sure the yeast and salt are evenly distributed. No one wants a salty bite or a dead yeast spot!
- Bring in the Water: Pour in that warm water. Now, switch to a sturdy wooden spoon or a spatula and stir until you no longer see dry flour bits. That’s it! The dough will be shaggy, sticky, and look a little rough around the edges. This is perfect. Chef’s Chatter: Embrace the stickiness! This high hydration is what gives us those incredible air pockets and open crumb. Don’t be tempted to add more flour.
- The Patience Part (First Rise): Cover the bowl tightly with plastic wrap or a clean, damp kitchen towel. Now, walk away. Let it hang out at room temperature for 2-3 hours. You’re looking for it to double in size and look bubbly on the surface. Time Hack: No rush! If it’s a cool day, it might take longer. If you’re short on time, a warmer spot (like an oven with the light on) will speed it up. You can even let it rise slowly in the fridge for up to 24 hours for more complex flavor!
- Preheat & Pot: About 30 minutes before your dough is ready, preheat your oven to a screaming hot 220°C (430°F). This is non-negotiable—we need that blast of heat for a great rise (called “oven spring”) and crust. Place your empty Dutch oven, with its lid on, right inside the heating oven. Tool Tip: No Dutch oven? No sweat! Any heavy, oven-safe pot with a tight-fitting lid will work. A cast-iron combo cooker, a heavy stainless steel pot, even a deep casserole dish. The lid is key—it traps steam, which is the secret to that crackly crust.
- Shape (Gently!): When the dough is ready, flour your hands and your work surface generously. Turn the dough out onto it. It will be loose and bubbly—handle it with care! Gently fold the edges over a few times to create a loose ball shape. Pro Move: We’re not kneading, we’re just coaxing it into a shape. Don’t punch it down or degas it completely. Those bubbles are our precious treasure.
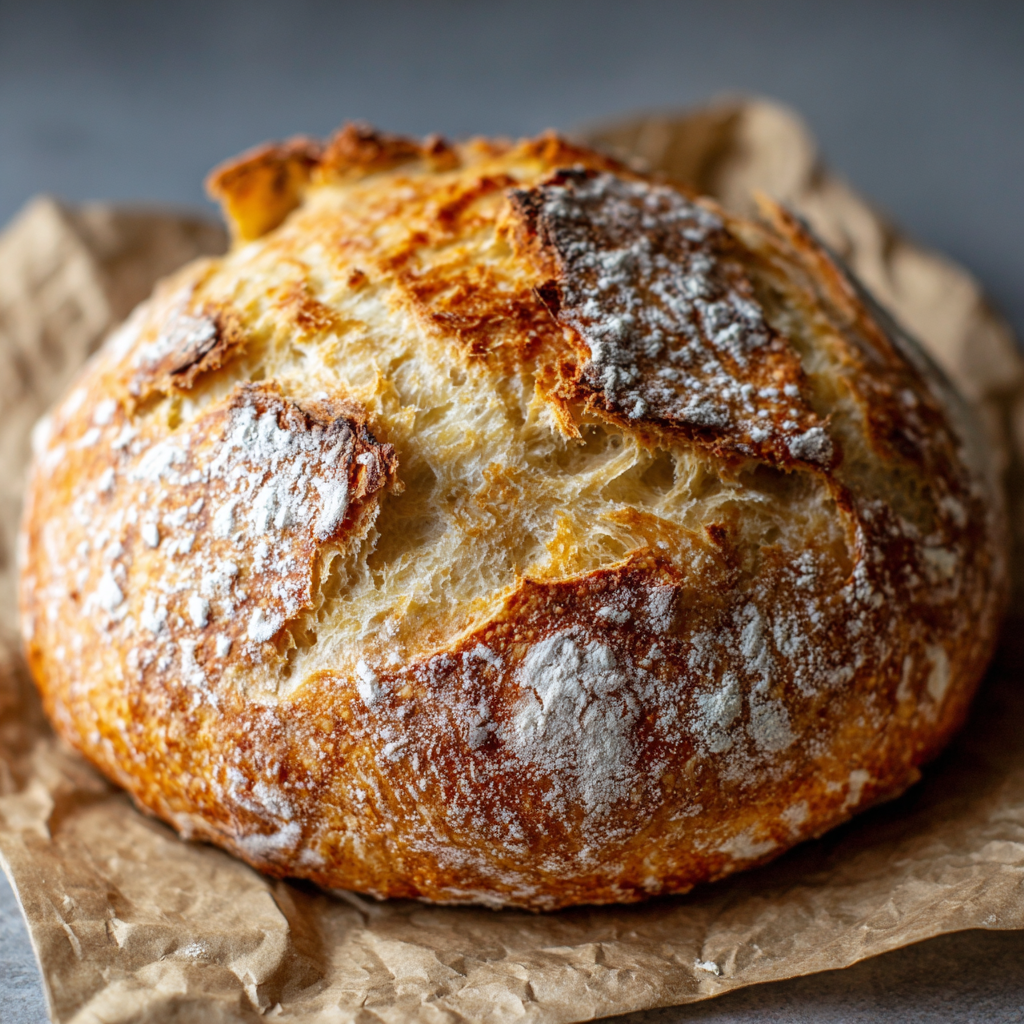
- Bake (The Big Show): Carefully take the scorching hot pot out of the oven. Remove the lid. Gently place your dough ball inside. It doesn’t have to be perfect! Cover it and get it back in the oven ASAP. Bake for 30 minutes with the lid on. This steams the loaf. Then, remove the lid and bake for another 10-15 minutes. This final blast browns and crisps the crust to perfection.
- The Hardest Part: Wait. Remove your beautiful, golden masterpiece and let it cool on a wire rack for at least 15-20 minutes. I know, it’s torture. But if you cut it too soon, the steam will escape and the interior will be gummy. Trust me, it’s worth the wait.
How to Serve Your Masterpiece
Okay, time’s up! Let’s eat. This bread is the star of any table.
The Classic: Slice it thick, slather it with high-quality salted butter, and watch it melt into the warm, airy pores. Pure heaven.
The Soup Soulmate: This is my favorite way. A big, crusty chunk dunked into a hearty beef stew, a creamy tomato soup, or a rustic lentil soup. It’s the ultimate comfort food duo.
The Appetizer Ace: Turn it into a stunning bruschetta bar. Toast slices, rub them with a garlic clove, and top with diced tomatoes and basil, a creamy mushroom ragout, or whipped feta and honey.
The Sandwich Star: Once it’s fully cooled, it makes unbelievable sandwiches. Its sturdy crust holds up to juicy fillings without getting soggy. Think roast beef with horseradish or a classic Italian caprese.
Mix It Up: Make It Your Own
Once you’ve mastered the basic loaf, the world is your oyster! Here are a few of my favorite twists:
- Everything Bagel Bomb: Before the final bake, brush the loaf with a little water or an egg wash and generously sprinkle with everything bagel seasoning. Savory, crunchy, incredible.
- Rosemary & Sea Salt: On baking day, my kitchen often smells like this. Fold 1-2 tablespoons of finely chopped fresh rosemary into the dry ingredients. Right before baking, top with flaky sea salt.
- Garlic & Herb Parmesan: Fold in 1/2 cup of grated parmesan and a teaspoon of Italian seasoning or herbes de Provence into the dry mix. For extra punch, add two minced garlic cloves.
- Whole Grain Health Kick: Substitute 1 cup of all-purpose flour with 1 cup of whole wheat flour. You might need to add an extra tablespoon or two of water, as whole wheat absorbs more liquid.
- Olive & Sun-Dried Tomato: A taste of the Mediterranean! Fold in 1/2 cup of chopped kalamata olives and 1/4 cup of chopped oil-packed sun-dried tomatoes (pat them dry first) during the final shaping stage.
Jackson’s Chef Notes & Kitchen Stories
This recipe is a living thing in my kitchen. I’ve made it in a blizzard when the power was out (using the residual heat from my wood stove to proof it, true story), and I’ve made it for fancy dinners where guests insisted it was from a professional bakery. The biggest lesson it’s taught me? Let the dough do its thing. Don’t fuss. Bread baking is a partnership between you and the ingredients. My first few loaves were… interestingly shaped. Lopsided, a little flat sometimes. But they always tasted amazing. So don’t stress about a perfect round ball. A rustic, free-form loaf has character! It’s proof you made it with your own two hands.
FAQs: Your Questions, Answered
Q: My dough didn’t rise much. What happened?
A: The usual suspects are old yeast or water that was too hot (which killed the yeast) or too cold (which put it to sleep). Your room temperature might also be too cool. Try placing the bowl in a warm, draft-free spot next time, like on top of the fridge or in an oven with just the light on.
Q: My bread is very dense. Why?
A: Density usually comes from over-handling the dough after the first rise. Remember, we’re being gentle to preserve those beautiful bubbles! Adding too much flour when shaping can also make it dense. Use a light hand and plenty of flour on your surface, not in the dough.
Q: Can I make this ahead of time?
A: Absolutely! After mixing the dough, you can cover the bowl and immediately put it in the refrigerator for a slow rise for 12-24 hours. Let it sit at room temperature for an hour before shaping and baking. This “cold ferment” actually develops a deeper, more complex flavor.
Q: I don’t have a Dutch oven. What can I use?
A: Get creative! Any heavy, oven-safe pot with a lid works. You can also use a baking sheet: preheat a pizza stone or baking steel, and create steam by placing a pan of boiling water on the bottom rack of the oven when you bake. The crust won’t be *quite* as epic, but it’ll still be fantastic.

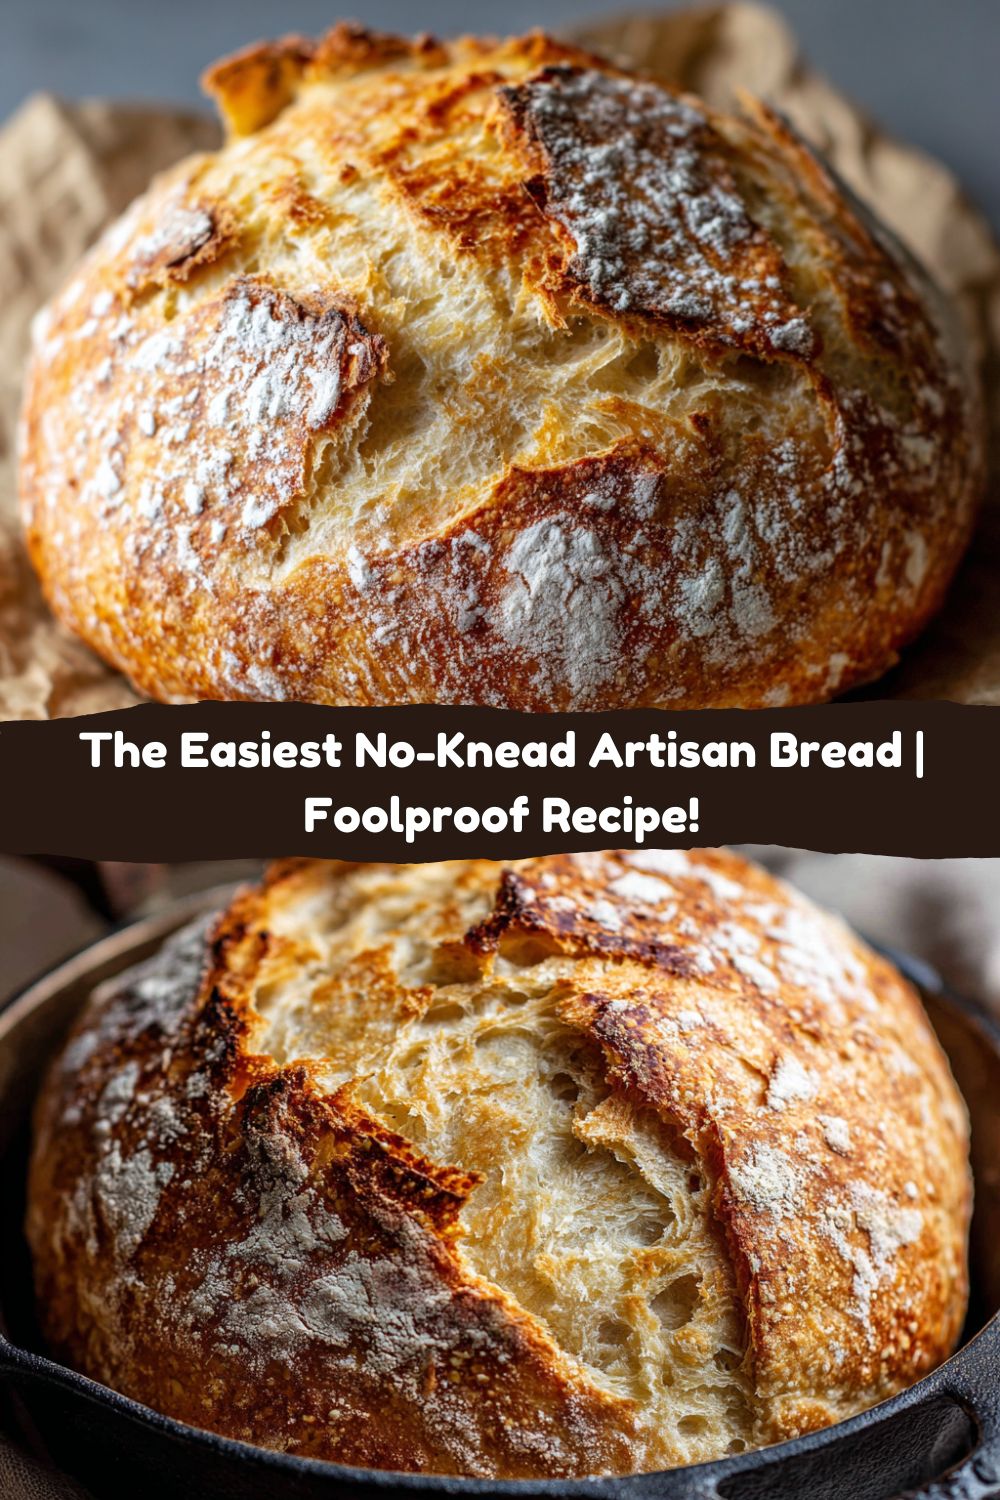
Easiest No-Knead Artisan Bread
- Total Time: ~3.5 hrs
- Yield: 10 Slices
Description
Crusty on the outside, soft and airy on the inside—this no-knead artisan bread is the definition of rustic perfection. You don’t need a mixer, a fancy bread maker, or even elbow grease. Just mix, rest, and bake your way to bakery-style bread right from your kitchen.
Ingredients
▢ 3 cups (450g) all-purpose flour
▢ 2 tsp instant or active dry yeast
▢ 1 1/4 tsp salt
▢ 1 1/2 cups (375 ml) warm water (not hot)
Instructions
In a large bowl, whisk together flour, yeast, and salt.
Add warm water and stir with a spoon until a sticky dough forms. No kneading needed—just mix until combined.
Cover the bowl with plastic wrap or a clean towel and let it rise at room temperature for 2–3 hours, until doubled and bubbly.
Preheat your oven to 220°C (430°F). Place a Dutch oven (or any oven-safe pot with a lid) inside to heat for 30 minutes.
While it heats, turn the dough out onto a well-floured surface. Shape it loosely into a ball (don’t knead).
Carefully place the dough into the hot pot. Cover and bake for 30 minutes.
Remove the lid and bake for another 10–15 minutes until golden and crusty.
Cool on a rack for 15 minutes before slicing.
- Prep Time: 5 minutes
- Rise Time: 2–3 hrs
- Cook Time: 40–45 mins
Nutrition
- Calories: 130 / Slice
- Sodium: 290mg / Slice
- Fat: 0.5g / Slice
- Carbohydrates: 25g / Slice
- Protein: 4g / Slice
Nutritional Information*
Alright, let’s talk fuel. This is real food, made with simple ingredients. Here’s the breakdown per slice (based on 10 slices per loaf):
- Calories: 130 kcal
- Carbohydrates: 25g
- Protein: 4g
- Fat: 0.5g
- Sodium: 290mg
*Please note: This is an estimate provided by an online nutrition calculator. It will vary based on specific ingredients and serving sizes. It does not include substitutions or added ingredients from the variations.
You Did It! Now, Go Forth and Bake.
Look at you, you artisan baker, you! Seriously, take a moment to appreciate what you just created. That gorgeous, crusty, impossibly delicious loaf came from YOUR kitchen. This recipe is more than just a list of steps; it’s a gateway. A gateway to confidence, to creativity, and to the undeniable joy of making something truly fundamental and wonderful from scratch.
I hope this bread becomes a regular in your kitchen, just like it is in mine. Experiment with the add-ins, find your favorite way to serve it, and most importantly, share it. Because food made with joy tastes better when it’s enjoyed together. Now, I’d love to hear from you! Tag me @FoodMeld on Instagram with your beautiful loaves. Let’s keep this flavor party going.
Until next time, keep cooking with curiosity and eating with joy.
– Jackson


