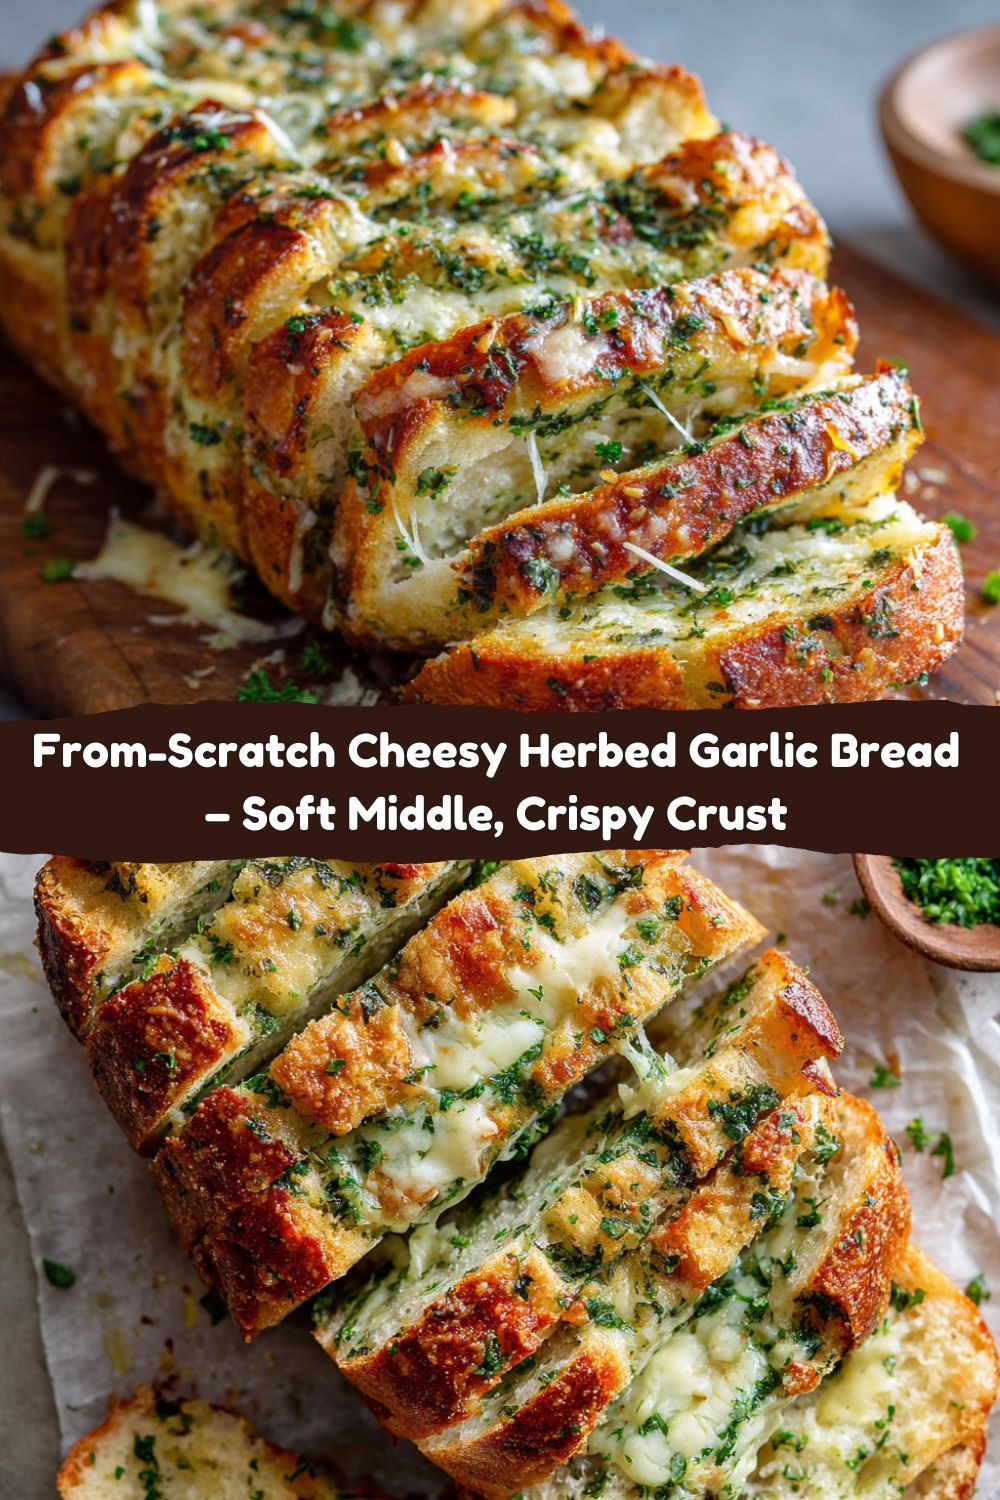
Let’s Get This Dough Rising: Your New Favorite Garlic Bread
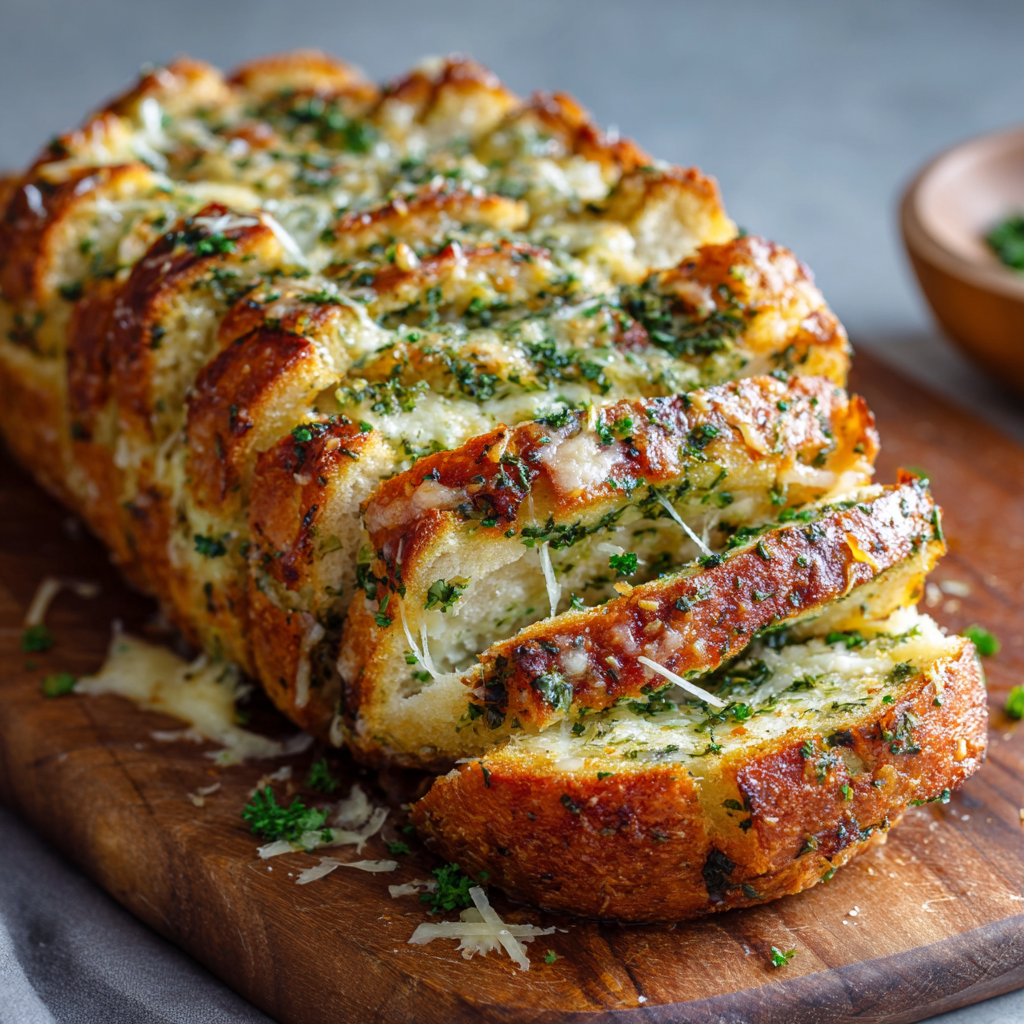
Hey friends, Jackson from Food Meld here. Let’s cut right to the chase: is there anything in this world more universally loved than a great piece of garlic bread? I’m not talking about the sad, pale, pre-packaged stuff from the freezer aisle. I’m talking about the real deal. The kind that’s baked in your own oven, filling the whole house with the insane aroma of toasting garlic and herbs. The kind that’s soft and pillowy on the inside, with a crust that shatters with a perfect crackle when you break it apart. The kind that’s absolutely loaded with not one, but two types of cheese, bubbling and golden brown on top.
This isn’t just a side dish; it’s the main event. It’s the recipe you’ll make for pizza night, for spaghetti Sunday, for game day, or honestly, just because it’s Tuesday. This Cheesy Herbed Garlic Bread is my ultimate homage to comfort food. We’re baking the bread from scratch because, trust me, it makes all the difference. We’re kneading love and flavor right into the dough itself, and then we’re doubling down on the good stuff with a cheesy, garlicky, herby topping that’s downright irresistible. It’s a project, but it’s a fun, messy, and incredibly rewarding one. So, tie on your apron, grab your favorite mixing bowl, and let’s cook something awesome together.
The Garlic Bread That Started It All
This recipe takes me straight back to my Nana’s kitchen in Georgia. Every big family dinner—and I mean every one—ended with the same ritual. While the adults were sipping sweet tea on the porch, us kids would be huddled around the oven door, watching through the little window as a massive, cheese-laden loaf of garlic bread transformed. The anticipation was a physical thing. The moment Nana pulled it out, that cloud of warm, yeasty, garlicky air would hit you, and it was pure magic. We’d burn our fingers because none of us had the patience to let it cool, tearing off massive, cheesy chunks and dipping them into whatever pasta sauce was left in the pot. It was more than food; it was the centerpiece of connection, of laughter, of “stop eating all the cheese crust, that’s my piece!” arguments. That’s the feeling I want to bring to your table. This recipe is my version of Nana’s legendary bread, tweaked and twisted with a few of my own bold moves, but always with that same heart and soul.
Gathering Your Flavor Arsenal
Here’s the beautiful part: you probably have most of this in your pantry right now. We’re building layers of flavor from the inside out, so every single bite is packed with personality. This is a double batch because, honestly, one loaf is never enough. It freezes beautifully, or you can be the hero of your next potluck.
- 5½ cups all-purpose flour: The foundation of our masterpiece. It gives us that perfect structure—sturdy enough to hold all the cheese but soft and tender inside. For a slightly heartier texture, you can swap in 1 cup of whole wheat flour, but all-purpose is my go-to for that classic pull-apart softness.
- 2 tablespoons active dry yeast: Our little miracle worker! This is what makes our dough rise and become light and airy. Make sure your water is warm (around 110°F, or feel warm but not hot on your wrist) to wake it up properly. No thermometer? No sweat. It should feel like a perfect baby bottle temperature.
- 2 teaspoons salt & 2 teaspoons white sugar: The yin and yang of baking. Salt enhances all the other flavors, while the sugar gives the yeast a quick snack to get it going. Don’t skip either!
- 2 teaspoons each garlic powder, dried oregano, dried thyme & 1 teaspoon dried basil: Here’s where the magic begins! We’re mixing these right into the dough. This is my #1 chef hack—it ensures every single inch of this bread is flavorful, not just the top. No dried thyme? Use an Italian seasoning blend instead.
- ¼ teaspoon ground black pepper: A little peppery kick that works wonders with the herbs and cheese.
- 2 cups warm water & 2 tablespoons vegetable oil: The hydrators. The water activates the yeast, and the oil gives the dough a beautiful tenderness and makes it easier to work with.
- 4 tablespoons olive oil (for brushing): We’ll brush this on top before adding the cheese. It creates a barrier so the dough doesn’t get soggy and gives the crust a gorgeous, golden finish.
- 2 cups shredded mozzarella cheese: The king of meltiness. I like to shred my own from a block—it melts smoother and doesn’t have the anti-caking agents that pre-shredded stuff does. But hey, if the bag is what you’ve got, we’re not judging! It’ll still be incredible.
- 2 tablespoons grated Parmesan cheese: The flavor bomb. Parmesan adds that salty, nutty, umami punch that takes this from great to “can I have the recipe?!” levels.
Flavorful Twists (Pick one or be a rebel and use both!):
- ½ teaspoon red pepper flakes: My personal favorite. It adds the subtlest background heat that makes you go, “Hmm, what is that? I need another bite to figure it out.”
- 1 tablespoon chopped sun-dried tomatoes: For a pop of tangy, sweet depth. Chop them super fine so they don’t weigh down the topping.
Let’s Build Some Magic: Step-by-Step
Ready to get your hands dirty? Let’s do this. Remember, baking is about feel, not just following a timer. Trust your instincts!
- Combine the Dry Goods: In your largest mixing bowl, whisk together the flour, yeast, salt, sugar, garlic powder, all those gorgeous herbs (oregano, thyme, basil), and the black pepper. Giving this a good whisk ensures the yeast and salt are evenly distributed, so you get a consistent rise and flavor in every bite. This is your flavor base—smell it! It already smells like victory.
- Bring It Together: Create a little well in the center of your flour mixture and pour in the warm water and vegetable oil. Now, use a sturdy wooden spoon or your hands (my preferred method!) to mix until a shaggy, floury dough forms. It might look a little messy, and that’s perfect. We’re not done yet.
- The Knead: Lightly flour your clean countertop and turn the dough out onto it. Here’s your arm workout for the day! Knead that dough for a solid 8-10 minutes. You’re looking for it to become smooth, elastic, and slightly springy to the touch. If it’s super sticky, add a tablespoon of flour at a time. Chef’s tip: Put on your favorite playlist and get into a rhythm. Push, fold, turn. It’s weirdly therapeutic.
- The First Rise: Place your beautiful smooth dough ball back into the bowl (give the bowl a quick wipe with oil first to prevent sticking). Cover it with a clean kitchen towel or plastic wrap and let it rest in a warm, draft-free spot for about 1 hour, or until it has doubled in size. My favorite trick? Heat your oven for just one minute, turn it OFF, and then place the bowl inside. It’s the perfect cozy proving drawer.
- Shape It: Once your dough is big and puffy, gently punch it down to release the air. This is the most satisfying step, don’t you think? Now, decide your shape. You can divide it in half and form two rustic round loaves on a parchment-lined baking sheet, or press the whole thing into a greased 9×13 sheet pan for a focaccia-style bread. No wrong answers here!
- Top and Second Rise: Use a pastry brush or the back of a spoon to generously coat the top of your dough with all that olive oil. Now, shower it with the mozzarella, Parmesan, and any of your chosen twists (those red pepper flakes, I’m telling you…). Now, let it rise again for just 15-20 minutes while you preheat your oven to 375°F (190°C). This short rest gives the yeast one last push.
- Bake to Perfection: Slide your creation into the hot oven and bake for 25-30 minutes. You’re waiting for that glorious golden-brown crust and the cheese to be completely molten and bubbly. If you’re making two loaves, you might need to rotate the pan halfway through for even browning.
- The Hardest Part: Wait! I know, I know. You want to tear into it immediately. But let it cool on the pan for at least 10-15 minutes. This allows the structure to set, so when you slice it, you get clean, cheesy pulls instead of a molten lava mess (which, to be fair, is also delicious, but messy).
How to Serve This Beautiful Beast
Presentation is part of the fun! For the round loaves, I love placing the whole thing on a big wooden cutting board right in the middle of the table and letting everyone tear off their own piece. It’s interactive, it’s communal, and it’s just downright cool. For the sheet pan version, you can slice it into big squares or rectangles.
This bread is the ultimate team player. Obviously, it’s a match made in heaven with a big bowl of spaghetti and meatballs or a hearty creamy Tuscan chicken. But don’t stop there! Serve it alongside a robust salad for a light(ish) lunch, or next to a bowl of tomato soup for the ultimate comfort food duo. And if you have any leftovers (a big if), it makes the most unbelievable croutons for a Caesar salad the next day.
Make It Your Own: Flavor Twists & Swaps
The beauty of this recipe is its flexibility. Here are a few ways to mix it up and keep things exciting:
- The ‘Everything’ Twist: Before the second rise, brush the dough with everything bagel seasoning along with the olive oil. Top with the cheese and bake as usual. Insanely good for a brunch gathering.
- Spinach & Artichoke Dip Style: Mix a ½ cup of finely chopped cooked spinach and a ½ cup of chopped marinated artichoke hearts into the shredded mozzarella before sprinkling it on top. Cream cheese dollops would also be next-level.
- Bacon & Cheddar Swap: For a totally different vibe, swap the mozzarella for sharp cheddar cheese and sprinkle ½ cup of cooked, crumbled bacon on top with the Parmesan. It’s a game-day powerhouse.
- Fresh Herb Blast: If you have them, use fresh herbs! When the bread comes out of the oven, immediately sprinkle it with 2 tablespoons of chopped fresh parsley and 1 tablespoon of chopped fresh basil. The heat will wake up their oils and make the whole thing smell like an Italian garden.
- Garlic Lover’s Overload: For an extra punch, mix 2-3 finely minced fresh garlic cloves into the olive oil before you brush it on the dough. Raw garlic has a sharper bite that mellows beautifully in the oven.
Jackson’s Chef Notes & Kitchen Confessions
This recipe has evolved so much since my first attempt, which I lovingly call The Garlic Brick. I once was so impatient I used boiling hot water and killed the yeast deader than a doornail. The result was a dense, sad loaf that we still ate because, well, cheese. But we dipped it extra hard in sauce. Lesson learned: warm water, not hot!
Over time, I learned that kneading is non-negotiable for that perfect texture, and adding the herbs to the dough itself was a total game-changer. This version is my pride and joy. It’s forgiving, it’s fun, and it never fails to make people smile. Don’t be afraid to mess it up. The worst-case scenario is you still have warm, cheesy bread. That’s a pretty great worst-case.
Your Questions, Answered
Q: Can I make this dough ahead of time?
A: Absolutely! After the first rise, punch the dough down, wrap it tightly in plastic wrap, and pop it in the fridge for up to 24 hours. When you’re ready, let it come to room temperature on the counter for about an hour before shaping, topping, and doing the second rise.
Q: My dough didn’t rise. What happened?
A: The usual suspects are old yeast or water that was too hot and killed the yeast. Always check the expiration date on your yeast. Your water should be warm to the touch, not scalding. If you’re unsure, proof it: mix the yeast with the warm water and sugar and wait 5-10 minutes. If it gets foamy, you’re good to go!
Q: The cheese is browning too fast! How do I prevent that?
A: If the cheese looks like it’s getting too dark before the bread is cooked through, simply lay a loose piece of aluminum foil over the top for the last 10 minutes of baking. This will shield the cheese and allow the bread to finish cooking.
Q: Can I freeze the baked bread?
A: For sure! Let it cool completely, then wrap it tightly in foil and place it in a freezer bag. It’ll keep for up to 3 months. To reheat, pop the frozen, foil-wrapped bread into a 350°F (175°C) oven for 15-20 minutes, until warm and crispy again.

Cheesy Herbed Garlic Bread
- Total Time: 1 hour 45 minutes
- Yield: 12–16 slices 1x
Description
Soft on the inside, golden and crisp on the outside—this homemade garlic cheese bread is layered with herbs, melty mozzarella, and a Parmesan punch. Doubled up and dressed with bold flavor, it’s perfect for tearing, dipping, and devouring at any table.
Ingredients
5½ cups all-purpose flour
2 tablespoons active dry yeast
2 teaspoons salt
2 teaspoons white sugar
2 teaspoons garlic powder
2 teaspoons dried oregano
2 teaspoons dried thyme
1 teaspoon dried basil
¼ teaspoon ground black pepper
2 cups warm water
2 tablespoons vegetable oil
4 tablespoons olive oil (for brushing)
2 cups shredded mozzarella cheese
2 tablespoons grated Parmesan cheese
Flavorful Twists:
½ teaspoon red pepper flakes (for heat)
1 tablespoon chopped sun-dried tomatoes (for tangy depth)
Optional: 1 teaspoon onion powder or Italian seasoning blend
Instructions
In a large bowl, combine flour, yeast, salt, sugar, garlic powder, herbs, and pepper.
Stir in warm water and vegetable oil. Mix until a dough forms. Knead for 8–10 minutes until smooth.
Cover and let rise in a warm place for 1 hour, or until doubled in size.
Punch down dough and divide into two loaves or press into a large sheet pan.
Brush dough with olive oil, then sprinkle with mozzarella, Parmesan, and optional toppings like red pepper flakes or sun-dried tomatoes.
Let rise again for 15–20 minutes while oven preheats to 375°F (190°C).
Bake for 25–30 minutes, or until golden and bubbling with cheese.
- Prep Time: 20 minutes
- Rise Time: 1 hour
- Cook Time: 25–30 mins
Nutrition
- Calories: 280 / Serving
- Fat: 10g / Serving
- Carbohydrates: 36g / Serving
- Protein: 9g / Serving
Nutritional Info (Because We’re Curious!)
Okay, let’s be real: this is a treat. It’s indulgent, comforting, and worth every single bite. But if you’re curious about what’s in it, here’s a rough breakdown per slice (assuming you get 14 slices from the double batch). Remember, these are estimates and can vary based on your specific ingredients and portion size.
- Calories: ~280
- Carbohydrates: ~36g
- Fat: ~10g
- Protein: ~9g
It’s a good source of energy (carbs) from the whole-grain flour and has a decent protein punch from the cheese, making it surprisingly satisfying!
Your Kitchen, Your Rules
And there you have it, my friends. My ultimate, never-fail, always-impressive Cheesy Herbed Garlic Bread. This recipe is less of a strict rulebook and more of a launchpad. I want you to make it yours. Add more garlic. Try a different cheese blend. Throw on some jalapeños. Cooking is all about that “what if we tried this?” energy, and I hope this recipe gives you a huge dose of confidence to play around in the kitchen.