Let’s Make Some No-Bake Pumpkin Magic!
Hey friends, Jackson from Food Meld here! Is there anything better than that first crisp breeze that tells you fall is finally, officially here? It’s my absolute favorite season to be in the kitchen. I’m talking about the smell of cinnamon and nutmeg wafting through the house, the vibrant orange gourms on the porch, and that undeniable craving for all things pumpkin. But let’s be real—sometimes, you want all that cozy flavor without turning on the oven and committing to a full-blown baking marathon. Am I right?
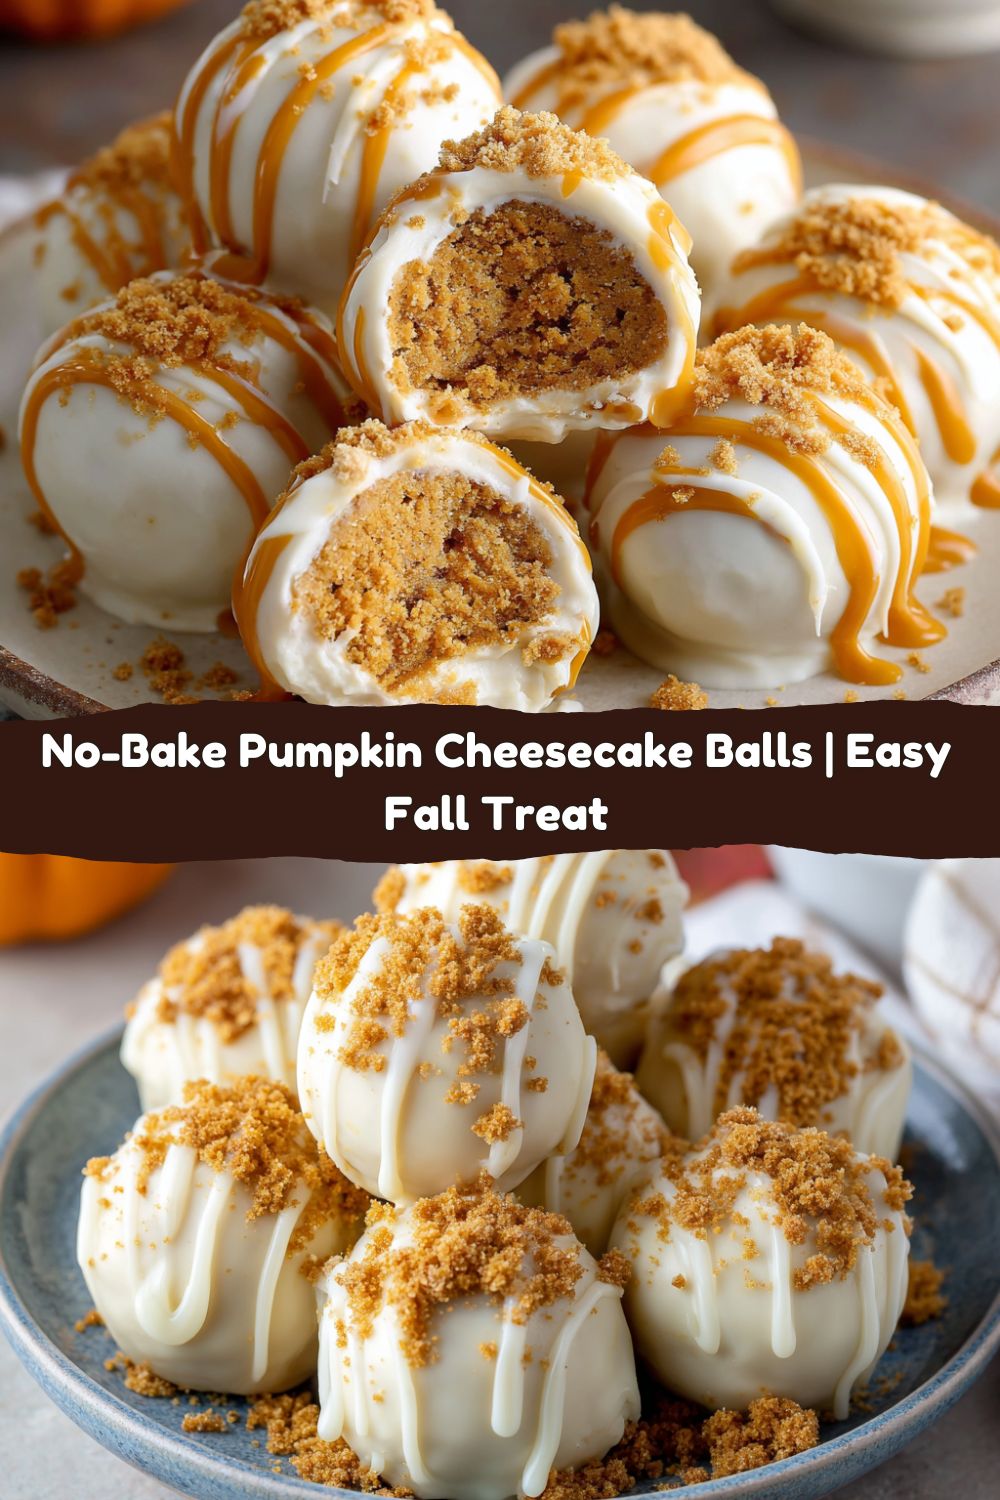
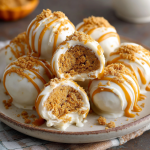
That’s where these little bites of absolute joy come in. These No-Bake Pumpkin Cheesecake Balls are your new secret weapon. Imagine the creamy, spiced filling of the best pumpkin cheesecake you’ve ever had, rolled into a perfect, pop-able ball, and then dunked in a luxurious layer of sweet white chocolate. They’re creamy, they’re crunchy thanks to the gingersnap base, and they are seriously, outrageously good. They’re the perfect treat for a Halloween party, a stunning addition to your Thanksgiving dessert spread, or just a Tuesday night when you need a little taste of autumn happiness. Best of all? No baking required. Zero. Zilch. Let’s get mixing!
A Happy Little Kitchen Accident
This recipe actually came from a beautiful, messy kitchen accident a few years back. I was testing a new baked pumpkin cheesecake recipe for the blog, and let’s just say I got a little overzealous with the pumpkin purée. The filling was delicious, but it never quite set. I was left with this massive bowl of incredibly tasty, but utterly un-sliceable, pumpkin cheesecake goop. My wife laughed and said, “Well, it tastes amazing. Just give me a spoon!”
But I couldn’t waste it. I stared at that bowl, determined. I remember thinking, “What if we treat it like a truffle?” I started tossing in cookie crumbs until I could scoop it, rolled them into balls, and dunked them in some melted chocolate I had leftover from another project. What emerged from the fridge was pure magic. They were even better than the original cheesecake I was trying to make! It was one of those “you’ve gotta try this” moments that reminds me why I love cooking—sometimes the best recipes are born from a little improvisation and a happy accident.
Gathering Your Flavor All-Stars
Here’s the lineup of ingredients you’ll need to create these no-bake wonders. This is where the flavor foundation is built!
- 2 oz cream cheese, softened: This is our creamy base. Full-fat is best here for richness and structure, but reduced-fat will work in a pinch. For a dairy-free version, a vegan cream cheese alternative works surprisingly well!
- 1 tbsp confectioners’ sugar: Just a touch of sweetness to balance the tang of the cream cheese. Its fine texture also helps keep the mixture smooth, so I don’t recommend swapping it for granulated sugar.
- ¼ cup pumpkin purée: The star of the show! Make sure you’re using 100% pure pumpkin purée, not pumpkin pie filling, which is pre-sweetened and spiced. Canned is perfect and convenient, but if you’re using homemade, make sure it’s nice and thick.
- ⅔ cup gingersnap cookie crumbs: This is my secret weapon. They add a warm, spicy crunch that pairs perfectly with pumpkin. You can buy them pre-crushed or just toss whole cookies into a food processor or zip-top bag and crush them with a rolling pin. Graham crackers work too, but the gingersnaps add a more complex flavor.
- ¼ cup graham cracker crumbs: The classic cheesecake crust flavor. Using a blend of gingersnap and graham gives you the best of both worlds—warm spice and that familiar, honey-kissed taste.
- 1 tsp pumpkin pie spice: The cozy flavor bomb. No pumpkin pie spice? No problem! Make your own by whisking together 1½ tsp cinnamon, ½ tsp ginger, ¼ tsp nutmeg, and ¼ tsp allspice or cloves.
- 2½ cups white chocolate chips or baking bars (for coating): This creates that gorgeous, sweet shell. I highly using high-quality chocolate baking bars for melting, as they contain more cocoa butter and melt much smoother than chips, which have stabilizers. If you use chips, add a teaspoon of coconut oil to help thin the melted chocolate for easier dipping.
Let’s Get Rolling: Your Foolproof Steps
Okay, team. Aprons on! This process is simple, but a few chef-style tips will make it absolutely seamless.
Step 1: The Mix-Down. In a medium-sized bowl, combine your softened cream cheese and confectioners’ sugar. Use a hand mixer or just a good ol’ fashioned whisk and some elbow grease to beat it until it’s completely smooth and there are no lumps. This is crucial for a silky texture! Then, gently fold in the pumpkin purée until it’s fully incorporated. Finally, add your gingersnap crumbs, graham cracker crumbs, and pumpkin pie spice. Switch to a spatula and mix until a soft, uniform dough forms. It should hold together when you pinch it.
Step 2: The Chill Factor. Pop that bowl of deliciousness into the refrigerator for at least 20 minutes. Don’t skip this! Chilling the mixture firms it up and makes the next step of rolling the balls infinitely easier and less messy. If you’re in a hurry, you can do a quick 10-minute freeze, but the fridge is best.
Step 3: Roll Call. Once your mixture is firm, use a small cookie scoop (about 1 tablespoon in size) or a spoon to portion out the dough. Roll each portion between your palms into a smooth, tight ball. Pro-Tip: If the mixture starts to get too soft and sticky on your hands, just wash and dry them, then give them a very light spritz of cooking spray. The dough won’t stick!
Step 4: The Deep Freeze. Place your rolled balls on a parchment or wax paper-lined baking sheet and stick the whole tray in the freezer for a solid 15 minutes. This is the MOST important step for a perfect chocolate coating. Frozen balls = no cracks in the shell and a clean, beautiful dip.
Step 5: Chocolate Dip. While the balls are chilling, melt your white chocolate. Do this gently! You can use a double boiler or the microwave. If microwaving, do it in 30-second bursts at 50% power, stirring vigorously between each burst. Do not overheat it or it will seize up and become a grainy mess. Once it’s smooth and fluid, it’s go-time. Remove a few balls from the freezer at a time (keeping the rest cold). Using a fork or a dipping tool, submerge each ball, tap off the excess chocolate, and gently place it back on the parchment-lined tray.
Step 6: The Finale. If you’re feeling fancy, immediately sprinkle the top of each ball with a little extra gingersnap crumb or a pinch of pumpkin pie spice before the chocolate sets. This adds great texture and lets everyone know what’s inside! Once all are dipped, transfer the tray to the refrigerator to let the chocolate coating set completely, about 30 minutes.
How to Serve These Showstoppers
Presentation is part of the fun! These little balls are gorgeous all on their own, but a little flair goes a long way.
For a party, arrange them on a beautiful platter or a rustic wooden board. Scatter a few whole gingersnap cookies and some autumn-themed sprinkles around them for a festive touch. They look incredible piled high in a clear glass trifle bowl so guests can see all the layers of flavor.
For a more elegant individual serving, place one or two balls in a small mini parchment paper liner (like a mini cupcake liner). It looks professional and keeps things neat. A tiny dusting of cinnamon right on the plate adds a chef’s kiss of color and aroma.
These are rich, so one or two per person is usually plenty. They pair wonderfully with a hot cup of coffee, a glass of cold milk, or even a dessert wine like a Riesling. Most importantly, serve them straight from the fridge—the cool, creamy center is what makes them so irresistible!
Make It Your Own: Creative Twists
The beauty of this recipe is how easily you can adapt it. Here are a few of my favorite ways to mix it up:
- The Chocolate Lover: Swap the white chocolate coating for semi-sweet or dark chocolate. The bitterness of dark chocolate is an incredible contrast to the sweet, spiced filling.
- The Nutty Professor: Roll the finished, chocolate-dipped balls in finely chopped pecans, walnuts, or pepitas (pumpkin seeds) before the chocolate sets. Adds amazing crunch and flavor.
- Cranberry Bliss: Mix 2-3 tablespoons of finely diced dried cranberries into the filling mixture for little pops of tartness.
- Ginger Zing: Add ¼ teaspoon of ground ginger or even 1-2 tablespoons of very finely minced crystallized ginger to the filling for an extra kick.
- gluten-Free & Vegan Friendly: Use certified gluten-free gingersnaps and graham crackers. For a vegan version, use vegan cream cheese and a high-quality vegan white chocolate bar (like Pascha or Enjoy Life).
Jackson’s Chef Notes
Over the years, this recipe has become a staple in our house, and I’ve learned a thing or two. The first time I made them, I got impatient and didn’t freeze the balls long enough. Let’s just say my chocolate coating turned into a messy, lumpy disaster because the filling started melting! Now, I set a timer and never skip the freeze.
I also once tried to use pumpkin pie filling by accident. The result was *way* too sweet and had an odd texture. Learn from my mistake—always double-check the can for “100% pure pumpkin”! This recipe is a testament to the idea that the best dishes often come from a willingness to play and see what happens. Don’t be afraid to put your own spin on it!
FAQs & Troubleshooting
Q: My mixture is too sticky to roll! What did I do wrong?
A: This usually means it needs more time to chill. Pop it back in the fridge for another 15-20 minutes. If it’s still sticky, you can add another tablespoon of cookie crumbs to help firm it up.
Q: Why did my white chocolate get clumpy and grainy when I melted it?
A: Ah, seized chocolate! This happens if even a single drop of water gets into the melting chocolate or if it’s overheated. Unfortunately, it’s hard to come back from. The best fix is prevention: make sure your bowl and tools are completely dry, and melt it low and slow. If it does seize, try stirring in a teaspoon of coconut oil or vegetable shortening off the heat; it might smooth out.
Q: Can I make these ahead of time?
A: Absolutely! They are perfect for making ahead. Store them in a single layer in an airtight container in the refrigerator for up to 5 days. You can also freeze them for up to 2 months. Just thaw in the fridge before serving.
Q: Is there a nut-free option for the coating?
A> Yes! Simply make sure the white chocolate you buy is processed in a nut-free facility. Many store brands and chocolate bars will have this information on the packaging.
Pumpkin Cheesecake No-Bake Balls
- Total Time: 55 minutes
- Yield: 12 balls 1x
Description
Creamy, spiced, and dipped in white chocolate, these no-bake pumpkin cheesecake balls are little bites of fall heaven. With gingersnap crunch and cozy pumpkin pie flavor, they make the perfect sweet treat for Halloween parties, Thanksgiving trays, or anytime you want autumn in one bite.
Ingredients
2 oz cream cheese, softened
1 tbsp confectioners’ sugar
¼ cup pumpkin purée
⅔ cup gingersnap cookie crumbs
¼ cup graham cracker crumbs
1 tsp pumpkin pie spice
2½ cups white chocolate (for coating)
Instructions
In a bowl, mix cream cheese, sugar, pumpkin purée, cookie crumbs, graham crumbs, and spice until smooth.
Chill mixture for 20 minutes. Roll into small balls.
Freeze for 15 minutes.
Melt white chocolate. Dip each ball to coat, then place on parchment-lined tray.
Optional: Sprinkle extra cookie crumbs on top before the coating sets.
Chill until firm.
- Prep Time: 20 minutes
- Chill Time: 35 min
Nutrition
- Calories: 130 / Ball
- Sugar: 11g / Ball
- Sodium: 60mg / Ball
- Fat: 7g / Ball
- Carbohydrates: 15g / Ball
- Protein: 1g / Ball
Nutritional Information
*Please note: This is an estimated nutritional breakdown based on the specific ingredients listed. Your actual values may vary depending on brands and specific ingredients used.
Per Serving (1 ball):
Calories: ~130 | Total Fat: 7g | Saturated Fat: 4g | Cholesterol: 5mg | Sodium: 60mg | Total Carbohydrates: 15g | Dietary Fiber: 0.5g | Total Sugars: 11g | Protein: 1g
These are a treat, meant to be enjoyed in moderation! While they do contain pumpkin (a great source of vitamin A!), the primary contributors to the nutrition profile are the cream cheese, sugar, and chocolate.
Your New Go-To Fall Treat
And there you have it! Your guide to making the easiest, most crowd-pleasing fall dessert that requires exactly zero oven time. I hope this recipe brings as much joy to your kitchen as it has to mine. It’s proof that you don’t need fancy equipment or complicated techniques to make something truly unforgettable.
I love seeing your creations! If you make these Pumpkin Cheesecake No-Bake Balls, tag me on Instagram @FoodMeld and use the hashtag #FoodMeld. I love being part of your kitchen adventures. Now go forth, get a little messy, and enjoy every single delicious bite. Until next time, friends—happy cookin