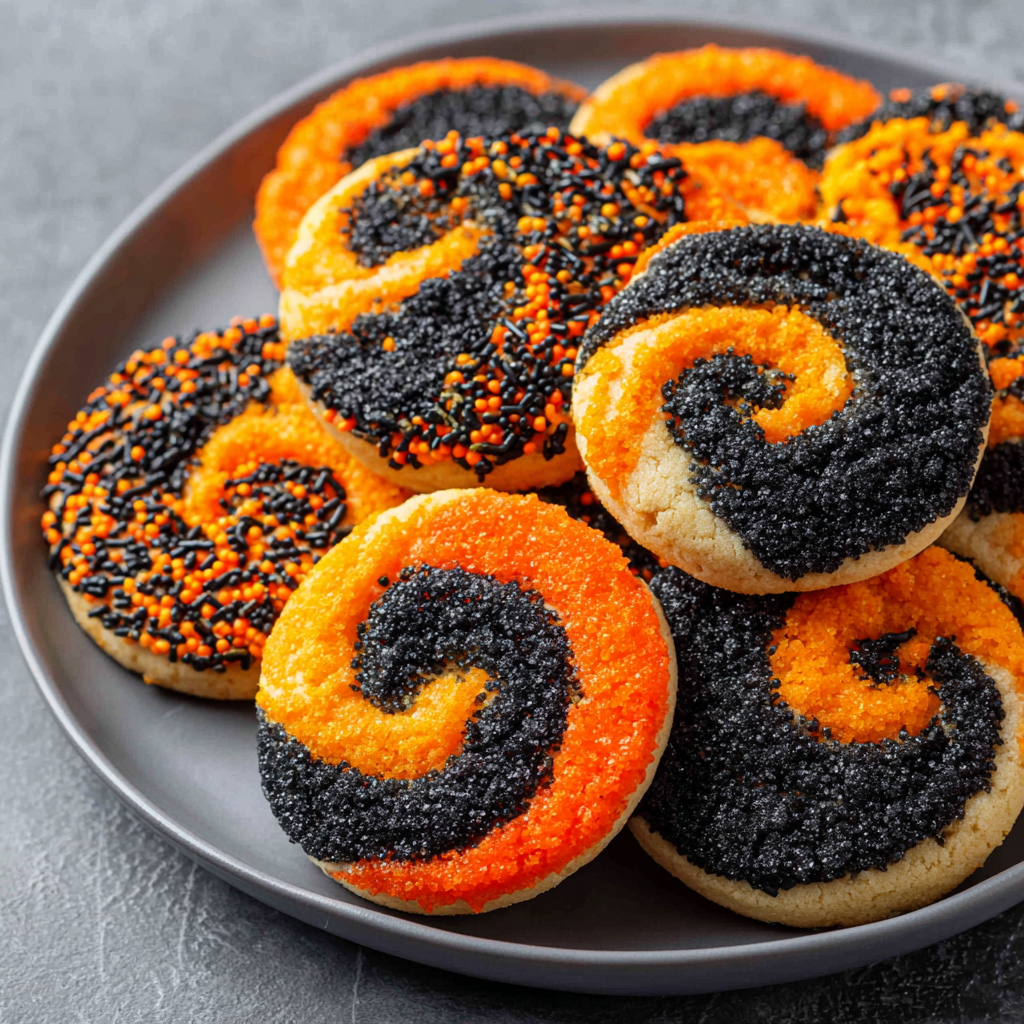
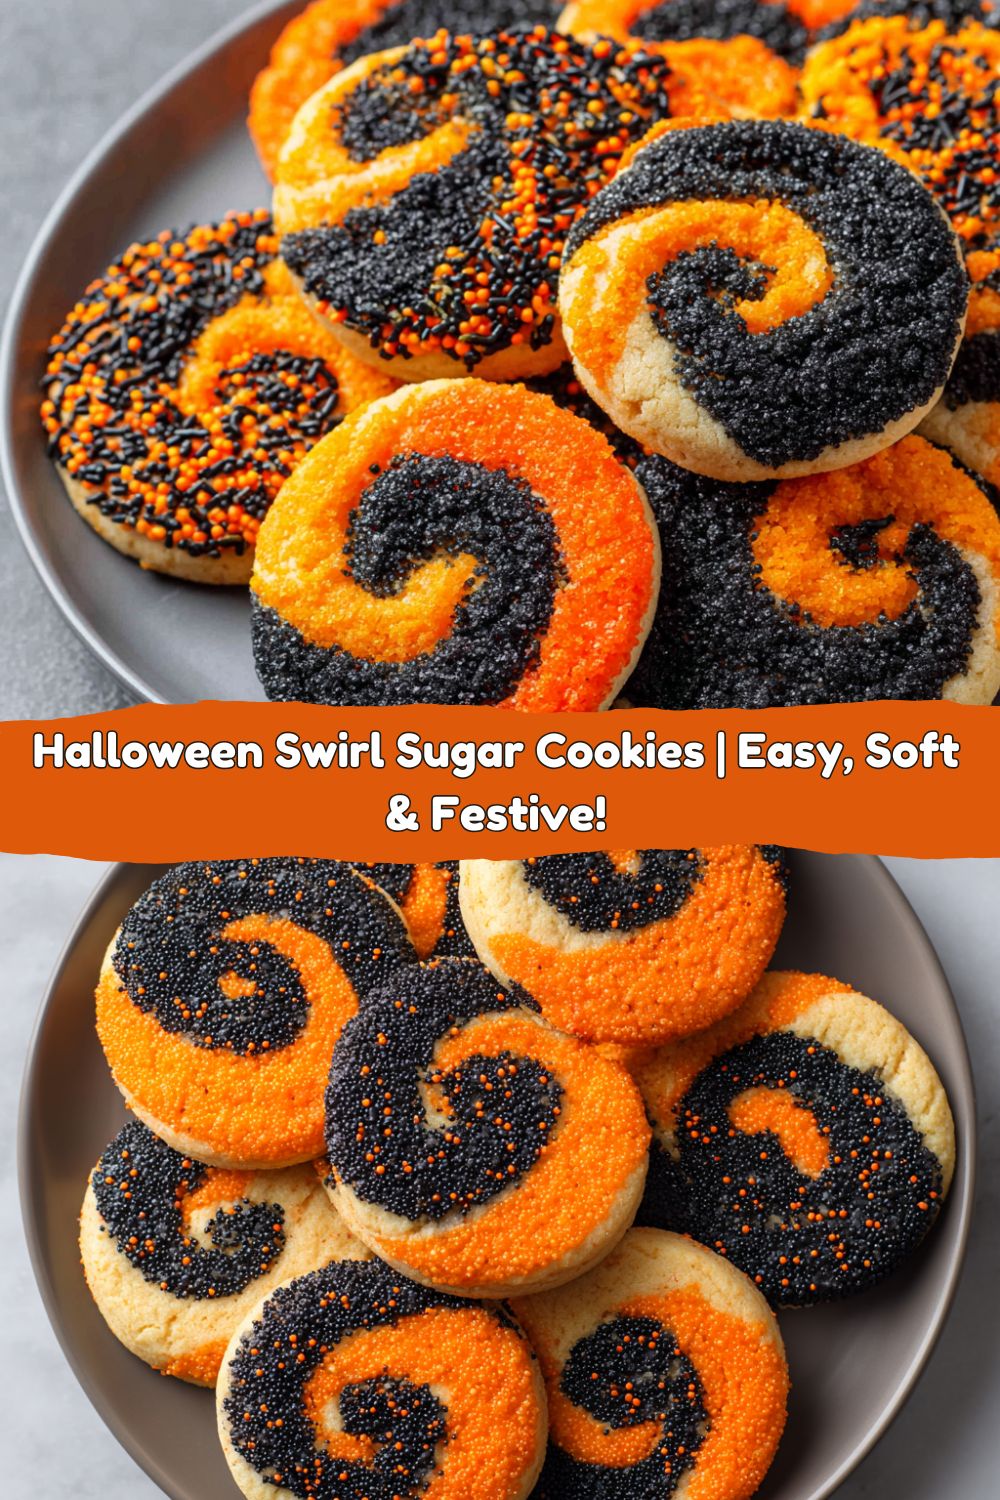
Spooky, Swirly, and Seriously Delicious: Your New Favorite Halloween Cookie
Hey there, Food Meld family! Jackson here. Is there anything better than the smell of cookies baking in the oven? I’m gonna go with a hard no on that one. But you know what takes that simple joy and cranks it up to a full-on, costume-worthy celebration? Turning that classic sugar cookie into a vibrant, swirly, absolutely show-stopping Halloween masterpiece. We’re talking about my Halloween Swirl Sugar Cookies, and friends, they are a total game-changer for your holiday baking lineup.
Imagine this: buttery, melt-in-your-mouth soft sugar cookies, but each one is a unique, marbled work of art in classic spooky orange and black. They look like you spent all day in a fancy bakery, but I’m letting you in on a little secret—they’re surprisingly simple to make. This is the kind of recipe that’s perfect for a party platter that’ll have everyone snapping pictures, for gifting to neighbors (instant Halloween hero status!), or for a super fun, slightly messy baking session with the kids. We’re making a double batch because, trust me, you’ll want plenty to share and a few to “test” straight off the cooling rack. So, tie on your apron, and let’s cook something awesome together that’s equal parts flavor and fun!
The Cookie That Started a Tradition
This recipe takes me right back to my first Halloween in my own apartment. I wanted to host a party, but my culinary budget was… let’s call it “aspirational.” I had big dreams of an epic spread but a wallet that said, “maybe just one bag of chips.” So, I decided to go all-in on one homemade, wow-factor item: cookies. I’d mastered my grandma’s sugar cookie base, but I wanted to make them festive. The first attempt was a disaster—red and green food coloring from a previous holiday attempt created a weird muddy brown that looked more like a failed science experiment than a treat. But then I found this super vibrant gel coloring at the store, and the idea to swirl instead of mix fully was born. That batch of orange and black cookies was the hit of the party. They were the only thing I made from scratch, but they sparked more conversations and recipe requests than anything else. It taught me that cooking isn’t about the quantity or the price tag; it’s about putting a little bit of your own creative, fun energy into something delicious. That’s the spirit I bring to every recipe here, and it all started with these spooky swirls.
Gathering Your Cookie Crew (The Ingredients!)
Here’s the lineup for our double batch of Halloween magic. This makes about 4 dozen cookies, perfect for sharing (or not, no judgment here).
- 6 cups all-purpose flour: The backbone of our cookie. It gives structure without making them tough. For a slightly softer cookie, you can replace 1 cup with cake flour, but all-purpose works beautifully.
- 2 tsp baking powder: Our leavening agent! This is the key to getting a soft, slightly puffy cookie instead of a thin, crisp one. Make sure it’s fresh for the best rise.
- 1 tsp salt: Never, ever skip the salt in sweet recipes! It’s the flavor enhancer that makes the buttery, sugary notes truly sing. It balances everything out.
- 2 cups (454g) unsalted butter, at room temperature: This is non-negotiable. Room temp butter is crucial for creaming properly with the sugar, which creates air pockets for a light texture. Unsalted lets us control the salt level. Chef’s Tip: If you forget to soften it, cut it into tablespoons and let it sit for 15-20 minutes. Don’t microwave it!
- 3 cups (600g) granulated sugar: Sweetness and tenderness, all in one. The sugar helps creaming with the butter and, of course, makes them irresistibly delicious.
- 4 large eggs: They bind the dough together and add richness. Make sure they’re at room temperature too! This helps them emulsify seamlessly into the butter and sugar mixture.
- 4 tsp vanilla extract: The classic flavor we know and love. Using a good quality pure vanilla makes a noticeable difference.
- 2 tsp orange gel food coloring (electric orange recommended): Gel coloring is the star here. Unlike liquid food coloring, it provides intense, vibrant color without watering down your dough. “Electric Orange” gives that perfect, bold Halloween vibe.
- 2 tsp black gel food coloring (super black recommended): Same rule applies! “Super Black” or similar dark shades will give you a deep, true black instead of a murky gray. Trust me, it’s worth seeking out.
- Halloween sprinkles, optional: Because why not add a little extra sparkle and crunch? A roll in some black and orange sprinkles before baking takes these to the next level.
Let’s Make Some Magic: The Step-by-Step
Alright, let’s get our hands dirty (probably literally with that food coloring!). Follow these steps, and you’ll have perfect swirled cookies.
Step 1: The Dry Team. In a large bowl, whisk together your 6 cups of flour, 2 teaspoons of baking powder, and 1 teaspoon of salt. Whisking this by hand does two things: it combines everything evenly, and it sifts the flour a little, preventing lumps. Set this aside for now.
Step 2: Creaming is Key. In the bowl of your stand mixer fitted with the paddle attachment (or a large bowl with a hand mixer), beat the room-temperature butter and granulated sugar together on medium-high speed. We’re not just mixing; we’re “creaming.” Do this for a good 2-3 minutes, until the mixture is light, pale yellow, and fluffy. This incorporates air, which is essential for the texture. Scrape down the sides of the bowl halfway through.
Step 3: Eggs-cellent Addition. With the mixer on low, add your eggs one at a time, letting each one fully incorporate before adding the next. This prevents the mixture from curdling. Then, mix in your 4 teaspoons of vanilla. Scrape the bowl down again to make sure everything is homogenous.
Step 4: Bring It All Together. Gradually add your dry ingredients to the wet ingredients, mixing on low speed just until the flour disappears. Do not overmix! Overworking the dough at this stage can lead to tough cookies. As soon as you don’t see any more dry flour, stop the mixer.
Step 5: Divide and Color. Split the dough right down the middle into two equal halves. Now for the fun part! To one half, add your 2 teaspoons of orange gel food coloring. To the other, add the 2 teaspoons of black gel coloring. I like to use a spatula to start mixing it in, then finish with my (gloved!) hands to make sure the color is fully and evenly distributed. No streaky dough here!
Step 6: The First Chill. Wrap each colored dough ball in plastic wrap or pop them into separate bowls and cover. Chill them in the fridge for 30 minutes. This firms up the butter slightly, making the next step of rolling much easier and less sticky.
Step 7: Roll, Stack, and Roll Again! This is the signature move. Take your chilled doughs. Place one between two sheets of parchment paper and roll it out into a rough rectangle, about ½-inch thick. Repeat with the second dough. Peel the top parchment off both. Now, carefully flip the orange dough on top of the black dough (or vice versa!). Peel off the final piece of parchment. Now, starting from the long end, use the parchment paper to help you tightly roll the stacked doughs into a log, just like you would with cinnamon rolls. Twist the ends of the parchment paper closed like a candy wrapper. Chill this log for at least 1 hour, or up to 2 days. This is critical for clean slicing!
Step 8: Slice and Bake! Preheat your oven to 350°F (175°C) and line your baking sheets with parchment paper. Take your firm dough log and slice it into ¼-inch thick rounds. If you’re using sprinkles, press the top of each cookie into a plate of sprinkles now. Place them about 2 inches apart on the baking sheet. Bake for 10-12 minutes. You’re looking for the edges to be just set. The centers might still look a tiny bit soft—that’s perfect! They will firm up as they cool, staying wonderfully soft.
Step 9: The Patience Test. Let the cookies cool on the baking sheet for 5 minutes before transferring them to a wire rack to cool completely. I know it’s hard, but this prevents them from breaking and lets them finish setting up.
How to Serve These Spooky Stars
Presentation is half the fun with these cookies! For a party, I love piling them high on a dark slate platter or a rustic wooden board—the contrast makes the colors pop. Stack them in a glass cloche for a cool, bakery-style display. For gifting, grab some clear cellophane bags, tie them with a black and orange ribbon, and you’ve got an incredible homemade gift that looks professional. They’re delicious on their own, but why not serve them with a cold glass of milk, a steaming mug of apple cider, or even a scoop of vanilla ice cream for an epic Halloween ice cream sandwich? Let your creativity run wild!
Mix It Up: Recipe Variations
Want to put your own spin on these? Go for it! That’s what Food Meld is all about.
- Citrus Zing: Add the zest of one orange to the orange dough portion. The bright, fresh citrus aroma cuts through the sweetness beautifully.
- Flavor Depth: Swap out 1 teaspoon of the vanilla extract in the main dough for ¼ teaspoon of almond extract or maple extract. It adds a wonderful, warm underlying flavor that complements the vanilla.
- Crunchy Edge: Before the final chill, roll your finished dough log in a mix of black and orange sanding sugar. You’ll get cookies with a gorgeous, sparkling, crunchy edge.
- Spooky Shapes: After you’ve made your swirl log, you can actually roll it out slightly and use Halloween-shaped cookie cutters! You’ll get cool, marbled ghosts, pumpkins, and bats.
- Gluten-Free Swap: Use a 1:1 gluten-free all-purpose flour blend. The texture might be a tad more crumbly, but they’ll still be delicious and festive!
Jackson’s Chef Notes
This recipe has evolved so much since that first apartment batch. The biggest game-changer was definitely switching to gel food coloring. The first time I used it, I actually did a little dance in my kitchen because the colors were so brilliantly bold. Another pro tip I’ve learned: if your dough log cracks a little when you slice it, don’t sweat it! Just smoosh it back together with your fingers—the cracks will bake out and it’ll still look great. I’ve also found that the dough log freezes amazingly well. Wrap it tightly in plastic wrap and then foil, and you can have Halloween-ready cookie dough for up to 3 months. Just thaw in the fridge overnight and slice. Easy peasy!
FAQs & Troubleshooting
Q: My dough is too sticky to roll! What do I do?
A: This means it needs more chilling. Pop it back in the fridge for another 20-30 minutes. The butter might have gotten too warm. Also, always roll between parchment paper—it prevents sticking without adding extra flour, which can dry out the cookies.
Q: Can I use liquid food coloring instead of gel?
A: You can, but be prepared for a much paler, pastel color and a slightly wetter dough. You’ll need to use a lot more liquid coloring to approach the same vibrancy, which can throw off the liquid-to-dry ratio. I highly, highly recommend gel for this recipe.
Q: My cookies spread too much and lost their swirl definition.
A: This is almost always a temperature issue. Your dough wasn’t chilled enough before baking, or your butter was too soft. Make sure you don’t skip the chilling steps! Also, ensure your oven is fully preheated.
Q: The black dough stained my hands. How do I prevent that?
A: Welcome to the club! This is totally normal with intense dark colors. Wearing food-safe disposable gloves when handling the black dough is the easiest way to keep your hands clean.

Halloween Swirl Sugar Cookies
- Total Time: 2 hrs
- Yield: 48 Cookies 1x
Description
Buttery, soft, and dressed in spooky colors—these Halloween swirl sugar cookies are a festive treat with a vibrant orange-and-black twist. Perfect for parties, gifting, or baking with kids, they’re simple to make but look like a bakery masterpiece. Double the batch means more fun—and more cookies to share.
Ingredients
6 cups all-purpose flour
2 tsp baking powder
1 tsp salt
2 cups (454g) unsalted butter, at room temperature
3 cups (600g) granulated sugar
4 large eggs
4 tsp vanilla extract
2 tsp orange gel food coloring (electric orange recommended)
2 tsp black gel food coloring (super black recommended)
Halloween sprinkles, optional
Optional Twists
Add 1 tsp orange zest to the orange dough for a citrusy pop
Mix in 1/4 tsp almond extract or maple extract for deeper flavor
Roll logs in Halloween-colored sanding sugar for a crunchy edge
Instructions
In a bowl, whisk flour, baking powder, and salt.
In a large bowl, beat butter and sugar until light and fluffy. Add eggs one at a time, then vanilla.
Gradually mix in dry ingredients until dough forms. Divide dough in half.
Tint one half with orange gel coloring, and the other with black gel coloring. Chill both doughs for 30 minutes.
Roll each dough between parchment into rectangles. Stack and roll into a log. Chill again for 1 hour.
Slice into 1/4-inch cookies. Add sprinkles if using.
Bake at 350°F (175°C) for 10–12 minutes until edges are set.
- Prep Time: 25 minutes
- Chill Time: 1.5 Hours
- Cook Time: 10 minutes
Nutrition
- Calories: 150 / Cookie
- Fat: 7g / Cookie
- Carbohydrates: 7g / Cookie
- Protein: 1g / Cookie
Nutritional Info (Because Knowledge is Power!)
Okay, let’s be real—these are a treat, and we’re here to enjoy every single bite! But I know some of you like to keep track, so here’s a general breakdown per cookie (based on a yield of 48 cookies). Remember, this is an estimate and can vary based on specific ingredients and exact size.
Per Cookie: Approximately 150 calories | 7g fat | 19g carbs | 1g protein
The main contributors are the butter and sugar, which is what makes them so deliciously rich and satisfying. They’re a fun, occasional indulgence perfect for celebrating the season!
Your Halloween Baking Adventure Awaits
And there you have it! Your complete guide to making the most incredible, conversation-starting Halloween Swirl Sugar Cookies. This recipe is all about embracing the fun, creative side of baking. Don’t stress about making every cookie look perfect—the beautiful, unpredictable swirls are part of their charm. I hope this recipe brings as much joy and laughter to your kitchen as it has to mine over the years. Remember, the best recipes are the ones you make your own. So put on some spooky tunes, get your swirl on, and create something unforgettable.
I’d love to see your creations! Tag me @FoodMeld on Instagram or Facebook so I can share in your baking triumph. Now, go forth and bake! Happy Halloween, everyone.