The Easiest, Most Addictive Little Bites: Homemade Cream Cheese Mints
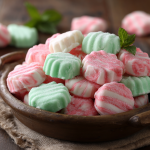
Hey there, friend! Jackson from Food Meld here. Let’s talk about those little moments at a party or a shower where you pop a single, pastel-colored mint into your mouth, and your entire world just stops for a second. That cool, creamy, melt-in-your-mouth sweetness that just… works. It’s a tiny explosion of happy. For the longest time, I thought those were some kind of magical, factory-made secret. A chef’s mystery. Then, one day in my grandma’s kitchen, I discovered the truth: these unforgettable little gems are embarrassingly easy to make at home. I’m talking four-ingredients-easy, no-bake, mess-around-and-have-fun easy.
These Cream Cheese Mints are my secret weapon for making any gathering feel a little more special. They’re the perfect project for a lazy afternoon, a fantastic way to get kids involved in the kitchen, and a guaranteed crowd-pleaser. They’re buttery smooth, perfectly minty (you control the punch!), and they have this incredible, almost velvety texture that just dissolves on your tongue. Forget the store-bought version; once you realize how simple it is to whip up a batch of these customizable cuties, you’ll be looking for reasons to make them. A wedding? Perfect. A holiday cookie plate? Absolutely. A Tuesday? Hey, I don’t judge. Let’s ditch the intimidation and cook up some awesome, fun, and flavor-packed moments together. Welcome to your new favorite kitchen hack.
A Spoonful of Sweetness: My Minty Memory
My love affair with these mints didn’t start at some fancy party. It started on a wobbly wooden stool in my Nana’s sun-drenched kitchen. She was the queen of “church lady food” – the kind of dishes that showed up at every potluck, baby shower, and funeral reception in our small Southern town. One spring, she was put in charge of the mints for my cousin’s wedding shower. I was her designated “sugar scooper” and official taste-tester.
I remember watching her, not with a fancy stand mixer, but with her hands dusted in a cloud of powdered sugar, kneading this pliable, sweet dough like a pro. She’d hand me little bits of it, and my job was to roll them into imperfect little balls before she’d press them with a fork or a fancy little mold. We’d talk and laugh, our fingers turning various shades of pink and green from the food coloring. The best part was always the “mistake” balls – the ones that weren’t quite round enough for the party platter. Those were our spoils, eaten immediately with a glass of sweet tea. It wasn’t about perfection; it was about the joy of making something with your own two hands to share with people you love. That’s the spirit I want to bring to you today. It’s more than a recipe; it’s a little edible memory.
Gathering Your Minty Magic
See? I told you it was simple. This is the kind of ingredient list you can probably assemble from your pantry right now. But as always, a few chef insights can take “good” to “unforgettable.”
- 8 oz (one block) Cream Cheese, softened: This is the star. It gives the mints their signature tangy creaminess and helps them hold their shape. Use full-fat for the best texture and flavor. Pro Tip: Let it sit on the counter for a good 1-2 hours until it’s truly soft. This is non-negotiable for a smooth, lump-free dough!
- 2 tbsp Unsalted Butter, softened: The butter adds a rich, melt-in-your-mouth quality that makes these feel luxurious. Using unsalted lets you control the final flavor perfectly. Same rule applies – get it soft!
- 4 cups Powdered Sugar (Confectioners’ Sugar), plus extra for dusting: This sweetens the deal and creates the dough’s structure. You’ll need to sift it if it’s lumpy! Chef’s Swap: For a slightly different texture, you can replace up to 1/2 cup of the powdered sugar with granulated sugar, but know it might be a tad grainier.
- 1/2 tsp Peppermint Extract (or more to taste): This is where the magic happens. Start with 1/2 tsp, then taste your dough (yes, it’s safe to eat!). Add more in 1/8 tsp increments until it’s minty enough for you. I often go up to 3/4 tsp for a real kick! Fun Twist: Try a mix of peppermint and a drop of vanilla extract for a more complex flavor.
- Food Coloring (optional): Gel food coloring is my best friend here. It provides vibrant color without adding extra liquid that could thin out your dough. Liquid food coloring works in a pinch, but use it sparingly!
- Granulated Sugar (for rolling or pressing): This gives the mints their classic, slightly crunchy exterior and that beautiful sparkly finish. Coarse sugar also works wonderfully for extra crunch.
Let’s Make Some Mints! Your Step-by-Step Guide
Alright, let’s get our hands dirty! This process is a blast. Put on some music, clear some counter space, and let’s do this.
- The Creamy Base: In a large bowl (I use my stand mixer with the paddle attachment, but a hand mixer works great too), beat the softened cream cheese and butter together on medium speed. We’re looking for a completely smooth, lump-free, and creamy consistency. This should take about 2-3 minutes. Scrape down the sides of the bowl to make sure everything is incorporated. This is your foundation – get it right, and the rest is a breeze.
- Minty Freshness: Now, beat in your peppermint extract. Start with that 1/2 teaspoon. Mix it in, then for heaven’s sake, taste it! Dip a clean finger in. Is it minty enough for you? Remember, the sugar will mellow it slightly, so it should be a touch strong at this stage. Adjust now if you need to.
- The Sugar Shower: Here’s where things get fun. With your mixer on LOW speed, gradually add the powdered sugar, about one cup at a time. I mean it – start slow! Unless you want to be the star of your own personal snowstorm. Once the sugar is mostly incorporated, you can bump the speed up to medium until the mixture comes together. After about 3 cups, it’s going to start looking like a stiff dough. You might need to switch to a wooden spoon or even your hands for the last cup. The final dough should be pliable but not sticky – like a firm Play-Doh. If it’s too sticky, add a little more powdered sugar, a tablespoon at a time.
- Color & Shape (The Fun Part!): Divide your dough into sections if you’re using different colors. Knead the gel food coloring into each section until the color is uniform. No fancy tools? No problem! Pinch off small pieces (about ½ to 1 teaspoon each) and roll them into smooth balls between your palms. Place them on a parchment-lined baking sheet. You can leave them as balls, roll them in granulated sugar, or press them with a fork to make a classic pattern. If you have candy molds, dust them with powdered sugar first, press the dough in firmly, and then pop them out onto your parchment paper.
- The Waiting Game (Drying): This is the only hard part: waiting. Leave your mints uncovered at room temperature for at least 12 hours, or up to 24 hours. They need this time to dry out slightly and develop their characteristic firm exterior and creamy interior. Don’t rush it! They’re not baking; they’re just setting. You’ll know they’re ready when they are firm to the touch and don’t squish easily.
How to Serve These Little Beauties
Presentation is part of the fun! Pile these mints high on a beautiful cake stand for a shower. Scatter them across a holiday dessert table for pops of color. For a wedding, arrange them by color on elegant silver trays. You can even package them in little cellophane bags tied with ribbon as a sweet party favor. They are a treat that’s as lovely to look at as it is to eat.
Mix It Up! Creative Flavor Twists
The basic recipe is a blank canvas. Don’t be afraid to make it yours!
- Citrus Zing: Swap the peppermint extract for lemon, orange, or even lime extract. Pair with yellow, orange, or green food coloring for a bright, sunny treat.
- Chocolate Dip: After the mints have dried, dip half of each one in melted dark or white chocolate. Let them set on a new piece of parchment paper. Next-level goodness.
- Almond Joy: Use 1/4 tsp almond extract and 1/4 tsp coconut extract instead of peppermint. Roll the balls in toasted coconut flakes instead of granulated sugar.
- Party Time: Use food coloring to match any holiday or theme – pastels for Easter, red and green for Christmas, school colors for a graduation party.
- Vibrant Swirl: Don’t mix the color in completely! For a cool marbled effect, just barely fold two different colored doughs together before shaping.
Jackson’s Chef Notes & Kitchen Stories
I’ve made these mints more times than I can count, and my process has evolved. The first time I made them by myself, I was so impatient I tried to speed up the drying process by putting them in the oven on the “warm” setting. Big mistake. I ended up with a pan of melted, buttery puddles. Lesson learned: good things come to those who wait! Now, I always make them the day before I need them.
Another fun memory: I once decided to make a massive batch for a friend’s wedding. I recruited my two nephews to be my “shape crew.” We had an assembly line going, and they thought it was the coolest thing ever to play with edible dough. The mints were all slightly lopsided and wildly different sizes, but they were made with so much joy and laughter that they were the hit of the reception. It just goes to show that cooking is about the experience, not just perfection.
Your Questions, Answered!
Q: My dough is too sticky! What did I do wrong?
A: This usually means your cream cheese or butter was a bit too soft, or you may have added a touch too much liquid (from extract or food coloring). No worries! Just add more powdered sugar, a tablespoon at a time, and knead it in with your hands until the dough is no longer sticky and is easy to handle.
Q: Can I use low-fat cream cheese?
A: You can, but I don’t recommend it. The full-fat version provides a much richer flavor and a creamier, smoother texture that holds up better during the drying process. The low-fat version might make your mints a bit gummier.
Q: How should I store these, and how long do they last?
A: Once they are fully dried, store them in a single layer in an airtight container at room temperature. You can place parchment paper between layers if you need to stack them. They will keep beautifully for up to two weeks! The flavor actually improves after a day or two.
Q: Can I freeze the dough or the finished mints?
A: Absolutely! You can freeze the undecorated dough, wrapped tightly in plastic wrap, for up to a month. Thaw in the refrigerator overnight, then let it come to room temperature before shaping. You can also freeze the finished, dried mints in an airtight container for up to 3 months. Thaw at room temperature.
Cream Cheese Mints
- Total Time: 12–24 hrs
- Yield: 100 small mints 1x
Description
Smooth, minty, and melt-in-your-mouth sweet—Cream Cheese Mints are the perfect little bites for holidays, baby showers, weddings, or anytime you need a pop of sweetness. They’re easy to make, no-bake, and fun to customize with colors and shapes.
Ingredients
8 oz cream cheese, softened
2 tbsp unsalted butter, softened
4 cups powdered sugar
½ tsp peppermint extract (or more to taste)
Food coloring (optional)
Granulated sugar (for rolling or pressing)
Instructions
Mix base: Beat cream cheese and butter until smooth. Add peppermint extract.
Add sugar: Gradually mix in powdered sugar until a stiff dough forms.
Color & shape: Divide and tint with food coloring if desired. Roll into small balls or press into molds.
Dry: Roll in sugar or flatten with a fork. Let mints air-dry on parchment for 12–24 hours until firm.
- Prep Time: 20 minutes
- Drying Time: 12–24 hrs
Nutrition
- Calories: 25 / mint
- Sugar: 4g / mint
- Fat: 1g / mint
- Carbohydrates: 4g / mint
- Protein: 0g / mint
Nutritional Information (Approximate, per mint)
Calories: ~25 | Fat: 1g | Carbs: 4g | Sugar: 4g | Protein: 0g
Please note: This is a rough estimate based on the ingredients used and will vary slightly based on the exact size of your mints and specific brands.
Final Thoughts
Cream Cheese Mints might be small, but they carry big energy—the kind of treat that transforms a table and lingers in memory long after the party’s over. What I love most about them is that they’re equal parts delicious and sentimental. They’re simple enough for kids to help with, pretty enough for weddings, and nostalgic enough to feel like they’ve always been part of life’s sweetest moments.
Once you make these at home, you’ll realize just how customizable they are. Change up the colors, play with extracts, dip them in chocolate, or roll them in coconut—every batch is an opportunity to put your own spin on tradition. And just like my Nana’s kitchen taught me, it’s not about perfection; it’s about the laughter, the stories, and the love that goes into each little mint.
So the next time you’re hosting a shower, filling out a holiday tray, or simply craving a bite-sized dose of happy, whip up a batch of these creamy, melt-in-your-mouth gems. Because sometimes the best memories aren’t the big feasts—they’re the small, sweet bites shared with people you love.