Monster Eyes Donuts: Your New Favorite Spooky Kitchen Adventure!
Hey there, Food Meld family! Jackson here. Can you feel it? That crispness in the air, the smell of fallen leaves, and the undeniable buzz of excitement that means Halloween is just around the corner. For me, Halloween isn’t just about the costumes and the candy—it’s about the kitchen chaos. It’s about rolling up your sleeves, getting a little messy, and creating something so fun and delicious that it becomes a new tradition.
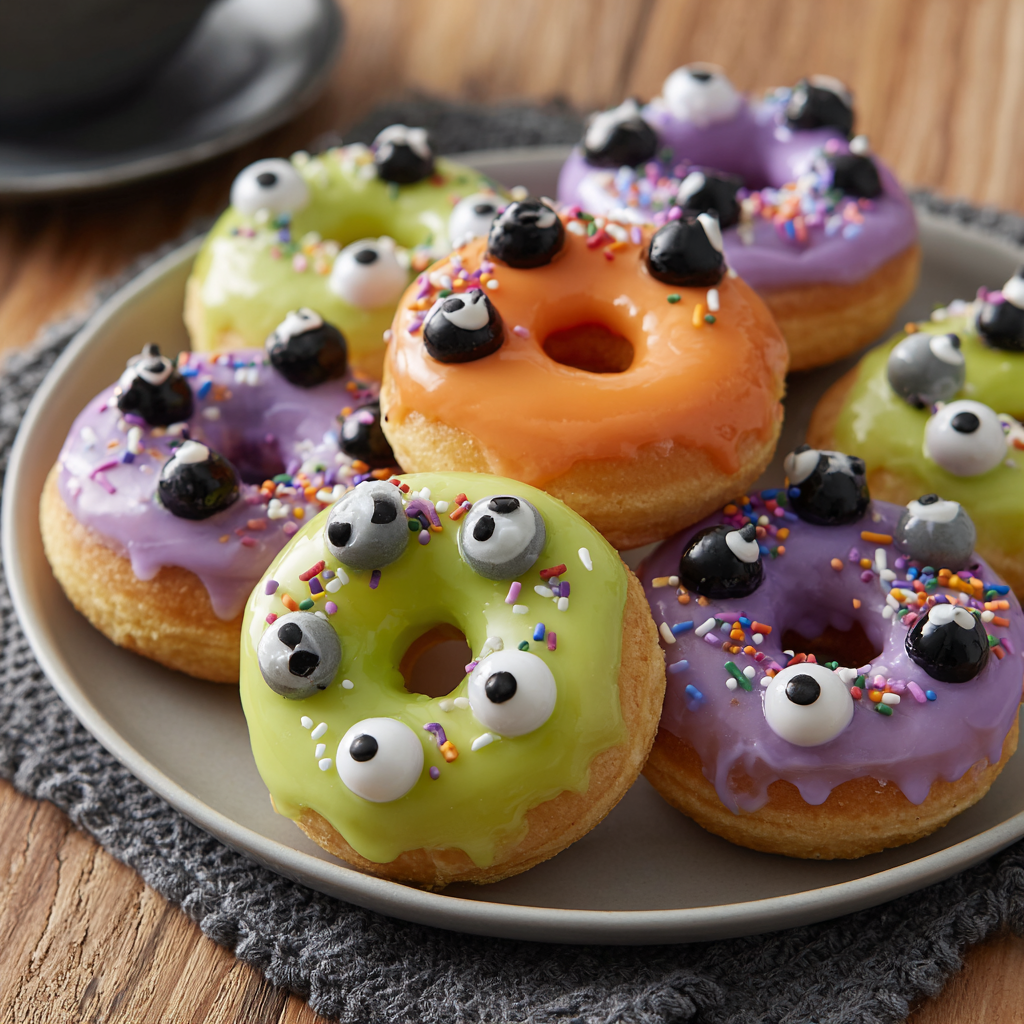
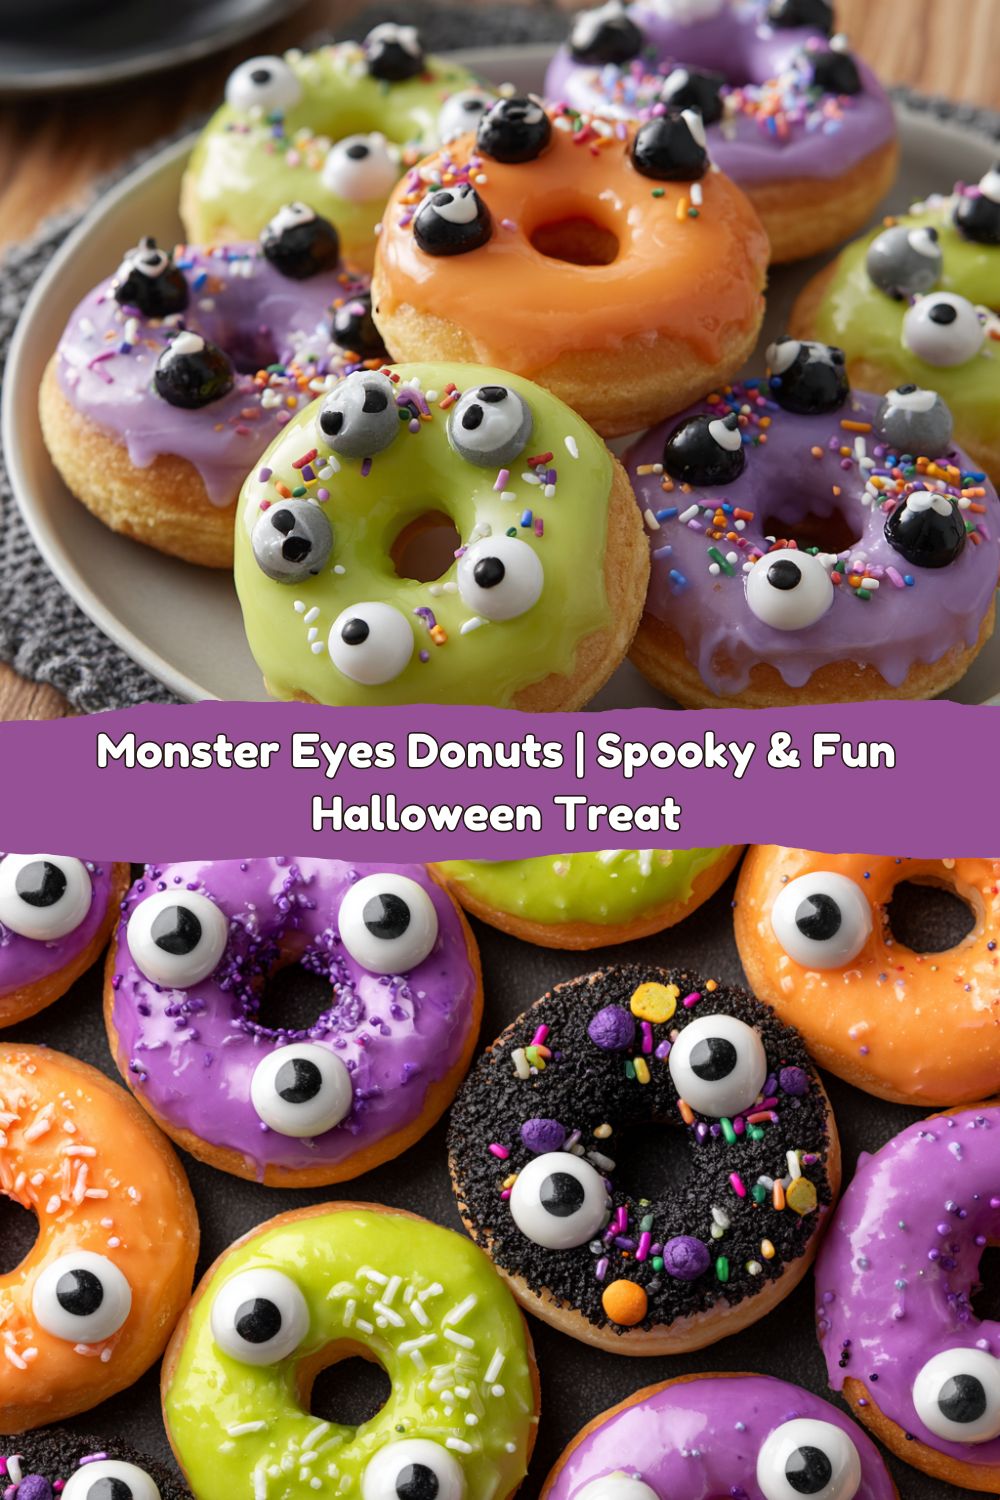
And that’s exactly what we’re doing today with these absolutely legendary Monster Eyes Donuts. We’re talking soft, pillowy baked donuts (way easier than you think, I promise!), dipped in wildly colorful glazes and brought to life with googly, gummy candy eyes. These donuts are the perfect blend of creepy and cute, guaranteed to be the star of any Halloween party, classroom treat, or just a super fun Saturday baking project with your favorite little monsters.
The best part? You don’t need any fancy equipment or a degree in pastry arts. We’re keeping it simple, real, and packed with flavor and fun. This recipe is all about that “you’ve gotta try this” energy I love so much. So, preheat that oven, grab your food coloring, and let’s turn your kitchen into a donut factory that would make any monster proud. Let’s cook something awesome together!
A Donut That Stares Back: My First Kitchen Monster
This recipe takes me right back to helping my mom in our tiny kitchen. She wasn’t a big baker, but Halloween? Halloween was her Super Bowl. She’d pull out all the stops. One year, she decided we were making “witch finger cookies,” which essentially involved shaping almond paste into grotesque, knobby fingers. I remember us laughing so hard we could barely get them on the baking sheet. They were lopsided, a little burnt, and absolutely terrifying—which made them perfect.
That’s the spirit I wanted to capture here. It’s not about perfection. It’s about the joy of creating something together, something that makes you smile and maybe even cackle a little. The first time I made a test batch of these Monster Eyes Donuts, I placed two giant eyeballs right next to each other and a bunch of tiny ones swirling around them. I held it up and it was just… staring at me. I burst out laughing. It had so much personality! That’s the magic I want for you. It’s not just a donut; it’s a little edible character waiting to cause some sweet, spooky trouble.
Gathering Your Monster-Making Kit
Here’s everything you’ll need to bring these colorful creatures to life. Remember, baking is a science, but don’t be afraid to make it your own!
For the Donuts (Baked & Beautifully Simple):
- 2 cups all-purpose flour: The trusty foundation of our donut. It gives them that classic, tender structure. For a slightly lighter texture, you can swap one cup for cake flour.
- 1/2 cup sugar: Just the right amount of sweetness. I use regular granulated sugar here.
- 2 tsp baking powder: This is our rising agent, giving these baked donuts their lovely lift and softness. Make sure it’s fresh for the best results!
- 1/2 tsp salt: Never skip the salt! It balances the sweetness and makes all the other flavors pop.
- 3/4 cup milk: Whole milk will give you the richest texture, but any milk you have on hand will work just fine.
- 2 large eggs: They bind everything together and add wonderful richness. Let them come to room temperature for a smoother batter.
- 1/4 cup unsalted butter, melted: Butter = flavor. Melting it ensures it incorporates evenly into the batter for a super moist crumb.
- 1 tsp vanilla extract: The classic flavor enhancer. A little splash makes the whole kitchen smell like home.
For the Spooky Decoration:
- 2 cups powdered sugar: The base of our simple, shiny glaze. Sift it if you have time to avoid any lumps!
- 2–3 tbsp milk: We’ll add this a tablespoon at a time to get our perfect, dippable glaze consistency.
- Gel food coloring (green, purple, orange, or black): Chef’s insight: Use gel food coloring! It gives you those vibrant, monster-worthy colors without thinning out your glaze like liquid food coloring would.
- Candy eyeballs (various sizes): The star of the show! You can find these in the baking aisle. The variety in sizes makes your monsters look more alive (in the best, creepiest way).
- Sprinkles (optional): Because why not? Black and orange jimmies or even some coarse sugar can add great texture.
Let’s Build Some Monsters: Step-by-Step
Follow these steps, and you’ll have a platter of perfect donuts in no time. I’ve packed this section with all my best tips and hacks to ensure your success!
- Preheat and Prep: Fire up your oven to 350°F (175°C). Now, grab your donut pan and give it a really good coat of non-stick spray or butter. Get into every nook and cranny! This is the most important step for getting donuts that pop out perfectly. Chef’s Hack: If you don’t have a donut pan, you can use a muffin tin! Just fill the wells about 1/3 full and you’ll end up with fun “donut holes” or muffin-top-style treats.
- Mix the Dry Team: In a large bowl, whisk together your flour, sugar, baking powder, and salt. Whisk it well! This ensures our leavening agents are evenly distributed so every donut rises beautifully.
- Whisk the Wet Team: In a separate medium bowl, whisk together the milk, eggs, melted (and slightly cooled) butter, and vanilla extract. Whisk until it’s completely smooth and homogenous.
- The Big Meld: Pour your wet ingredients into the dry ingredients. Now, here’s the key: gently fold them together with a spatula until just combined. A few lumps are totally fine! Overmixing is the enemy of tender donuts—it develops the gluten and can make them tough. We want light and fluffy.
- Fill the Pan: You have a few options here. You can spoon the batter into the pan, but it can be messy. My preferred method is to transfer the batter to a large piping bag or even a sturdy zip-top bag. Snip off a corner (about an inch wide) and pipe the batter into each well, filling them about 2/3 of the way full. This gives you the cleanest, most even donuts.
- Bake to Perfection: Slide the pan into your preheated oven and bake for 10-12 minutes. You’ll know they’re done when the edges are lightly golden and the tops spring back lightly when you press them. Chef’s Tip: Rotate the pan halfway through for even baking if your oven has hot spots.
- The Cool Down: This is crucial! Let the donuts cool in the pan for about 5 minutes before gently transferring them to a wire rack to cool completely. If you try to glaze them while they’re warm, the glaze will just melt right off and create a huge puddle. Patience, young monster-maker!
- Create the Glaze: While the donuts are cooling, make your glaze. In a medium bowl, whisk the powdered sugar with 2 tablespoons of milk. You’re looking for a thick but pourable consistency. It should coat the back of a spoon. If it’s too thick, add more milk a teaspoon at a time. If it’s too thin, add a bit more powdered sugar. Divide the glaze into separate bowls and unleash your inner artist with the gel food coloring. Go bold!
- Decorate! Now for the best part. Take a cooled donut and dip the top straight down into the glaze, then lift it straight up. Twist it gently over the bowl to let any excess drip off. Place it back on the wire rack (put some parchment paper underneath to catch drips!) and immediately, while the glaze is still wet, press on your candy eyeballs and sprinkles. This is where you and the kids can get creative. Give them personalities! Cross-eyed, wide-eyed, a swarm of tiny eyes—go wild!
- Let Them Set: Allow the glaze to set completely, about 15-20 minutes, before serving. This helps the eyes stay put and makes them less messy to eat.
How to Serve Your Spooky Masterpieces
Presentation is part of the fun! Pile these guys high on a dark slate platter or a rustic wooden board for a serious “wow” factor. For a Halloween party, arrange them in a sinister circle with a bowl of candy in the middle. If you’re packing them for a school party, place them in individual cupcake liners inside a box to keep them safe during transport. However you serve them, be prepared for laughs, gasps, and immediate recipe requests!
Mix It Up: Creative Twists on Monster Eyes
Don’t stop at the classic recipe! Here are a few ways to make these donuts uniquely yours:
- Chocolate Monster: Add 1/4 cup of cocoa powder to the dry ingredients for a chocolate donut base. Use a black or dark purple glaze for a truly dramatic creature.
- Zesty Citrus: Add the zest of one lemon or orange to the dry ingredients for a bright, zingy flavor that cuts through the sweetness beautifully.
- Spiced Pumpkin: It’s Halloween, after all! Replace 3/4 cup of the milk with canned pumpkin puree and add a teaspoon of pumpkin pie spice to the dry ingredients.
- Dairy-Free/Vegan: Use your favorite plant-based milk and a vegan butter substitute. For the egg, a commercial egg replacer or even a flax egg should work well in this batter.
- “Bloodshot” Effect: After glazing, use a toothpick and a tiny bit of red gel icing to draw squiggly red veins radiating out from the eyeballs. So creepy, so cool!
Jackson’s Chef Notes & Kitchen Stories
This recipe has evolved from a simple idea into a Food Meld favorite. The first time I tested it, I may have gotten a little *too* excited with the food coloring. Let’s just say my fingers were neon green for three days, and my dog looked at me like I’d been infected by an alien. Pro tip: wear disposable gloves when working with intense gel colors!
I also learned that the donut batter is incredibly versatile. It’s my go-to base now for all kinds of baked donuts. Sometimes, the best recipes come from just playing around. The goal here isn’t bakery-level perfection. It’s about the joy of the process. So if your glaze drips a little or your monster has one big eye and one small one, that just gives it more character. Embrace the happy accidents—they often taste the best.
FAQs & Troubleshooting: Your Questions, Answered
Q: My donuts stuck to the pan! What did I do wrong?
A: Ah, the classic bake-off dilemma! This almost always comes down to greasing. Be *generous* with that non-stick spray, making sure to get it in every curve. Letting them cool for exactly 5 minutes in the pan is also key—it allows them to set and pull away from the sides slightly.
Q: My glaze is too thin/too thick. How can I fix it?
A: No worries, glaze consistency is easily adjustable! Too thin? Whisk in more powdered sugar, a tablespoon at a time. Too thick? Add more milk, a teaspoon at a time, until it flows smoothly. Remember, it’s easier to thin a thick glaze than to thicken a thin one, so start conservative with the milk.
Q: Can I make these donuts ahead of time?
A> Absolutely! You can bake the donuts a day ahead, let them cool completely, and store them in an airtight container at room temperature. I’d recommend glazing them the day you plan to serve them for the freshest look and taste. The glaze can sometimes cause them to get a tad sticky if stored for too long.
Q: Where do I find candy eyeballs?
A> These are a Halloween baking staple! You’ll find them in the seasonal baking aisle of most major grocery stores, craft stores like Michaels or JoAnn Fabrics, or, of course, online. If you’re in a pinch, you can make your own by using white chocolate chips or large circular candies and drawing pupils on with edible marker!

MONSTER EYES DONUTS
- Total Time: 40 minutes
- Yield: 12 Donuts 1x
Description
These Monster Eyes Donuts are a playful Halloween treat that combines soft donuts, colorful glaze, and candy eyeballs for a sweet, spooky bite. Perfect for parties, trick-or-treat platters, or a fun kitchen project with kids.
Ingredients
For the Donuts (Baked):
2 cups all-purpose flour
1/2 cup sugar
2 tsp baking powder
1/2 tsp salt
3/4 cup milk
2 large eggs
1/4 cup unsalted butter, melted
1 tsp vanilla extract
For Decoration:
2 cups powdered sugar
2–3 tbsp milk
Gel food coloring (green, purple, orange, or black)
Candy eyeballs (various sizes)
Sprinkles (optional)
Instructions
Preheat oven to 350°F (175°C). Grease a donut pan.
In a bowl, whisk together flour, sugar, baking powder, and salt. In another bowl, whisk milk, eggs, butter, and vanilla. Combine wet and dry ingredients until smooth.
Fill donut pan wells about 2/3 full. Bake 10–12 minutes, until donuts spring back lightly. Cool completely.
Make glaze: whisk powdered sugar and milk until smooth. Divide into bowls and tint with food coloring.
Dip cooled donuts into glaze. While still wet, decorate with candy eyeballs and sprinkles.
Let set before serving.
- Prep Time: 15 minutes
- DECORATING TIME: 10 minutes
- Cook Time: 15 minutes
Nutrition
- Calories: 210 / Donut
- Sugar: 22g / Donut
- Fat: 6g / Donut
- Carbohydrates: 38g / Donut
- Protein: 3g / Donut
Nutritional Information (Per Donut – Approximate)
Calories: 210 | Protein: 3g | Carbs: 38g | Fat: 6g | Sugar: 22g
Please note: This is an estimate generated from an online nutrition calculator. Actual values will vary based on specific ingredients used and portion sizes.
Prep Time: 15 min | Cook Time: 12 min | Decorating Time: 10 min | Total Time: 37 min
Final Thoughts
Halloween baking doesn’t have to be fussy—it should be fun, a little messy, and full of personality. These Monster Eyes Donuts capture all of that in one bite: soft, pillowy donuts, bold colors that practically glow, and goofy eyeballs that turn every treat into a character. They’re spooky-cute, endlessly customizable, and the kind of recipe that gets everyone laughing around the table.
Whether you’re whipping these up for a party, sending them to school as a classroom hit, or just making a Saturday afternoon feel like a Halloween adventure, these donuts deliver more than sugar—they deliver memories. Don’t stress the details; let the drips, the smudges, and the wild-eyed stares make them uniquely yours. After all, the best monsters are a little imperfect.
So preheat that oven, unleash the sprinkles, and let your kitchen turn into a spooky donut lab. One bite of these staring, silly little creatures, and you’ll have a new Halloween tradition on your hands. 🎃👀🍩


