
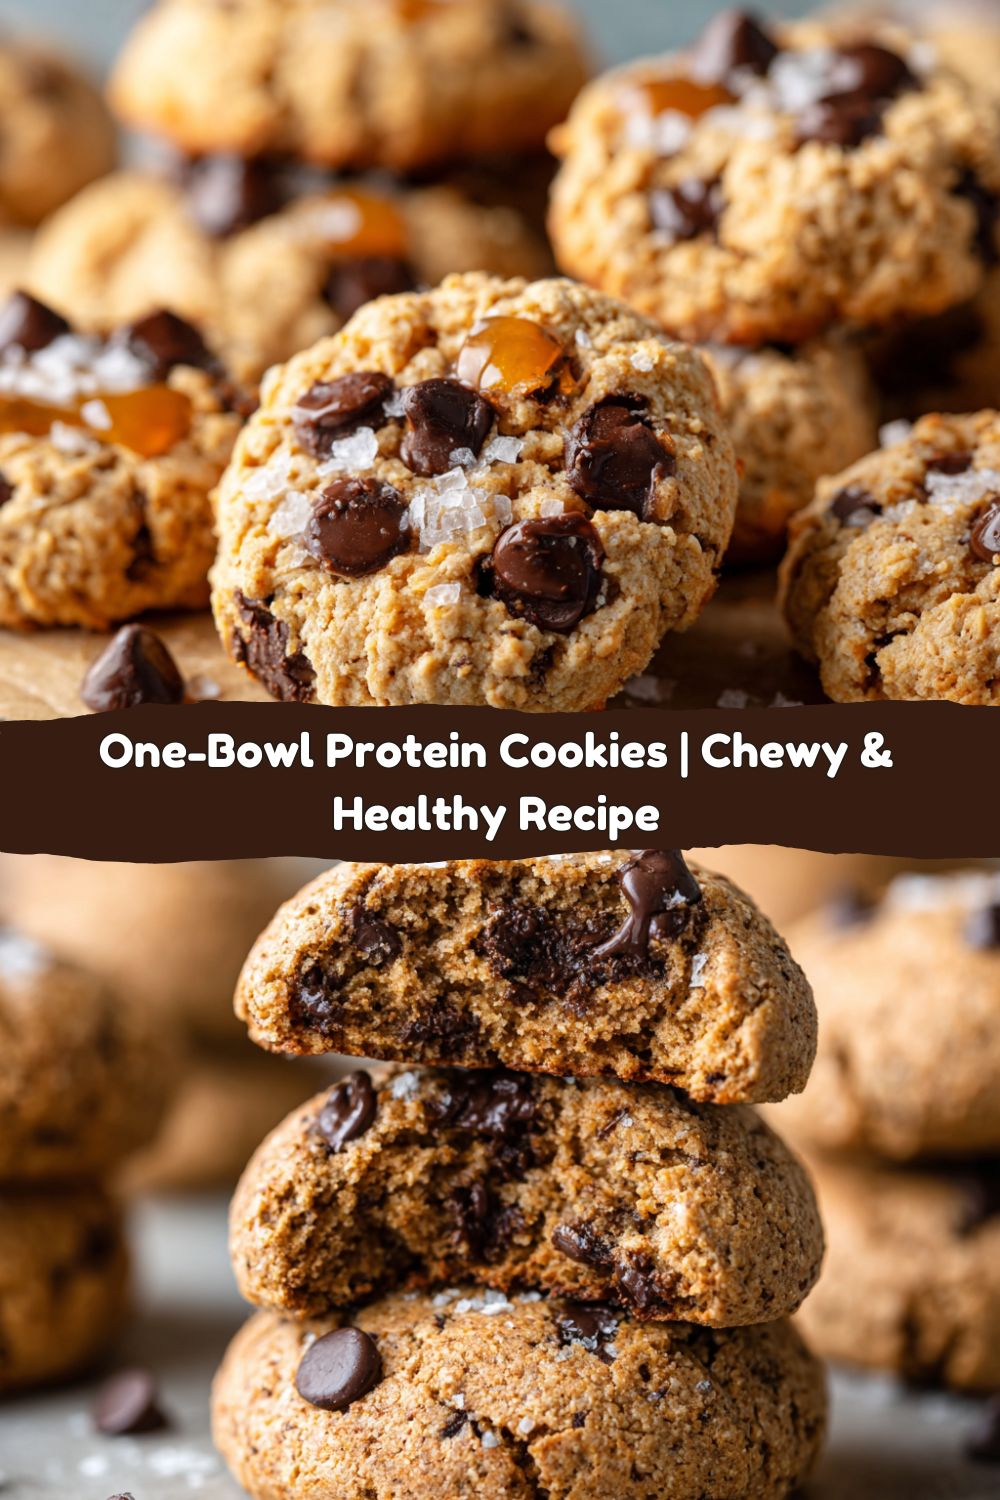
Let’s Bake Some Magic: The Easiest, Chewiest Protein Cookies You’ll Ever Make
Hey there, friend! Jackson here from Food Meld. Let’s have a real talk for a second. How many times have you reached for a “healthy” snack only to be met with a chalky, bland, and frankly sad excuse for a treat? You know the ones I’m talking about. They promise the world—protein, energy, guilt-free indulgence—but they taste like sweetened cardboard. Yeah, we’ve all been there. That’s exactly why I went on a kitchen mission, a delicious crusade if you will, to create a protein cookie that doesn’t just fuel your body but actually makes your soul do a happy dance.
What if I told you that in just one bowl and about 15 minutes, you could be pulling a batch of warm, incredibly chewy, and satisfying cookies out of your own oven? Cookies that are packed with wholesome ingredients, a solid punch of protein, and are so good you’ll have to hide a few from the family (I won’t tell). This isn’t just a recipe; it’s your new secret weapon for nailing those post-workout cravings, packing a lunchbox that’ll make you the envy of the breakroom, or enjoying a dessert that feels decadent but is actually nourishing. We’re ditching the complicated steps and the sink full of dishes. This is about simple, real, and flavor-packed food that works for your life. So, grab your favorite mixing bowl and let’s cook something awesome together.
The Cookie That Started It All
This recipe has a little bit of my grandma’s kitchen in it, though she’d probably raise an eyebrow at the protein powder. Growing up, her peanut butter cookies were legendary. They were the kind of treat that could fix a scraped knee, mend a broken heart, or just make a boring Tuesday feel special. The kitchen would be warm, the air sweet and toasty, and that first bite of a cookie fresh from the oven was pure, chewy bliss.
When I got deeper into my own cooking journey, juggling long days of recipe testing and wanting to stay fueled, I craved that same comforting feeling but needed something that would keep me going longer than a sugar rush. I started playing around in the kitchen, trying to meld that nostalgic, chewy texture with the protein boost my body was asking for. There were a few… let’s call them “learning experiences” (read: hockey pucks and crumbly messes). But then it clicked. The one-bowl method, the simple swap of oat flour, the perfect ratio of nut butter to syrup. I took that first successful batch to my friends, and the response was immediate: “Wait, these are healthy?!” That’s the Food Meld magic right there—taking the comfort of the past and giving it a delicious, modern twist.
Gathering Your Cookie Crew: The Ingredients
Here’s the beautiful part: you probably have most of this in your pantry right now. This is a no-fuss, all-flavor lineup. Let’s break it down.
- 1 cup oat flour (or finely ground oats): This is our wholesome base! Oat flour gives an incredible chewy texture and a mild, nutty flavor. Chef’s Insight: No oat flour? No problem! Just toss old-fashioned or quick oats into a blender or food processor and blitz until they form a fine powder. It takes 30 seconds and works perfectly.
- 1/2 cup vanilla protein powder: The protein star! This adds structure, sweetness, and of course, that muscle-loving macronutrient. Substitution Tip: The flavor of your protein powder will shine through, so use one you genuinely enjoy eating. For a vegan option, a plant-based vanilla protein powder works great.
- 1/2 tsp baking soda: Our little leavening agent that gives the cookies just the right amount of lift and spread.
- 1/4 tsp salt: Never skip the salt! It’s the flavor enhancer that makes all the other ingredients pop and balances the sweetness.
- 1/2 cup nut butter (peanut, almond, or cashew): This is the glue and the richness. It binds everything together and provides healthy fats. Substitution Tip: Use any nut or seed butter you love! Creamy or crunchy both work. For a nut-free version, sunflower seed butter is a fantastic swap.
- 1/3 cup maple syrup or honey: Our natural liquid sweetener. It adds moisture and helps create that dreamy, chewy center. Chef’s Insight: Maple syrup keeps these vegan-friendly, while honey adds a deeper floral note. Agave nectar works too!
- 1 egg (or flax egg for vegan): The binder. It helps hold the cookies together and adds to the texture. For a flax egg, just mix 1 tbsp ground flaxseed with 2.5 tbsp water and let it sit for 5 minutes to gel up.
- 1 tsp vanilla extract: The flavor booster! It rounds out all the other ingredients and makes the kitchen smell amazing.
- 1/4 cup chocolate chips (optional): Because… chocolate. This is the “fun” factor. Substitution Tip: Swap for chopped nuts, dried cranberries, raisins, or even cacao nibs for an antioxidant kick. You do you!
Let’s Get Mixing: Your Foolproof Cookie Guide
This is where the one-bowl magic happens. I promise, it’s as easy as it sounds.
Step 1: Preheat and Prep. Fire up that oven to 350°F (175°C). This gives it time to get to the perfect temperature while we make the dough. Line a baking sheet with parchment paper. This is my #1 hack for no-stick cookies and even easier cleanup. No parchment? A light spray of cooking oil will work in a pinch.
Step 2: The Dry Team. Grab your favorite mixing bowl—the bigger the better for easy stirring. To that bowl, add your oat flour, protein powder, baking soda, and salt. Give this a good whisk. We’re not just mixing; we’re making sure the baking soda and salt are evenly distributed so every single cookie bakes up perfectly. No one wants a bite of pure baking soda!
Step 3: The Wet Team Joins the Party. Now, plop the nut butter, maple syrup, egg, and vanilla right on top of the dry ingredients. Here’s a pro tip: if your nut butter is super thick and stubborn, you can microwave it for 15-20 seconds to loosen it up. It makes mixing a dream. Now, take a sturdy spatula or a wooden spoon and start to combine. It might seem thick at first, but keep going. You’ll see it transform from a crumbly mess into a thick, cohesive, and slightly sticky dough. That’s exactly what we want!
Step 4: The Fun Fold-In. Time for the mix-ins! Dump in your chocolate chips (or whatever goodies you chose) and gently fold them into the dough until they’re evenly distributed. Try not to eat all the dough straight from the bowl at this stage… I know, it’s a challenge.
Step 5: Scoop and Shape. Using a cookie scoop or a tablespoon, portion out the dough. Roll it into balls—you should get about 10 to 12. Place them on your prepared baking sheet, giving them about 2 inches of space to spread. Now, here’s the key to a perfect cookie: flatten them slightly with your palm or the back of a spoon. Because there’s no butter to melt and spread, they need a little help to become cookie-shaped instead of remaining dough balls.
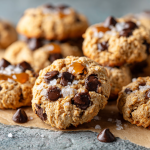
Step 6: Bake to Perfection. Slide that sheet into your preheated oven and bake for 8-10 minutes. You’re looking for set edges and a slightly soft center. DO NOT overbake them! They will continue to set up as they cool on the baking sheet. This is the secret to that ultra-chewy, soft-batch texture we’re after. Let them cool on the sheet for at least 10-15 minutes before transferring them to a wire rack. I know, the wait is torture, but it’s worth it for a cookie that doesn’t fall apart.
How to Serve These Beauties
These cookies are stars all on their own, but a little presentation never hurt anybody! Let them cool completely for a firmer, chewier bite. For the ultimate experience, serve one slightly warm with a cold glass of almond milk or a dunk in your morning coffee. Crumble one over a bowl of Greek yogurt for a next-level breakfast parfait, or just stack them on a simple plate and watch them disappear. They’re humble, satisfying, and don’t need any fuss.
Mix It Up: Endless Flavor Possibilities
The best part about a base recipe this good is making it your own. Here are a few of my favorite twists:
- Double Chocolate Chunk: Swap the vanilla protein powder for chocolate. Use only 1/4 cup of oat flour and add 1/4 cup of cocoa powder to the dry ingredients. Fold in dark chocolate chunks instead of chips.
- Almond Joy: Use almond butter, fold in shredded coconut and dark chocolate chips, and sprinkle a little extra coconut on top before baking.
- Apple Pie Spice: Use a neutral protein powder. Add 1 tsp of cinnamon and a pinch of nutmeg to the dry ingredients. Fold in finely chopped dried apples instead of chocolate chips.
- Peanut Butter Banana: Replace the maple syrup with mashed ripe banana (about 1/2 cup) and use peanut butter protein powder if you have it for an insane PB flavor boost.
- Seedastic (Nut-Free): Use sunflower seed butter and pumpkin seeds instead of chocolate chips for a totally nut-free, crunchy delight.
Jackson’s Kitchen Notes
This recipe has evolved more times than I can count. The first batch? Let’s just say they were so dry you needed a glass of water standing by. But that’s the beauty of cooking—it’s all about experimentation. I’ve learned that the type of protein powder can change the game. Whey protein tends to make a softer, cakier cookie, while plant-based proteins (like brown rice or pea protein) often result in a denser, chewier texture. Both are delicious, just different!
My biggest piece of advice? Don’t be afraid to get your hands dirty. If the dough feels too wet, add a tablespoon more oat flour. Too dry? A tiny splash of milk or water will fix it right up. This is your kitchen, and you’re the boss. Make a mess, have fun, and trust your instincts. Some of the best recipes are born from a happy accident.
Your Questions, Answered
Q: My cookies came out really dry and crumbly. What happened?
A: The most common culprit is overbaking! Remember, they continue to cook on the hot baking sheet after you take them out. Pull them out when the edges are just set, even if the center looks a little underdone. Another reason could be your protein powder; some brands are more absorbent than others. If your dough seems super thick and dry before baking, add a teaspoon of water or milk at a time until it comes together.
Q: Can I make these without an egg?
A: Absolutely! A “flax egg” is the perfect swap. Just mix 1 tablespoon of ground flaxseed with 2.5 tablespoons of water. Let it sit for 5 minutes until it becomes gel-like, then use it exactly as you would the egg. It works like a charm for binding.
Q: Why did my cookies not spread at all?
A: This usually means the dough was too thick or cold. Did you remember to flatten the dough balls before baking? That’s a crucial step for these guys. Also, if your nut butter was super thick and cold, it can inhibit spreading. Letting all your ingredients come to room temperature can help.
Q: How should I store these? Can I freeze them?
A> They store beautifully! Keep them in an airtight container at room temperature for 3-4 days. For longer storage, they freeze incredibly well. Place cooled cookies in a freezer-safe bag or container for up to 3 months. You can even freeze the raw dough balls and bake them straight from frozen—just add a minute or two to the baking time.
THE BEST PROTEIN COOKIES (ONE-BOWL!)
- Total Time: 15 minutes
- Yield: 10 - 12 Cookies 1x
Description
These protein cookies are soft, chewy, and packed with flavor—made in just one bowl for easy cleanup. With wholesome ingredients and a boost of protein, they’re perfect for a post-workout snack, lunchbox treat, or healthy dessert.
Ingredients
1 cup oat flour (or finely ground oats)
1/2 cup vanilla protein powder
1/2 tsp baking soda
1/4 tsp salt
1/2 cup nut butter (peanut, almond, or cashew)
1/3 cup maple syrup or honey
1 egg (or flax egg for vegan)
1 tsp vanilla extract
1/4 cup chocolate chips (optional, or swap for nuts/dried fruit)
Instructions
Preheat oven to 350°F (175°C). Line a baking sheet with parchment.
In a mixing bowl, stir together oat flour, protein powder, baking soda, and salt.
Add nut butter, maple syrup, egg, and vanilla. Mix until a dough forms.
Fold in chocolate chips.
Scoop dough into balls, place on baking sheet, and flatten slightly.
Bake 8–10 minutes, until edges are set. Let cool before eating.
- Prep Time: 5 minutes
- Cook Time: 10 minutes
Nutrition
- Calories: 160 / Cookie
- Fat: 8g / Cookie
- Carbohydrates: 15g / Cookie
- Fiber: 2g / Cookie
- Protein: 8g / Cookie
Nutritional Information
Per Cookie (approx., based on 12 cookies, using peanut butter and maple syrup):
Calories: 160 | Protein: 8g | Carbs: 15g | Fat: 8g | Fiber: 2g
*Please note: This is an estimate and can vary greatly based on the specific brands of ingredients you use, especially the protein powder and nut butter.
Prep Time: 5 min | Cook Time: 10 min | Total Time: 15 min
Final Thoughts
At the end of the day, these protein cookies aren’t just about macros or meal prep—they’re about joy. They’re about pulling something warm from the oven that makes your kitchen smell like comfort, and knowing that each bite is both delicious and nourishing. No chalky textures, no sad excuses for dessert—just chewy, golden perfection that fuels your body and makes your taste buds cheer.
What I love most is how adaptable this recipe is. You can stick with the classic chocolate chip version, or play around with flavors until you’ve got your own signature batch. These cookies can be a quick breakfast, a post-gym refuel, or a sweet nightcap with a glass of milk. However you enjoy them, they’re proof that “healthy” doesn’t have to mean boring.
So the next time that craving for something sweet and satisfying hits, skip the store-bought cardboard and whip these up instead. You’ll have a tray of chewy, protein-packed magic ready in minutes. And hey, maybe keep a secret stash tucked away—you deserve it.
Happy baking, and here’s to snacks that make you smile! 🍪✨


