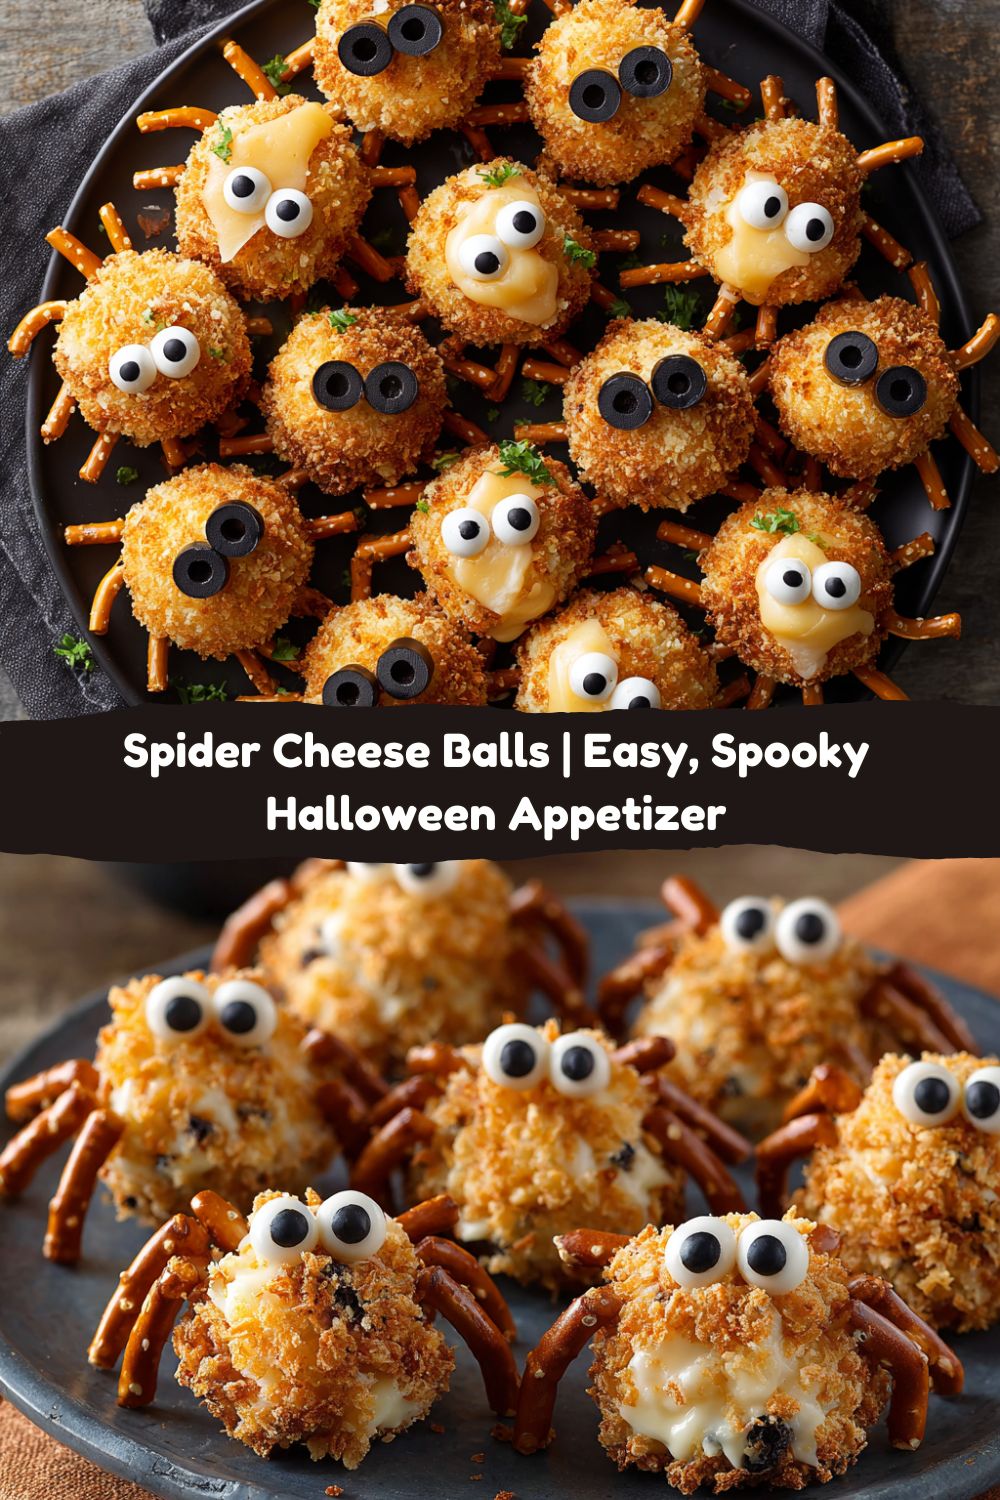
Spider Cheese Balls: Your New Go-To Spooky Snack!
Hey there, Food Meld family! Jackson here, and I am absolutely buzzing with excitement to share this recipe with you. Halloween is just around the corner, and you know what that means—it’s time to get our spooky snack on! I’m talking about those moments when you walk into a party and see a platter of food so clever and cute that you just have to stop and admire it (before you devour it, of course). That’s the exact vibe we’re going for with these Spider Cheese Balls.
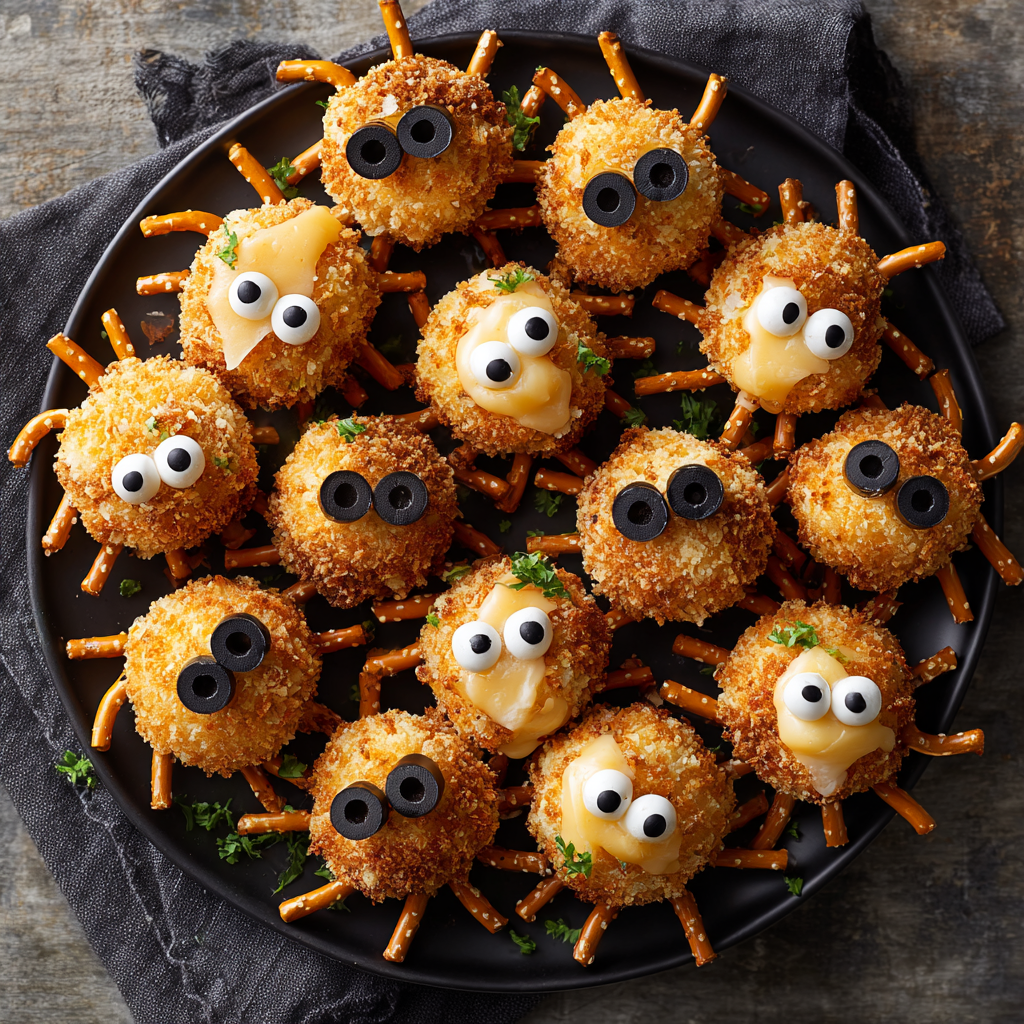
Now, I’m all about bold, comforting flavors that don’t require a culinary degree to pull off. These little guys are the perfect example. We’re taking a classic, creamy, zesty cheese ball mixture—the kind your grandma might make, but we’re kicking it up a notch with some smoked paprika for that “what if we tried this?” energy I love. Then, we’re rolling them in a crazy satisfying crunchy coating and turning them into adorable, edible spiders with pretzel legs and olive eyes. They’re creepy-crawly in the best way possible, perfectly poppable, and guaranteed to be the hit of any Halloween bash. They’re not just a snack; they’re a conversation starter. So, let’s roll up our sleeves, get a little messy, and cook something awesome together that’s equal parts flavor and fun!
A Web of Delicious Memories
This recipe takes me right back to my first Halloween in my own apartment. I was dead-set on throwing a legendary party, but my budget was, well… spooky thin. I wanted to create something that looked impressive but was secretly easy on the wallet. I remember staring into my fridge, seeing blocks of cream cheese and a bag of shredded cheddar, and the wheels started turning. A cheese ball was a no-brainer for a crowd-pleaser, but how to make it Halloween? I started playing around with pretzel sticks for legs and, after a few hilarious failed attempts (RIP, my first three-legged spider), the concept finally clicked. The moment I set that first platter down at my party, they were gone in minutes. Friends were snapping pictures, laughing, and most importantly, asking, “How did you make these?!” That’s the magic I want to bring to your kitchen—that moment of pure, shared joy, where food is more than fuel; it’s a experience. It’s a reminder that the best recipes often come from a little bit of necessity and a whole lot of heart.
Gathering Your Spider Squad: The Ingredients
Here’s everything you’ll need to summon a legion of delicious cheesy spiders. Don’t stress about being exact—cooking is about making it yours!
- 2 (8 oz) blocks cream cheese, softened – This is the creamy, luxurious base of our spider bodies. Pro Tip: Take it out of the fridge at least an hour beforehand. If you’re in a pinch, you can microwave it for 15-20 seconds on 50% power, but no longer! We want it soft, not melted and soupy.
- 2 cups shredded sharp cheddar cheese – This brings the bold, tangy flavor that makes you go “Wow!” I highly recommend shredding your own from a block. The pre-shredded stuff is coated in anti-caking agents that can make the texture a little grainy instead of gloriously smooth.
- ½ cup sour cream – This is our secret weapon for ultra-creaminess and a slight tang that balances the richness of the cheeses. Plain Greek yogurt works in a pinch if that’s what you have on hand.
- 1 tsp garlic powder & 1 tsp onion powder – These are the flavor workhorses. They distribute flavor evenly throughout the mixture without the sharp bite of fresh alliums.
- ½ tsp smoked paprika – This is my “creative twist.” It doesn’t add heat, but it gives a wonderful, warm, smoky depth that takes this from a standard cheese ball to a Food Meld special. Trust me on this one.
- Salt & pepper to taste – Always season as you go! Taste your mixture before rolling. The cheese and chips will have salt, so you might not need much extra.
- 1½ cups crushed black tortilla chips or crushed cheese crackers – This is our “dirt” or “web” coating! The black tortilla chips are perfect for the spider aesthetic, but cheese crackers (like Cheez-Its or Goldfish) add an amazing cheesy, buttery crunch. Get creative!
- 48 mini pretzel sticks – The iconic spider legs! Mini pretzel sticks are the perfect size. If you can only find regular ones, just snap them in half.
- 24 small black olives or sliced olives – For those spooky, beady little eyes. Sliced olives are easier, but whole small olives look fantastic. You could even use capers for a different look!
- Optional: chopped green onions, jalapeños, or hot sauce – This is where you can really make it yours. Want a little kick? Add some finely diced jalapeño or a few dashes of your favorite hot sauce into the cheese mix. Green onions add a nice fresh bite.
Weaving the Web: Step-by-Step Instructions
Alright, team, let’s build some spiders! This process is a blast, especially if you recruit a helper (or a few little helpers).
Step 1: The Cheese Meld
Grab your largest mixing bowl and toss in the softened cream cheese, shredded cheddar, sour cream, garlic powder, onion powder, smoked paprika, salt, and pepper. Now, get in there with a sturdy wooden spoon or spatula and mix until it’s completely smooth and all those beautiful flavors are one big, happy family. If you’ve got optional add-ins like jalapeños, now’s the time to fold them in. Don’t be afraid to use a little muscle! Chef Hack: If you have a stand mixer with a paddle attachment, you can let it do the work for you on low speed. Just be careful not to overmix once it’s combined.
Step 2: The Chill Factor
This step is non-negotiable, but it’s the perfect time to clean up or prep your coating. Cover the bowl with plastic wrap and pop it into the fridge for a solid 30 minutes. This firms up the mixture, making it infinitely easier to roll into perfect little balls without it sticking to your hands like superglue. A firm mixture is a friendly mixture!
Step 3: Coating & Rolling
While the cheese is chilling, pour your crushed chips or crackers into a shallow bowl or plate. Once the cheese mix is firm, use a small cookie scoop or a tablespoon to portion out the mixture. Roll each portion between your palms to form a smooth, 1-inch ball. Then, roll each ball generously in the crushed coating, pressing gently to make sure it adheres on all sides. Place each finished ball on a parchment-lined baking sheet. You’ve just given your spiders their fuzzy little bodies!
Step 4: The Big Assembly
This is the fun part! Take your mini pretzel sticks and gently press four into each side of a cheese ball to make eight legs total. Push them in deep enough that they’re secure, but be gentle so you don’t crack the pretzel. If one breaks, no worries—just eat the evidence and try again. For the eyes, take your olives. If using sliced olives, just press two pieces into the front. If using whole small olives, you can slice them in half or use them whole. A tiny dot of cream cheese on the back of the olive can act as “glue” if they’re being stubborn.
Step 5: The Final Countdown
You can serve them immediately, but I find they benefit from a final 15-minute chill in the fridge to let everything set up. However, for the ultimate creamy, spreadable texture, let them sit at room temperature for about 10-15 minutes before your guests arrive. This makes them perfect for spreading on a cracker or just popping straight into your mouth!
Setting the Spooky Scene: Serving Suggestions
Presentation is everything with these guys! Don’t just plop them on a plate. Lean into the theme. Arrange your spider cheese balls on a large platter or a clean cutting board. Scatter a few extra crushed black chips around them to look like “dirt” or a “web.” You can even draw a little spider web pattern on the plate with some sour cream or Greek yogurt using a squeeze bottle or a zip-top bag with the corner snipped off. Place a bowl of sturdy crackers (like Wheat Thins or Triscuits) right in the center for dipping and spreading. Watch them disappear!
Make It Your Own: Recipe Variations
The beauty of this recipe is its flexibility. Don’t be afraid to play!
- Everything Bagel Spider: Use everything bagel seasoning in the cheese mixture and roll the balls in everything bagel seasoning for a savory, oniony crunch.
- Pizza Spider: Mix in some pepperoni bits and a tablespoon of Italian seasoning into the cheese. Roll in crushed pizza-flavored crackers or Parmesan cheese.
- Buffalo Chicken Spider: Fold in 1 cup of finely shredded cooked chicken and ¼ cup of buffalo sauce. Roll in crushed blue cheese crumbles or more tortilla chips.
- Vegan Spider: Use your favorite plant-based cream cheese and shreds. For the coating, crushed black bean chips or nutritional yeast work great. Use vegan pretzels and olives!
- Sweet & Salty Spider: For a dessert version, make a sweet cheese ball with powdered sugar and vanilla, roll it in crushed Oreos, and use chocolate pretzel sticks for legs!
Jackson’s Chef Notes
This recipe has evolved so much since that first apartment party. I’ve learned that the type of pretzel really matters—the mini sticks are the undisputed champions. I also used to put the legs in before chilling, which resulted in a lot of broken pretzels. Now, I’m a firm believer in the coating-first, legs-later method. One of my favorite kitchen memories is trying to teach my nephew how to put the legs on. He was so focused, his little tongue sticking out, and he ended up making a six-legged spider because he “wanted it to be faster.” We called it his mutant spider, and it was the first one eaten. The point is, it doesn’t have to be perfect. A broken leg or a wobbly eye just adds character. This is about having fun and making a mess together. That’s where the real magic happens.
FAQs & Spider Saving Tips
Q: My cheese mixture is too soft to roll! What do I do?
A: Don’t panic! This usually means it needed more chilling time. Just pop the whole bowl back into the fridge for another 20-30 minutes. If you’re in a serious time crunch, you can pop the rolled-but-uncoated balls on the sheet tray into the freezer for 10 minutes to flash-chill them. You’ve got this!
Q: My pretzel legs keep breaking when I try to insert them. Help!
A: This is a common one! First, make sure you’re using mini pretzel sticks, as they are more delicate. Second, try poking a pilot hole with a toothpick or a skewer first. This creates a tiny path for the pretzel to follow, reducing the pressure and chance of a snap.
Q: Can I make these spider cheese balls ahead of time?
A: Absolutely! You are a party-planning genius. Assemble the cheese balls completely (including legs and eyes), arrange them on your parchment-lined tray, cover tightly with plastic wrap, and store in the fridge for up to 24 hours. I’d hold off on adding the legs more than a day in advance, as the pretzels can get a little soft.
Q: The coating isn’t sticking very well. Any tricks?
A: If the coating is being shy, your cheese balls might be a bit too cold and dry on the surface. Try lightly dampening your hands with water before rolling the balls—this creates just enough moisture for the crumbs to grab onto. You can also gently press the coating onto the ball after the initial roll.

Spider Cheese Balls
- Total Time: 55 minutes
- Yield: 24 mini spiders 1x
Description
Crunchy, creamy, and creepily cute—perfectly poppable Halloween bites!
Ingredients
2 (8 oz) blocks cream cheese, softened
2 cups shredded sharp cheddar cheese
½ cup sour cream
1 tsp garlic powder
1 tsp onion powder
½ tsp smoked paprika (adds warmth and depth)
Salt & pepper to taste
1½ cups crushed black tortilla chips or crushed cheese crackers (for coating)
48 mini pretzel sticks (for spider legs)
24 small black olives or sliced olives (for eyes)
Optional: chopped green onions, jalapeños, or hot sauce for kick
Instructions
In a large bowl, mix cream cheese, cheddar, sour cream, garlic powder, onion powder, paprika, and seasoning until smooth and combined.
Chill mixture for 30 minutes until firm enough to roll.
Scoop and roll into 1-inch balls. Roll each ball in crushed tortilla chips or cracker coating.
Gently insert 4 pretzel sticks on each side to make spider legs.
Cut olives into tiny pieces and press into each ball to form spooky little eyes.
Chill until ready to serve or let come to room temp for a creamier texture.
- Prep Time: 25 minutes
- Cook Time: 30 minutes
Nutrition
- Calories: 130 / mini spider
- Fat: 10g / mini spider
- Carbohydrates: 5g / mini spider
- Protein: 4g / mini spider
Quick Nutritional Info
Estimated per spider cheese ball: Calories: 130 | Fat: 10g | Carbs: 5g | Protein: 4g
Remember, these are estimates and can vary based on specific ingredients and brands used. It’s a party snack—enjoy every delicious, spooky bite!
Final Thoughts
These Spider Cheese Balls are the perfect example of what Halloween food should be—fun, flavorful, and just spooky enough to make everyone smile before they take that first bite. They’re the kind of recipe that looks party-perfect but doesn’t leave you stressed in the kitchen. With their creamy, smoky filling, crunchy coating, and pretzel-leg personality, they’re guaranteed to be the dish people crowd around and talk about.
The best part? They’re endlessly adaptable. Want them spicy? Add jalapeños. Going for a kid-friendly vibe? Stick with the classic cheddar base. Need a vegan option? Easy swap. These creepy-cute bites are as flexible as they are festive, which means they’ll fit seamlessly into any Halloween spread.
So this year, skip the store-bought snack trays and whip up a batch of these edible eight-legged wonders. They’ll spark laughter, create memories, and—just like any good Halloween tradition—probably disappear faster than you can say boo! 🕷️🧀🎃