
Double the Trouble, Double the Joy: My No-Bake Double Peanut Butter Cream Pie
Hey friends, Jackson from Food Meld here. Let’s have a real talk for a second. Are you a member of the clean-plate club? Do you believe that peanut butter is its own food group? And have you ever taken a bite of something so decadent, so perfectly balanced between salty and sweet, that you just had to close your eyes for a second and truly savor the moment?
If you’re nodding your head (and I know you are), then you and I are about to become best friends. Because today, we’re throwing the kitchen rules out the window and diving headfirst into a dessert that’s pure, unadulterated joy. We’re making my legendary Double Peanut Butter Cream Pie. And yes, I said double. We’re making two pies. One for you, and one to share… or, you know, one for you tonight and one for you tomorrow. I don’t judge.
This isn’t just any peanut butter pie. This is the pie of dreams. It’s a no-bake wonder, which means it’s your secret weapon for beating the heat and impressing a crowd without breaking a sweat. We’re talking a velvety, cloud-like filling that’s somehow both rich and light, all nestled into a crispy crust and finished with a sprinkle of salty peanuts and a sneaky chocolatey twist. It’s the kind of dessert that makes people stop mid-sentence, look you dead in the eye, and ask, “Okay, what is in this?” So, grab your mixing bowls and let’s cook something awesome together.
The Pie That Started It All
This recipe takes me right back to my grandma’s linoleum-floored kitchen. She was a woman who believed dessert wasn’t a treat, it was a necessity. But during those sticky Southern summers, firing up the oven was a last resort. Her solution? A version of this very pie.
I remember standing on a wobbly step-stool, my job was to “help” by slowly pouring the powdered sugar into the bowl. A cloud of sweet dust would puff up, coating us both in a fine white powder, and we’d just laugh. She’d always let me lick the beaters, and that first taste of the peanut butter and cream cheese mixture was pure magic. It tasted like love and cool air conditioning. My twist? I double the batch because her pie always disappeared too fast, and I add that hit of flaky salt and chocolate on top. It’s my way of honoring her classic while turning up the volume on flavor, just like we do here at Food Meld.
Gathering Your Dream Team: The Ingredients
Here’s the beautiful part: this pie is all about simple, powerhouse ingredients that work together to create something truly unforgettable. Let’s break them down.
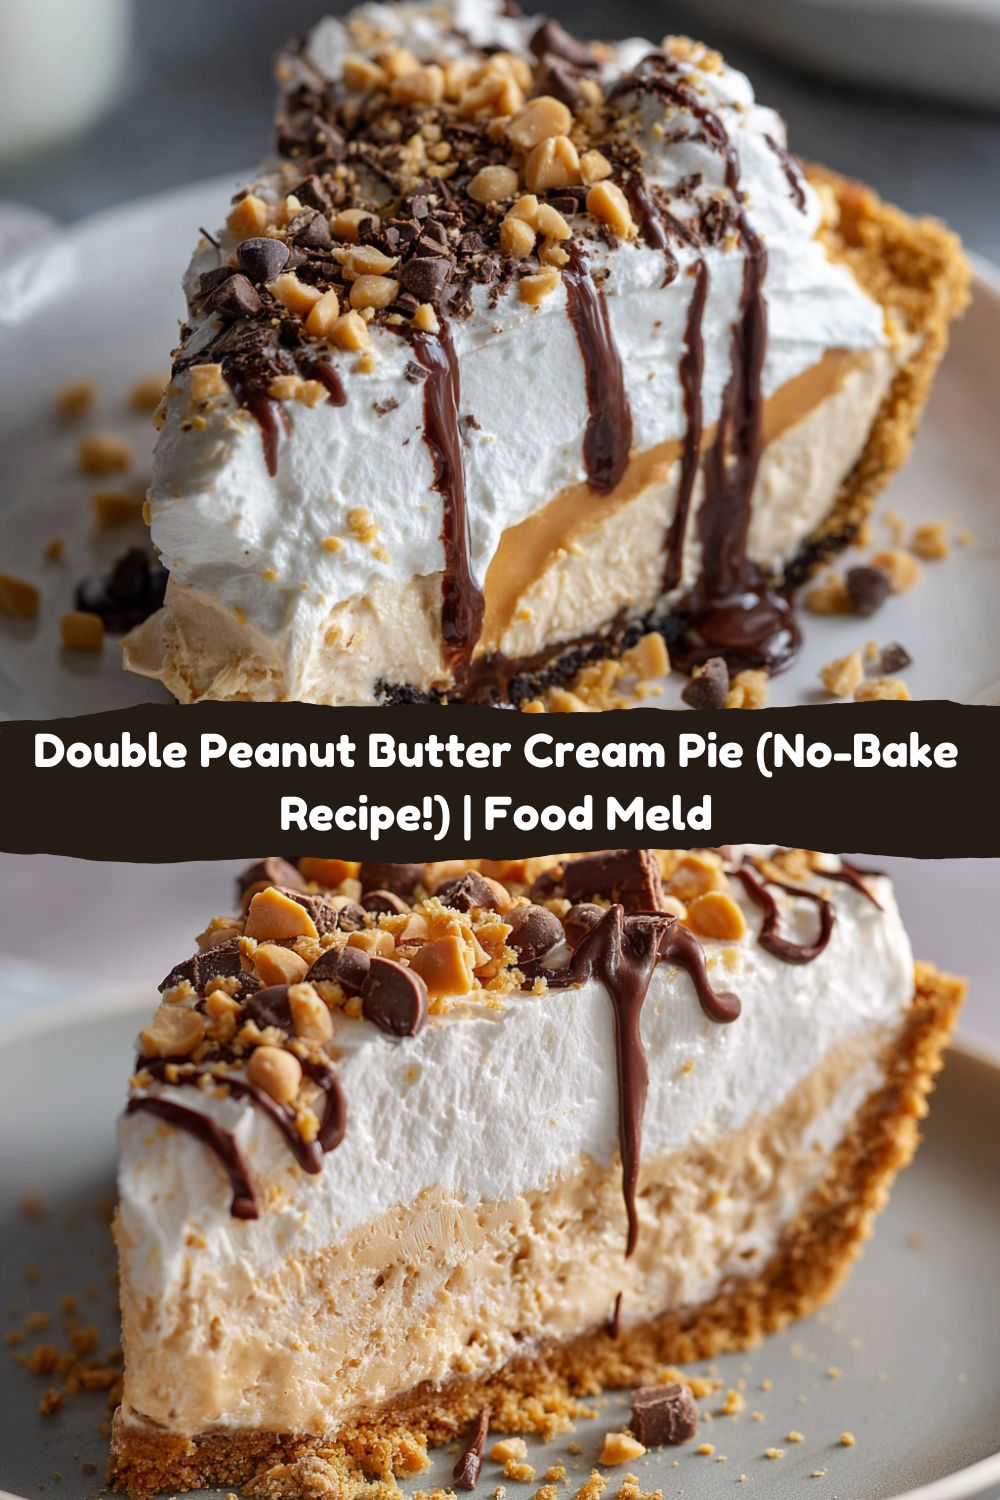
- 2 (9-inch) baked pie crusts: I’m a huge fan of a classic graham cracker crust here—its honey-kissed sweetness is the perfect foundation. But a chocolate cookie crust (like Oreo) is an absolute game-changer that leans into the PB&Chocolate vibe. Chef’s Insight: Store-bought is totally fine! We’re keeping things easy. But if you’re feeling ambitious, my homemade graham cracker crust (just crushed grahams, sugar, and melted butter, pressed and baked for 10 minutes) is next-level.
- 2 cups creamy peanut butter: This is the star, so use a brand you love! I go for a standard, no-stir creamy peanut butter for consistent texture and sweetness. Substitution Tip: For a more intense, grown-up peanut flavor, natural peanut butter works, but make sure it’s well-stirred and note that the filling might be a tad less sweet. I don’t recommend crunchy PB for the filling, as it can mess with that luxurious creamy texture.
- 8 oz cream cheese, softened: This is the secret weapon. It gives the pie structure and a wonderful tang that cuts through the richness of the peanut butter. Chef’s Hack: SOFTENED is the key word here. Leave it on the counter for a good hour before you start. If it’s cold, you’ll end up with lumpy filling, and we’re all about that smooth, silky vibe.
- 2 cups powdered sugar: Also called confectioner’s sugar. It sweetens and helps thicken the filling beautifully. Chef’s Insight: Sifting it is an extra step, but it prevents little lumps of sugar in your otherwise perfect filling.
- 3 cups heavy cream: Also labeled as heavy whipping cream. We’re whipping this into fluffy clouds to fold into our base. This is what gives the pie its incredible, light-as-air texture.
- 2 teaspoons cream of tartar (optional): This is my pro-stabilizer move. Cream of tartar helps the whipped cream hold its structure for days, preventing it from weeping or deflating. Highly recommended if you’re making this pie ahead of time!
- 4 tablespoons chopped roasted peanuts: For that essential CRUNCH. It provides a textural contrast and reinforces that roasted peanut flavor.
- ½ teaspoon flaky sea salt: Don’t you dare skip this! A sprinkle of a good salt like Maldon on top right before serving is what takes this pie from “great” to “I-need-the-recipe-NOW” status. It makes all the flavors pop.
- Optional twist: ½ cup mini chocolate chips or a drizzle of melted chocolate: This is the “Meld” in action. A little chocolate takes this over the top. Mini chips are great for a fun texture, while a artful drizzle looks gorgeous.
- Optional: 1 teaspoon vanilla extract: A splash of vanilla is like a flavor amplifier. It rounds out the sweetness and adds a warm, cozy depth. I always add it to my whipped cream.
Let’s Build Some Magic: Step-by-Step Instructions
Ready to make some magic? This process is simple, but a few chef-approved tricks will ensure your pie is absolutely perfect. Let’s do this.
Step 1: The Creamy Base
Grab your largest mixing bowl and beat together the 2 cups of peanut butter, the softened (I see you!) cream cheese, and the 2 cups of powdered sugar. Use an electric hand mixer or stand mixer fitted with the paddle attachment on medium speed. Beat it for a good 2-3 minutes, until it’s completely smooth, fluffy, and well-combined. Scrape down the sides of the bowl halfway through to make sure no cream cheese is hiding out un-mixed. You want this base to be lump-free!
Step 2: The Fluffy Clouds
Now, in a separate, clean, dry bowl, pour in your 3 cups of heavy cream. If you’re using the cream of tartar and vanilla extract, add them now. Using a whisk attachment on your mixer (clean those beaters!), start on low speed and gradually increase to high. Watch the magic happen as it goes from liquid to soft peaks to stiff peaks. You’ll know it’s ready when you lift the beaters out and the peaks of cream stand straight up without flopping over. Chef’s Hack: A cold bowl helps! I sometimes pop my metal mixing bowl in the freezer for 10 minutes before whipping. It whips faster and gets fluffier.
Step 3: The Gentle Fold
This is the most important step for keeping that airy texture. We’re not mixing; we’re folding. Add about one-third of your whipped cream to the peanut butter base. Use a spatula to gently cut through the middle and fold it over on itself, rotating the bowl as you go. This lightens the thick base. Now, add the remaining whipped cream and continue to fold gently until no white streaks remain. Be patient! You’ll be rewarded with a silky, cloud-like filling.
Step 4: The Grand Finale
Divide this gorgeous, fluffy filling evenly between your two waiting pie crusts. Smooth the tops with the back of a spoon or your spatula. Now, for the bling! Sprinkle the chopped peanuts over both pies, followed by that crucial flaky sea salt. If you’re going for the chocolate twist, now’s the time to sprinkle on the mini chips or drizzle with melted chocolate.
Step 5: The Test of Willpower (The Chill)
Carefully place your gorgeous pies in the refrigerator. You must let them chill for at least 4 hours, but honestly, overnight is even better. This isn’t just to make them cold; it’s crucial for the pie to set properly so you get clean, beautiful slices. I know it’s hard to wait, but trust me, it’s worth it.
How to Serve This Masterpiece
When it’s finally time to serve, take your pie out of the fridge just for a minute. For the cleanest slices, run a sharp knife under very hot water, wipe it dry, and then cut. The heat will glide right through the filling. Slide a pie server underneath and place a generous slice on a plate. I like to serve it straight up—it’s rich enough to stand on its own. But a little extra dollop of whipped cream and a single peanut on the side never hurt anybody! Serve it cold and watch the magic happen.
Make It Your Own: Recipe Variations
The fun doesn’t stop here! This recipe is a perfect canvas for your own creativity.
- Cookie Butter Swap: Replace one cup of the peanut butter with speculoos cookie butter for a warm, spiced flavor explosion.
- Chocolate Crust & Ganache: Use a chocolate cookie crust and top the finished pie with a layer of dark chocolate ganache before adding the peanuts and salt.
- PB&J Swirl: Before chilling, dollop a few spoonfuls of your favorite seedless raspberry or strawberry jam on top and use a knife to swirl it beautifully into the filling.
- Elvis Special: For the ultimate tribute, add sliced bananas on top of the crust before adding the filling, and then again on top as a garnish. Maybe even a drizzle of honey!
- Lighter Version: Use reduced-fat cream cheese and swap the heavy cream for a tub of light, extra-creamy whipped topping (like Cool Whip). Fold it in just the same!
Chef’s Notes: From My Kitchen to Yours
This recipe has evolved so much from my grandma’s original. I once tried to be fancy and used natural peanut butter without thinking, and the filling was a loose, oily mess. Lesson learned! I also learned the hard way that if your cream cheese isn’t soft, you’ll have little white specks throughout your filling. It still tastes good, but it’s not the smooth dream we’re after. My biggest kitchen story with this pie? I brought it to a potluck once and literally saw two people get into a friendly, mock-argument over who got the last slice. That’s when I knew I had to double the recipe forever. It’s a crowd-pleaser in the truest sense.
Your Questions, Answered: FAQs & Troubleshooting
Q: Can I make this pie ahead of time?
A: Absolutely! In fact, I highly recommend it. This pie needs that 4-hour chill to set, so making it the day before you need it is a perfect plan. Just keep it covered in the fridge. The stabilized whipped cream (thanks to the cream of tartar) will hold up beautifully for 2-3 days.
Q: My filling is too runny! What did I do wrong?
A: Don’t worry, we can troubleshoot! This usually happens for one of two reasons: 1) The whipped cream wasn’t whipped to stiff peaks, or 2) The natural oils in natural peanut butter can sometimes make the filling looser. The best fix is time. Pop it in the fridge and let it chill longer—often overnight will firm it right up. If it’s still too soft, it will still taste amazing as a mousse-like dessert served in bowls!
Q: Can I freeze this peanut butter pie?
A: You can! Wrap it tightly in a couple layers of plastic wrap and freeze for up to a month. The texture will be more like ice cream cake, which is honestly delicious. Thaw it in the refrigerator for a few hours before serving.
Q: I don’t have cream of tartar. Is the pie going to fall?
A: Not at all! The cream of tartar is my insurance policy for making-ahead. Without it, your whipped cream is still perfectly stable for a day or so. Just make sure you whip it to those nice, firm peaks. The cream cheese also helps the pie hold its shape.
Print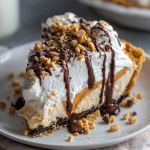
Double Peanut Butter Cream Pie
- Total Time: 4 hours 20 minutes
- Yield: 16 slices 1x
Description
This no-bake peanut butter pie is next-level creamy with a tangy cream cheese base, fluffy whipped topping, and just enough salty crunch to keep things interesting. We doubled the batch and added a chocolatey twist for more layers of indulgence—because one slice is never enough.
Ingredients
2 (9-inch) baked pie crusts (graham cracker or chocolate cookie crusts work beautifully too)
2 cups creamy peanut butter
8 oz cream cheese, softened
2 cups powdered sugar
3 cups heavy cream
2 teaspoons cream of tartar (optional, for stabilized whipped cream)
4 tablespoons chopped roasted peanuts
½ teaspoon flakey sea salt
Optional twist: ½ cup mini chocolate chips or a drizzle of melted chocolate for topping
Optional: 1 teaspoon vanilla extract for added flavor depth
Instructions
In a large mixing bowl, beat together peanut butter, cream cheese, and powdered sugar until smooth and fluffy.
In a separate bowl, whip the heavy cream (and cream of tartar if using) until stiff peaks form. Add vanilla extract if desired.
Gently fold the whipped cream into the peanut butter mixture until well combined and silky.
Divide the filling evenly between both prepared pie crusts.
Top each pie with chopped peanuts, a sprinkle of sea salt, and mini chocolate chips or a drizzle of chocolate if using.
Chill in the fridge for at least 4 hours or overnight for best texture.
Slice, serve cold, and enjoy the creamy, salty-sweet bliss.
- Prep Time: 20 minutes
- Chill Time: 4 hrs
Nutrition
- Calories: 420 / Slice
- Fat: 24g / Slice
- Carbohydrates: 30g / Slice
- Protein: 7g / Slice
Nutritional Info (Per Slice)
This is a treat, through and through! Here’s a rough estimate per slice (based on 16 slices total).
Calories: ~420 | Protein: 7g | Fat: 24g | Carbs: 30g
Final Thoughts
This Double Peanut Butter Cream Pie is everything I love about dessert—simple to make, impossible to resist, and guaranteed to spark that “just one more slice” feeling. With its silky peanut butter filling, fluffy whipped cream, and salty-sweet crunch on top, it’s the kind of recipe that makes people lean back in their chairs, sigh, and ask when you’ll be making it again.
The beauty here is in the balance: rich but not heavy, indulgent yet refreshing, decadent without needing an oven. And doubling the batch? That’s not just smart—it’s essential. One pie disappears too fast, and this way, you’ll always have another waiting in the fridge (or freezer).
So whether you’re sharing with friends, bringing dessert to a potluck, or just treating yourself on a Tuesday night, this pie is pure peanut butter bliss. Keep this recipe in your back pocket—it’s a no-fail, no-bake, all-smiles kind of dessert.


