Shark Snack Cups — The Fun, Bite-Sized Dessert (or Savory Party Twist!)
Introduction
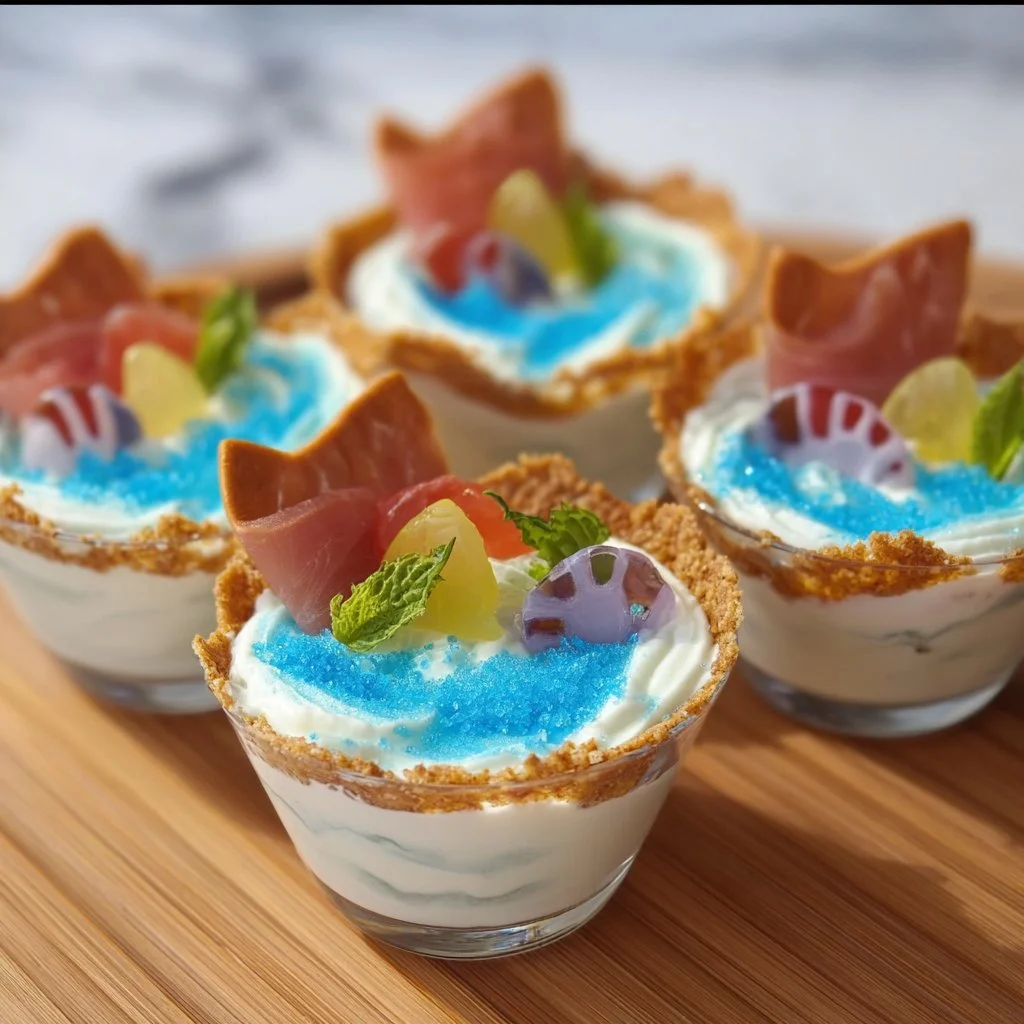
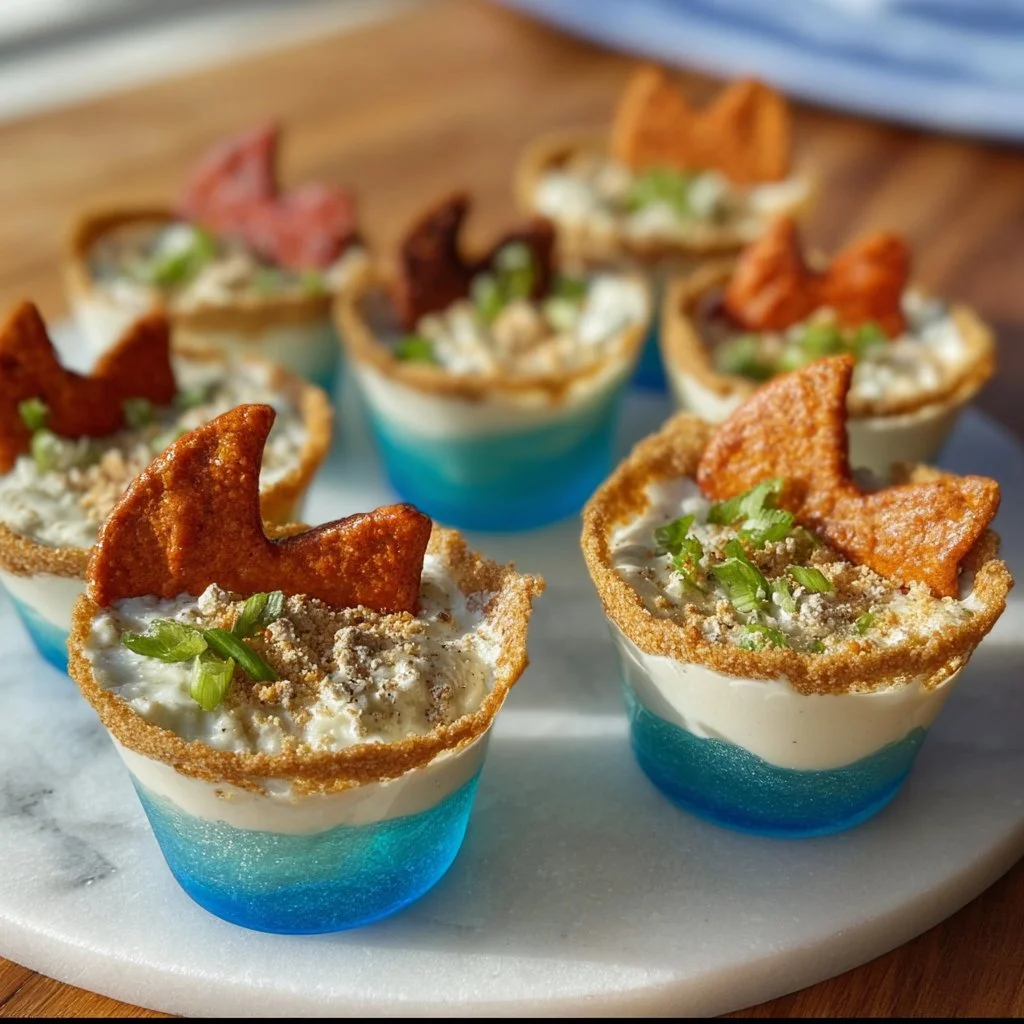
Hey—Jackson Walker here, the guy behind Food Meld. If you love playful, slightly cheeky recipes that make people smile (and reach for seconds), these Shark Snack Cups are going to be your next party flex. Think layered blue “ocean” gelatin, a cloud of whipped cream waves, crunchy “sand” made from crushed cookies, and a dramatic shark fin surfacing just in time for the big splash. They’re adorable, simple to assemble, and perfect for birthdays, summer barbecues, or any time you want to introduce a little seaside sass into dessert time.
I love stuff that’s easy to scale—whether you’re making a dozen for a kiddo party or a tray for casual guests—so these come together fast and look like you spent way more time than you did. They’re also endlessly customizable: swap in a savory version for grown-up hors d’oeuvres, add fresh berries for brightness, or go full sparkle with edible glitter and candy sharks. If you’ve enjoyed any of my other make-ahead snack ideas, you’ll find the same vibe here—playful, fuss-free, and packed with flavor. For more easy make-ahead inspiration that saves you time (and keeps you looking like a kitchen rockstar), check out my take on a popular frozen snack for busy mornings: make-ahead frozen yogurt granola cups.
This post will walk you through everything: a little memory about how this recipe came to be, a full ingredient breakdown with my chef tips, step-by-step assembly directions, serving ideas, some creative variations (including a savory spin that’s shockingly good), and answers to the questions I get most from readers. Ready to make something unforgettable? Grab your mini cups and let’s dive in.
Personal Story
I’ll never forget the first time I made a batch of shark-themed treats. It was a sweltering summer pool party when my nephew decided his cake needed fins. I tried staying “classy” with a plain sheet cake, but five minutes of toddler brainstorming and a plastic shark later, I was inspired. I grabbed some blue Jell-O, whipped cream, and crushed chocolate cookies for the sand—and suddenly adults were getting just as excited as the kids. The best part? Because they were individual cups, everyone could grab one and wander around without the chaos of cutting slices or balancing plates. The idea stuck with me: handheld desserts are party heroes. Over time I tweaked the original: swapping store-bought gummy sharks for chocolate-dipped graham cracker fins, adding a stabilized whipped topping so the waves held up in heat, and testing a savory version with cream cheese, smoked salmon, and dill for grown-up gatherings. Little experiments like that—what if I tried this?—are how Food Meld recipes get their personality. These Shark Snack Cups are the result of a few poolside “what-ifs” and a lot of tasting.
Ingredients
- Mini clear plastic or paper cups (12–16): I like 4–6 oz cups—small, single-serve, and perfect for layering. Use bigger cups for taller layers. Reusable glassware works too for a slightly fancier presentation.
- Blue gelatin mix (or blue food coloring + clear gelatin) (1 package): Classic blue Jell-O is easiest. If you prefer a custom shade, dissolve unflavored gelatin in water and tint with a few drops of blue food coloring until you get your desired ocean hue.
- Whipped cream or stabilized whipped topping (about 2 cups): Stabilized whipped cream (use a bit of cream cheese or gelatin) will hold up better outdoors; aerosol whipped cream works in a pinch but can deflate faster.
- Crushed chocolate cookies or graham crackers (1–1.5 cups): Oreo-style cookies give a dark-sand look; graham crackers are lighter and a bit more neutral. Pulse in a food processor for an even crumb.
- Graham crackers or vanilla wafers for shark fins (12–16 large pieces): Triangular-shaped pieces make perfect fins. You can cut graham crackers into triangles or use broken vanilla wafers for a lighter finish.
- Blue candy melts or white chocolate + blue food coloring (optional) (4–6 oz): Melt and dip your cracker fins to make them waterproof and more dramatic. Candy melts are mess-free; white chocolate needs gentle tempering to avoid seizing when you add color.
- Mini gummy sharks or fish candies (optional) (12–24): Fun, chewy additions. Use sparingly—two per cup is usually plenty.
- Fresh berries (optional) (½ cup): Blueberries or raspberries add fresh flavor and color contrast—especially nice in spring and summer.
- Sprinkles or edible glitter (optional): For extra whimsy—perfect for birthday parties or themed events.
- Optional savory twist ingredients: cream cheese, smoked salmon, cucumbers, dill: Swap the sweet layers for savory cream cheese and crushed crackers, top with smoked salmon and a cucumber ribbon, and insert a cracker “fin” for a grown-up appetizer.
Step-by-Step Instructions
- Prepare the gelatin
- Follow the package instructions for the blue gelatin mix: boil water, stir in powder until dissolved, add cold water, and let it cool slightly.
- Tip: Chill the gelatin in the fridge for 10–15 minutes until it’s warm but not starting to set. This helps protect whipped cream and other toppings when you layer. If you’re using unflavored gelatin and blue food coloring, bloom the gelatin in cold water first, then dissolve over low heat before tinting.
- Make the “sand” and fins
- While the gelatin cools, pulse your chocolate cookies or graham crackers in a food processor until you get fine crumbs. Transfer to a bowl.
- Break or cut graham crackers into large triangular fins. If you want coated fins, melt blue candy melts (or white chocolate with food coloring) in a microwave-safe bowl at 20-second intervals, stirring between until smooth. Dip each triangle about halfway and set on parchment to harden.
- Tip: If your candy melts thicken, add a teaspoon of coconut oil to loosen the mixture. For white chocolate, warm gently and be patient—don’t overheat.
- Layer the base
- Spoon about 1–2 tablespoons of crushed cookies into the bottom of each mini cup, making an even base.
- Chef hack: Use the back of a spoon to press the crumbs down so they form a solid base that supports the gelatin layer.
- Add the blue ocean
- Pour or spoon a shallow layer of slightly-cooled blue gelatin over the crumb base—enough to create a visible ocean layer but leaving room for whipped waves. Chill the cups in the fridge for 20–30 minutes, or until the gelatin is set to the touch.
- Tip: Pour slowly and close to the surface to avoid disturbing the crumbs. If you’re making multiple layers, set each layer before adding the next to keep clean lines.
- Whip up the waves
- Whip cream to medium peaks or use stabilized whipped topping. Spoon or pipe about 1–2 tablespoons of whipped cream over the set gelatin to mimic foamy waves.
- Tip: If you want sturdy peaks that hold up in warm weather, gently fold in a teaspoon of gelatin (bloomed and dissolved) into your whipped cream.
- Add the finishings
- Sprinkle more crumbs around the edge of the whipped cream to make “sand” along the shoreline. Add a graham cracker fin, inserting it at a jaunty angle to look like a dorsal fin slicing the surface.
- Place a gummy shark or fresh berries for extra personality. Add sprinkles or edible glitter for the kids.
- Hack: Use tweezers for precise placement of gummies and sprinkles—great for a neat, professional look.
- Chill and serve
- Let the assembled cups chill for at least 30 minutes so flavors meld and the whipped topping sets a bit. Keep chilled until serving time; if you’re transporting them, pack them in a shallow cooler to avoid sloshing.
- Tip: If you’re prepping several hours ahead, wait to add delicate decorations (berry, sprinkles, gummy sharks) until 15–30 minutes before serving so they stay fresh.
Serving Suggestions
Presentation is everything with these Shark Snack Cups. Arrange them on a large tray lined with blue tissue or a nautical-themed napkin for instant charm. Cluster a few on a bed of crushed graham crackers or coconut flakes to look like a sandy beach—use extra gummy sharks scattered around for fun. If you’re serving at a kid’s party, stick a small paper umbrella in a few cups or add a laminated shark tooth name tag to each cup for seating.
For adult gatherings or a more refined look, swap bright gummy sharks for chocolate-dipped fins only, and serve on a sleek white platter with lemon wedges and a bowl of mixed berries. You can also present them as part of a dessert bar with scoopable options—mini spoons nearby are a must so guests can dive right in.
Portion tips: these 4–6 oz mini cups are perfectly bite-sized; plan for 1–2 per person as part of a multi-dessert spread, or 2–3 per person for a dessert-centric event. If making the savory version, plate them on a chilled tray with cucumber rounds and capers for garnish.
Recipe Variations
- Tropical Shark Cups
- Swap blue gelatin for pineapple or lemon-flavored clear gelatin tinted light blue. Layer with crushed vanilla wafers and top with toasted coconut flakes and a maraschino cherry. Add small pineapple chunks for a bright, beachy spin.
- Grown-Up Boozy Ocean
- Add a tablespoon of coconut rum or blue curaçao (optional) to the cooled gelatin mixture for an adult-only twist. Keep quantities small so the gelatin still sets. Top with a lime zest sprinkle for balance.
- Savory Shark Bites (Appetizer)
- Replace sweet layers with a base of crushed savory crackers, a layer of whipped herbed cream cheese, and top with smoked salmon ribbons, a dill sprig, and a cucumber dent to mimic a wave. Insert a toasted baguette triangle instead of a graham cracker fin. This one is a crowd-pleasing surprise at cocktail parties.
- Allergy-Friendly & Vegan
- Use agar-agar (plant-based gelling agent) with blue natural food dye for vegan gelatin, coconut whipped cream for topping, and gluten-free cookies for the sand. Check your candy choices for gelatin content if using gummies.
- Berry Ocean
- Add a thin layer of mixed berries between the gelatin and whipped cream for color, texture, and a burst of freshness. Blueberries double as little islands and flavor bombs.
Chef’s Notes
I love recipes that invite experimentation, and Shark Snack Cups are perfect for that. Over the years I’ve learned a few things: first, always cool gelatin slightly before pouring over delicate layers—hot liquid melts the whipped cream faster than you think. Second, stabilized whipped cream is a game changer for outdoor events. Third, the cracker fin idea started because gummy sharks wilt in heat; a dipped cracker fin stays crunchy, looks dramatic, and gives you a nice chocolate-salty contrast.
A funny thing: the first time I made a bunch for a summer party, I underestimated how many kids would want the gummy sharks. We went through a bag per dozen cups! Now I keep extras on standby and offer a topping station so folks can personalize their cups. This recipe keeps evolving—every party teaches me a tweak or two. If something doesn’t hold up in the heat or a flavor falls flat, I rework it until it earns the Food Meld stamp of approval: simple, delicious, and joyful.
FAQs and Troubleshooting
Q: My gelatin set too fast or didn’t set at all—what happened?
- A: If gelatin sets too fast, it might be that your refrigerator is too cold or your gelatin concentrated. If it didn’t set, either the gelatin wasn’t fully dissolved/activated or you added alcohol/oils in large amounts that interfere. Always bloom unflavored gelatin in cold water first and fully dissolve over low heat before adding any liquids.
Q: How do I keep whipped cream from deflating on hot days?
- A: Stabilize it. Fold in a little dissolved gelatin or use cream cheese or mascarpone to add body. Also, keep cups chilled until the last possible second—store in a cooler if you’re outdoors.
Q: Can I make these ahead of time?
- A: Yes—assemble up through the gelatin layer a day ahead, then add whipped cream, fragile decorations, and cracker fins a few hours before serving. This prevents sogginess and keeps decorations fresh.
Q: My cracker fins got soggy—how do I prevent that?
- A: Dip the portion of the fin that will be exposed into candy melts or melted chocolate and let it harden before inserting. That creates a moisture barrier and makes the fin more durable.
Nutritional Info
These Shark Snack Cups are party treats, so they’re best enjoyed in moderation. A rough estimate per mini cup (sweet version) is:
- Calories: ~180–260 kcal depending on cookie choice and amount of whipped topping
- Fat: 8–14 g (from whipped cream and chocolate/candy melts)
- Carbohydrates: 22–35 g (from gelatin, cookies, and any added candies)
- Protein: 1–3 g (minimal unless you add cream cheese)
- Sugar: 12–20 g (varies with candy and gelatin)
If you’re reducing calories or sugar:
- Use sugar-free gelatin, a light stabilized whipped topping (or a smaller portion), and swap crushed graham crackers for a lighter crumble or toasted oats. For a protein bump, try a layer of Greek yogurt (sweetened lightly) under the whipped cream—think of it as a tangy, creamy mid-layer that adds body and nutrition.
For the savory version, nutrition will shift: expect higher protein and fat from cream cheese and smoked salmon, and lower sugars. If you need precise numbers for dietary reasons, I recommend plugging your exact brands and quantities into a nutrition calculator to get accurate per-serving stats.
Conclusion
If you’re planning a party, want a playful dessert for family night, or need a clever savory canapé, Shark Snack Cups are the kind of recipe everyone remembers. They’re quick to make, customizable, and have that delightful visual punch that sparks conversation. For more party-perfect shark-themed inspiration and kids’ dessert ideas that pair beautifully with these cups, check out this fun roundup of shark snack ideas at Shark Snack Cups – Shark Birthday Party Food for Kids. Give these a try, tweak them your way, and let me know how you made them your own—I love hearing about creative spins from the Food Meld community. Let’s keep cooking awesome things together.
Print
Shark Snack Cups
- Total Time: 45 minutes
- Yield: 12 servings
- Diet: Vegetarian
Description
Fun and playful layered dessert cups featuring blue gelatin, whipped cream waves, and cookie ‘sand’ topped with shark fins.
Ingredients
- Mini clear plastic or paper cups (12–16)
- Blue gelatin mix (1 package)
- Whipped cream or stabilized whipped topping (about 2 cups)
- Crushed chocolate cookies or graham crackers (1–1.5 cups)
- Graham crackers or vanilla wafers for shark fins (12–16 large pieces)
- Blue candy melts or white chocolate + blue food coloring (optional) (4–6 oz)
- Mini gummy sharks or fish candies (optional) (12–24)
- Fresh berries (optional) (½ cup)
- Sprinkles or edible glitter (optional)
- Optional savory twist ingredients: cream cheese, smoked salmon, cucumbers, dill
Instructions
- Prepare the gelatin by following the package instructions.
- Make the “sand” and fins using crushed cookies and cut graham crackers.
- Layer the base with crushed cookies in the bottom of each mini cup.
- Add a layer of blue gelatin over the cookie base.
- Whip cream to medium peaks and layer over the gelatin to mimic waves.
- Add sprinkles and fins, garnishing with gummy sharks or fresh berries.
- Chill the cups in the fridge for at least 30 minutes before serving.
Notes
Use stabilized whipped cream for outdoor events and consider personalizing with toppings.
- Prep Time: 15 minutes
- Cook Time: 30 minutes
- Category: Dessert
- Method: Chilling
- Cuisine: American
Nutrition
- Serving Size: 1 cup
- Calories: 220
- Sugar: 18g
- Sodium: 150mg
- Fat: 10g
- Saturated Fat: 5g
- Unsaturated Fat: 3g
- Trans Fat: 0g
- Carbohydrates: 30g
- Fiber: 1g
- Protein: 2g
- Cholesterol: 15mg
Keywords: party dessert, shark cups, playful dessert, summer treats, kid-friendly snacks