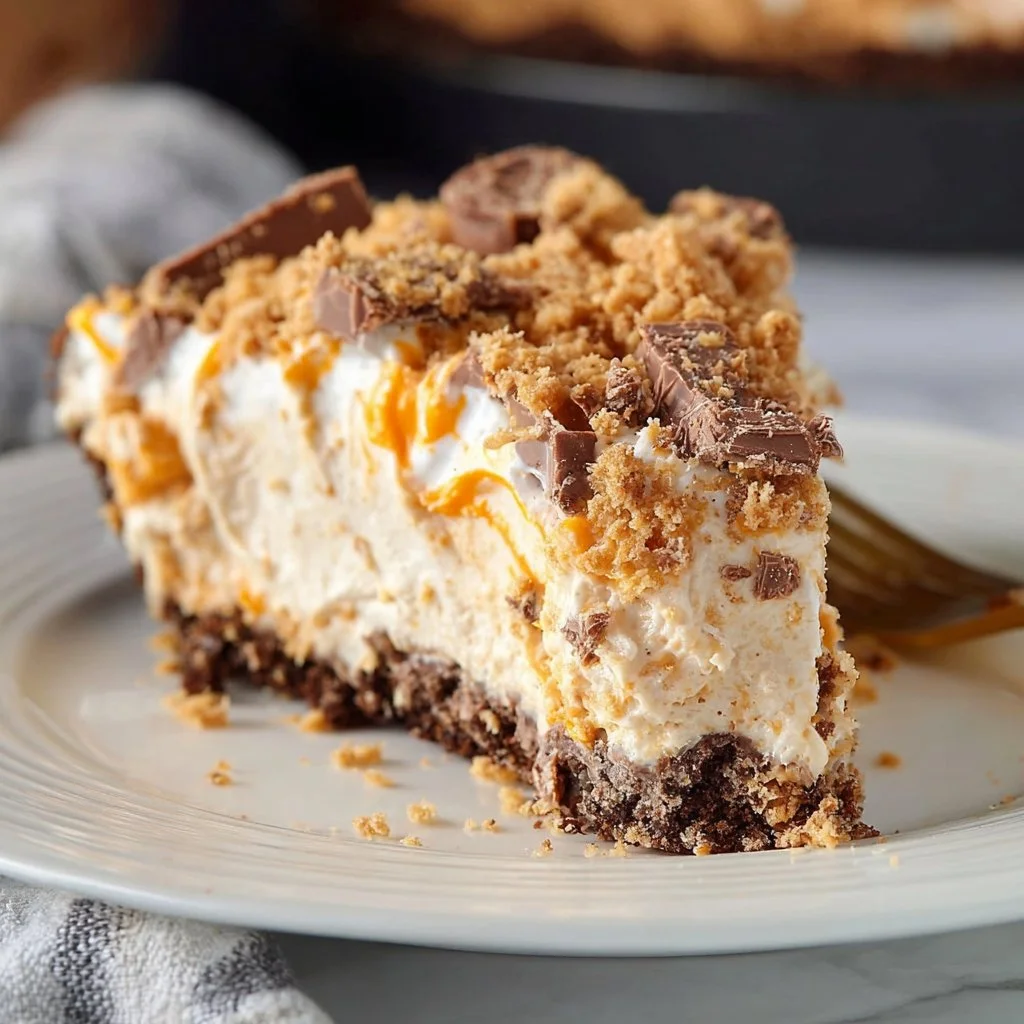
Butterfinger Pie: A Decadent Delight for Every Sweet Tooth
Hey there, fellow food lovers! Jackson Walker here, and today I’m thrilled to share with you one of my all-time favorite desserts—Butterfinger Pie. This delightful treat is the perfect blend of creamy, crunchy, and absolutely indulgent, making it a hit at gatherings, holiday celebrations, or just a sweet way to cap off a weeknight dinner.
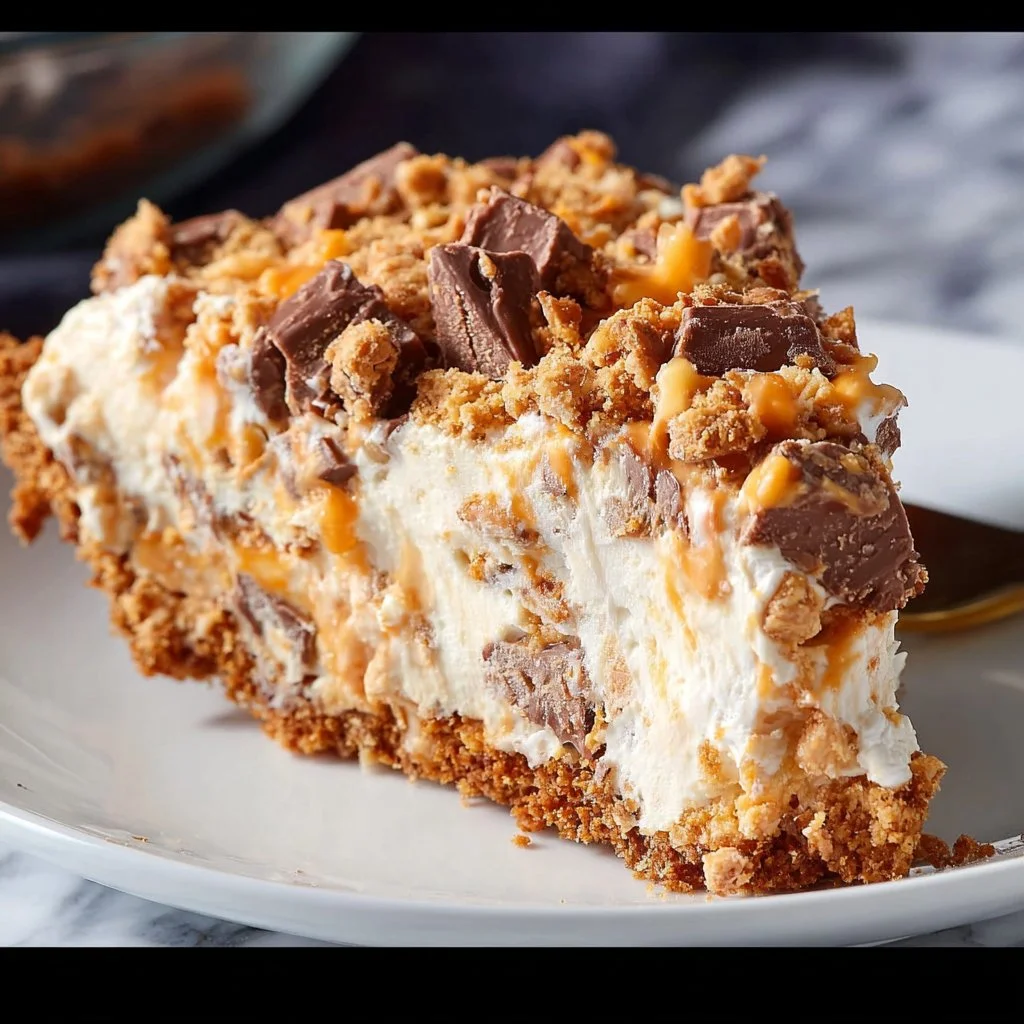
What makes this dessert so darn good? Well, for starters, it’s loaded with luscious cream cheese and crushed Butterfinger candies that add a satisfying crunch alongside a silky-smooth texture. And let’s not forget that graham cracker crust, which provides the ideal base for all that rich, decadent goodness. When you drizzle chocolate sauce on top, it’s like the cherry on the sundae!
Whether you’re a seasoned baker or just dipping your toes in the world of desserts, this Butterfinger Pie is super easy to whip up. And the best part? You don’t even have to turn on the oven! This no-bake pie is all about convenience and flavor, so you can spend less time stressing in the kitchen and more time enjoying the company of your loved ones.
So grab your aprons and bring on the excitement because we’re about to dive into a recipe that will have everyone at the table asking for seconds—and the recipe! Trust me, nothing beats the joy of serving up a homemade dessert that’s guaranteed to impress. Let’s get cooking!
Personal Story
Growing up in the South, desserts were the highlight of any gathering. I remember my grandma’s kitchen bustling with activity during family holidays, the warm aroma of baked goods filling the air. One year, she decided to make Butterfinger Pie for Thanksgiving, swapping out the traditional pumpkin pie that usually graced our table. I was skeptical at first—how could anything compete with her famous pumpkin pie? But the moment I tasted that creamy filling, topped with crushed Butterfinger bars, my skepticism melted away.
The satisfying crunch mixed with the sweetness of chocolate became an instant favorite. It wasn’t just a dessert; it was a moment of joy, laughter, and love. Grandma shared her secret recipe with me, and since that day, I’ve made it a tradition to serve Butterfinger Pie at every family gathering. It evokes nostalgia and warmth, reminding me of those sweet times in her cozy kitchen. Now, I’m excited to pass it on to you, hoping it creates as many beautiful memories for you and your loved ones as it has for me.
Ingredients
Let’s gather everything we need to make this sensational Butterfinger Pie! Here’s your shopping list:
- 1 pre-made graham cracker crust
- Tip: Store-bought crust is quick and easy, but if you’re feeling adventurous, you can make your own by mixing crushed graham crackers with melted butter.
- 8 oz cream cheese, softened
- Chef Insight: Softening cream cheese is key to a smooth filling. Leave it out at room temperature for 30 minutes or microwave it for about 10 seconds.
- 1 cup powdered sugar
- Substitution Tip: For a less sweet filling, you can reduce the sugar to 3/4 cup without compromising too much on texture.
- 1 cup whipped topping
- Substitution Tip: If you prefer homemade, you can whip heavy cream with a little powdered sugar until soft peaks form.
- 1 cup Butterfinger candy bars, crushed
- Chef Insight: Use a kitchen mallet or food processor to crush those Butterfingers, but don’t pulverize them into dust—leave some chunks for texture!
- 1/2 cup chocolate sauce (for drizzling)
- Tip: You can use store-bought chocolate sauce or melt some chocolate chips with a bit of cream for a homemade version.
Step-by-Step Instructions
Ready to bring this masterpiece to life? Let’s roll up our sleeves and get started!
Step 1: Prepare Your Crust
First things first, grab that pre-made graham cracker crust and place it on a serving plate. If you’re using a homemade crust, let it cool completely before proceeding. A well-chilled crust will hold its shape better once filled.
Step 2: Make the Creamy Filling
In a mixing bowl, combine the softened cream cheese and powdered sugar. Using a hand mixer, whip them together until you achieve a smooth and creamy batter. This step is crucial because it ensures there are no lumps in your filling.
Step 3: Fold in the Whipped Topping
Now, gently fold in the whipped topping using a spatula. Be careful not to deflate the whipped cream; we want to keep that light and airy texture. This is where the magic happens, transforming the mixture into a cloud-like filling!
Step 4: Add the Butterfinger
Time to stir in the crushed Butterfinger bars! Fold them into the cream mixture until they’re evenly distributed. You’ll want a good balance of candy and cream in each slice, so don’t skimp on the stirring.
Step 5: Fill the Crust
Spoon the luscious filling into your prepared graham cracker crust. Use a spatula to spread it evenly, smoothing the top for a beautiful presentation. Once it looks good, cover the pie with plastic wrap and refrigerate it for at least 4 hours, or overnight if possible. This helps it set properly.
Step 6: Drizzle with Chocolate Sauce
When it’s time to serve, pull your pie out of the fridge, and drizzle warm chocolate sauce over the top. You can get creative with your drizzle—go for a rustic style, or use a piping bag for more precision.
Step 7: Slice and Serve
Using a sharp knife, slice the pie into wedges. Each slice should reveal that creamy filling speckled with Butterfinger goodness. Serve cold for a refreshing treat, and don’t hesitate to add extra chocolate sauce or whipped cream on the side!
Serving Suggestions
Presentation counts, especially when it comes to dessert! To plate your Butterfinger Pie, consider serving it on a colorful platter or individual dessert plates. For an elegant touch, you can add fresh berries or a sprig of mint on the side. Not only does it add visual appeal but it also complements the sweetness of the pie. If you’re feeling extra indulgent, serve with a scoop of vanilla ice cream on the side—trust me, it’ll take this dessert over the top!
If you really want to wow your guests, consider layering the pie in individual jars instead of a traditional pie pan. You can alternate layers of the creamy filling and crushed Butterfingers for a fun twist. Plus, it’s a great way to control portions and add a playful presentation.
Recipe Variations
Like to mix things up? Here are a few creative twists to elevate your Butterfinger Pie!
- Peanut Butter Bliss: Add 1/2 cup of creamy peanut butter to the cream cheese mixture before folding in the whipped topping. This will give you a delightful peanut butter-chocolate combo!
- Minty Fresh: Toss in a few drops of peppermint extract to the filling for a refreshing mint Butterfinger Pie. Top it off with crushed Andes mints instead of Butterfinger for a fun twist!
- Chocolate Chip Crunch: Want more texture? Fold in 1/2 cup of mini chocolate chips along with the Butterfinger pieces. It will add another layer of chocolatey goodness!
- Nutty Delight: Incorporate chopped nuts into the mixture or sprinkle them on top as a garnish. Walnuts or pecans would add a lovely crunch and complement the chocolate flavor perfectly.
- Coconut Dream: Fold in some sweetened shredded coconut for a tropical twist. You could also switch the chocolate drizzle with a coconut cream drizzle for a unique flavor profile.
Chef’s Notes
Ah, the evolution of this recipe! Over the years, I’ve switched up my process and made it my own. The first few attempts were definitely a learning curve—like the time I accidentally used salt instead of sugar (you can imagine how that turned out!). After a few more batches, I nailed the proportions and found the perfect balance of ingredients.
This Butterfinger Pie is not only a family favorite but has become a go-to dessert for gatherings with friends. No matter how busy life gets, whipping up this pie remains a joy. It never fails to spark conversations and laughter, and there’s something incredibly satisfying about sharing a recipe that brings people together.
FAQs and Troubleshooting
Q: Can I make this pie ahead of time?
Absolutely! Butterfinger Pie is a perfect make-ahead dessert. Just prepare it the day before you plan to serve it, and it’ll be even more flavorful after chilling overnight.
Q: What if I don’t like Butterfinger?
No worries! You can easily swap in another candy bar of your choice. Snickers, Milky Way, or even Reese’s cups would work wonderfully!
Q: How do I prevent my pie from getting soggy?
Using a pre-made graham cracker crust helps, but ensure that your filling is firm enough before refrigerating. Chilling it for a good length of time will help prevent any sogginess.
Q: How do I store leftovers?
If you have any leftovers (which is rare, trust me!), simply cover the pie with plastic wrap and store it in the fridge. It should be good for about 3-4 days.
Nutritional Info
If you’re keeping an eye on your nutritional intake, here’s a rough breakdown per slice (based on 8 servings):
- Calories: 320
- Protein: 4g
- Fat: 20g
- Carbohydrates: 34g
- Sugars: 18g
(Note: Nutritional values will vary based on specific brands and ingredients used.)
Keep in mind, dessert is meant to be enjoyed, so don’t stress too much about the numbers!
Final Thoughts
There you have it, my friends—a delicious, no-bake Butterfinger Pie that’s sure to impress at any gathering. This recipe embodies my philosophy of making cooking fun and flavorful. Whether it’s a holiday celebration, a birthday party, or simply a sweet treat for your family on a Tuesday night, this pie is a showstopper.
I hope you enjoy making and sharing this recipe as much as I do. Remember, cooking is all about experimenting and having fun, so feel free to make it your own! Be sure to tag me on social media if you try it out; I can’t wait to see your beautiful creations!
Happy cooking and even happier indulging! Until next time, let’s keep mixing it up in the kitchen!
Print
Butterfinger Pie
- Total Time: 240 minutes
- Yield: 8 servings 1x
- Diet: Vegetarian
Description
A decadent no-bake Butterfinger Pie that features a creamy filling loaded with crushed Butterfinger candies, all sitting in a graham cracker crust.
Ingredients
- 1 pre-made graham cracker crust
- 8 oz cream cheese, softened
- 1 cup powdered sugar
- 1 cup whipped topping
- 1 cup Butterfinger candy bars, crushed
- 1/2 cup chocolate sauce (for drizzling)
Instructions
- Prepare your crust by placing it on a serving plate.
- Combine the softened cream cheese and powdered sugar in a mixing bowl.
- Whip them together until you achieve a smooth and creamy batter.
- Fold in the whipped topping gently with a spatula.
- Add the crushed Butterfinger bars and stir until evenly distributed.
- Spoon the filling into your prepared graham cracker crust, smoothing the top.
- Refrigerate for at least 4 hours, or overnight if possible.
- Drizzle warm chocolate sauce over the top before serving.
- Slice into wedges and serve cold.
Notes
This pie is perfect for make-ahead preparation. Serve with berries or a sprig of mint for extra flair.
- Prep Time: 15 minutes
- Cook Time: 0 minutes
- Category: Dessert
- Method: No-Bake
- Cuisine: American
Nutrition
- Serving Size: 1 slice
- Calories: 320
- Sugar: 18g
- Sodium: 200mg
- Fat: 20g
- Saturated Fat: 10g
- Unsaturated Fat: 8g
- Trans Fat: 0g
- Carbohydrates: 34g
- Fiber: 1g
- Protein: 4g
- Cholesterol: 30mg
Keywords: Butterfinger, pie, dessert, no-bake