Spring Blossom Cookies: A Sweet Celebration of the Season
Spring is here, and you know what that means: flowers are blooming, the sun is shining, and it’s the perfect time for some delicious cookies that capture the essence of the season! 🌼 Enter my Spring Blossom Cookies — a delightful treat that’s as whimsical as a day spent lounging under a cherry blossom tree. Whether you’re planning a backyard picnic, an afternoon tea party, or simply treating yourself after a long week, these cookies are the answer to all your springtime cravings.
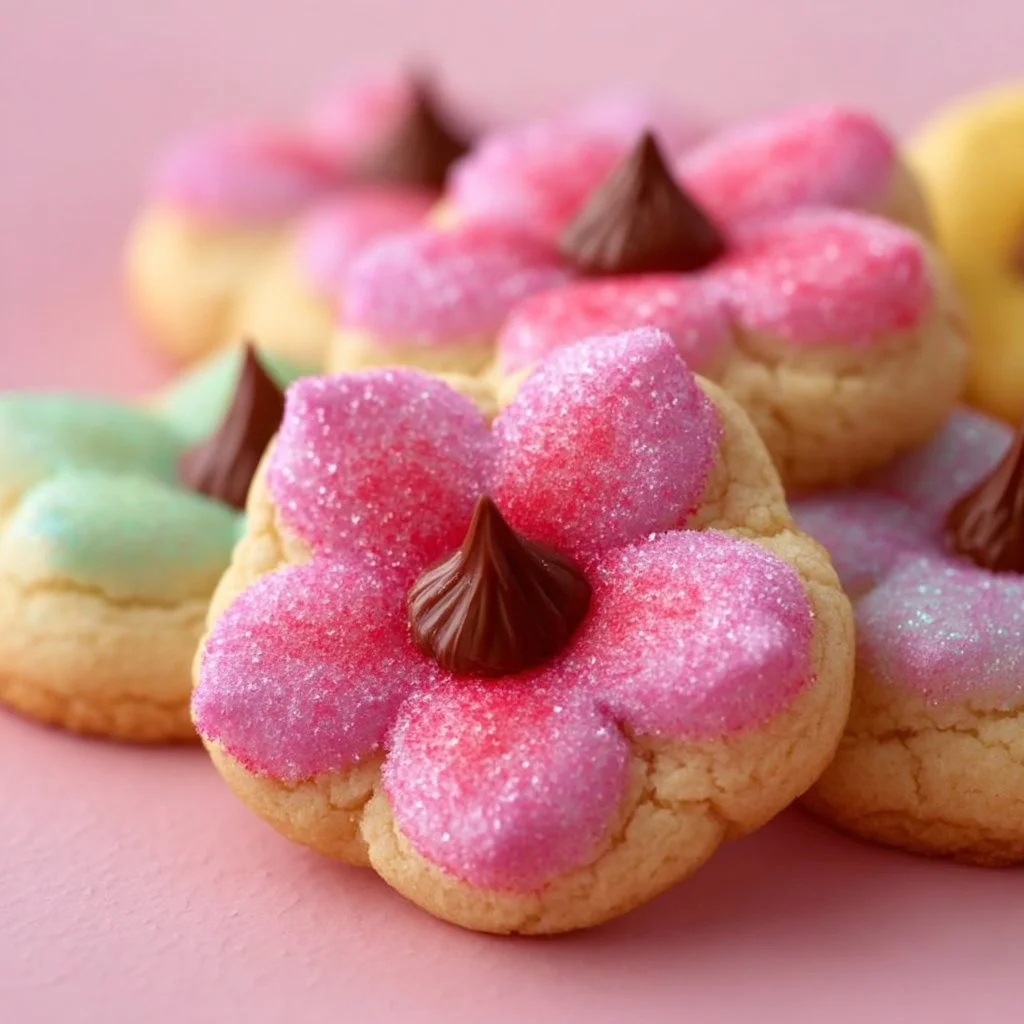
Just picture this: the soft, buttery sweetness of the cookie melting in your mouth, paired with the burst of fruity flavor from the filling. And let’s not forget the fun, decorative aspect of these cookies! With a simple icing drizzle and some edible flowers or sprinkles, your cookie platter will be the showstopper of any gathering.
But before we dive into the recipe, let me share a little story about how these cookies came to be. With a dash of nostalgia and a sprinkle of love, I invite you to join me in the kitchen as we whip up a batch of Spring Blossom Cookies that are sure to elicit smiles from everyone around you. Grab your apron, let’s get baking, and make your kitchen smell like a springtime garden!
Personal Story
Growing up, springtime meant more than just warmer weather and blooming flowers for my family; it was also a time for baking marathons! I vividly remember rushing home from school, with the scent of cookies wafting through the air as I entered our small kitchen. My grandma, bless her heart, could whip up the most magical treats with just a few simple ingredients. But it was her flower-shaped cookies that held a special place in my heart. We would spend the afternoon decorating them together with colorful icing and sprinkles, transforming each cookie into a unique masterpiece.
One day, in an effort to infuse our baking routine with some fresh creativity, my grandma and I decided to incorporate edible flower petals into our classic cookie dough. The idea was to celebrate the arrival of spring in both flavor and aesthetics. And oh boy, did we hit the jackpot! The gentle floral notes mixed with the sweetness of the dough made for a delightful surprise. Each cookie was a little adventure—awaiting excitement and the joy of springtime within every bite! Fast forward to today, and that spirit of nostalgic baking now lives on in my Spring Blossom Cookies. They remind me of those cherished afternoons, and I can’t wait for you to create your own spring memories with them!
Ingredients
Before we roll up our sleeves, let’s gather our ingredients for these delightful Spring Blossom Cookies! Here’s what you’ll need:
-
2 ½ cups all-purpose flour
- This is the base of our cookies! If gluten-free is your jam, feel free to swap this out for a 1:1 gluten-free baking blend.
-
1 teaspoon baking powder
- Baking powder is your ticket to fluffy, lift-off cookies! Just make sure it’s fresh; old baking powder can lead to flat cookies.
-
½ teaspoon baking soda
- A little extra lift from baking soda creates that beautiful golden color. Interested in a richer flavor? Consider using a blend of baking soda and brown sugar—a classic cookie hack!
-
½ teaspoon salt
- It’s amazing how salt enhances the sweetness! Just a pinch will do, but you can add a touch more if you’re feeling adventurous.
-
1 cup unsalted butter, softened
- Softened butter is key for creamy, dreamy cookies. For a dairy-free option, coconut oil or vegan butter can step in perfectly.
-
1 cup granulated sugar
- Sweeten the deal! For a deeper flavor, you could replace half of this with brown sugar; it’s a baker’s secret weapon for deliciousness.
-
2 large eggs
- Eggs add texture and help bind everything together. For a vegan alternative, you can use flax eggs (1 tablespoon flaxseed meal + 2.5 tablespoons water = 1 egg).
-
2 teaspoons vanilla extract
- Vanilla is the magic touch! Opt for pure vanilla extract for a richer flavor, but imitation will work, too, in a pinch.
-
½ cup edible flower petals
- Think violets, nasturtiums, or even dandelions! They add a gorgeous touch and a hint of floral flavor. Check your local farmer’s market or get creative with herbs like lavender!
-
Yogurt or whipped cream cheese for icing (optional)
- For a light and lovely finish, you can mix yogurt with powdered sugar or whip some cream cheese with a dash of milk and vanilla. You could even use ready-made icing to save time.
Step-by-Step Instructions
Now that we’ve got everything prepped let’s get baking! Follow these detailed steps to make your Spring Blossom Cookies.
Step 1: Preheat Your Oven
Preheat your oven to 350°F (175°C). This ensures your cookies bake evenly and gets that cookie magic started as soon as the dough hits the pan!
Step 2: Prepare Your Baking Sheets
Line two baking sheets with parchment paper. This prevents the cookies from sticking and makes cleanup a breeze—my favorite kind of kitchen hack!
Step 3: Whisk Your Dry Ingredients
In a medium bowl, whisk together the flour, baking powder, baking soda, and salt. This step is crucial because it helps to evenly distribute the leavening agents throughout the flour. Make sure you use a fine-mesh sieve if your flour has any lumps!
Step 4: Beat the Butter and Sugars
In a large bowl, beat together the softened butter and granulated sugar using a hand mixer or stand mixer until the mixture is creamy and light. This step usually takes about 2-3 minutes. The more air you incorporate now, the fluffier your cookies will be!
Step 5: Add the Eggs and Vanilla
Add the eggs, one at a time, beating well after each addition. Then, mix in your vanilla extract. Don’t be shy about scraping down the sides of the bowl to make sure everything is well combined. A well-mixed batter equals better cookies!
Step 6: Mix in the Dry Ingredients
Gradually add your dry ingredients to the butter mixture, mixing until just combined. Overmixing can lead to tougher cookies, and we don’t want that!
Step 7: Fold in the Edible Flower Petals
Now, gently fold in the edible flower petals. This is where the cookie dough gets its springtime charm! I always love the surprise of spotting those beautiful petals within the cookie. It adds an artistic touch and a delightful flavor.
Step 8: Scoop the Dough
Using a cookie scoop or a tablespoon, drop rounded tablespoons of dough onto the prepared baking sheets, leaving about 2 inches between each cookie. If you want larger cookies, you can certainly go bigger—just note that baking time may need to be adjusted!
Step 9: Bake the Cookies
Bake in the preheated oven for 10-12 minutes or until the edges turn lightly golden. The centers may look a little underbaked—that’s okay! They’ll continue to cook as they cool.
Step 10: Cool and Decorate
Once baked, remove the cookies from the oven and let them cool on a baking rack for 5 minutes. This is the perfect time to whip up your icing if you’re using it! Once completely cooled, decorate your cookies with a light drizzle of icing and sprinkle with extra flower petals or colorful sprinkles for added cheer.
Serving Suggestions
Serve these Spring Blossom Cookies on a whimsical platter that showcases their beauty, perhaps alongside a refreshing iced tea or a delightful fruit salad. For an added touch, pair them with a selection of cheeses—brie paired with floral notes is heavenly! These cookies are not only perfect as an afternoon snack but also make for a delightful dessert after a spring-themed dinner party or a festive gathering.
Consider arranging the cookies on a tiered stand; it elevates the presentation and makes every guest feel like they’re indulging in a little bit of springtime magic.
Recipe Variations
Feel like getting creative? Here are a few fun twists to try with our Spring Blossom Cookies:
-
Lavender Lemon Blossom Cookies: Add lemon zest to the dough and substitute lavender petals for an invigorating flavor combo. Just remember: a little lavender goes a long way!
-
Chocolate Chip Spring Blossoms: Mix in a cup of mini chocolate chips for those who may prefer a chocolate touch. Chocolate and floral flavors can create a harmonious blend that’s hard to resist!
-
Citrus-Scented Cookies: Experiment with orange or lime zest in place of the vanilla. It’s an exciting twist that will create a refreshing explosion of flavors.
-
Nutty Floral Cookies: Fold in 1/2 cup of finely chopped nuts, like almonds or pistachios, along with the flower petals. This adds a delightful crunch to your cookies.
-
Gluten-Free Option: Swap the all-purpose flour for almond flour or a gluten-free flour blend to cater to gluten-sensitive friends. The nutty flavor of almond flour pairs beautifully with floral notes!
Chef’s Notes
These cookies have definitely evolved in my kitchen over the years. What started as my grandma’s traditional flower-shaped cookies transformed into a colorful spring celebration, thanks to experimentation and inspiration from nature. I love that cooking can be a canvas for creativity!
And here’s a little secret: I always save some dough to make small “taste-testing” cookies. They might not be as cute as the rest, but they are crucial in ensuring the final batch is delicious. Plus, it gives me a reason to indulge while waiting for the prettier ones to bake!
FAQs and Troubleshooting
-
Why did my cookies spread too much?
This can happen if the dough was too warm or if you didn’t have enough flour. Make sure your butter is soft but not melted, and scoop the dough while it’s still chilled. -
How do I store these cookies?
Store your Spring Blossom Cookies in an airtight container for up to a week. If you want to keep them longer, freeze them for up to three months! A little secret: place parchment paper between layers to prevent sticking. -
Can I use dried flowers instead of fresh?
Sure thing! Just ensure they are labeled as edible and do not have added preservatives. Use half the amount of dried flowers as you would fresh because the flavor is more concentrated. -
Why didn’t my cookies rise?
Check your baking powder and soda’s expiration dates. Fresh leavening agents are crucial for soft and fluffy texture. Additionally, avoid overmixing the dough, as it can lead to denser cookies!
Nutritional Info
While I’m all about indulging in delicious desserts like these Spring Blossom Cookies, it’s also important to enjoy them thoughtfully. Every cookie comes in at about 150 calories, depending on how big you make them. Here’s a quick breakdown for a single cookie:
- Calories: ~150
- Total Fat: 8g
- Saturated Fat: 5g
- Carbohydrates: 20g
- Dietary Fiber: 0.5g
- Sugars: 9g
- Protein: 2g
Of course, you can tweak these values based on any substitutions you make. For instance, using coconut oil instead of butter or swapping sugar with a natural sweetener can modify calories and healthier fats!
Final Thoughts
As we wrap up this delightful journey into the world of Spring Blossom Cookies, I hope you find yourself inspired to gather your loved ones and share some joyful baking moments. No matter if they’re flower-covered or classic in presentation, these cookies carry the essence of spring sunshine and blooming creativity.
So, next time you find yourself needing a lovely pick-me-up, remember these whimsical treats. They’re not merely cookies; they’re little pockets of joy that remind us to savor the sweetness of life and connect with the warmth of those we hold dear. Now go on, grab that apron, and let’s create some delicious memories in the kitchen! Happy baking! 🍪💐
Print
Spring Blossom Cookies
- Total Time: 27 minutes
- Yield: 24 cookies 1x
- Diet: Vegetarian
Description
A delightful treat capturing the essence of spring with floral flavors and a whimsical charm.
Ingredients
- 2 ½ cups all-purpose flour
- 1 teaspoon baking powder
- ½ teaspoon baking soda
- ½ teaspoon salt
- 1 cup unsalted butter, softened
- 1 cup granulated sugar
- 2 large eggs
- 2 teaspoons vanilla extract
- ½ cup edible flower petals
- Yogurt or whipped cream cheese for icing (optional)
Instructions
- Preheat your oven to 350°F (175°C).
- Line two baking sheets with parchment paper.
- In a medium bowl, whisk together the flour, baking powder, baking soda, and salt.
- In a large bowl, beat together the softened butter and granulated sugar until creamy.
- Add the eggs one at a time, mixing well after each addition, then add the vanilla extract.
- Gradually add the dry ingredients to the butter mixture and mix until just combined.
- Fold in the edible flower petals.
- Scoop rounded tablespoons of dough onto the prepared baking sheets, leaving about 2 inches between each cookie.
- Bake for 10-12 minutes or until edges are lightly golden.
- Let cool for 5 minutes and decorate with icing and sprinkles if desired.
Notes
Store cookies in an airtight container for up to a week or freeze for up to three months.
- Prep Time: 15 minutes
- Cook Time: 12 minutes
- Category: Dessert
- Method: Baking
- Cuisine: American
Nutrition
- Serving Size: 1 cookie
- Calories: 150
- Sugar: 9g
- Sodium: 100mg
- Fat: 8g
- Saturated Fat: 5g
- Unsaturated Fat: 3g
- Trans Fat: 0g
- Carbohydrates: 20g
- Fiber: 0.5g
- Protein: 2g
- Cholesterol: 30mg
Keywords: Spring Cookies, Floral Cookies, Baking, Dessert, Springtime Treats


