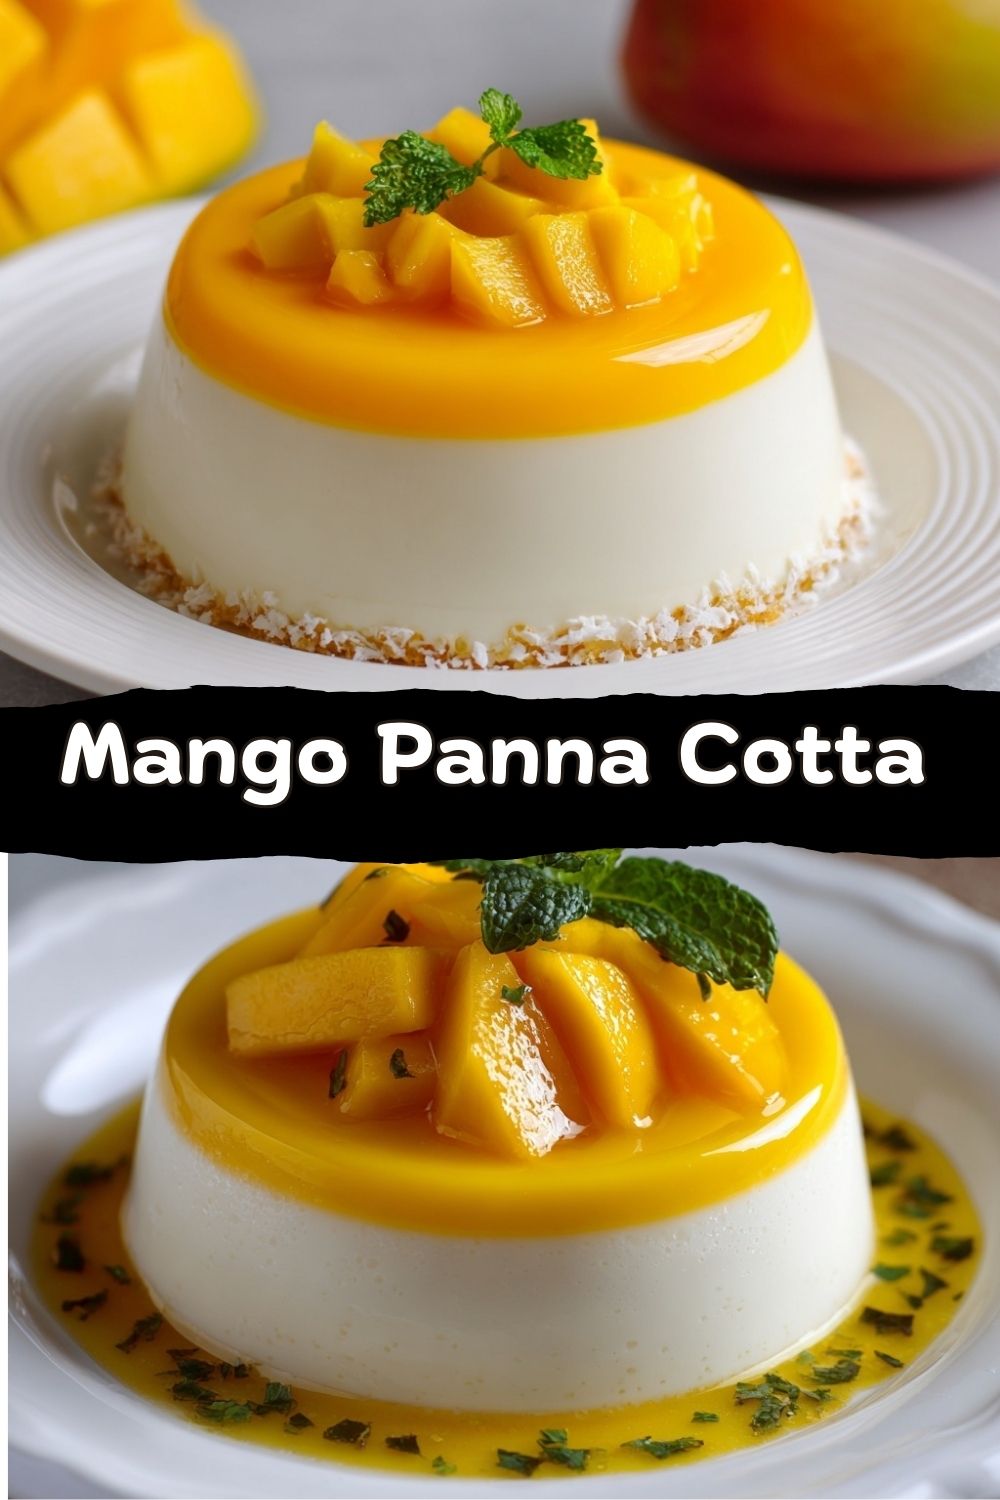
Mango Panna Cotta: Your Ticket to a Creamy, No-Bake Paradise
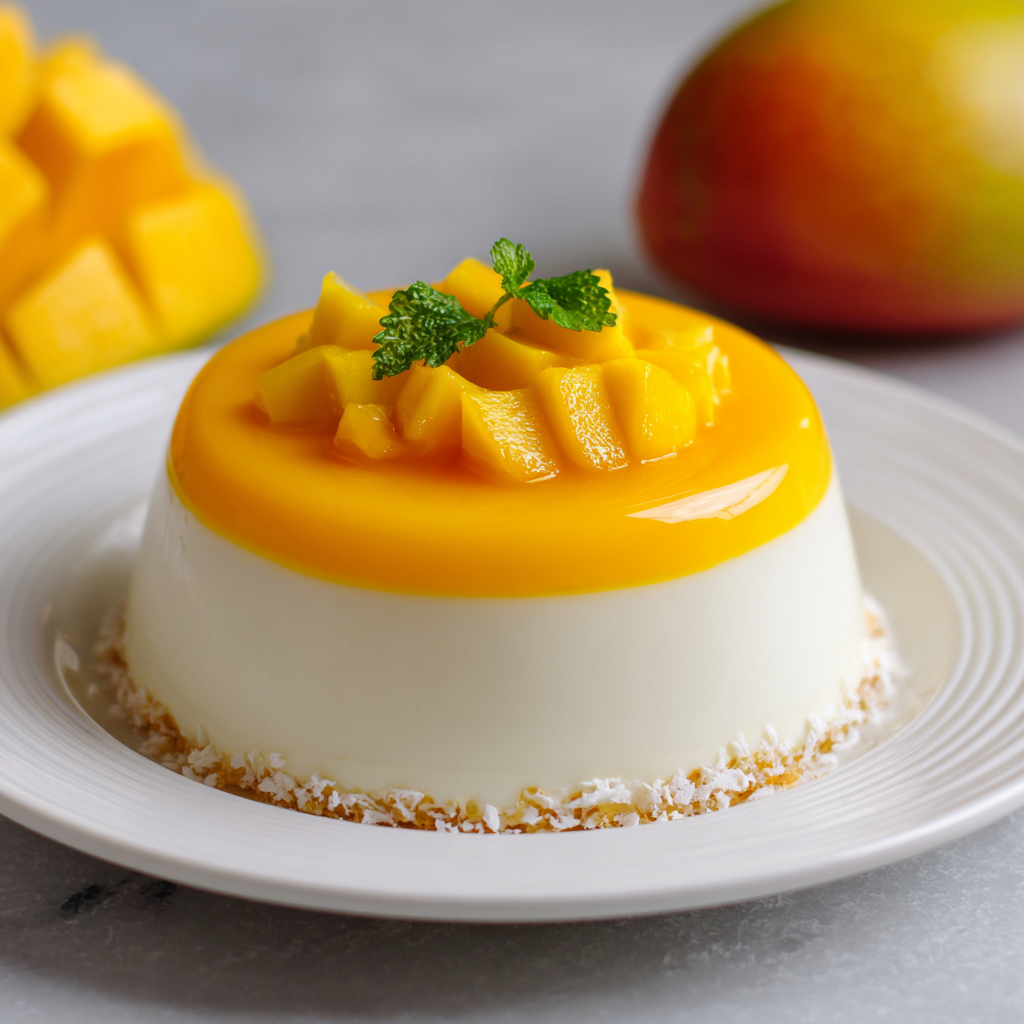
This isn’t just a dessert; it’s a experience. We’re taking the classic, velvety-smooth Italian panna cotta—which literally means “cooked cream”—and giving it a full-blown tropical makeover. Imagine the most luxurious, jiggle-perfect vanilla cream meeting a vibrant, sunny layer of fresh mango puree. Each spoonful is a dreamy contrast: rich yet light, indulgent yet refreshing. And the best part? It’s a no-bake wonder that does all its magic in the fridge while you put your feet up.
I live for recipes like this. They look like you fussed for hours, they taste like a million bucks, but they’re built on simple, honest techniques. Whether you’re prepping for a fancy dinner party or just treating yourself on a Tuesday, this dessert delivers every single time. So, grab your favorite blending appliance and let’s turn those gorgeous ripe mangoes into something truly unforgettable. Welcome to flavor paradise—let’s cook something awesome together.
The Mango That Started It All
This recipe always takes me back to my grandmother’s screened-in porch. She wasn’t Italian, but she had a neighbor, Mrs. Rossi, who was. Mrs. Rossi would bring over the creamiest, most delicate panna cotta you’ve ever tasted, usually plain with a drizzle of honey. It was like edible silk. Meanwhile, my grandma’s answer to every summer fruit bounty was to blend it, can it, or bake it into a cobbler.
One particularly sweltering August, inspiration struck in the form of a huge crate of overripe mangoes from a friend’s tree. We had to use them, and fast. I remember looking at Mrs. Rossi’s latest panna cotta delivery and then at the bowl of blushing orange mango pulp on the counter. “What if we tried this?” I thought. I stirred some of that bright, sweet puree right into the cream mixture before it set. The result was a happy, delicious mess—more of a mango cream soup, really. But the *flavor* was there. It took a few more tries (and learning to layer it properly) to get it right, but that first messy experiment on the porch, with two grandmas laughing and taste-testing, is the heart of this recipe. It’s a beautiful meld of old-world technique and bold, sun-soaked flavor.
Gathering Your Sunshine: What You’ll Need
Here’s the lineup for our creamy tropical dream. I’ve broken it into two easy parts: the vanilla panna cotta base and the mango layer. Read the notes—they’re packed with my favorite swaps and chef secrets to make this recipe truly yours.
For the Vanilla Panna Cotta Layer:
- 2 cups (480 ml) heavy cream: This is our star. It gives the panna cotta its signature luxurious, rich mouthfeel. For a slightly lighter version, you can use half cream and half full-fat coconut milk, which adds a subtle tropical note!
- 1 cup (240 ml) whole milk: The milk lightens the texture just enough so it’s decadent but not heavy. Don’t skimp on the fat here—it’s key for that perfect silky set.
- 1/2 cup (100 g) granulated sugar: Just the right amount to sweeten the cream without making it cloying. You can swap in coconut sugar for a deeper, caramel-like flavor.
- 2 tsp pure vanilla extract: The better the vanilla, the better the taste. If you have a vanilla bean pod, split it and scrape the seeds into the cream while heating for those beautiful little specks.
- 2 1/2 tsp (1 packet) unflavored gelatin: Our magic setter. It’s what gives panna cotta its iconic, delicate jiggle without turning it into rubber. Pro Tip: Always use unflavored for this!
- 3 tbsp (45 ml) cold water: This is for “blooming” the gelatin, which just means waking it up and getting it ready to do its job.
For the Vibrant Mango Layer:
- 1 1/2 cups (330 g) mango, pureed: Fresh, ripe mango is absolute heaven here. Look for the Alphonso or Ataulfo (Champagne) varieties if you can find them—they’re the kings of sweetness and color. No fresh mangoes? No problem. High-quality frozen mango chunks, thawed, work like a charm and are often picked at peak ripeness.
- 2 tbsp sugar (adjust to taste): Mangoes vary in sweetness. Taste your puree! If it’s perfectly ripe and sweet, you might only need 1 tablespoon or even none at all.
- 1 tsp lemon or lime juice: A tiny hit of acidity is the secret weapon. It brightens the entire mango layer and makes the flavor pop, preventing it from being one-dimensionally sweet.
- 1 tsp unflavored gelatin: A little extra help to set the fruit layer firmly on top of the cream layer.
- 2 tbsp warm water: For dissolving this second batch of gelatin.
Let’s Build Some Layers: Your Step-by-Step Guide
Ready? Put on some good music, clear a spot in the fridge, and let’s get to it. This process is more about patience than difficulty. We’ll take it one smooth step at a time.
Step 1: Bloom the Gelatin (For the Cream Layer)
In a small bowl, sprinkle the 2 1/2 teaspoons of gelatin evenly over the 3 tablespoons of cold water. Give it a gentle shake to make sure all the powder gets wet, then just walk away. Let it sit for 5-10 minutes. You’ll come back to a firm, spongy, slightly opaque blob. This is perfect! Blooming hydrates the gelatin so it dissolves smoothly into our warm cream later, without any nasty lumps.
Step 2: Create the Creamy Vanilla Base
In a medium saucepan, combine the heavy cream, whole milk, and sugar. Place it over medium-low heat. We are not boiling this. We just want to warm it through until the sugar is completely dissolved and you see little bubbles forming around the edges (this is called “scalding”). Stir it occasionally with a whisk—this is your moment to relax and enjoy the incredible aroma. Once it’s hot, take it off the heat.
Step 3: Marry the Gelatin and Cream
Now, grab your bloomed gelatin blob and whisk it right into the warm cream mixture. Keep whisking for a good minute or two until you are 100% sure there are no little gelatin bits left. It should be completely seamless. Then, whisk in the vanilla extract. Give it a final taste (carefully, it’s hot!)—this is your base, and it should taste like the best melted vanilla ice cream imaginable.
Step 4: First Chill – The Vanilla Layer Sets
Now, we pour. Divide the vanilla cream mixture evenly among your serving glasses or ramekins. I love using clear glasses or coupes so you can see those beautiful layers later. Fill each one only halfway. Carefully transfer them to a level spot in your refrigerator. Let them chill for at least 2-3 hours, or until they are completely set and don’t jiggle like liquid when you gently shake the glass. This is the patience part. Go watch an episode of your favorite show.
Step 5: Craft the Sunny Mango Layer
While the first layer chills, make the mango topping. Add your mango chunks (fresh or thawed) to a blender and puree until completely smooth. Pour it into a bowl and whisk in the sugar and lemon/lime juice. In a separate tiny dish, dissolve the 1 teaspoon of gelatin in the 2 tablespoons of warm water, stirring until it’s clear and liquid. Whisk this liquid gelatin thoroughly into the mango puree. This step is crucial—it ensures our mango layer will set into a soft, sliceable gel rather than a runny sauce. Let this mixture sit on the counter for about 10-15 minutes to cool down slightly. You don’t want to pour piping hot mango on top of your set cream layer!
Step 6: The Grand Finale – Layering & Final Chill
Check your vanilla layers. They should be firm to the touch. Once they are, slowly and gently pour the cooled mango mixture over the top, dividing it evenly among the glasses. The key here is gentle—we want a clean line between the layers. Pop them back in the fridge for another 2-3 hours, or ideally overnight, until the top layer is completely set.
Sunshine on a Plate: How to Serve It
The moment of truth! Serving this dessert is half the fun. You’ve created something beautiful, so let it shine.
Pull the glasses out of the fridge about 10 minutes before serving to take the deepest chill off. Then, get creative with your garnishes. A thin slice of fresh mango fanned on top is a classic. A single, perfect mint leaf adds a pop of color and freshness. For a bit of texture and a fancy touch, sprinkle on some toasted coconut flakes or a few crushed pistachios. If you’re feeling extra indulgent (and why wouldn’t you be?), a tiny dollop of whipped cream or a drizzle of reduced passionfruit pulp sends this straight over the top.
Serve them right in the glasses you set them in for easy, elegant individual portions. Watch your friends’ or family’s eyes light up when they see those distinct, sunny layers. Then, listen for the “Mmm…” after the first spoonful breaks through the mango and into the creamy vanilla beneath.
Make It Your Own: Delicious Twists & Swaps
The “Meld” in Food Meld means I always encourage you to play with your food. Here are a few of my favorite ways to riff on this recipe:
- Coconut Dream: Replace the whole milk in the panna cotta base with full-fat coconut milk. You’ll get a creamy coconut-vanilla layer that pairs magically with the mango. Garnish with toasted coconut.
- Berry Burst: Swap the mango puree for strained raspberry, strawberry, or passionfruit puree. The vibrant red or yellow against the white cream is stunning, and the tartness is incredible.
- Dairy-Free Delight: Use full-fat canned coconut milk for both the cream and milk in the base. For the mango layer, use agar-agar instead of gelatin (check package instructions for substitution ratios, as it sets differently).
- Spiced & Nice: Infuse the cream base with flavor! Add a cinnamon stick, a few cardamom pods, or a strip of orange zest to the cream while heating. Strain it out before adding the gelatin for a wonderfully aromatic twist.
- Mango All the Way: For intense mango lovers, replace the milk in the panna cotta base with additional mango puree. You’ll get a stunning, all-mango creamy dessert that’s next-level tropical.
Chef Jackson’s Notes from the Kitchen
This recipe has evolved from that first messy porch experiment into my go-to “wow” dessert. Over the years, I’ve learned a few things. First, the quality of your mango is everything. A bland mango makes a bland layer. Taste it! If it’s not sweet or fragrant enough, a tiny pinch of sugar and that squeeze of lime will do wonders to wake it up.
Second, don’t rush the chilling. I know, I know, you want to eat it. But giving each layer its full time to set is the difference between clean, distinct layers and a delicious but homogenous mush. Overnight is truly best. Trust me, future-you will thank past-you for the patience. Finally, have fun with it. My kid once insisted on sprinkling “edible glitter” (which was just colored sugar) on top for a birthday party, and you know what? It was a hit. It’s your kitchen, your rules. Make it awesome.
Your Questions, Answered
Here are answers to the most common questions I get about this recipe:
Can I make this dessert ahead of time?
Absolutely, and I highly recommend it! Panna cotta is the ultimate make-ahead dessert. Prepare it fully 1-2 days before you need it. The flavors meld and the texture becomes perfect. Just keep it covered in the fridge.
My panna cotta didn’t set. What went wrong?
Don’t panic! This usually boils down to two things: 1) The gelatin wasn’t fully dissolved in the warm cream. Make sure you whisk it thoroughly until no granules remain. 2) It didn’t chill long enough. Gelatin sets with time and cold. Pop it back in the fridge for several more hours. If it’s truly a lost cause, you’ve made an incredible mango cream soup—pour it into glasses and enjoy it with a spoon anyway!
Can I use agar-agar instead of gelatin?
Yes, for a vegetarian version! Agar-agar is a plant-based setting agent derived from seaweed. **Important:** It sets differently and requires boiling to activate. Follow the package instructions for substitution ratios (you’ll typically need less agar powder than gelatin), and make sure to boil the cream/mango mixtures with the agar for a minute or two to ensure it sets properly.
How do I get a perfectly clean unmolded panna cotta?
If you’re using ramekins and want to unmold them, lightly grease the cups with a neutral-flavored oil (like sunflower) before pouring in the mixture. Once set, dip the bottom of the ramekin in hot water for 5-10 seconds, run a thin knife around the edge, and invert onto a plate. But for this layered version, I find serving in the glass is easier and just as beautiful!
A Note on Nutrition
Let’s keep it real: this is a dessert, a treat meant to be savored and enjoyed slowly, joyfully, and without guilt. This Mango Panna Cotta is rich, yes—but it’s also made with real ingredients, fresh fruit, and simple techniques. Mango brings natural sweetness, vitamin C, and that sunny, vacation-energy vibe, while the creamy base is meant to be enjoyed in modest, elegant portions. Think of it as a mindful indulgence: satisfying, beautiful, and worth every spoonful.
Approximate nutrition per serving (will vary by ingredients and portions):
Calories: 280–330
Fat: 20–24 g
Carbohydrates: 24–28 g
Sugar: 20–24 g
Protein: 4–5 g
Not bad for a dessert that feels like it came from a resort restaurant, right?
Final Spoonful Thoughts
This Mango Panna Cotta is exactly why I love desserts that rely on technique instead of chaos. No oven. No stress. Just patience, balance, and ingredients that shine when you let them do their thing. It’s the dessert you make when you want to impress without exhausting yourself—the one that feels calm, confident, and quietly luxurious.
So whether you’re serving it at a dinner party, making it ahead for a weekend treat, or sneaking a spoonful straight from the fridge after a long day (no judgment here), I hope it brings a little sunshine into your kitchen. If you give it a try, tag me or drop a comment—I love seeing how you make these recipes your own.
Until next time, keep blending, chilling, and cooking with curiosity.
— Jackson 🥭✨


