No-Bake Cookies and Cream Dessert Cups: Your New Favorite 20-Minute Miracle
Hey friends, Jackson here from Food Meld. Let’s be real for a second: sometimes you need a show-stopping dessert, but you *absolutely do not* have the time, energy, or desire to turn on your oven. Maybe it’s a last-minute potluck invite, a surprise “I need a treat” moment from the kids, or just one of those days where your sweet tooth is screaming but your motivation is… napping. I get it. That’s exactly why I’m obsessed with these No-Bake Cookies and Cream Dessert Cups.
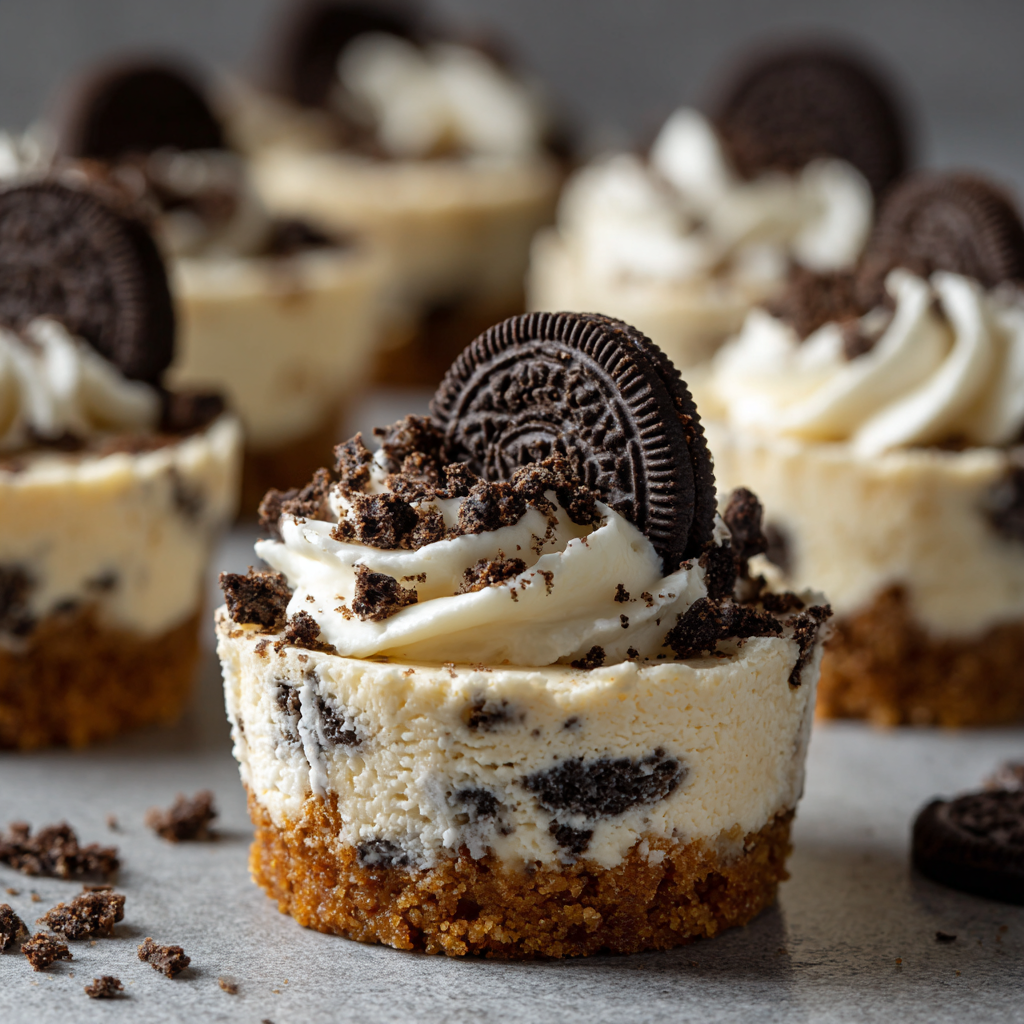
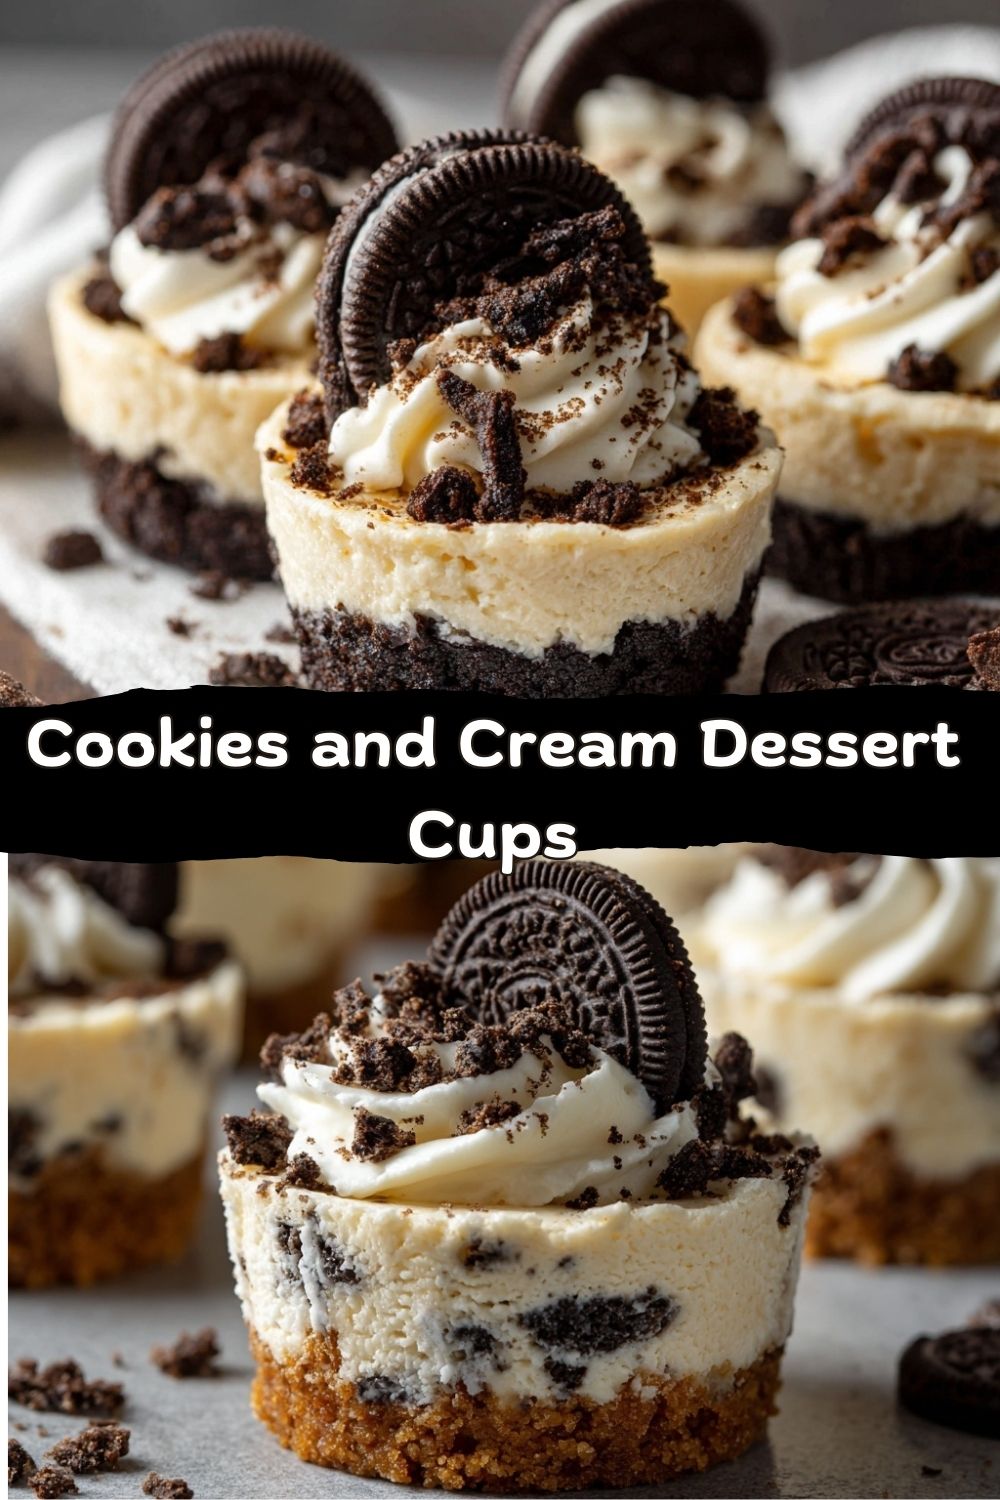
Imagine this: a buttery, crunchy chocolate cookie crust. A cloud-like, impossibly creamy cheesecake filling, speckled with more of those chocolatey cookie bits. All crowned with a perfect mini Oreo, just sitting there daring you to take a bite. The best part? It’s seriously easy. We’re talking about 20 minutes of active kitchen time, a few hours to chill, and you’ve got a dessert that looks like you fussed for hours. This is the kind of recipe that builds your kitchen confidence—no fancy techniques, no scary ingredients, just pure, unadulterated flavor fun. So grab your mixing bowl and let’s turn that classic cookies-and-cream combo into something truly unforgettable, one delightful little cup at a time.
The Midnight Snack That Started It All
This recipe takes me straight back to my college days, and not in the “instant ramen” way. My roommate, Leo, had a legendary obsession with Oreos. One night, after a seriously long study session (or maybe it was a video game marathon—details are fuzzy), we hit a wall. We were out of milk for dunking, which was a crisis. But we had a block of cream cheese, some leftover heavy cream from a failed attempt at homemade Alfredo, and of course, Leo’s emergency stash of Oreos.
What happened next was pure, hungry experimentation. We crushed cookies with a soup can, mushed things together in a bowl, and shoved it all into some leftover paper cupcake liners. It was messy, it was imperfect, but when we tried it after a couple hours in the fridge… mind. blown. It tasted like a cheesecake parfait from a fancy diner. That “what if we tried this?” moment is the heart of Food Meld, and this recipe is its delicious, no-bake grandson. Every time I make these cups now, I think of that messy kitchen, that sense of discovery, and the reminder that the best food often comes from just playing around.
What You’ll Need: Simple Ingredients, Big Flavor
Here’s the beautiful part: you only need a handful of simple ingredients, and I bet you have most of them already. Let’s break it down. Remember, quality matters, but so does knowing where you can swap things out!
For the Chocolate Cookie Crust:
- 2 cups (about 320g) crushed chocolate sandwich cookies – That’s roughly one standard package of Oreos. No need to remove the cream! That creamy center adds a little extra richness and helps bind the crust. Chef’s Insight: I use a food processor for ultra-fine crumbs, but a zip-top bag and a rolling pin works just as well—plus, it’s a great stress reliever!
- 1/4 cup (56g) butter, melted – Unsalted is my go-to so I can control the saltiness, but salted works in a pinch and adds a nice sweet-salty kick. This is the glue that holds our crunchy base together.
For the Cookies and Cream Filling:
- 8 oz (227g) full-fat cream cheese, room temperature – This is non-negotiable. Full-fat gives you that luxuriously smooth, rich texture that holds its shape. Let it sit on the counter for a good 30-60 minutes until it’s soft to the touch. Cold cream cheese will leave lumps, and we want cloud-like fluffiness.
- 3/4 cup (150g) granulated sugar – Sweetens and helps stabilize the whipped filling. You can use powdered sugar (confectioner’s sugar) if you prefer; it dissolves instantly and can make the filling slightly thicker.
- 2 tsp pure vanilla extract – The flavor booster. It rounds out the sweetness and adds a warm, comforting aroma. Don’t skip it!
- 1 1/2 cups (357g) heavy whipping cream, cold – The key to our fluffy miracle. Make sure it’s cold, cold, cold straight from the fridge. It whips up higher and faster. Sub Tip: For a slightly lighter option, you can use an equal amount of whipped topping (like Cool Whip), folded in at the end. Just know the texture will be a bit different.
- 1/2 cup (about 80g) crushed chocolate sandwich cookies – More Oreos! Crush these a bit coarser than the crust crumbs. We want little pops of chocolate crunch in every creamy bite.
For the Garnish:
- 28 mini chocolate sandwich cookies – The adorable cherry on top! One per cup. If you can’t find minis, just break regular Oreos into quarters for a cute, rustic look.
Let’s Make Some Magic: Step-by-Step Instructions
Alright, team. Let’s get our hands (or our mixer) dirty. This process is all about building layers of texture. Follow these steps, and you’re guaranteed dessert success.
Step 1: Make the Crust
First, crush those cookies for the crust into fine, sandy crumbs. In a medium bowl, pour the melted butter over the crumbs. Mix it with a fork until every last crumb looks damp and holds together when you pinch it. Grab your serving cups—I use small plastic or paper dessert cups, but you can use a mini muffin tin (without liners for a more formal look) or even small glasses. Spoon about 1 heaping tablespoon of the mixture into each cup and press it down firmly with the back of a spoon or your fingers. A solid, compact crust is what prevents a sandy mess later. Pop these in the fridge to set up while you make the filling.
Chef’s Hack: If you’re using a mini muffin tin, use the end of a thick-handled utensil (like a wooden muddler or the handle of a rolling pin) to press the crumbs in neatly.
Step 2: Whip Up the Dreamy Filling
In a large bowl (or the bowl of your stand mixer fitted with the paddle attachment), beat the softened cream cheese and sugar together on medium speed for 1-2 minutes. Stop and scrape down the sides. You want this mixture to be completely smooth, with zero lumps. This is the foundation of your filling, so take your time here!
Now, switch to the whisk attachment if you have one. With the mixer on low, slowly pour in the cold heavy cream and the vanilla. Once it’s combined, crank the speed up to medium-high and let it whip. Watch it transform from a liquidy mess to soft peaks, then to beautiful, thick, spreadable peaks. This usually takes 2-4 minutes. Don’t walk away! You’re looking for a texture like a very thick frosting—it should hold its shape on the whisk. Over-whipping can lead to a grainy texture, so stop as soon as you get those firm peaks.
Step 3: Fold in the Cookie Goodness
Take your coarsely crushed cookies (the 1/2 cup for the filling) and sprinkle them over the whipped cream cheese mixture. Here’s where we get gentle. Use a rubber spatula and fold the cookie bits in. That means cutting down through the center, sliding along the bottom of the bowl, and folding the mixture over on top of itself. Rotate the bowl and repeat. We want to keep all that beautiful air we just whipped in, so be patient and fold just until the cookies are evenly distributed.
Step 4: Assemble the Cups
Pull your crust-lined cups from the fridge. You can spoon the filling in, but for a super pro look (and it’s actually easier!), scrape all the filling into a large zip-top bag. Snip about a 1-inch hole off one corner—instant piping bag! Pipe the filling into each cup, filling them about ¾ of the way to the top. Leave a little room for the garnish. A quick swirl of the bag as you lift gives a nice little peak.
Step 5: Garnish, Chill, and Dream
Finally, the pièce de résistance: gently press one mini Oreo onto the top of each filled cup. Now, the hardest part. Cover them loosely and refrigerate for at least 2-3 hours, but ideally 4 or overnight. This chill time is crucial—it lets the flavors meld, the crust firm up, and the filling set into the perfect, sliceable-yet-creamy texture. Trust me, it’s worth the wait.
How to Serve These Showstoppers
Presentation is half the fun with these little guys! They’re already portion-controlled and adorable in their individual cups. Arrange them on a platter for a party—they look like little edible jewels. For a casual family dessert night, I just set the whole tray on the table and let everyone grab their own.
Want to dress them up even more? Just before serving, you can add a tiny dollop of whipped cream next to the mini Oreo, or a light dusting of cocoa powder. If you’re feeling extra, a tiny drizzle of hot fudge or melted chocolate over the top takes it to sundae-level decadence. Serve them straight from the fridge with spoons and watch them disappear.
Mix It Up! Your Recipe, Your Rules
The “meld” in Food Meld means I *love* a good variation. Here are some of my favorite twists on this classic:
- Mint Chocolate Chip: Use Mint Oreos (or regular Oreos + 1/4 tsp peppermint extract in the filling). Fold in 1/3 cup mini chocolate chips instead of the cookie bits. So refreshing!
- Peanut Butter Paradise: Add 1/3 cup of smooth peanut butter to the cream cheese and sugar mixture. Use Peanut Butter Oreos or Nutter Butters for the crust and garnish. A dream for PB lovers.
- Fruity Swirl: For a berry burst, after piping the filling, make a small well in the center and add a teaspoon of seedless raspberry or strawberry jam. Use a toothpick to lightly swirl it. Garnish with a fresh berry.
- Dairy-Free Delight: Use your favorite vegan cream cheese and coconut cream (chilled solid, whipped). Gluten-free chocolate sandwich cookies work perfectly for the crust and filling. It’s an easy, inclusive swap!
- Mocha Buzz: Dissolve 1 tablespoon of instant espresso powder in the vanilla extract before adding it. The coffee flavor makes the chocolate taste even richer.
Jackson’s Chef’s Notes
This recipe has come a long way from that college kitchen floor. I’ve made it for probably every birthday, potluck, and “just because” occasion in the last decade. The biggest lesson? Patience with the chill time. I once tried to serve them after just an hour because I was impatient, and while they tasted great, the texture was a bit too soft. Letting them fully set makes all the difference.
Also, a funny story: I once accidentally used salted caramel Oreos for the entire recipe—crust, filling, and all. It was a happy accident! The sweet-salty-creamy combo was insane, and it’s now a requested variation from my friends. Don’t be afraid of your own happy accidents in the kitchen; that’s where the magic happens.
FAQs & Troubleshooting
Q: My filling is runny! What did I do wrong?
A: The most common culprits are 1) Cream cheese wasn’t room temp, leading to lumps that broke the emulsion, or 2) The heavy cream wasn’t cold enough, or it was under-whipped. Make sure you whip until you have firm, spreadable peaks. If it’s already runny, you can try re-whipping it after chilling the bowl and beaters in the freezer for 15 minutes, but it’s better to prevent it from the start.
Q: Can I make one big dessert instead of individual cups?
A: Absolutely! Press the crust into a 9-inch pie plate or an 8×8 square dish. Spread the filling over the top, garnish with a pattern of whole or halved cookies, and chill. Slice and serve.
Q: How long do these keep in the fridge?
A: They’re best within 2-3 days. The crust will start to get softer the longer they sit, but they’ll still taste delicious. I do not recommend freezing them, as the filling can separate and become grainy when thawed.
Q: Can I use reduced-fat cream cheese?
A: You *can*, but I really don’t recommend it. The filling will be less stable, softer, and lack the rich, creamy mouthfeel that makes this dessert so special. This is a treat—go for the full-fat joy.Nutritional Info (Per Cup, Approximate)
Calories: 200–250 | Carbohydrates: 25–30g | Sugar: 15–20g | Fat: 14–16g | Protein: 2–3g | Sodium: 50–100mg
Please note: This is an estimate based on the specific ingredients I used. Values can vary significantly based on the brand of cookies, cream cheese, etc. If you have specific dietary needs, please calculate using your exact ingredients with a trusted nutrition calculator. This treat is meant to be enjoyed in moderation as part of a balanced diet—it’s a celebration in a cup!
Final Thoughts
And there you have it! My go-to, never-fail, always-impresses no-bake dessert. These Cookies and Cream Dessert Cups are more than just a recipe; they’re a reminder that incredible food doesn’t have to be complicated. It’s about taking familiar flavors, mixing them with a little creativity and a lot of love, and creating something that brings people pure joy.


