
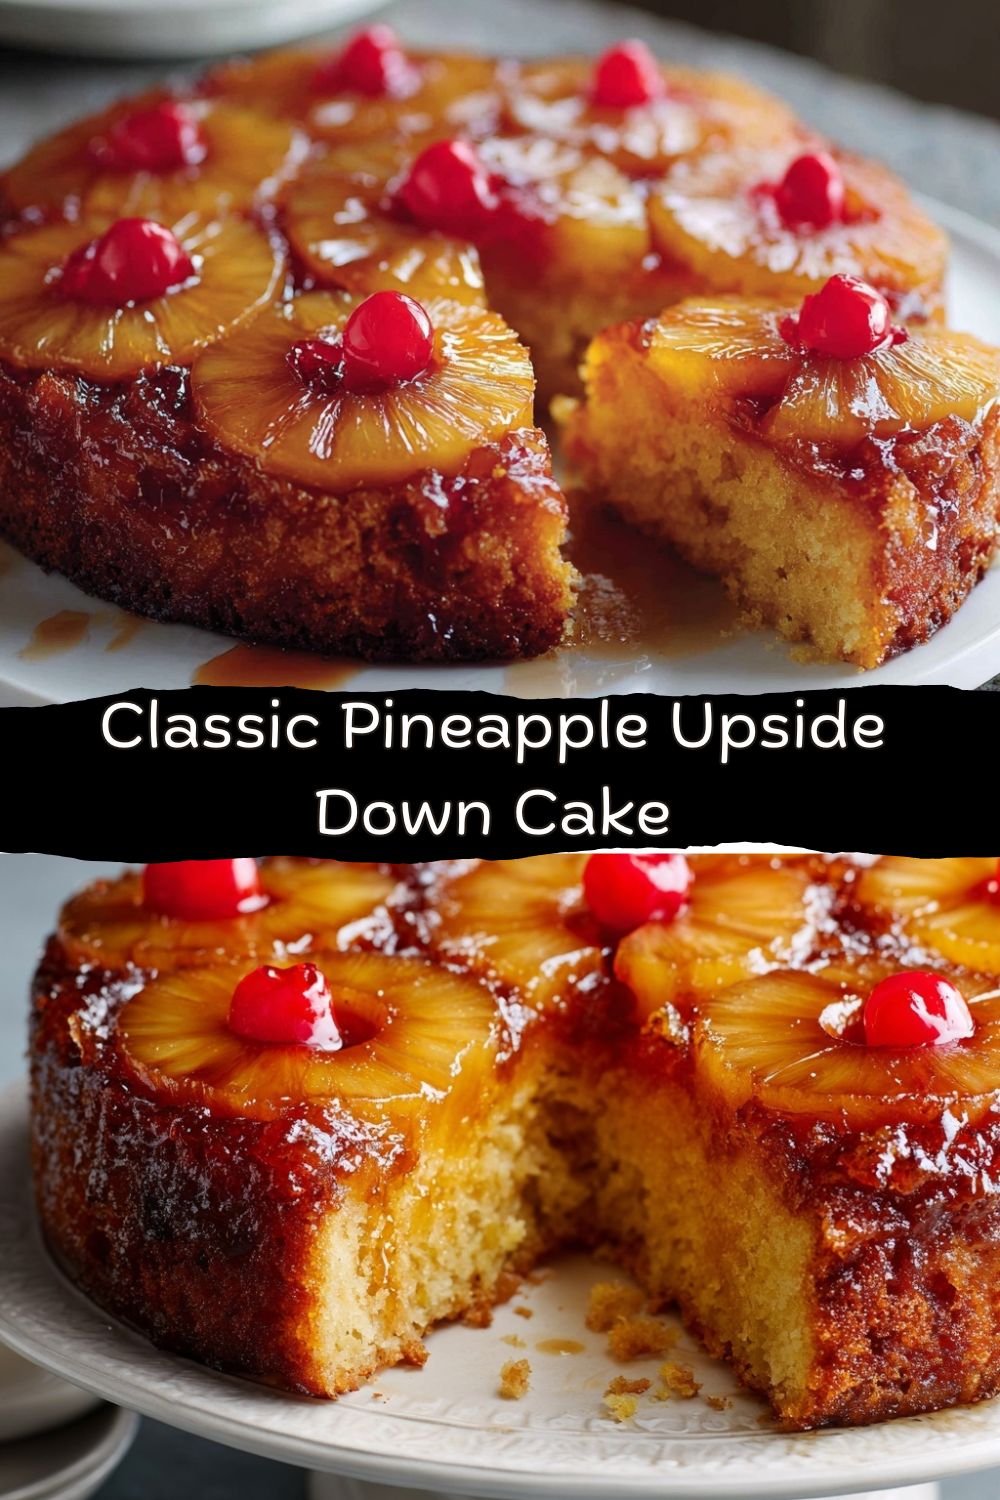
Classic Upside Down Cake – Golden, Caramelized & Seriously Simple
This Classic Upside Down Cake is a showstopper that’s surprisingly easy to make. With buttery caramelized fruit on top (hello, golden pineapples or fresh seasonal picks) and a moist vanilla cake underneath, every slice is a sweet surprise. Flip it out warm and watch the glossy topping steal the spotlight—perfect for gatherings, birthdays, or just a cozy dessert night. Let’s cook something awesome together.
The Magic Flip: Why This Cake Never Gets Old
Hey there, friend. Jackson here. Let me ask you a question: what’s the most fun you can have with a cake pan? Is it licking the batter spoon? (A solid choice). Is it decorating with fancy piping? (Admirable, but stressful). Nope. I’m here to tell you it’s the glorious, nerve-wracking, utterly satisfying FLIP of an upside-down cake.
You spend about an hour layering humble ingredients—butter, sugar, fruit, batter—into what looks like a bit of a messy experiment. Then, you trust the process, invert the pan, and… ta-da! You’re greeted with a glistening, jewel-like masterpiece. The kind of dessert that makes people go, “Wow, you made that?” and you get to grin and say, “Yeah, and it was stupid easy.” That’s the magic I live for in the kitchen. No fancy equipment, no intimidating techniques—just simple ingredients transformed by heat, a little patience, and that final theatrical reveal.
This isn’t just a recipe; it’s a kitchen experience. It’s a lesson in trust and caramelization. It’s about taking something as simple as a pineapple ring or a slice of peach and turning it into a sticky, golden work of art. Whether you’re a baking newbie looking for a confidence boost or a seasoned cook who needs a reminder of why you fell in love with simple desserts, this cake is your ticket. So, preheat that oven, grab your favorite skillet or cake pan, and let’s dive into creating a dessert that’s equal parts comforting and spectacular. Welcome to the fun side of baking.
A Flippin’ Good Memory: My First Kitchen Triumph
My love affair with this cake started in my grandma’s kitchen, under a cloud of flour and the scent of melting brown sugar. I was maybe eight, standing on a step-stool, tasked with the most important job: arranging the maraschino cherries in the centers of the pineapple rings. To me, they weren’t just cherries; they were rubies, the final, crucial gems in a treasure map.
I remember the heavy, well-seasoned cast iron skillet she used. I remember her hands, steady and sure, guiding the batter over my careful cherry placement. But most of all, I remember the suspense. The whole family crowded around as she loosened the edges with a knife, placed a plate on top, took a deep breath, and flipped. That silent second before she lifted the skillet felt like an eternity. Then—success! A perfect, glossy, golden cake emerged, the cherries beaming up from their buttery amber sea. That collective “Ooh!” from my family was my first hit of pure culinary joy. It wasn’t just cake; it was a shared moment of wonder, and I was hooked. Every time I make this, I’m that kid on the stool again, believing in a little bit of kitchen magic.
Gathering Your Flavor Players
Here’s the beautiful part: the ingredient list is short, sweet, and probably already in your pantry. Let’s break it down. This makes one gorgeous 9-inch cake, serving 8-10 happy people.
For The Topping (The Star of the Show):
- 1/4 cup (1/2 stick) butter, melted – This is the foundation of your caramel. Use unsalted so you control the salt, but salted will work in a pinch—just maybe skip the extra pinch in the batter. The melt is key for an even layer.
- 1/2 cup packed brown sugar – Dark or light? I prefer dark for its deeper molasses flavor, which gives a richer caramel. Light brown sugar is milder and perfect if you want the fruit flavor to shine a tiny bit brighter.
- Pineapple rings, apple slices, peach slices, or other firm fruit – Chef’s Insight: The fruit needs to hold its shape. Canned pineapple (drained well!) is classic and foolproof. Fresh apples (like Granny Smith for tartness or Honeycrisp for sweetness) or peaches are sublime. Pat fresh fruit slices VERY dry to prevent a soggy layer.
- Maraschino cherries (optional, if using pineapple) – The nostalgic “cherry in the middle.” They add a pop of color and a hit of sweet syrup. No cherries? A fresh blueberry or raspberry works, or just leave it out!
For The Cake Batter (The Fluffy Support System):
- 1/2 cup (1 stick) butter, softened – “Softened” means it should give easily when pressed but not be oily or melted. This is non-negotiable for a light, creamed texture. Leave it on the counter for an hour, or in a pinch, microwave a cold stick for 5-second bursts at 10% power.
- 2/3 cup granulated sugar – This teams up with the butter to create air pockets, giving the cake its tender crumb.
- 2 large eggs – Bring them to room temperature! A cold egg can make your beautifully creamed butter seize up. Sit them in warm water for 5 minutes if you forgot.
- 1 tsp pure vanilla extract – The soul of the cake. Don’t skimp. A good vanilla makes all the difference.
- 1 1/2 cups all-purpose flour – Spoon it into your measuring cup and level it off. Don’t scoop directly from the bag—you’ll pack in too much and get a dense cake.
- 1 1/2 tsp baking powder – Our leavening agent. Make sure it’s fresh! If it doesn’t fizz when you add a pinch to hot water, it’s time for a new can.
- 1/4 tsp salt – Balances all the sweetness and enhances flavor. Crucial.
- 1/2 cup milk or buttermilk – Buttermilk is my secret weapon. Its tanginess cuts the sweetness and yields an incredibly moist, tender crumb. No buttermilk? Add 1/2 tbsp lemon juice or white vinegar to your milk, let it sit for 5 minutes, and boom—DIY buttermilk.
Let’s Build Some Magic: Step-by-Step
Ready? Put on some tunes, and let’s get into it. This is where the fun happens.
- Preheat & Prep: Crank your oven to 350°F (175°C). This is step one, always. A properly preheated oven is your best friend for even baking. While it heats, grab your pan. A 9-inch round cake pan, a 9-inch springform, or even a 10-inch cast-iron skillet (my personal favorite for even browning) all work. Grease the sides lightly. Chef Hack: I don’t grease the bottom where the topping goes—the butter and sugar handle that, and I want it to stick just enough to flip out cleanly.
- Create the Caramel Canvas: Pour the 1/4 cup of melted butter into the bottom of your pan. Tilt it to coat evenly. Sprinkle the brown sugar over the butter as evenly as you can. Don’t stir! Just let it sit there, a sandy, buttery promise of goodness to come.
- Arrange Your Fruit Art: Now, the creative part. Arrange your fruit in a single, snug layer over the sugar-butter mixture. If using pineapple and cherries, place a cherry in the center of each ring. Get pretty with it! This is the design everyone will see.
Pro Tip: If using fresh apples or peaches, you can fan them out in a concentric circle. It looks stunning when flipped.
- Make the Batter: In a medium bowl, using a hand mixer or a stand mixer with the paddle attachment, cream the softened butter and granulated sugar together on medium-high speed for 2-3 minutes. Stop and scrape down the bowl. It should be pale, fluffy, and almost look like frosting. Beat in the eggs, one at a time, making sure each is fully incorporated before adding the next. Mix in the vanilla.
- Combine Dry & Wet: In another bowl, whisk together the flour, baking powder, and salt. With your mixer on low, add about a third of the dry ingredients to the butter mixture, mixing just until combined. Pour in half the milk/buttermilk, mix, then another third of the flour, the rest of the milk, and finally the last of the flour. MIX ONLY UNTIL THE FLOUR DISAPPEARS. Overmixing at this stage develops gluten and leads to a tough cake. A few streaks are okay; they’ll work themselves out.
- The Gentle Spread: This is important: you don’t want to disturb your beautiful fruit arrangement. Spoon the batter in dollops over the fruit, then use an offset spatula or the back of a spoon to gently spread it into an even layer, working from the center out.
Chef Hack: If the batter is thick, you can slightly wet your fingers or the spatula to help spread it without sticking and pulling.
- Bake to Golden Perfection: Slide the pan into the middle of your preheated oven. Bake for 40-45 minutes. You’re looking for a deep golden top, and the cake should spring back lightly when touched in the center. The real test? A toothpick or thin knife inserted into the center of the cake (try to avoid poking straight down into fruit) should come out clean or with just a few moist crumbs.
- The Big Flip (Don’t Panic!): Here we go! Take the cake out and let it cool on a wire rack for exactly 5 minutes. No more, no less. This is the sweet spot where the caramel is still fluid but the cake is set enough to hold its shape. Run a thin knife or an offset spatula around the edges to loosen any sticky bits. Place your serving plate upside-down on top of the pan. Using oven mitts (the pan is still hot!), firmly hold the plate and pan together and FLIP them over in one confident, swift motion. Set it down, give it a gentle shake, and slowly lift the pan away. You should hear a lovely sigh as the cake releases. If a piece of fruit sticks, just use a spatula to pluck it from the pan and place it back on the cake. No one will know.
How to Serve This Beauty
This cake is a diva and deserves a proper entrance. Serve it warm, when the caramel is still gloriously gooey. I like to let it rest for just 10-15 minutes after flipping so no one burns their tongue on molten sugar (a delicious but painful experience).
It’s sublime all on its own, but let’s gild the lily, shall we? A dollop of freshly whipped cream is my go-to—the cool cream against the warm cake is perfection. A scoop of vanilla bean ice cream melting into the crevices is a close second. For a boozy, adult twist, a tiny splash of dark rum or bourbon in the whipped cream is incredible.
Presentation-wise, slice it right at the table. That first view of the layers—shiny fruit, buttery caramel soaking into the cake—is part of the experience. Use a sharp knife and wipe it clean between slices for perfect pieces.
Make It Your Own: Flavor Twists & Swaps
The classic is forever, but playing with flavors is where the “Food Meld” energy comes alive. Here are a few of my favorite riffs:
- Tropical Escape: Use a mix of pineapple rings, mango slices, and a sprinkle of toasted coconut in the batter. Swap the vanilla extract for coconut extract.
- Bourbon Apple Pecan: Use tart apple slices. Add 1 tbsp of bourbon to the brown sugar-butter topping and sprinkle a handful of chopped pecans over the sugar before adding the apples.
- Ginger-Peach Bliss: Use fresh peach slices. Add 1 tsp of ground ginger to the dry ingredients and 2 tbsp of finely chopped crystallized ginger to the topping with the brown sugar.
- Gluten-Free & Still Great: Use a 1:1 gluten-free all-purpose flour blend (like Bob’s Red Mill or King Arthur). The batter might be slightly thicker, so just spread it gently.
- Upside-Down Skillet Cornbread (Savory!): Not a sweet tooth? Make a savory version. Use the same topping method with 1/4 cup butter, 2 tbsp brown sugar (or maple syrup), and a layer of thinly sliced onions and jalapeños. Pour your favorite cornbread batter over the top and bake. Flip for a stunning, caramelized-on-top cornbread. Thank me later.
Jackson’s Notebook: A Few Final Thoughts
This Classic Upside Down Cake is proof that the most memorable desserts don’t need layers, frosting, or complicated techniques. They need warmth, balance, and a little drama. The flip is the show. The caramel is the reward. And the flavor? Timeless.
This is the cake you make when you want something comforting but impressive. When you want nostalgia without feeling old-fashioned. When you want people to pause mid-bite and smile.
So the next time you’re standing in your kitchen wondering what to bake, remember this one. Butter. Sugar. Fruit. Batter. Flip. Magic.
From my kitchen to yours—
Jackson 🍍🍒


