
Your Meal Prep Savior: Saucy Chicken Breast Cuts That Stay Juicy & Exciting All Week
But what if I told you the problem isn’t meal prep itself—it’s the method? We’ve been taught to cook chicken breasts whole, season them simply, and hope for the best. But friends, hope is not a strategy in the kitchen. We need a plan. A delicious, sauce-forward, flavor-locking plan.
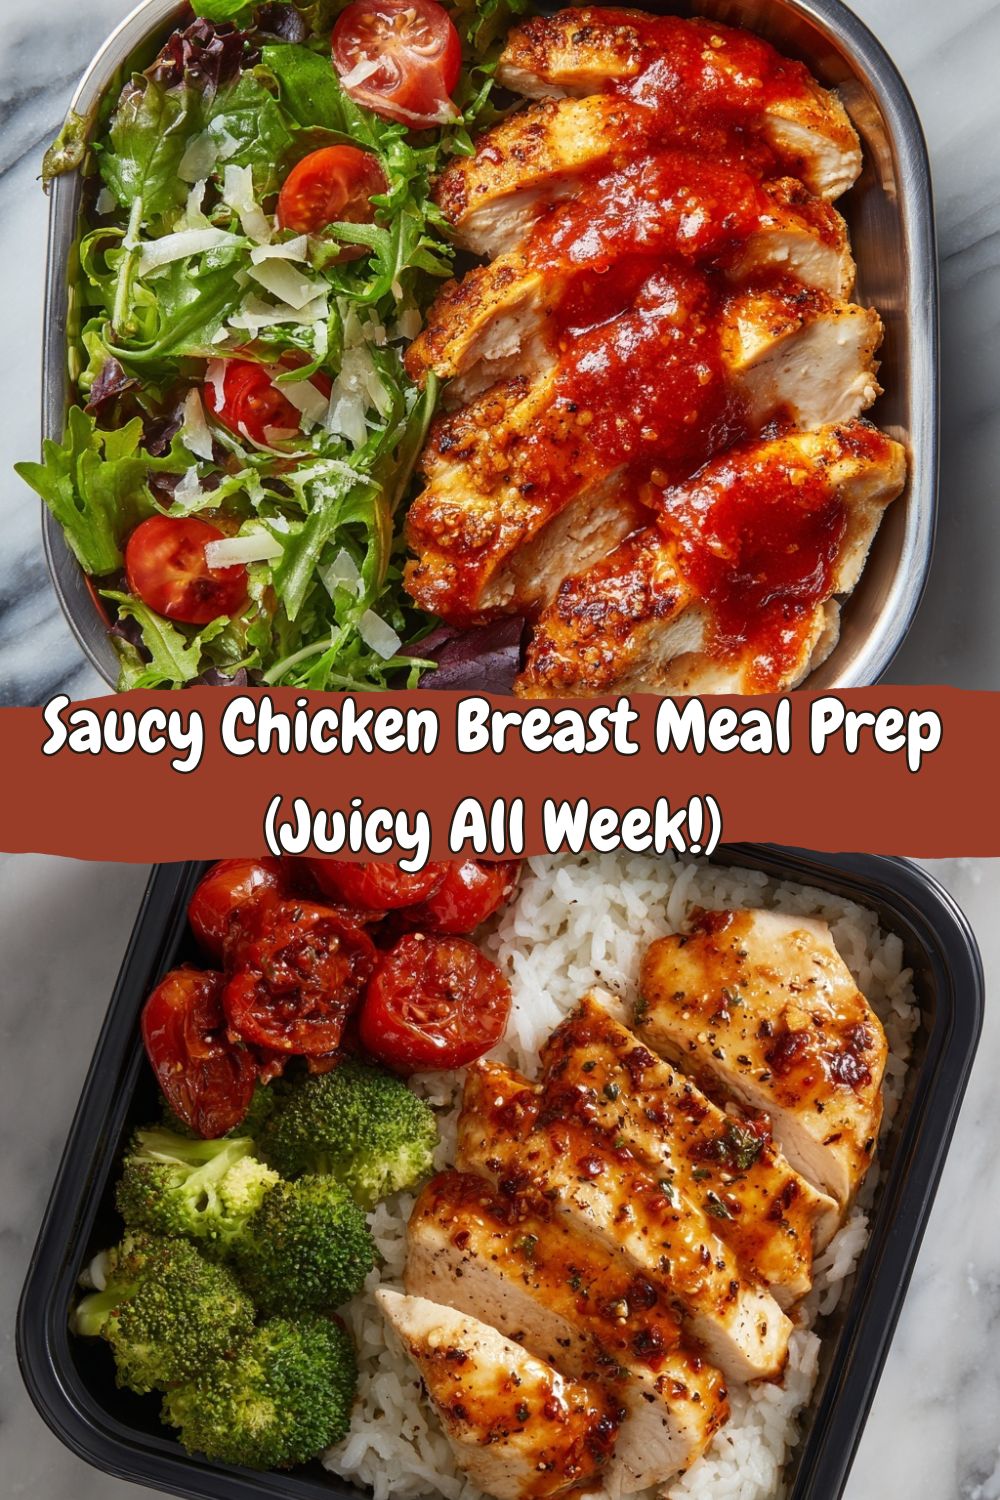
That’s where these Saucy Chicken Breast Meal-Prep Cuts come in. This isn’t just a recipe; it’s a game-changing technique. Instead of whole, lonely breasts, we’re slicing or cubing them first. This creates more surface area for browning (hello, flavor!) and allows every single piece to get intimately acquainted with a glorious sauce. We’re not just topping with sauce; we’re simmering in it, letting it cling and caramelize slightly, creating a protective, juicy barrier against the dreaded microwave reheat.
Whether you’re a meal-prep veteran or a total newbie just trying to eat better without the boredom, this is your new foundation. It’s fast (30 minutes, promise), endlessly adaptable, and designed for real life. Let’s banish dry chicken and boring lunches together. Ready to cook something awesome?
The “Aha!” Moment That Changed My Meal Prep Game
This whole idea was born from a minor kitchen disaster that turned into a major win. Years ago, I was testing a recipe for a creamy garlic chicken skillet. I was distracted (probably by a simmering pot of gumbo), and I sliced the chicken breasts way thinner than I meant to. “Great,” I thought, “these are gonna cook in 30 seconds and be tougher than my old hiking boots.”
But something magic happened. Those thin slices seared up beautifully, and when I tossed them back into the garlicky cream sauce, they drank it up. Every nook and cranny was coated. I packed the leftovers skeptically. The next day at lunch, I reheated it, fully expecting the sauce to have separated and the chicken to be rubber. Instead? It was somehow better. The sauce had settled in, the chicken was unbelievably tender, and the flavors had gotten to know each other on a deep, spiritual level in that fridge overnight.
That was my lightbulb moment. The secret to reheat-friendly chicken wasn’t undercooking or some fancy technique—it was maximizing surface area and sauce coverage. It was about treating meal prep not as a chore, but as the first step in a flavor-building process. Every time I make these saucy cuts now, I think of that happy accident. It reminds me that the best kitchen discoveries often come from a little mess and a lot of curiosity.
Gathering Your Flavor Toolkit
Here’s everything you need. The beauty is in the base chicken and your choice of sauce adventure! I’ve broken down the “why” behind key players.
- 4 boneless, skinless chicken breasts (about 1.5 lbs) – The star. Look for plump, even-sized breasts for consistent cooking. Chef’s Insight: Slicing against the grain (see that faint line of fibers? cut perpendicular to it) is the #1 trick for guaranteeing tender bites, every time.
- Salt and pepper, to taste – The foundation. Don’t be shy here. Seasoning the chicken directly is non-negotiable for building flavor from the inside out.
- 1 tablespoon olive oil – Our cooking workhorse. A neutral oil with a high smoke point is perfect for getting that beautiful, quick sear.
Pick Your Sauce Adventure:
Option 1: Creamy Garlic Parmesan (Comfort in a Pan)
- 2 tablespoons butter – For richness and that gorgeous fond (the tasty browned bits) in the pan. Sub: More olive oil works, but butter brings the flavor.
- 3 garlic cloves, minced – Fresh is best here! That sharp bite mellows into sweet, aromatic goodness.
- 1/2 cup chicken broth – Lifts the sauce and adds depth. Sub: Vegetable broth or even water in a pinch.
- 1/2 cup heavy cream or full-fat Greek yogurt – Cream for ultimate silkiness, Greek yogurt for a tangy, protein-packed twist. If using yogurt, take the pan off the heat before stirring it in to prevent curdling.
- 1/4 cup grated Parmesan – The salty, umami kick that makes the sauce cling. Freshly grated melts smoother than the pre-shredded stuff.
Option 2: Spicy Tomato & Smoked Paprika (A Bold, Rustic Hug)
- 1 tablespoon olive oil – To start the sauce.
- 2 garlic cloves, minced
- 1 cup crushed tomatoes – I love the texture of crushed—it’s saucy but still has a bit of body. Sub: Tomato passata or a good marinara.
- 1/2 teaspoon chili flakes – Adjust to your heat tolerance! This gives a warm, lingering spice.
- 1/2 teaspoon smoked paprika – The secret weapon. It adds a deep, almost smoky-sweet complexity that makes the sauce taste like it simmered for hours.
Option 3: Sweet & Salty Honey-Soy Glaze (Sticky, Shiny Perfection)
- 1/3 cup low-sodium soy sauce – Using low-sodium lets you control the salt level. Sub: Tamari for gluten-free.
- 2 tablespoons honey – For that gorgeous gloss and balance. Sub: Maple syrup or agave.
- 1 garlic clove, minced
- 1 teaspoon cornstarch + 1 tbsp water – Our thickening slurry. It turns the soy and honey into a luxurious, sticky glaze that coats the chicken perfectly.
Let’s Build Some Flavor: Your Step-by-Step Roadmap
Grab your favorite skillet (a nice big one!) and let’s get cooking. I’ll walk you through every step with my best tips.
- Prep & Season the Chicken. Pat those chicken breasts completely dry with paper towels. This is CRUCIAL for getting a sear, not a steam. Slice them into 1/2-inch thick strips or bite-sized cubes, always cutting against the grain. Pile them in a bowl and season generously with salt and pepper. Toss to coat evenly. Chef’s Hack: Do this right before cooking so the salt can start working its magic without drawing out too much moisture.
- Sear to Golden-Brown Perfection. Heat the olive oil in your large skillet over medium-high heat. Wait until the oil shimmers—a hot pan is your best friend. Add the chicken in a single layer (work in batches if you have to; crowding is the enemy of browning!). Let it cook, untouched, for 2-3 minutes until you get a beautiful golden crust. Flip and cook for another 1-2 minutes until just cooked through. It will finish cooking in the sauce, so don’t overdo it here! Remove to a plate. Story Time: That sizzle when the chicken hits the pan? That’s the sound of flavor being created. Don’t rush it. Let it sing.
- Create Your Masterpiece Sauce. This is where the magic happens. In the same skillet (keep all those tasty browned bits!), lower the heat to medium. For Creamy Garlic: Melt butter, sauté garlic for 30 seconds until fragrant, pour in broth to deglaze (scrape up all those bits!), simmer for 2 minutes, then stir in cream and Parmesan until melted. For Spicy Tomato: Add oil if needed, sauté garlic and spices for 30 seconds, pour in crushed tomatoes, and simmer for 3-4 minutes to thicken slightly. For Honey-Soy: Whisk soy, honey, and garlic in the pan, bring to a simmer. Whisk the cornstarch slurry and stir it in, cooking for 1-2 minutes until glossy and thickened.
- The Grand Meld. Return all the chicken and any accumulated juices back to the skillet with the sauce. Gently toss and simmer for 1-2 minutes, letting the chicken warm through and absorb the sauce. You’ll see it transform, becoming glossy and perfectly coated. Pro Tip: For the Honey-Soy version, let it bubble for a minute to really caramelize that glaze onto the chicken.
- Cool & Portion Like a Pro. Remove the skillet from the heat and let it cool for 10-15 minutes. This allows the sauce to set a little and adhere to the chicken, making it less messy to portion. Then, divide your saucy chicken into meal-prep containers alongside your chosen sides—fluffy rice, quinoa, roasted veggies, or pasta. Chef’s Secret: Spoon a little extra sauce over the top of each portion. Future-you will be so grateful.
Beyond the Container: Serving It Up Fresh or Reheated
This chicken is a chameleon! Here’s how to make it shine, whether you’re eating it right away or on day four.
For a Fresh “Tonight’s Dinner” Vibe: Serve it hot from the pan over a bed of creamy mashed potatoes (with the creamy garlic version – trust me), or atop a mound of buttery egg noodles. Garnish with something fresh: chopped parsley, sliced green onions, or a sprinkle of extra chili flakes. It’s instant restaurant-quality.
For Meal-Prep Bowl Brilliance: This is its true calling. Build a bowl with a grain base (rice, couscous, farro), add a hearty scoop of your saucy chicken, and surround it with colorful veggies—steamed broccoli, roasted bell peppers, a simple cucumber salad. The sauce acts as a built-in dressing! For the Honey-Soy version, quick-pickled carrots and radishes are a game-changer.
The Reheat Ritual (For Best Results): Microwave for 1.5-2 minutes, stopping to stir halfway. If the sauce seems a little tight, add a teaspoon of water or broth before heating. For a real treat, reheat in a small skillet over medium-low heat with a splash of water, covered, until steaming. It’s almost as good as new!
Make It Yours: 5 Flavor Twists to Try Next Time
Got the basics down? Awesome. Now let’s play. Here are some of my favorite spins on this formula.
- Lemon-Herb Piccata Style: Use the creamy garlic base, but swap the Parmesan for 2 tablespoons of capers and a big squeeze of fresh lemon juice at the end. Finish with a handful of fresh chopped parsley or dill. Bright, tangy, and incredible over orzo.
- Tikka Masala-Inspired: Sauté 1 tbsp grated ginger with the garlic, add 1 tbsp tomato paste and 2 tsp garam masala (instead of paprika) to the spicy tomato sauce. Finish with a splash of heavy cream or coconut milk for richness.
- Buffalo “Bowl” Style: After searing the chicken, ditch the other sauces. Toss the cooked cuts directly in 1/2 cup of your favorite Buffalo sauce and 2 tbsp of melted butter. Pack with celery sticks, carrot sticks, and a side of blue cheese or ranch for dipping. Perfect for game day prep!
- Pesto & Sun-Dried Tomato: Skip the simmer. After searing chicken, remove from heat and toss with 1/2 cup of prepared basil pesto and 1/4 cup of chopped, oil-packed sun-dried tomatoes. No cooking needed—just a vibrant, no-cook sauce that’s packed with flavor.
- Dairy-Free Creamy Mushroom: Sauté 1 cup of sliced mushrooms after removing the chicken. Use the creamy garlic sauce recipe, but substitute the heavy cream with full-fat canned coconut milk. It’s lush, decadent, and totally plant-based friendly.
Jackson’s Kitchen Notebook
This recipe has become my meal-prep MVP, and it’s evolved in fun ways. I once accidentally used vanilla Greek yogurt in the creamy sauce (don’t ask). It was… interesting. Not my finest moment, but a good reminder to taste as you go! I’ve also learned that slicing the chicken when it’s still slightly frozen is actually easier and gives you cleaner, thinner cuts.
The biggest lesson? Don’t skip the sear. I know it’s tempting to just throw everything in to simmer, but those browned bits are pure flavor gold. They’re what make the sauce taste deep and complex, not one-dimensional. This recipe is a testament to simple techniques done well. It’s proof that with a little know-how, you can turn a basic ingredient into something you’re genuinely excited to eat, day after day. Now, go make your week delicious.
Your Questions, Answered
Q: Can I use chicken thighs instead?
A: Absolutely! Thighs are more forgiving and stay incredibly juicy. Just increase the initial cook time by 1-2 minutes per side since they have a higher fat content. They’re a fantastic choice.
Q: My sauce (especially the creamy one) looks thin/separated when I reheat it. What did I do wrong?
A: Don’t panic! This is common with dairy-based sauces. The key is how you reheat it and what the sauce is made of. Here’s how to fix (and prevent) it:
If you used cream or Greek yogurt, always reheat gently. High heat is the enemy. Microwave in short bursts, stirring halfway, or reheat in a skillet over low heat with a splash of broth or water to loosen the sauce. If it separates slightly, just stir—it will come back together.
For tomato-based or honey-soy sauces, you’re golden. These are naturally stable and often taste even better after a day or two.
Q: How long will this chicken last in the fridge?
A: Properly stored in airtight containers, these saucy chicken cuts stay fresh and juicy for 4–5 days. That’s the whole workweek handled.
Q: Can I freeze this for later?
A: Yes—with a caveat.
-
Tomato-based and honey-soy versions freeze beautifully for up to 2 months.
-
Creamy sauces can be frozen, but may need a good stir and a splash of liquid when reheated to restore texture.
Pro tip: freeze in single portions so you’re not thawing more than you need.
Q: What’s the best sauce for beginners?
A: Start with Creamy Garlic Parmesan. It’s forgiving, crowd-pleasing, and works with almost any side—rice, pasta, veggies, or potatoes.
The Nutrition Angle (Because It Matters)
These saucy cuts aren’t just about flavor—they’re smart fuel.
Per serving (approx., chicken + sauce, no sides):
-
Calories: 350–420 (depends on sauce)
-
Protein: ~38–42g
-
Fat: 14–22g
-
Carbs: 6–18g
By slicing first and cooking quickly, you’re avoiding overcooking (the #1 cause of dry chicken) while keeping protein high and satisfaction even higher. Pair with whole grains or veggies, and you’ve got a balanced, crave-worthy meal that doesn’t feel like “diet food.”
Final Thoughts: This Is a Method, Not Just a Recipe
This is the real takeaway, friend—this isn’t one recipe. It’s a system.
Once you understand:
-
slice first
-
sear hot
-
simmer in sauce
-
store with extra sauce
You can turn any chicken breast into meal prep you actually look forward to eating.
No more chewing through dry cubes.
No more drowning chicken in sauce just to survive lunch.
No more abandoning meal prep by Thursday.
This is how you win the week—one saucy, juicy bite at a time.
If you try this, tag me @FoodMeld or drop a comment. I love seeing how you make it your own. And if you want a one-page meal-prep cheat sheet with sauce ratios and reheating tips, just say the word.
Until next time—keep melding flavors,
Jackson


