Let’s Bake Some Portable Joy!
Hey there, friend! Jackson here. Let me ask you a question: do you ever find yourself craving a slice of warm, fruit-filled pie but the thought of making a whole darn pie crust, rolling it out, blind baking it… just makes you want to lie down on the cool kitchen floor? Yeah, me too. Sometimes you just want that perfect bite of flaky crust and sweet, juicy fruit without the commitment of a full pie pan and the pressure of a perfect lattice top.
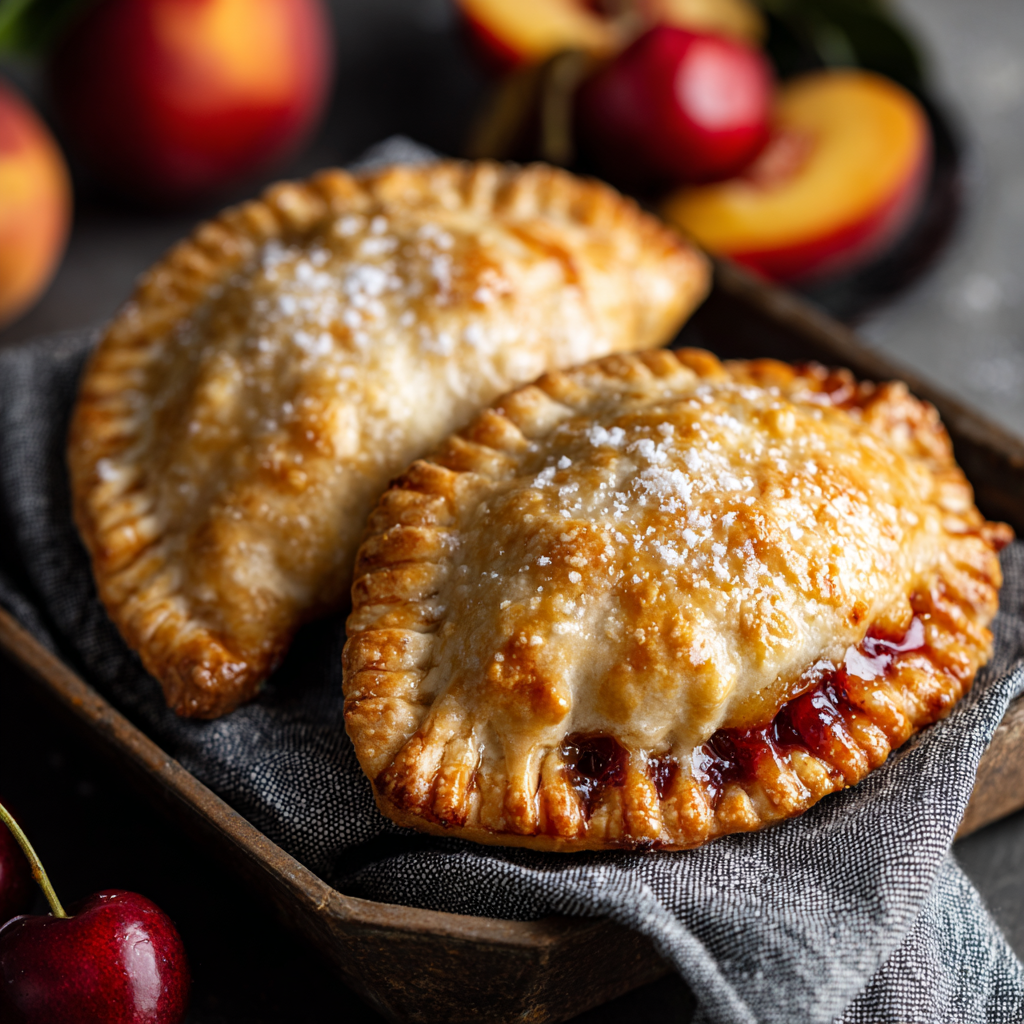
That’s where these little heroes come in. Hand pies are the ultimate kitchen hack. They’re all the soul-satisfying goodness of your grandma’s best pie, but folded up into a neat, personal-sized package you can eat with your hands. No plates required. No forks clanging. Just pure, unadulterated, buttery joy.
Think of them as the best snack, dessert, or breakfast-on-the-run you’ve ever met. They’re perfect for picnics, lunchboxes, bake sales (you’ll be a legend), or just taming that 3 PM sugar monster. And the best part? They’re incredibly forgiving and endlessly customizable. Got some berries about to turn? Apples looking lonely? Peach season in full swing? Let’s meld those flavors into something unforgettable. Today, I’m walking you through my go-to, never-fail recipe. It’s simple, real, and packed with the kind of flavor that makes people ask, “Wait, you made these?” Let’s get into it.

The Pie That Started It All: A Grandma’s Lesson
My love for hand pies isn’t just about convenience. It’s baked right into my earliest food memories. My Granny Walker didn’t make “hand pies.” She made “fried pies.” And they were an event. I can still see her in her tiny, sun-drenched kitchen, a cloud of flour in the air, rolling out biscuit dough on a well-worn wooden board. She’d use whatever fruit was about to “go over the hill”—usually peaches from the neighbor’s tree or a jar of last season’s homemade apple butter.
Her method was pure intuition. A little sugar here, a pinch of cinnamon there, no measuring cups in sight. She’d fry them in a cast-iron skillet until they were golden brown and puffed up like little pillows. The first bite was always dangerously hot, bursting with sweet, syrupy fruit, but we could never wait. That was the magic: a perfect, self-contained treat, made with love and whatever we had on hand. This recipe is my ode to her—a baked, slightly more polished version, but with the same heart. It’s about making something awesome from simple things, and sharing it without any fuss.
What You’ll Need: The Flavor Building Blocks
Don’t let the two-part list fool you—this is simple stuff. The beauty is in the quality and the little tweaks. Here’s your shopping list, with my chef-y insights sprinkled in.
For the Flaky, Buttery Crust:
- 2 ½ cups all-purpose flour: The workhorse. It gives us structure. For a tender, flaky crust, avoid over-measuring. Spoon it into your cup and level it off.
- 1 teaspoon salt: Crucial. This isn’t just for taste; it tightens the gluten, making our crust more tender. Always use fine sea salt or table salt for baking.
- 1 tablespoon sugar: Just a touch! It helps with browning and adds a whisper of sweetness to contrast the filling.
- 1 cup (2 sticks) COLD unsalted butter, cubed: The star of the show. Cold is non-negotiable. I stash my sticks in the freezer for 15 minutes before I start. The tiny pockets of cold butter melting in the oven = FLAKY LAYERS. Unsalted lets us control the salt level.
- ½ cup ice-cold water (as needed): I add a couple ice cubes to a glass of water. We only want to hydrate the dough, not melt the butter. You might not use it all!
For Your Juicy Fruit Filling (Pick Your Fighter!):
- 1 ½ cups chopped fruit (berries, peaches, apples, pears): Fresh or frozen! If using frozen, don’t thaw—just toss directly with the cornstarch mix. It’ll prevent a soggy bottom.
- 2-3 tablespoons sugar: Adjust based on your fruit’s sweetness. Tart berries? Go for 3 tbsp. Ripe peaches? 2 might do it.
- 1 teaspoon fresh lemon juice: Brightens everything up and balances the sweetness. Bottled works in a pinch, but fresh is best.
- 1 teaspoon cornstarch (or tapioca starch): This is our secret weapon! It thickens the natural fruit juices so they don’t turn our beautiful crust into a soggy mess. A non-negotiable step.
- Spice it up (optional): A pinch of cinnamon with apples, a dash of cardamom with peaches, or a little vanilla extract with berries. Make it yours!
For the Shiny, Golden Finish:
- 1 egg + 1 tablespoon water: Whisked together for an egg wash. This gives our pies that gorgeous, professional golden-brown shine.
- Coarse or Turbinado sugar: For sprinkling. It adds a delightful crunch and a little sparkle. Regular sugar works too, but the texture is magic.
Let’s Build Some Pies: A Step-by-Step Dance
Ready? Put on some tunes, clear some counter space, and let’s do this. It’s more fun than it is work, I promise.
Step 1: Make the Dough (The “Keep It Cold” Rule)
In a large bowl, whisk together your flour, salt, and that one tablespoon of sugar. Now, scatter your tiny, ice-cold butter cubes over the flour. Here’s my favorite part: using your fingers or a pastry cutter, work the butter into the flour. You’re not making paste! You want pea-sized and smaller bits of butter coated in flour. Some bigger flat pieces are totally fine—they’ll create epic flakes. Now, drizzle in the ice water a few tablespoons at a time, mixing with a fork, just until the dough starts to clump together. Squeeze a bit in your hand; if it holds, you’re golden. Dump it onto a surface, press it together into a disc (don’t over-knead!), wrap in plastic, and chill for at least 30 minutes. This relaxes the gluten and re-chills the butter. Patience is a virtue here.
Step 2: Craft the Filling (The “No Soggy Bottoms” Protocol)
While the dough chills, make your filling. In a medium bowl, toss your chosen fruit with the sugar, lemon juice, and cornstarch. Make sure every piece gets a light coating. This is where you add any spices. Let it sit for 10 minutes—you’ll see the juices start to mingle with the cornstarch. That’s exactly what we want.
Step 3: Roll, Cut, and Fill (The Assembly Line)
Preheat your oven to 375°F (190°C) and line a baking sheet with parchment paper. On a lightly floured surface, roll your chilled dough out to about ⅛-inch thick—the thickness of a standard quarter. No need to be perfect! Use a 4-5 inch round cutter (a bowl or mug works), or cut into 4×5 inch rectangles for a more rustic look. Re-roll the scraps once. Place a heaping tablespoon of filling slightly off-center on each piece. Pro-Tip: Leave a ½-inch border clean. Too much filling is the #1 cause of leaks!
Step 4: Seal the Deal (The “Fork Press” of Destiny)
Fold the dough over the filling to create a half-moon or rectangle. Now, seal it tight! Press the edges with your fingers, then crimp them with the tines of a fork. This isn’t just pretty; it locks in the juice. Transfer your little parcels to the baking sheet. Use a sharp knife to cut 2-3 small slits in the top of each. This lets steam escape so they don’t puff up and explode (it’s dramatic).
Step 5: Bake to Golden Perfection (The Aroma Therapy)
Give each pie a light brush with the egg wash and a generous sprinkle of coarse sugar. Bake for 20-25 minutes. You’re waiting for a deep, golden brown crust and maybe a little bit of juicy bubble action from the vents. Your kitchen will smell incredible. Let them cool on the sheet for 10 minutes before you even think about touching them—the filling is molten lava! Then, transfer to a wire rack.
How to Serve These Little Gems
The beauty is in the grab-and-go, but let’s elevate the moment. Slightly warm is the absolute ideal. If they’ve cooled completely, a 10-second zap in the microwave brings back the magic.
For a casual dessert, pile them on a rustic wooden board. For a fancier touch, plate one on a drizzle of vanilla custard or a dollop of lightly sweetened whipped cream. A scoop of vanilla ice cream on the side turns it into a proper dessert. For breakfast? Pair with a strong cup of coffee and call it a pastry. They’re fantastic at room temperature in a lunchbox, too. The portability is the whole point!
Mix It Up: Your Creative Playground
This recipe is a blank canvas. Here’s where the “Food Meld” spirit really shines:
- Peach Ginger: Use diced peaches and add ½ teaspoon of finely grated fresh ginger to the filling. Game changer.
- Mixed Berry Lemon Thyme: Use a mix of blueberries, raspberries, and blackberries. Add the zest of one lemon and a pinch of fresh thyme leaves to the filling for a surprisingly elegant twist.
- Apple Cheddar: A classic! Use a sharp, finely grated cheddar cheese in the crust (replace ¼ cup of the flour with cheese). Fill with spiced apple filling.
- Savory Twist: Skip the sugar in the crust. Fill with a mix of cooked, seasoned ground sausage, potato, and onion for a killer breakfast hand pie. Brush with egg wash, skip the sugar topping.
- Dietary Swaps: Use a 1:1 gluten-free flour blend for the crust. For vegan pies, use very cold vegan butter and a plant-based milk or aquafaba for the wash. Coconut sugar works in the filling, too.
Jackson’s Kitchen Notes & Stories
This recipe has seen some things in my test kitchen! I once got overzealous with blueberry filling and created what my wife lovingly called “Vesuvius Pies” – they erupted spectacularly in the oven. Lesson learned: don’t overfill. I’ve also learned that the dough is incredibly forgiving. If it tears while you’re assembling, just patch it with a scrap and seal over it. No one will know.
I always make a double batch and freeze the unbaked, assembled pies on a sheet pan before transferring them to a bag. Bake from frozen, adding 5-7 extra minutes. Having homemade hand pies at the ready is a life upgrade, trust me. The recipe has evolved from Granny’s fried version to this baked staple, but the soul—the joy of a perfect, personal pie—is exactly the same.
Your Questions, Answered
Q: My filling leaked everywhere! What did I do wrong?
A: The two main culprits are 1) Overfilling, and 2) Not sealing the edges tightly enough. Make sure your border is clean, use just a tablespoon of filling, and really press that fork seal. Also, the cornstarch is essential for thickening!
Q: Can I use store-bought pie crust?
A: You can, for sure! It’s a great shortcut. Let it come to room temp per the package, roll it out a bit thinner, and proceed. The flavor and texture of the homemade crust is next-level, but no judgment here. We’re about making awesome food, period.
Q: How do I store these, and how long do they last?
A: Let them cool completely, then store in an airtight container at room temp for 2 days. For longer storage, freeze them (baked or unbaked) for up to 3 months. Reheat baked pies in a 350°F oven for 10 minutes to re-crisp.
Q: My crust wasn’t flaky. It was tough.
A: This usually means the butter got too warm or the dough was overworked. Remember: cold butter, cold water, handle minimally, and chill thoroughly. Those butter pockets are the key to flakiness!
Nutritional Information (A Rough Guide)
Alright, friends, let’s keep it real. This is a treat, a pastry, a moment of joy. Here’s a general estimate per hand pie (based on a recipe yielding 10 with a berry filling). This will vary based on your specific ingredients and size:
- Calories: ~210
- Total Carbohydrates: 26g
- Dietary Fiber: 1g
- Sugars: 6g
- Total Fat: 11g (Saturated Fat: 7g)
- Protein: 2g
Remember, these are homemade with real ingredients—butter, fruit, flour. It’s about quality and enjoyment, not just numbers.
Final Thoughts: Little Pies, Big Joy
And that’s the magic of hand pies, friends. They’re proof that baking doesn’t have to be complicated or precious to be deeply satisfying. No perfect lattice. No towering pie plate. Just flaky crust, jammy fruit, and that unmistakable feeling of biting into something warm, buttery, and made with intention.
These hand pies are the kind of thing that quietly make life better. They turn a regular afternoon into a treat, a picnic into a memory, and a bake sale into a destination. They invite creativity, reward simplicity, and remind us that the best food is often the kind you can hold in your hand and share without ceremony.
I hope you make these your own—swap the fruit, play with spices, try a savory version, or bake a batch just to stash in the freezer for future-you. That future-you will be very grateful.
If you bake them, I’d love to see what you create. Tag me @FoodMeld and let me know what flavors you chose. Until next time, keep it flaky, keep it fun, and keep melding those flavors into something joyful.
Stay cozy,
Jackson


